A/C Clicking off and on rapidly, here's what I've done..
Posted: Thu Jun 19, 2014 7:55 pm
So, I noticed that my A/C randomly likes to click off and on while driving or idling. Sometimes it clicks VERY rapidly. Many times it just stays off, other times it actually stays on for like 10 seconds (and when it actually IS on, the air is very nice and ice cold!). I know the A/C is supposed to switch off and on in somewhat regular intervals during normal use, according to the cooling element temperature, but my situation is certainly abnormal. After looking through threads on this forum, I found that the "clicking" I'm hearing is coming from the dash. From what I found, chances are my problem may be the thermo switch.
That said, I went to my local junkyard and pulled a few thermo switches from the same vehicle (89-94 Legacy Wagons). I found 2 that had the sensor/switch fully intact, so I grabbed them - fully knowing that they are likely to have similar issues to mine, considering their age. Anyway, onward.
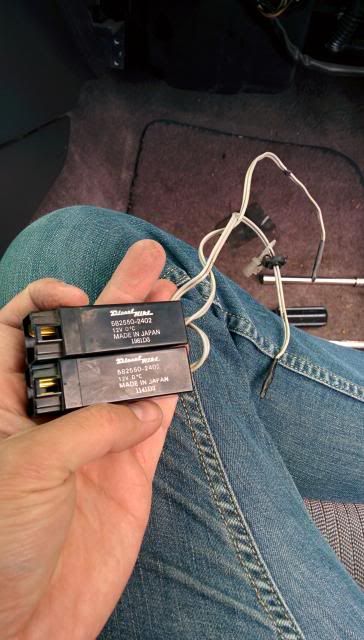
Here are the two junkyard thermo switches I found...
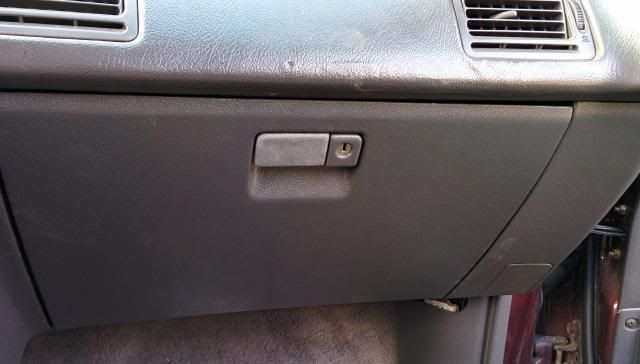
Now, I'm glad I went to the junkyard first as I was able to figure out how everything worked (ie digging through the dashboard) without worrying about ruining things. Thus, when I came home to my car, I was able to work on things confidently. That said, accessing the thermo switch is relatively simple. Just remove the glovebox, and the switch is sitting on top of the evaporator core box..
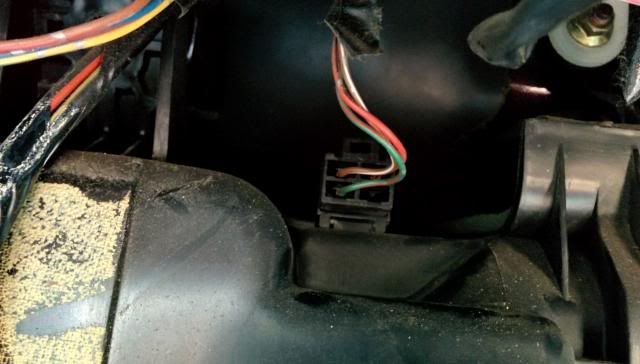
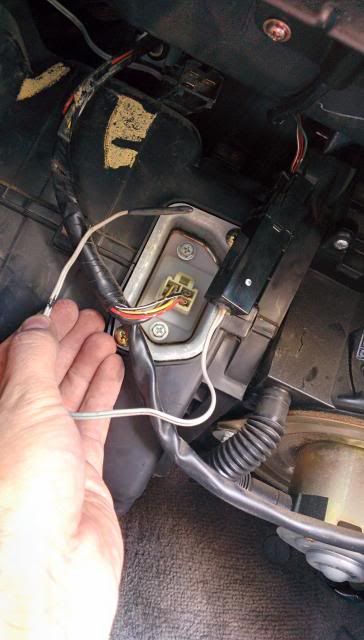
I simply removed the 3p connector and plugged it into each of my junkyard units to see if they'd even work...
Turns out only 1 of them actually worked. At this point I decided to attempt to replace the thermo switch with the working junkyard unit. Problem is, it's impossible to reach inside of the evaporator core box to remove the embedded thermo switch probe.... At least until I got one of these.
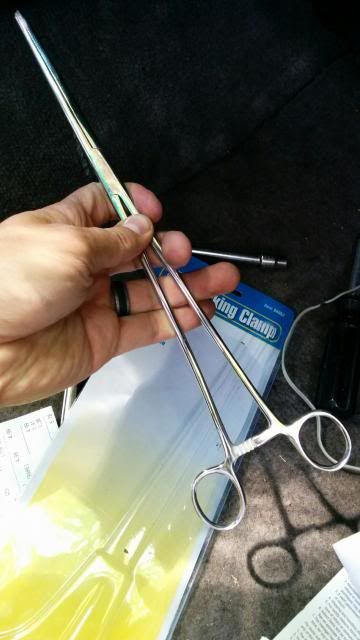
Hemostats are used in the medical industry for a variety of purposes. Since I couldn't bring any home from work, I found out that Harbor Freight sells them for roughly $5 a piece. That is where I picked the above one up (it's 12" long).
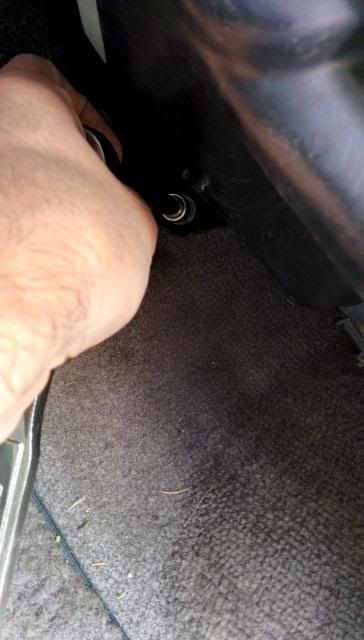
Now, you can access the evaporator core without removing too many things. First, you must remove the upper and lower mounting nut/bolt on the box.
(lower mounting bolt)
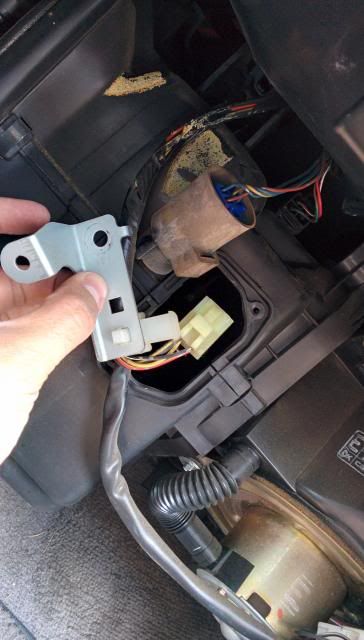
(upper mounting nut which also holds this bracket + relay)
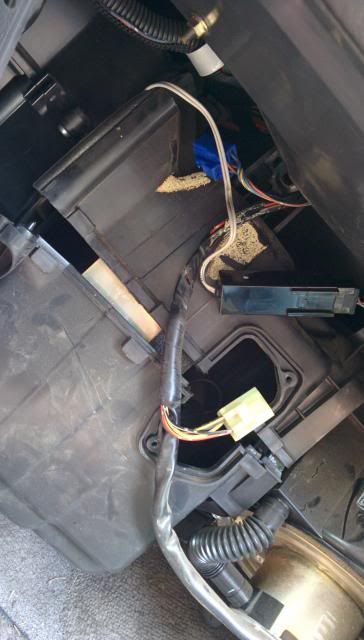
Once you've got those off, you need to remove the fan resistor switch, and all 3 metal clips holding the 2 halves of the box together... Once those are done, you get this.
(disregard the extra thermo switch hanging there)
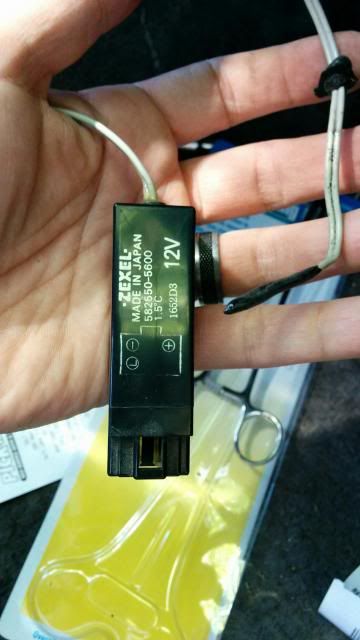
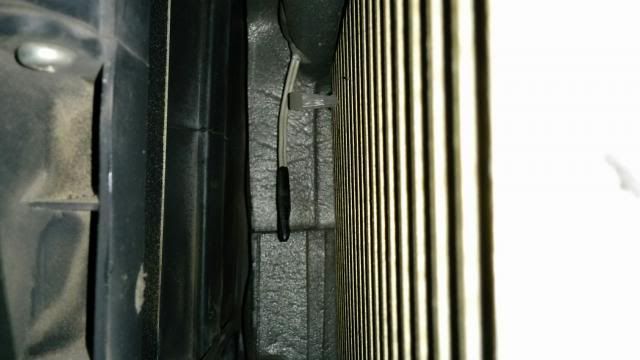
As you can see, you can split open the box to a certain extent. You can also pull it forward/outward and down a little bit. This is enough access to remove the old switch and replace it. The original thermo switch sits on top of the evaporator core box, and the temperature probe goes inside of the box, through a small hole in the top left rear-ish area of the box. Pictured below is the sensor, as you can see it's pressed into the core fins with a clip for extra security (although it's not needed).

To remove the old switch, you must first remove the temperature probe. This is where your hemostat comes in. Grip the base of the wires closest to the core, clip them tight, then work out the probe. The retaining clip isn't too tight, thus you can simply pull the wire out from the clip while it still stays in place. Here is the original thermo switch, in all its glory...
As you can see above, the sensor has a bit of sealant where the wires enter into the box, to keep everything relatively air tight. Now, if you're paranoid you can keep the original sealant of your junkyard thermo switch, but honestly it makes reinserting the new probe extremely difficult. Thus I chose to remove the sealant off my junkyard unit. Without sealant you will lose a TINY bit of air, but it's very small and not noticeable. If I really wanted to, I could patch the area with duct tape, but it doesn't bother me at all (the hole is VERY small).
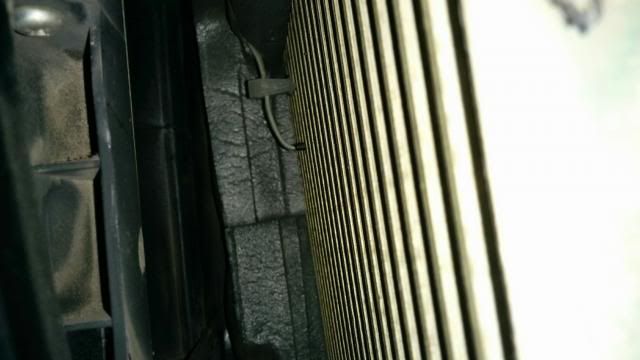
Anyway, installing the new switch is obviously reverse of removal, and it can be slightly tedious, but it's really not too bad. Start off by threading in your temp probe from the top. You have to work by feel at this point because you can't see the hole. What I ended up doing is to shine my phone flash light inside of the box, to where I could see where the wire should go from the inside. After a bit of trial and error, I found the hole from the top, and threaded in the replacement wiring/probe. At this point you can see the new probe/wire. The rest is simple, just work your hemostat to grab the probe, and shove it into place. Don't forget to do your best to clip it into the retainer clip as well!

And there we are. It's not perfect, but that probe is firmly in place. At this point I just clipped the replacement thermo switch onto the top of the box where the original was, put my 3 metal clips to close the box halves, reinstalled my mounting nut and bolt (all while reinstalling the metal bracket + relay combo on the top!). Reinstall your fan resistor switch, reinstall the glovebox, and boom - done.
Now, with the sensor in place I tested it again. A/C is actually working properly as far as I can tell! However, I've just tested it with a hot engine, idling. The compressor clicks on and stays one for about 1 minute, then clicks off for about 15 seconds, then clicks back on for the same time. This is how it SHOULD have been working all along. Even so, I'm still a bit cautious. It may not work perfectly whilst driving, but even if it doesn't, I don't think I'll mind too much, as it is already LOADS better than the original thermo switch.
Thanks for reading, and I hope this helps others who may be in a similar situation.
That said, I went to my local junkyard and pulled a few thermo switches from the same vehicle (89-94 Legacy Wagons). I found 2 that had the sensor/switch fully intact, so I grabbed them - fully knowing that they are likely to have similar issues to mine, considering their age. Anyway, onward.
Here are the two junkyard thermo switches I found...

Now, I'm glad I went to the junkyard first as I was able to figure out how everything worked (ie digging through the dashboard) without worrying about ruining things. Thus, when I came home to my car, I was able to work on things confidently. That said, accessing the thermo switch is relatively simple. Just remove the glovebox, and the switch is sitting on top of the evaporator core box..


I simply removed the 3p connector and plugged it into each of my junkyard units to see if they'd even work...

Turns out only 1 of them actually worked. At this point I decided to attempt to replace the thermo switch with the working junkyard unit. Problem is, it's impossible to reach inside of the evaporator core box to remove the embedded thermo switch probe.... At least until I got one of these.

Hemostats are used in the medical industry for a variety of purposes. Since I couldn't bring any home from work, I found out that Harbor Freight sells them for roughly $5 a piece. That is where I picked the above one up (it's 12" long).
Now, you can access the evaporator core without removing too many things. First, you must remove the upper and lower mounting nut/bolt on the box.
(lower mounting bolt)

(upper mounting nut which also holds this bracket + relay)

Once you've got those off, you need to remove the fan resistor switch, and all 3 metal clips holding the 2 halves of the box together... Once those are done, you get this.
(disregard the extra thermo switch hanging there)

As you can see, you can split open the box to a certain extent. You can also pull it forward/outward and down a little bit. This is enough access to remove the old switch and replace it. The original thermo switch sits on top of the evaporator core box, and the temperature probe goes inside of the box, through a small hole in the top left rear-ish area of the box. Pictured below is the sensor, as you can see it's pressed into the core fins with a clip for extra security (although it's not needed).

To remove the old switch, you must first remove the temperature probe. This is where your hemostat comes in. Grip the base of the wires closest to the core, clip them tight, then work out the probe. The retaining clip isn't too tight, thus you can simply pull the wire out from the clip while it still stays in place. Here is the original thermo switch, in all its glory...

As you can see above, the sensor has a bit of sealant where the wires enter into the box, to keep everything relatively air tight. Now, if you're paranoid you can keep the original sealant of your junkyard thermo switch, but honestly it makes reinserting the new probe extremely difficult. Thus I chose to remove the sealant off my junkyard unit. Without sealant you will lose a TINY bit of air, but it's very small and not noticeable. If I really wanted to, I could patch the area with duct tape, but it doesn't bother me at all (the hole is VERY small).
Anyway, installing the new switch is obviously reverse of removal, and it can be slightly tedious, but it's really not too bad. Start off by threading in your temp probe from the top. You have to work by feel at this point because you can't see the hole. What I ended up doing is to shine my phone flash light inside of the box, to where I could see where the wire should go from the inside. After a bit of trial and error, I found the hole from the top, and threaded in the replacement wiring/probe. At this point you can see the new probe/wire. The rest is simple, just work your hemostat to grab the probe, and shove it into place. Don't forget to do your best to clip it into the retainer clip as well!


And there we are. It's not perfect, but that probe is firmly in place. At this point I just clipped the replacement thermo switch onto the top of the box where the original was, put my 3 metal clips to close the box halves, reinstalled my mounting nut and bolt (all while reinstalling the metal bracket + relay combo on the top!). Reinstall your fan resistor switch, reinstall the glovebox, and boom - done.
Now, with the sensor in place I tested it again. A/C is actually working properly as far as I can tell! However, I've just tested it with a hot engine, idling. The compressor clicks on and stays one for about 1 minute, then clicks off for about 15 seconds, then clicks back on for the same time. This is how it SHOULD have been working all along. Even so, I'm still a bit cautious. It may not work perfectly whilst driving, but even if it doesn't, I don't think I'll mind too much, as it is already LOADS better than the original thermo switch.
Thanks for reading, and I hope this helps others who may be in a similar situation.
