Progress from ghetto beater, to something...better?

Anything and Everything about the Body, from paint to undercoating and interior, including in-car entertainment (ICE).

Moderators: Helpinators, Moderators

MrTodd
First Gear
Posts: 67
Joined: Wed Apr 30, 2014 6:52 pm
Location: OR

Progress from ghetto beater, to something...better?

Post by MrTodd »

Hey everyone, so I've decided that I am going to take small steps, on at a time, to make my car look a bit nicer from the outside. I've just started on the exterior, so I'll update this thread as I go along.

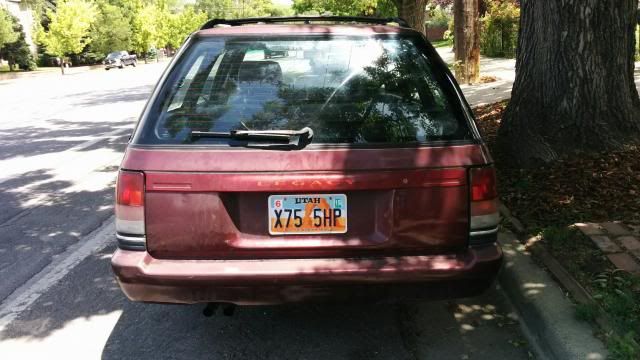
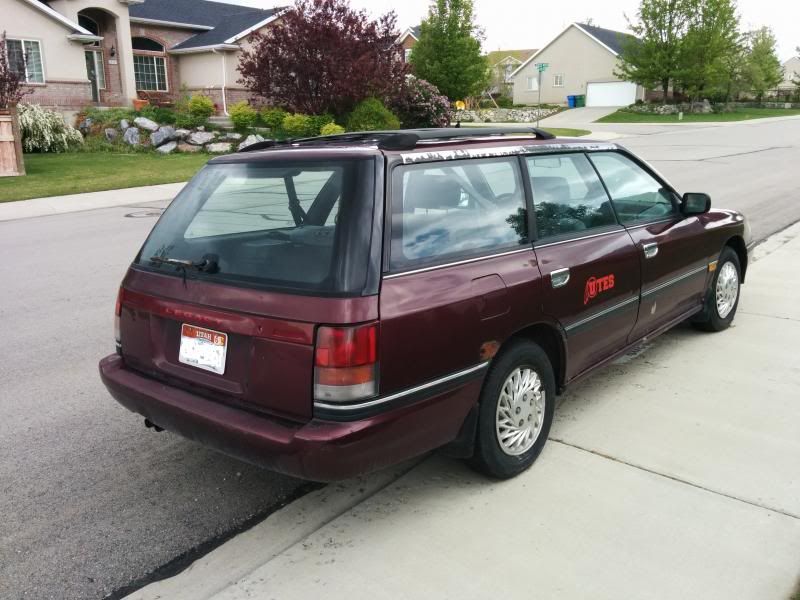
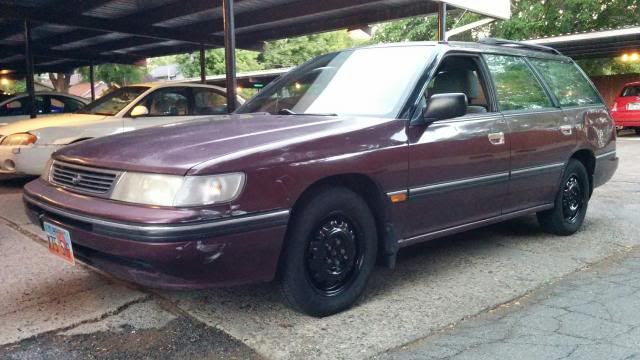
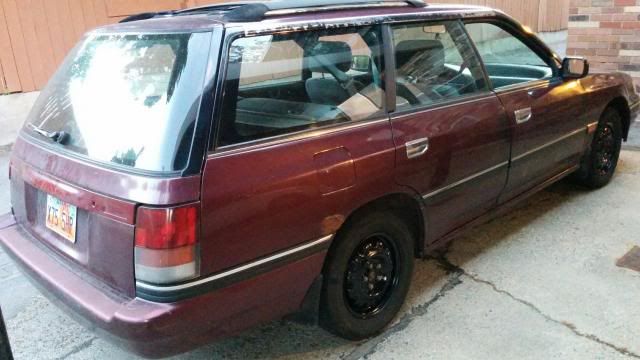
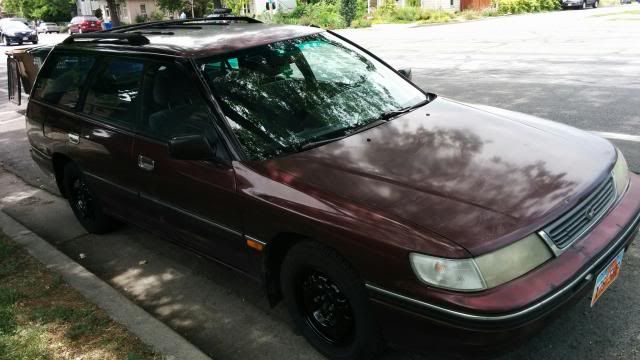
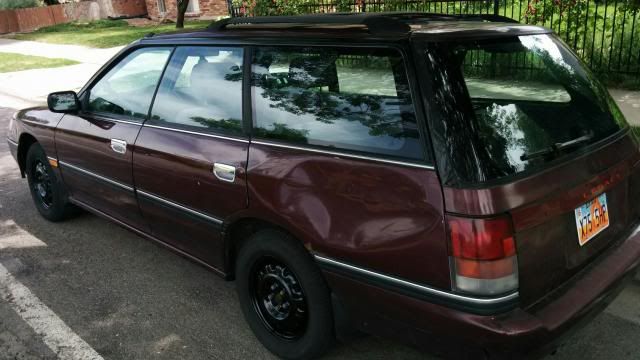
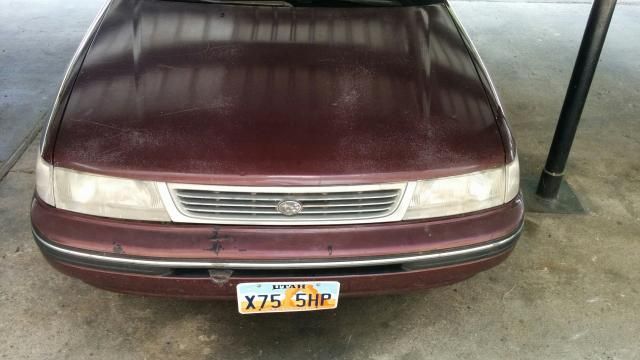
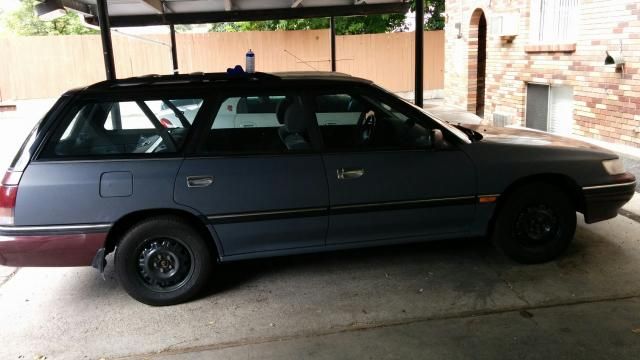
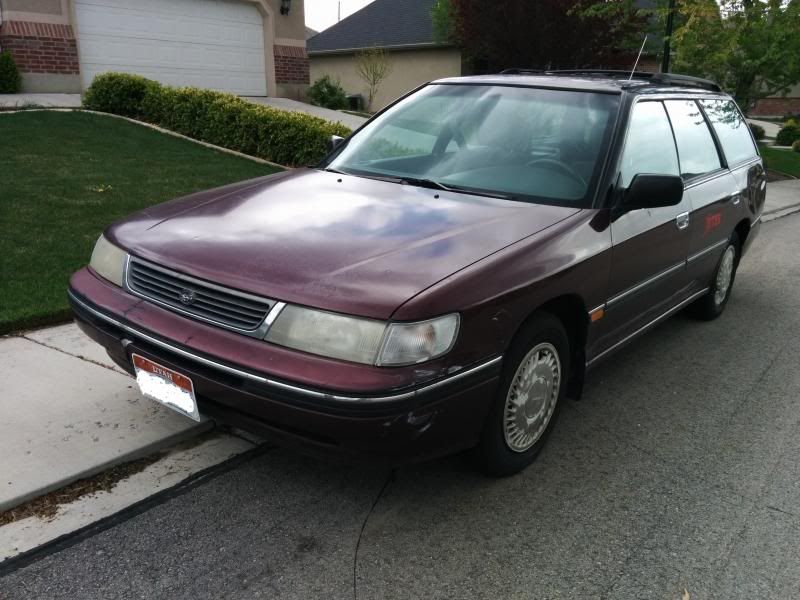
First thing's first, here is how it started...

Image
Image

The first thing I did was to remove the stupid stickers, easy peasy.
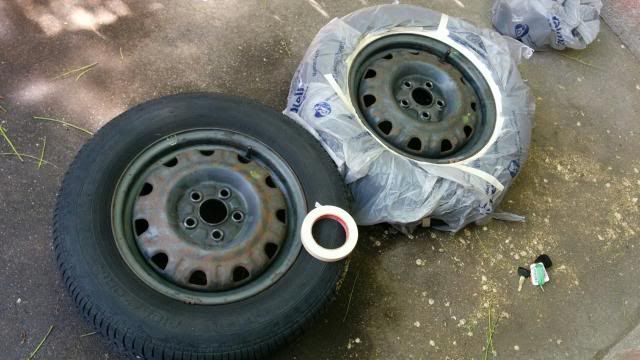
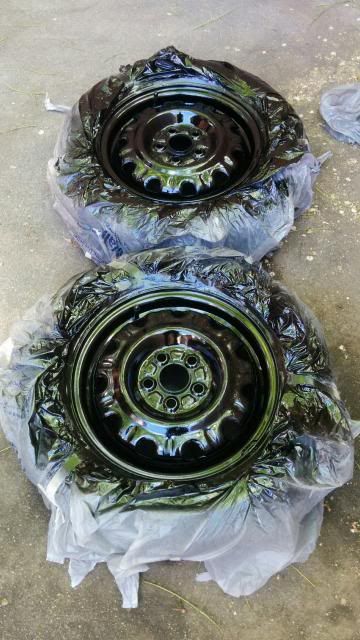
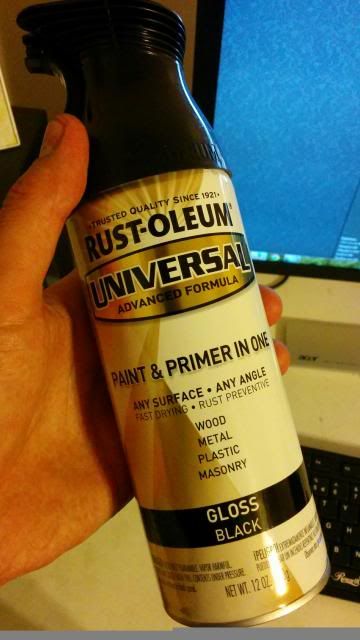
Next, I was able to clean up the wheels a bit. I took off the cracked, broken hubcaps, to bring it down to the bare, rusted steelies. I took the wheels off, washed and scrubbed them down with simple green. Then, taped everything off, and sprayed it with RustOleum paint + primer spray. I've had excellent success with that spray paint before, and I figure that it would be a solid, long lasting choice for glossy wheels. Anyway, on to the pictures...

(wheels off, finished scrubbing them down, masking for paint)
Image

(after the 2nd coat - I ended up doing a total of 6, even though just 2 would've done it!)
Image

(finally, the finished beast. still got a ways to go to make it look decent, but the first step is now finished)
Image
Image

(here is the spray paint. be careful not to get it on your hands/fingers, it's VERY thick and sticky)
Image


That's it for today (6/21/14). My next step is to spray the molding above the side window line, the paint has chipped off showing the chrome underneath. I'm going to spray that with a glossy black. I'll update after making more progress.

Thanks for looking!
MrTodd
First Gear
Posts: 67
Joined: Wed Apr 30, 2014 6:52 pm
Location: OR

Re: Progress from ghetto beater, to something...better?

Post by MrTodd »

(6/23/14)

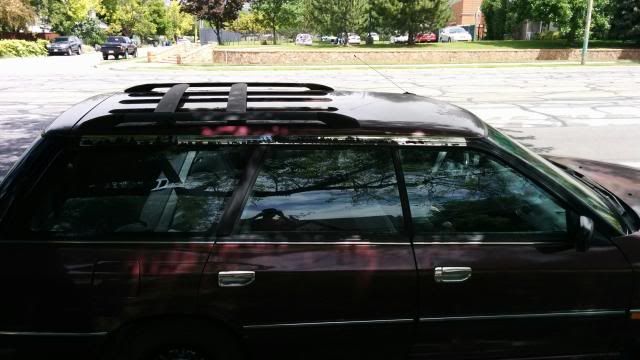
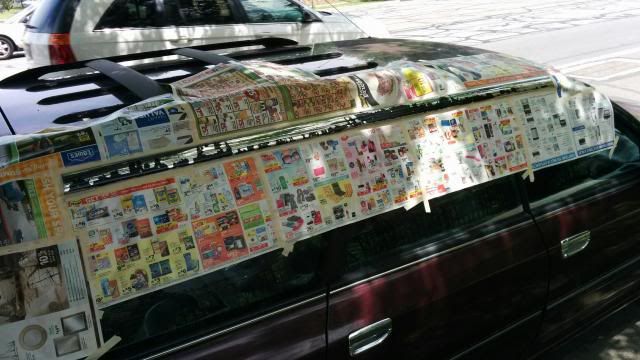
Just finished up on the upper window moldings. Process was kind of a half-ass sort of a deal. Ideally, I'd take off the moldings, sand them smooth, spray them, then reinstall. However, I didn't want to run the risk of breaking any old old clips, so I just cleaned it, masked, and sprayed. Take a look...

(before)
Image

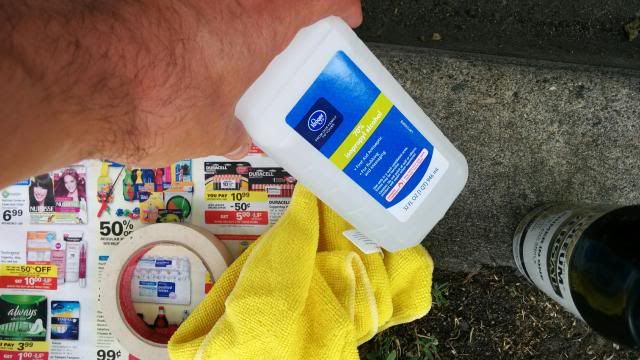
(clean w/rubbing alcohol and microfiber cloth, then masked off)
Image
Image

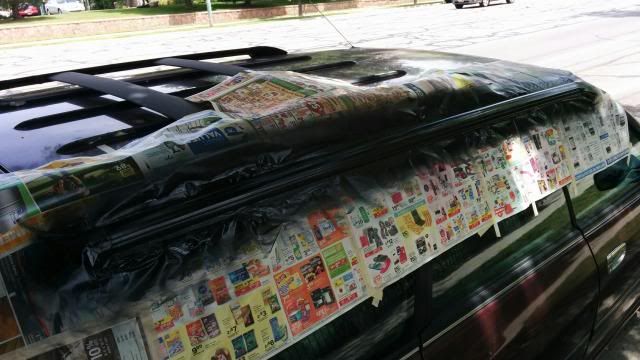
(after the first 2 coats of spray)
Image


(finished product, 4 coats on each side. I wiped off the dusty overspray from the windows using my alcohol + microfiber cloth, worked great)
Image
Image


It turned out alright. You can still see the texture of the old chipped paint on the new finish, but it's only noticeable when close-up. Even so, I'm not looking to win any awards with this puppy. :)

Next up, I'll be working on pounding out that huge walrus sized dent on the rear driver's side panel. Haha. Then, I'll see what I can do about the dull/foggy headlights, and finally I'll move on to prep for plasti-dip.
MrTodd
First Gear
Posts: 67
Joined: Wed Apr 30, 2014 6:52 pm
Location: OR

Re: Progress from ghetto beater, to something...better?

Post by MrTodd »

(6/24/14)

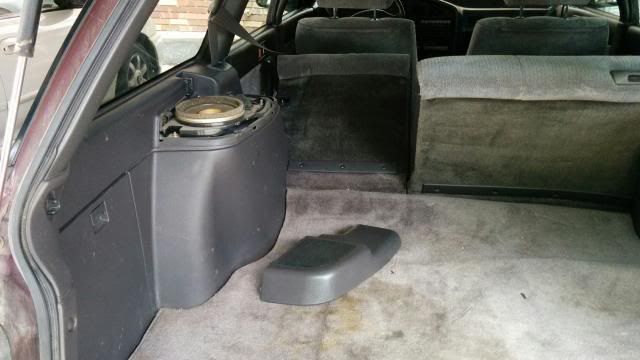
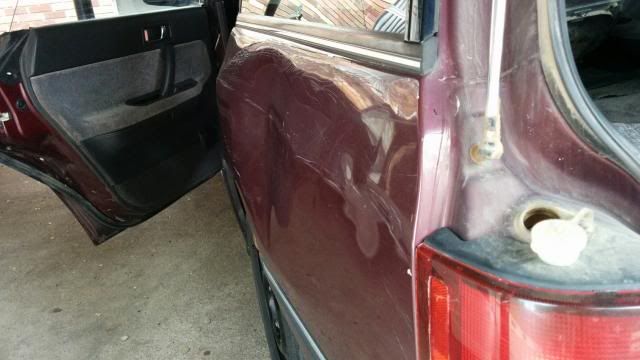
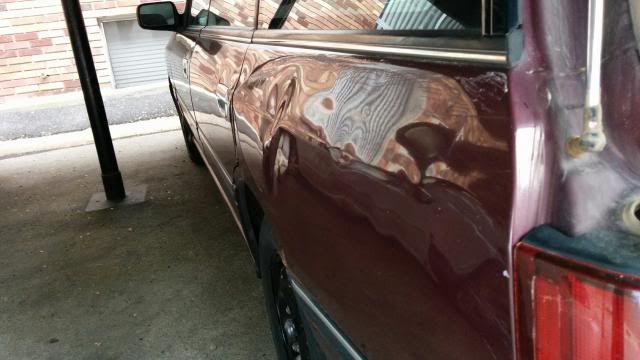
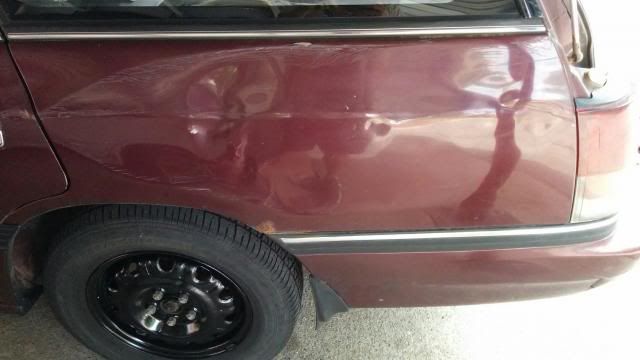
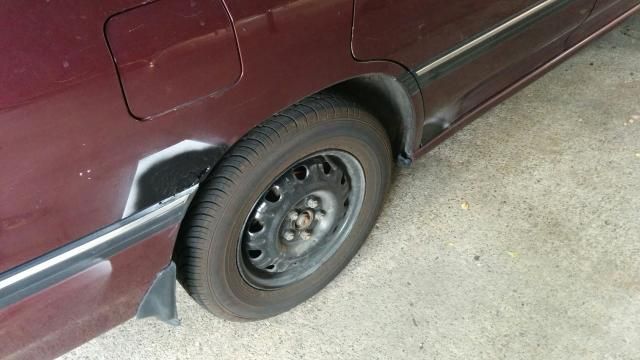
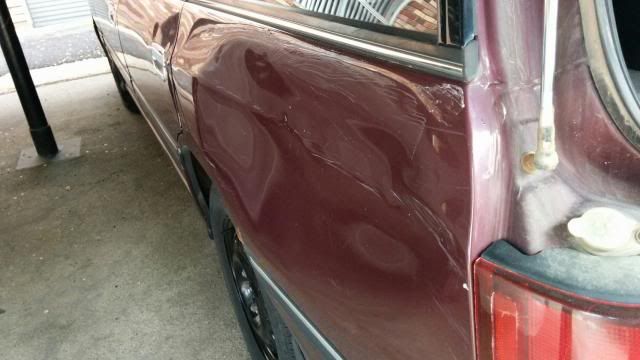
So today I had some time to work on the walrus dent; however, I didn't do as good of a job as I'd hoped. I pulled off the interior paneling, then attempted to push out the dent. On to the pics..

(Here it is, before)
Image


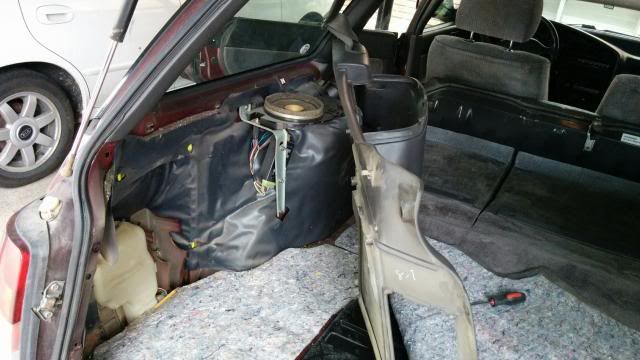
(Interior paneling coming off)
Image
Image


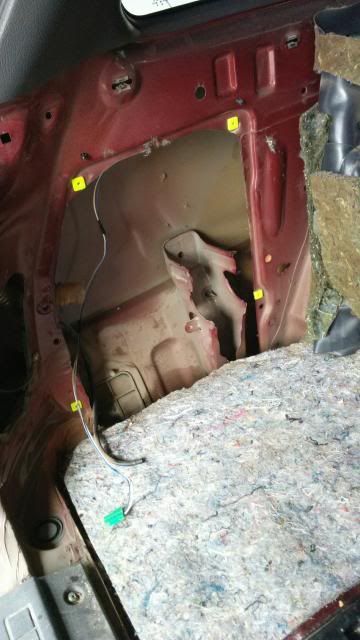
(I first attempted to push right in here, and it popped a big portion out - good start!)
Image
Image


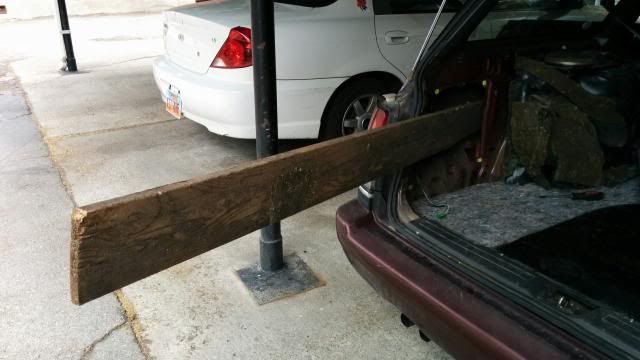
(Next, I tried to push the rest out, but I couldn't quite reach in there. I used some wood, which helped, haha.)
Image
Image


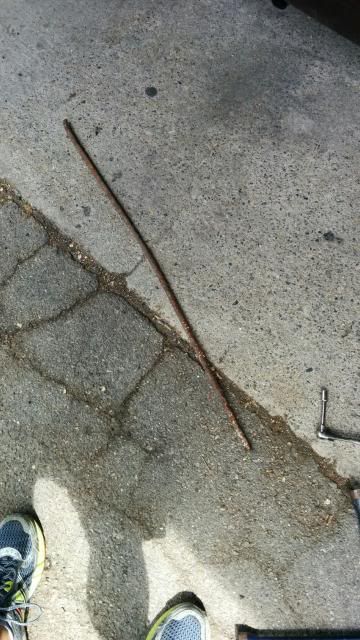
(I still wasn't satisfied, so I had the *bright* idea of using some old rebar that was laying around... Didn't help, in fact, it made some outward dings making the whole thing look worse... :/ )
Image
Image


Needless to say I am now a bit bummed out. I made it better, but I also made it worse. Haha. I should've just used one of those suction cup dent-pullers, I'm sure that would've given better results (and it would've been substantially easier. Oh well). Anyway, I decided to tackle another dent in the rear lift gate.

(before)
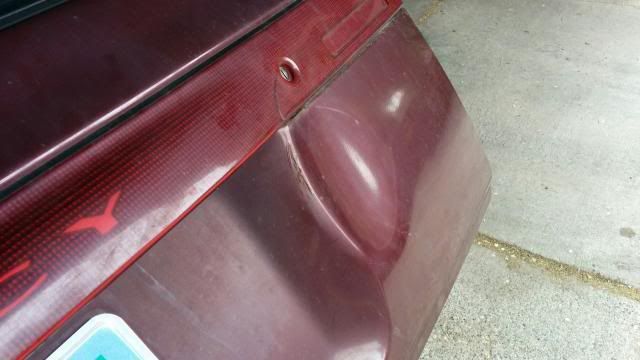
Image


(paneling removed, it was really simple)
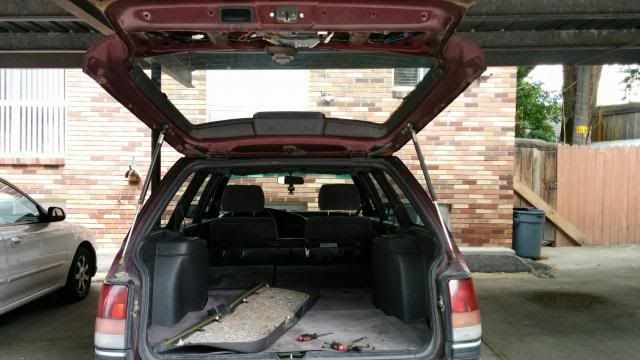
Image


(reached in, pressed it out with my hand. It's not perfect, but it's a lot better)
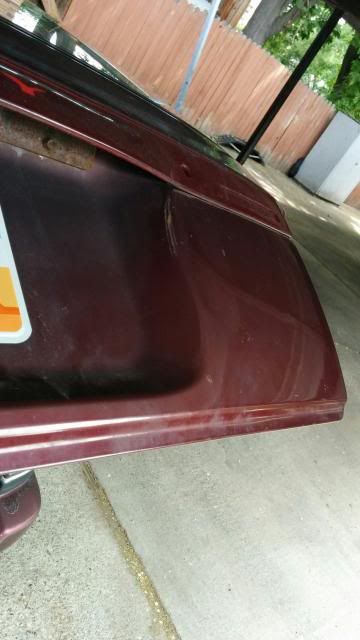
Image


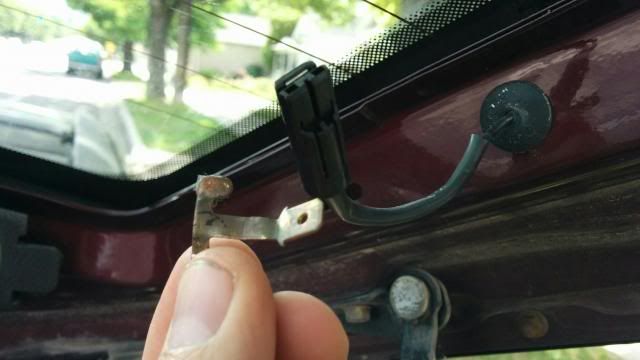
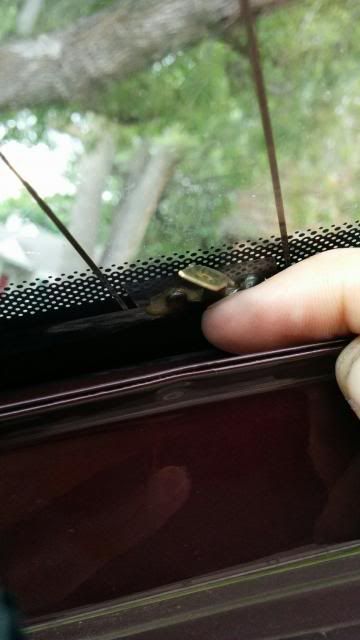
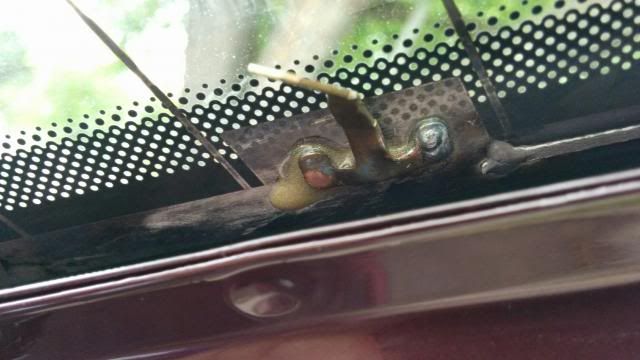
Although I wanted it to look better, I decided against using any 'special' tools and left it as is. Anyway, while I was back there, I noticed that my rear defroster wiring had broken off from the window. The soldering completely cracked off.
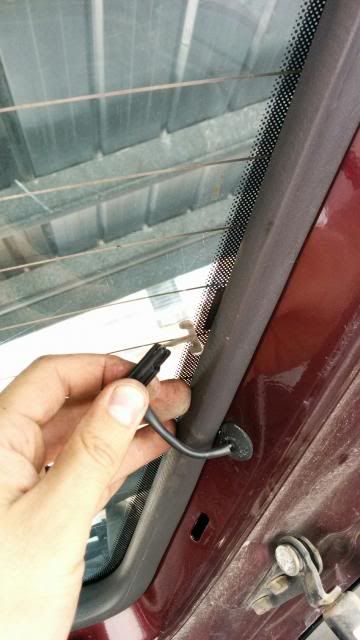
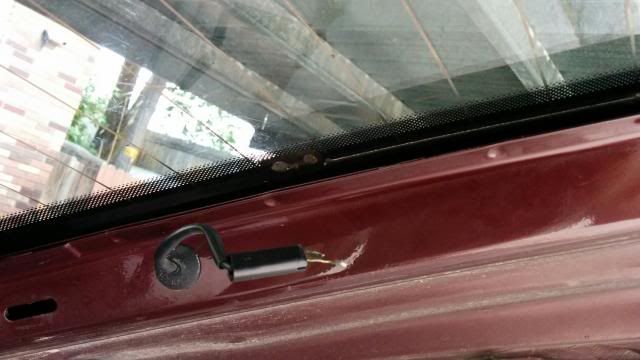
Image
Image


I attempted to re-solder the terminals, but I had no such luck... I'm competent at soldering and I used all my tricks, cleaning each side w/alcohol, removed the old solder with a copper braid, use flux on both mating surfaces, etc.....but apparently I'm not good enough to get these things to work. I either need more heat, or just to use some other method besides solder. Needless to say, I failed. :(

(here it is after spending too much time on it)
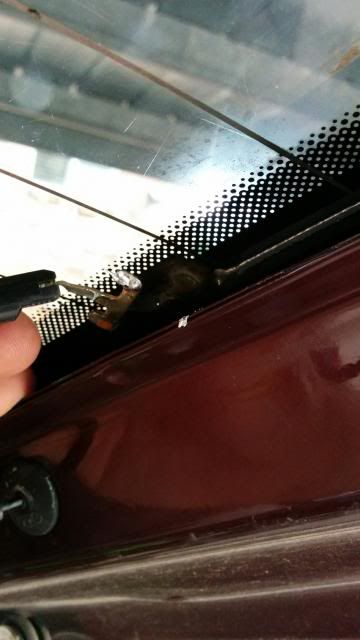
Image


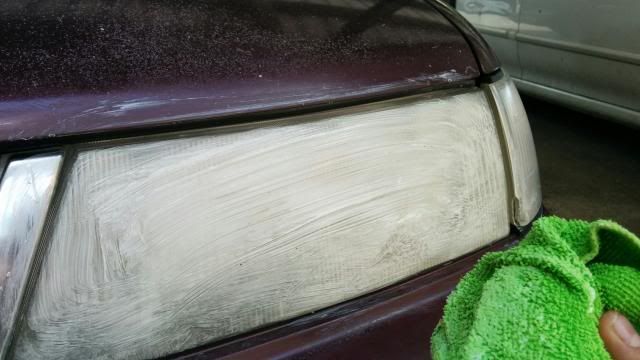
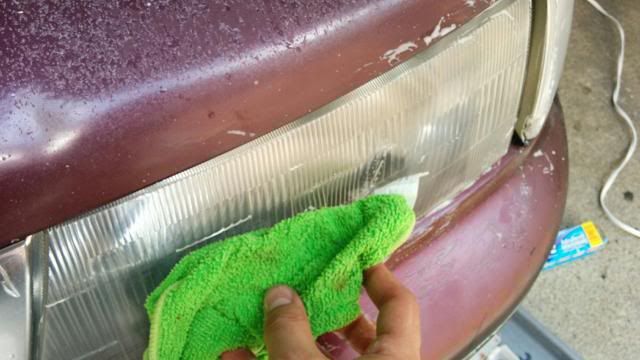
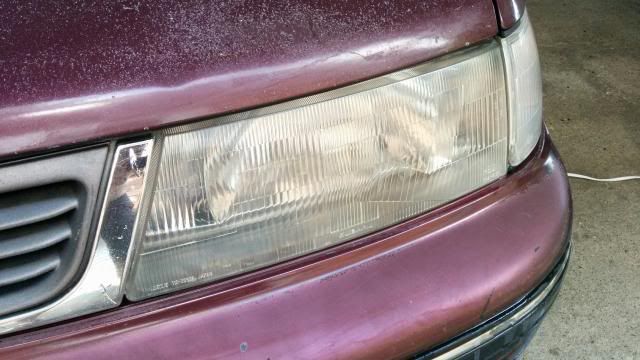
To try and end things on a lighter note (*baddump tssss*), I decided to use the old toothpaste method of cleaning up my headlights. I just found some youtube videos illustrating it, then went to work.

(before)
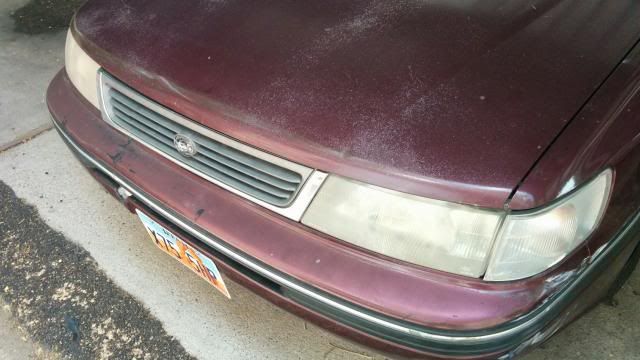
Image

(cleaned the headlight first, then put on a bead of paste)
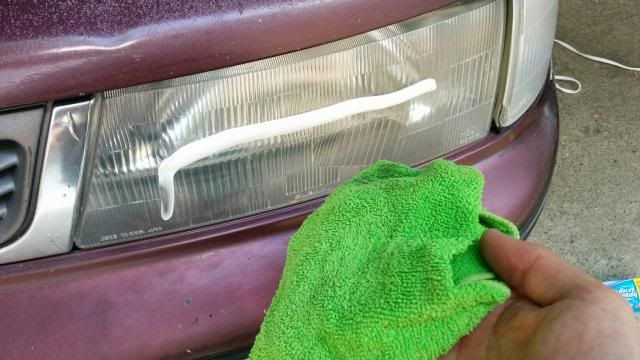
Image

(rub, scrub, rinse and repeat)
Image
Image


(here is the finished product on the driver's side, also a comparison)
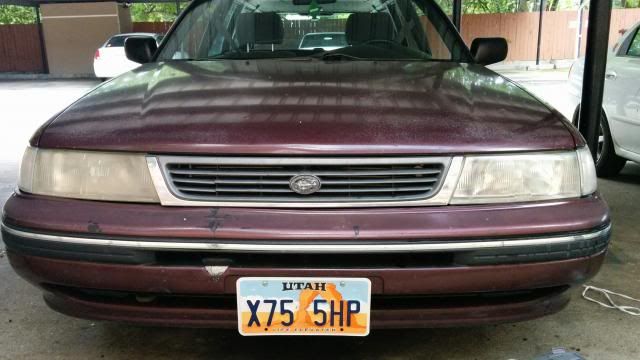
Image
Image


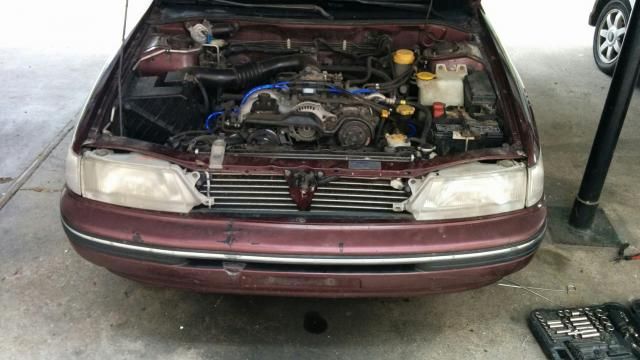
Seeing that it ACTUALLY worked (to a certain extent), I went ahead and did the passenger's side. This time it didn't seem to go as well, as there apparently was more oxidation on the inside of the housing compared to the driver's side. Oh well, it still was an improvement. Here is a pic of the front end all finished up. (Gotta fix that grill, though!)
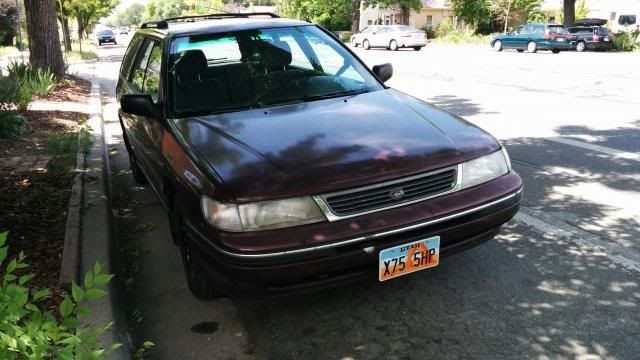
Image


Last, but not least, another set of pics of the ghetto dent removal job I attempted. Haha.
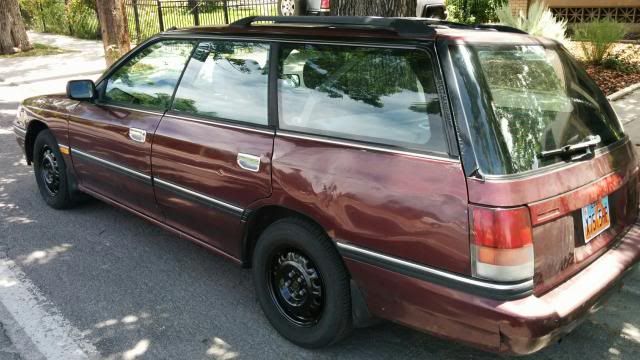
Image
Image

The dent in the rear lift gate is almost non-existent, which I'm very pleased with. The walrus dent really does look better, and I'm debating on whether or not I should try to grab some sort of suction cup to pull a little more out. Regardless, I'm hoping that the dull sheen of the plasti-dip will help hide the imperfections.

That's it for today. Next up, I'll be doing a half-ass job on the rust spots to smooth things out a bit before painting.

Thanks for looking!
Legacy777
Site Admin
Site Admin
Posts: 27884
Joined: Tue Oct 15, 2002 11:37 am
Location: Houston, Tx
Contact:

Re: Progress from ghetto beater, to something...better?

Post by Legacy777 »

Nice progress! Keep up the work.
Josh

surrealmirage.com/subaru
1990 Legacy (AWD, 6MT, & EJ22T Swap)
2020 Outback Limted XT

If you need to get a hold of me please email me rather then pm
Nohbdy
First Gear
Posts: 89
Joined: Fri Nov 15, 2013 4:04 pm
Location: Hampton Roads, VA

Re: Progress from ghetto beater, to something...better?

Post by Nohbdy »

I love your methods to fix your "walrus" dent because I'm sitting here going I would sooo do that myself. But great job so far it really is looking better already (just be happy you don't have to struggle with east coast rust its a killer)
91 Legacy L (AT, FWD)-crashed 2/3/14
95 Legacy L (AT)
05 Outback XT (AT)
92 Legacy L (MT,AWD)
James614
Fourth Gear
Posts: 1744
Joined: Sun Jun 10, 2007 4:35 am
Location: Arkansas

Re: Progress from ghetto beater, to something...better?

Post by James614 »

Definitely coming along! Mine has that east coast rust on the rear quarters, and it kills any motivation to make the car look nice, since I'd have to replace a very sizeable portion of the panels which is far away from my skill set (I can't even do a decent bondo job).
93 Touring Wagon (EJ20G 5spd Swap) -- Finally back and running strong as ever!

05 Outback 2.5XT 5spd -- Now the wife can have her SUV and get in on the turbo Legacy goodness at the same time.
MrTodd
First Gear
Posts: 67
Joined: Wed Apr 30, 2014 6:52 pm
Location: OR

Re: Progress from ghetto beater, to something...better?

Post by MrTodd »

Thanks for the positive responses, everyone!
Nohbdy - The rust underneath the car doesn't look very good, but you're right - it could be worse!
James614 - I'm right there with ya. I SUCK at bondo, but I'll be using a little bit on this car once I get to those rear 1/4 panel rust spots.
Legacy777 - Thanks for the props!!


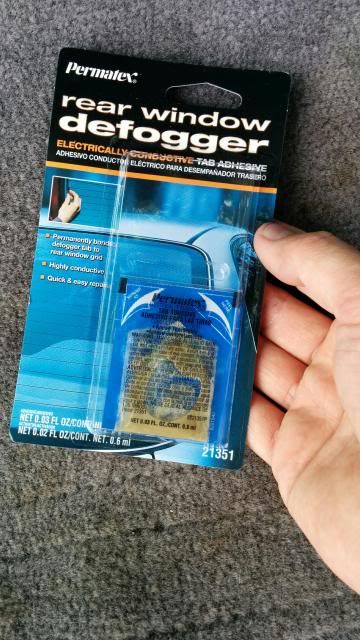
Okay, the other day (6/27/14) I was able to do a little bit of work. I *think* I fixed the rear defroster tabs. Apparently there are several quick fixes available in the form of metallic epoxy-type bonding. I used on of these and re-attached my rear defogger/defroster tabs. Take a look....

(found this at the parts store)
Image

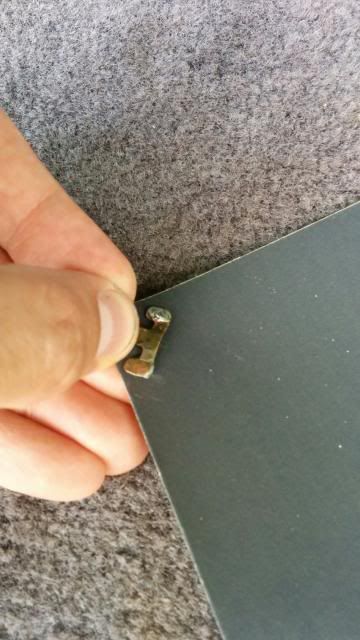
(remove each tab from the connector)
Image

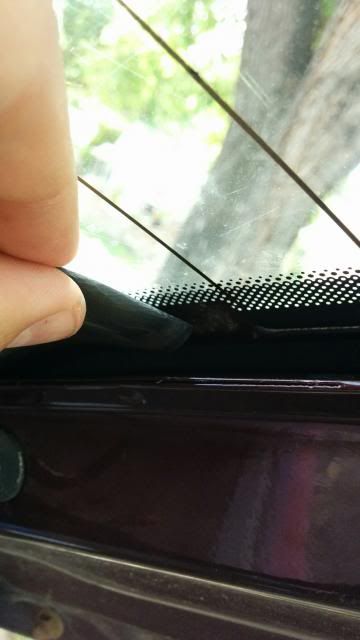
(lightly sand the tab along with the window)
Image
Image

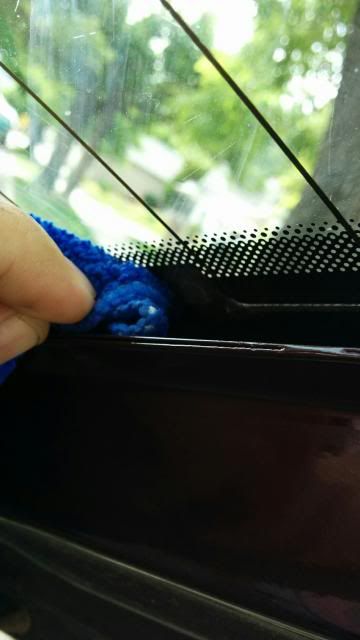
(both wiped down w/alcohol + microfiber cloth)
Image
Image

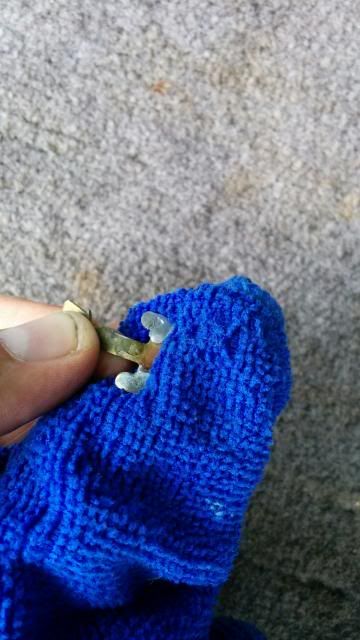
(apply activator, wait 5 min, then apply sealant on the terminal, wait 1 minute to bond)
Image
Image


24 hours later, I plugged them back in and put all my paneling back together. Can't really tell if it's working or not, though. It's too warm outside. *shrugs*
Legacy777
Site Admin
Site Admin
Posts: 27884
Joined: Tue Oct 15, 2002 11:37 am
Location: Houston, Tx
Contact:

Re: Progress from ghetto beater, to something...better?

Post by Legacy777 »

You can use a multimeter to check the resistance between the contacts and the strips on the window.

I need to fix a few cuts on the window in my Impreza. I had tried a while back, but I think the stuff I got was old and didn't work right.
Josh

surrealmirage.com/subaru
1990 Legacy (AWD, 6MT, & EJ22T Swap)
2020 Outback Limted XT

If you need to get a hold of me please email me rather then pm
MrTodd
First Gear
Posts: 67
Joined: Wed Apr 30, 2014 6:52 pm
Location: OR

Re: Progress from ghetto beater, to something...better?

Post by MrTodd »

Legacy777 wrote:You can use a multimeter to check the resistance between the contacts and the strips on the window.

So, check the resistance between the 2 contacts? I'm assuming it would be pretty high even if it were normal....but then again, as long as it's not infinity then we should be good. Thanks for the insight, Josh! I may try that tomorrow.
MrTodd
First Gear
Posts: 67
Joined: Wed Apr 30, 2014 6:52 pm
Location: OR

Re: Progress from ghetto beater, to something...better?

Post by MrTodd »

7/11/14 - Did some more work!


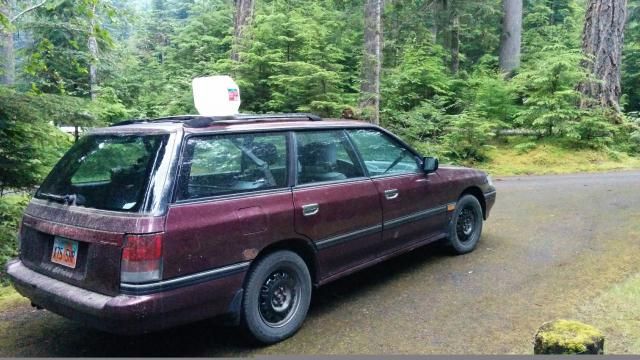
So the wife and I recently got back from a 2,000 mile road trip up to Olympic National Park in Washington state. We decided to take my Legacy after all the work I've done to see if it was up to the task. Made the trip there and back without any major problems!

Image

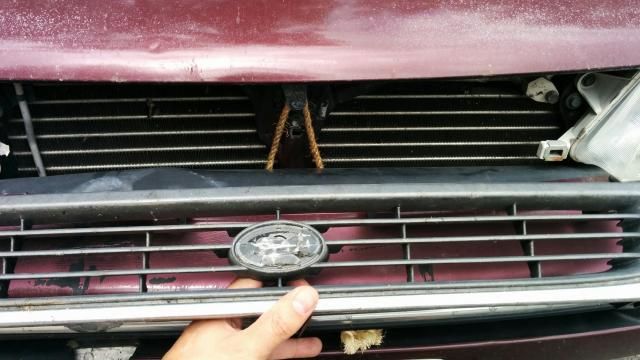
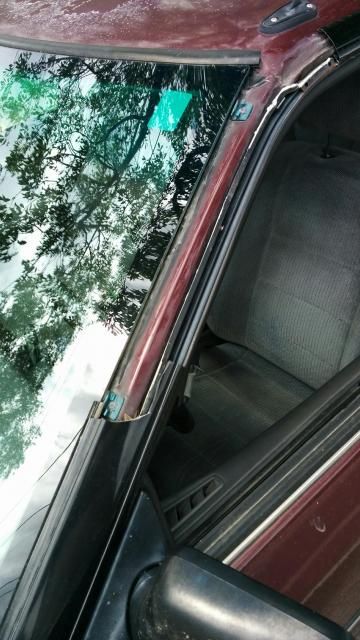
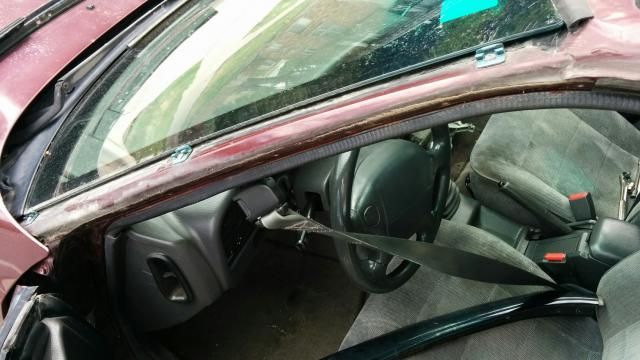
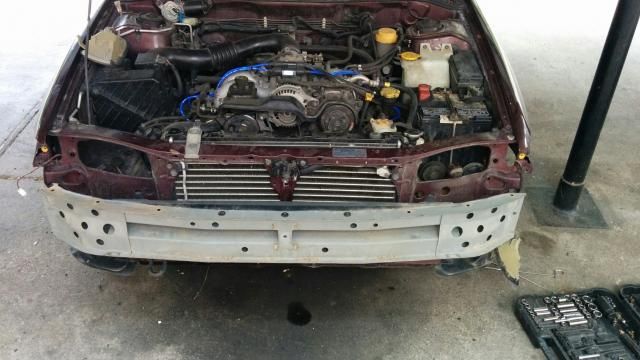
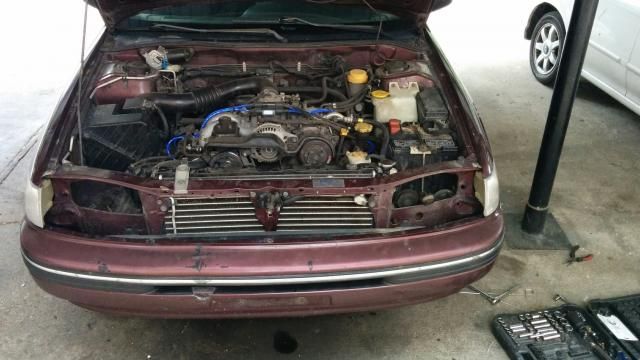
Even so, the trip wasn't quite perfect... A couple things acted up on my car. First, the driver's side windshield molding cracked and ripped right off while driving on the freeway! Haha. It was pretty loud. Also, the hood latch wasn't staying locked on the way back home. I ended up ghetto rigging it with some rope so it wouldn't fly up while driving...

Image
Image

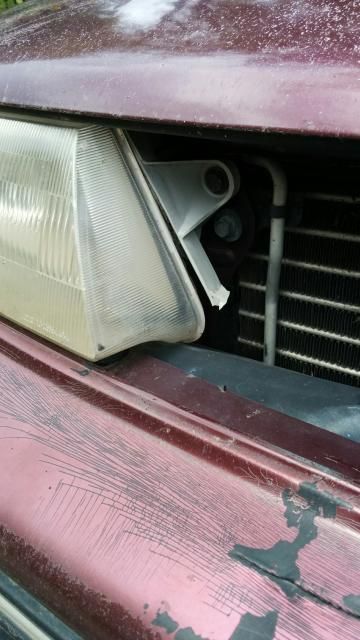
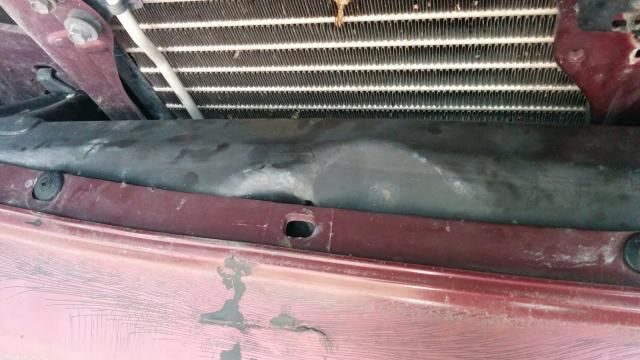
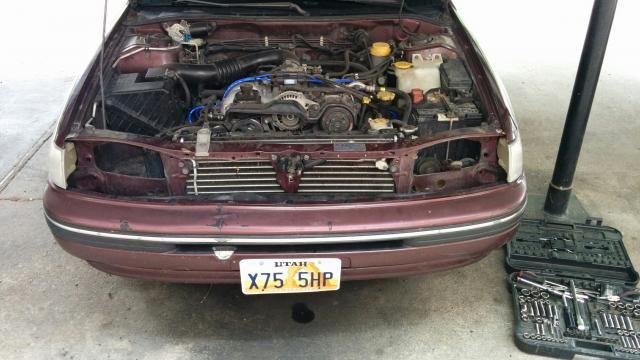
While I was in there, I found out that the headlight bracket was busted and there was a big smashed area on the bumper support. This must be why my grill wasn't sitting flush...

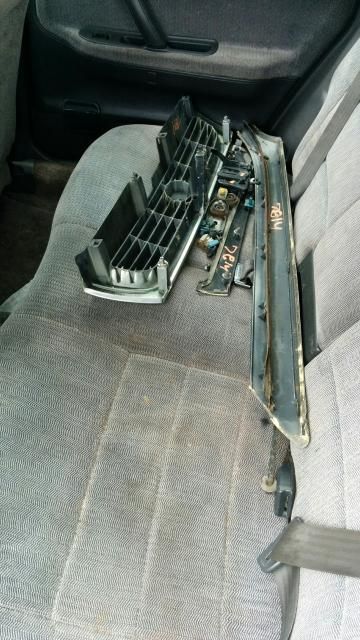
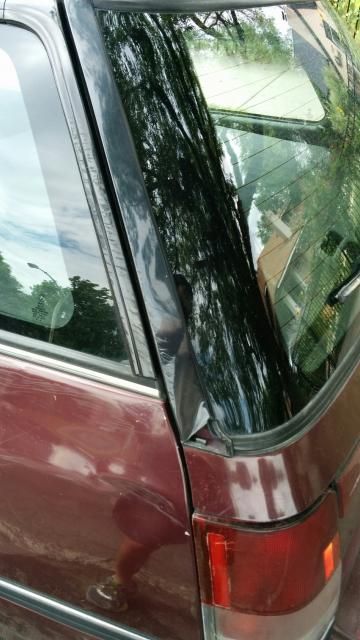
Fast forward to now, I decided to pick up a few parts at the junkyard. Not only did I want to replace the broken molding on the front, I also wanted to replace an old cracked/broken molding on the back. Also, I found a newer hood grill that was fully intact! I wanted to replace mine as it never sit right, and the Subaru decal was destroyed. Here are my junkyard spoils.

Image


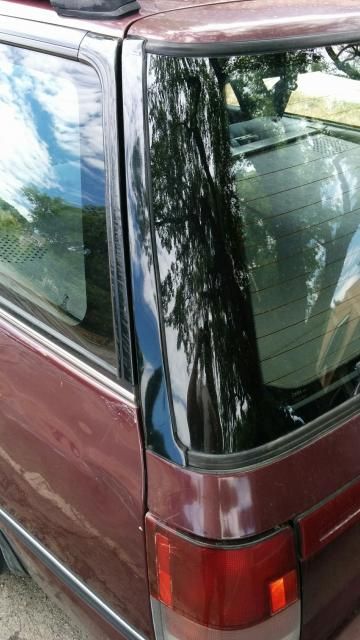
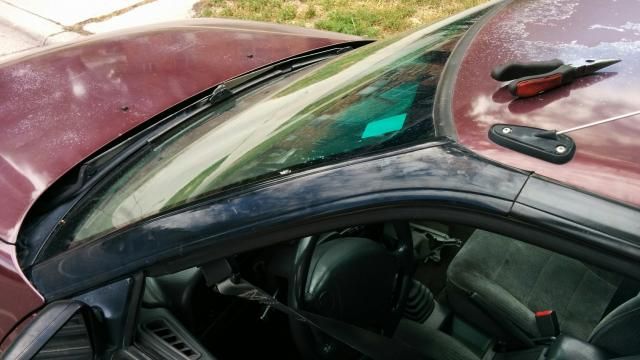
Did the easy stuff first, replaced both front and back driver's side moldings.

Image
Image

Image
Image
Image


Done!
James614
Fourth Gear
Posts: 1744
Joined: Sun Jun 10, 2007 4:35 am
Location: Arkansas

Re: Progress from ghetto beater, to something...better?

Post by James614 »

Nice work! Looks like its more beat than meets the eye, but you've been improving her pretty nicely.
93 Touring Wagon (EJ20G 5spd Swap) -- Finally back and running strong as ever!

05 Outback 2.5XT 5spd -- Now the wife can have her SUV and get in on the turbo Legacy goodness at the same time.
MrTodd
First Gear
Posts: 67
Joined: Wed Apr 30, 2014 6:52 pm
Location: OR

Re: Progress from ghetto beater, to something...better?

Post by MrTodd »

Now that the easy part was done, time to get to work on the tough stuff.

I went to the junkyard and got a replacement headlight housing, along with a replacement front bumper reinforcement. I also found that my driver's side turn lamp mount was cracked/broken, so I had to grab another one of those from the junkyard donor car as well. Luckily it all wasn't too expensive.

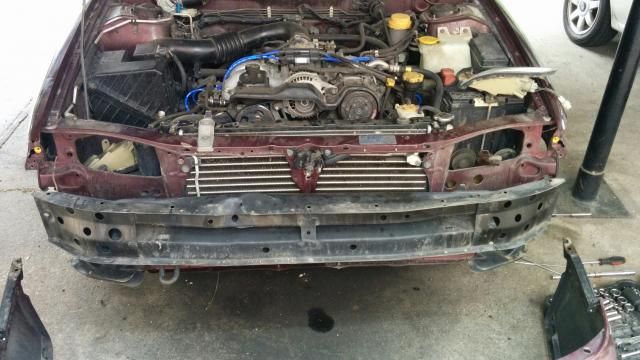
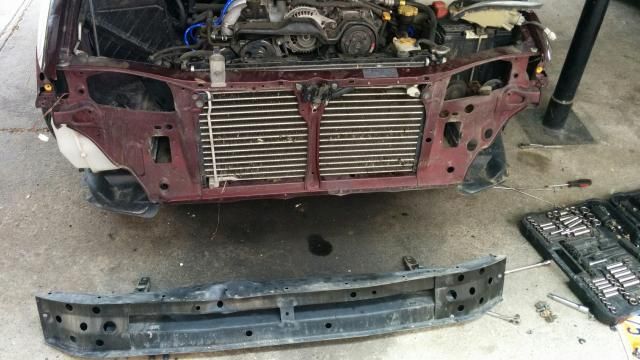
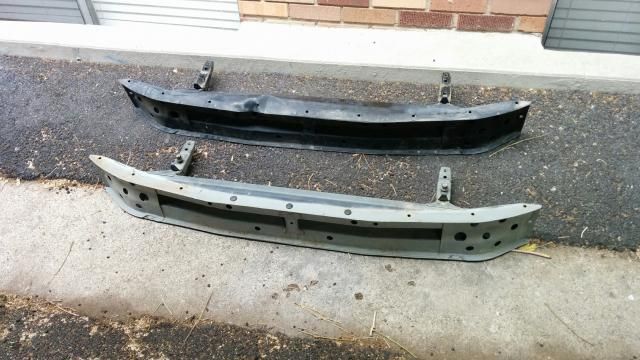
Anyway, here is a close up pic of the damaged area of the bumper reinforcement. It was crumpled enough to make it so I couldn't insert the new grill in place. Time to replace it....

Image
Image
Image
Image

(old vs new....ish)
Image

Image
Image

Already looking a bit better. But let me tell you something, getting the front bumper cover (plastic) off IS A PAIN IN THE ASS. I hate that damn thing.

Anyway, onward. Put in the replacement passenger's side headlamp housing, along with the replacement driver's side turn signal housing.

Image


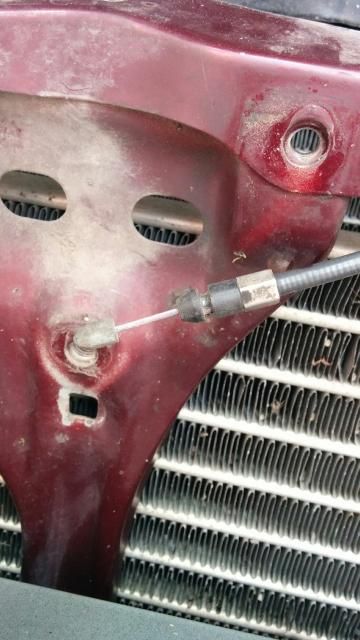
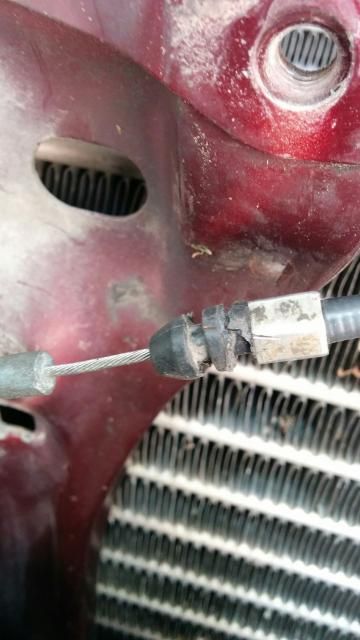
Okay, with that out of the way, I went to tackle that hood latch problem. Turns out the hood release cable appeared to be too short, and I decided to modify it so it would stop pulling the hood release so that the hood could actually stay closed! After checking at both ends of the cable, I decided to just cut a little bit out from the end closest to the latch itself. This is what I came up with.

(before)
Image

(after)
Image

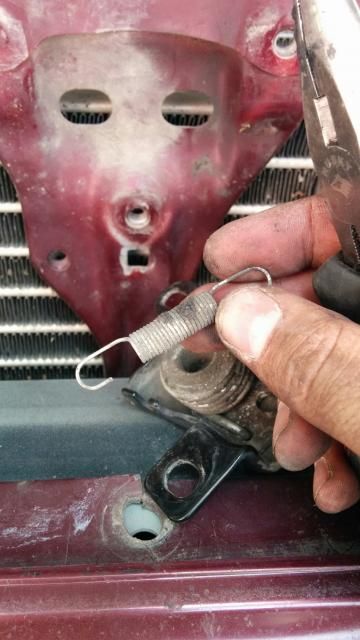
I also shortened the latch release spring so that there was a bit more tension on it at all times. I clipped off part of one of the end hooks, and bent it back into a hook with my needle nose pliers. I don't have an "after" pic of it, but at least you can see which one I'm talking about..

Image

After I finished with those, I wrapped the end of the hood latch with duct tape so that it would cover my cutting into the plastic. I put it all back together and tested it out. SO MUCH BETTER! The hood actually closes with a solid, audible 'click' and it doesn't pop back up again with tugging. Much much much better. :)

Okay, now....finally...the moment I had been waiting for - installed the replacement grill!!

Image


Yay.

The end.
For today.
MrTodd
First Gear
Posts: 67
Joined: Wed Apr 30, 2014 6:52 pm
Location: OR

Re: Progress from ghetto beater, to something...better?

Post by MrTodd »

James614 wrote:Nice work! Looks like its more beat than meets the eye, but you've been improving her pretty nicely.

Thanks for the props! I think all the major bodywork that I had planned is done, now I'm going to move on to prep for my ghetto paint job. I may get started on it tomorrow, in fact. 1/4 panel rust removal phase. Then, rattle can Plastidip. :X
Nohbdy
First Gear
Posts: 89
Joined: Fri Nov 15, 2013 4:04 pm
Location: Hampton Roads, VA

Re: Progress from ghetto beater, to something...better?

Post by Nohbdy »

I know all about those bumper skin screws, they worst invention ever. On the plus side though your hood closes and it looks great nice job and you can always look to Mighty Car Mods on youtube for some handy DIY tips on painting and just general knowledge things. Looking forward to see how it all comes out in the end!
91 Legacy L (AT, FWD)-crashed 2/3/14
95 Legacy L (AT)
05 Outback XT (AT)
92 Legacy L (MT,AWD)
MrTodd
First Gear
Posts: 67
Joined: Wed Apr 30, 2014 6:52 pm
Location: OR

Re: Progress from ghetto beater, to something...better?

Post by MrTodd »

Thanks man! Also, I love MCM. Those guys are rad.
Nohbdy
First Gear
Posts: 89
Joined: Fri Nov 15, 2013 4:04 pm
Location: Hampton Roads, VA

Re: Progress from ghetto beater, to something...better?

Post by Nohbdy »

Awesome to hear a fellow MCM fan. I think there's quite a few of us on this forum alone. Keep this up to date I love following it, even if my baby has been done in for.
91 Legacy L (AT, FWD)-crashed 2/3/14
95 Legacy L (AT)
05 Outback XT (AT)
92 Legacy L (MT,AWD)
MrTodd
First Gear
Posts: 67
Joined: Wed Apr 30, 2014 6:52 pm
Location: OR

Re: Progress from ghetto beater, to something...better?

Post by MrTodd »

Got some more progress.....sort of. More like one step forward and two steps back.


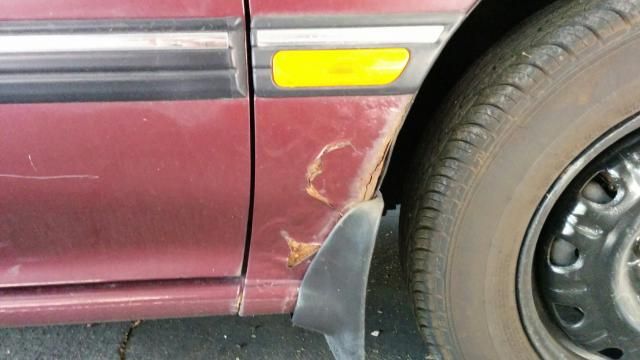
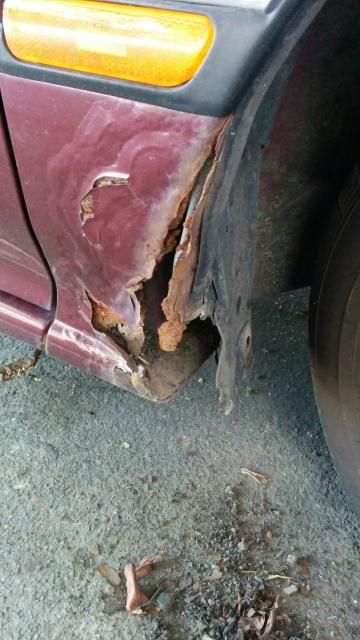
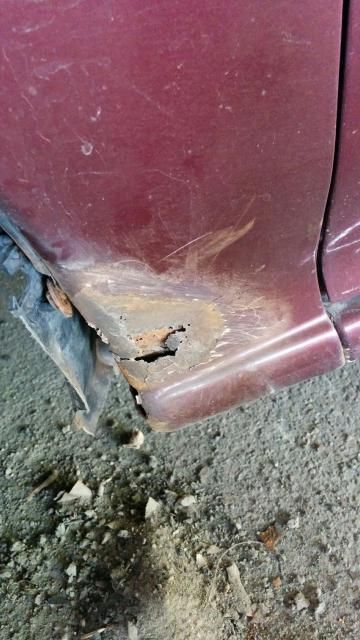
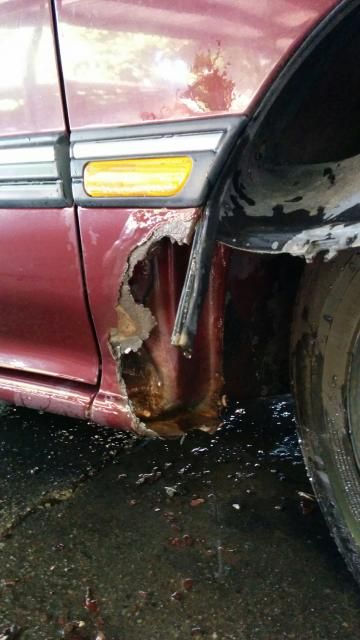
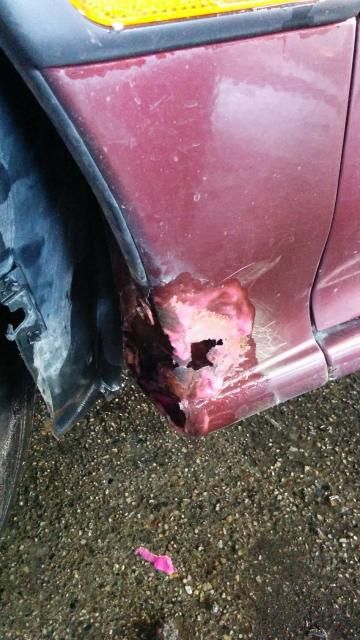
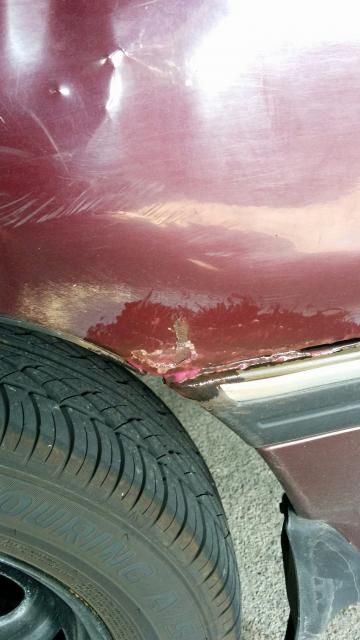
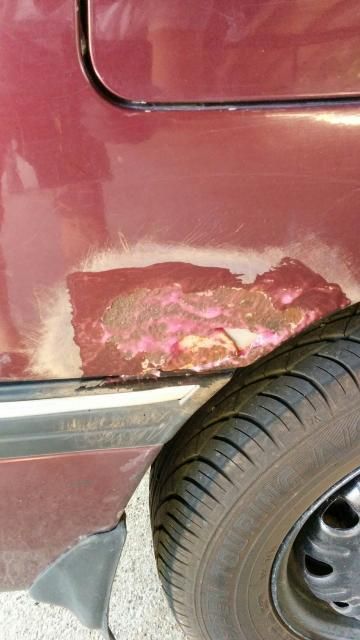
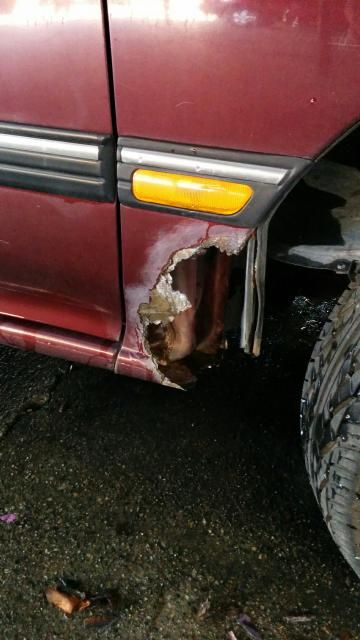
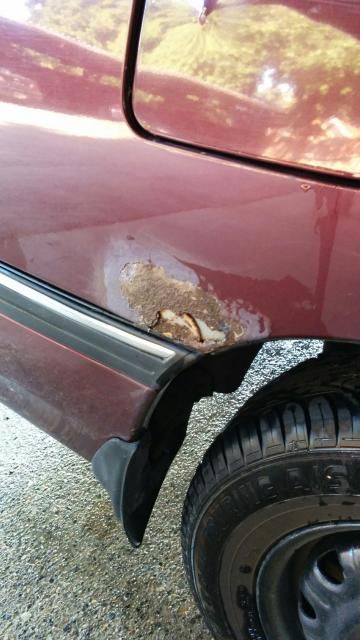
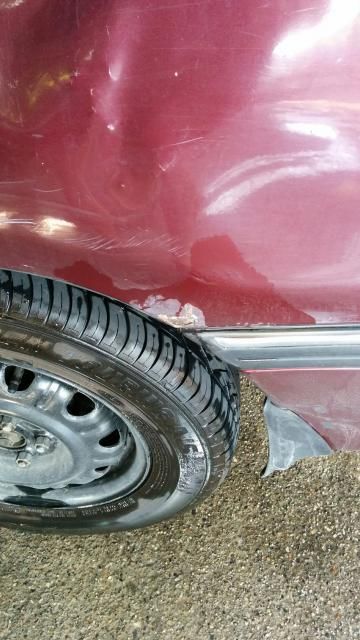
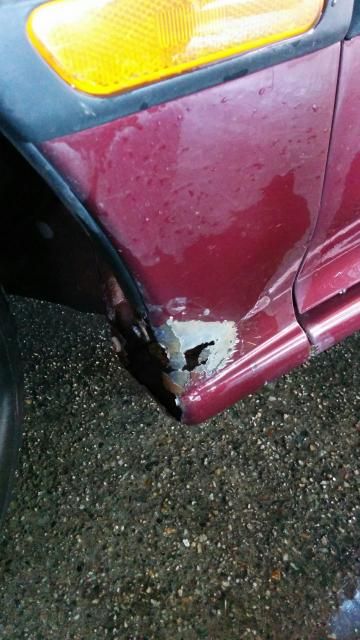
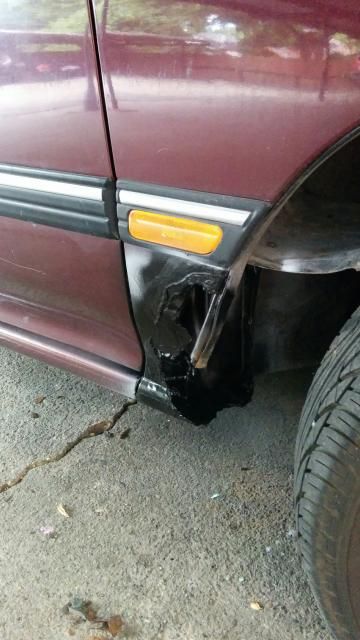
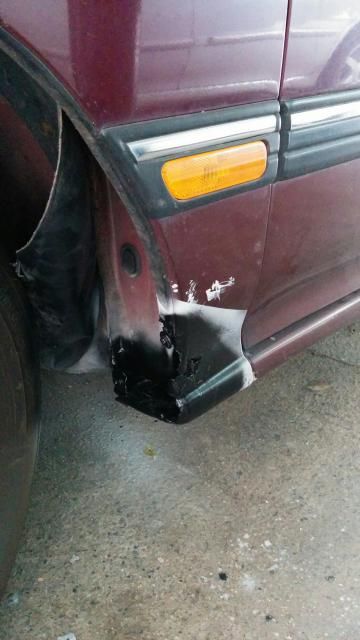
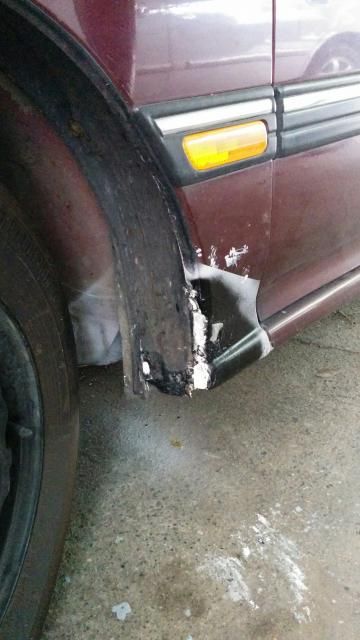
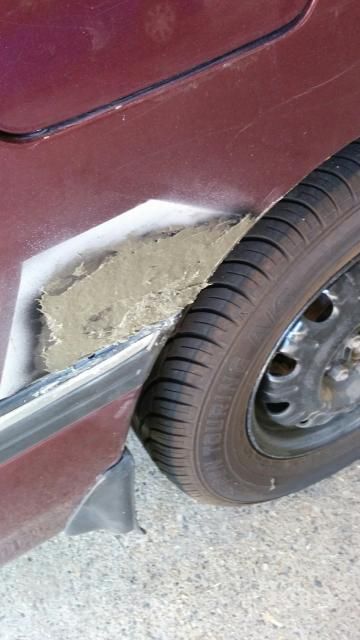
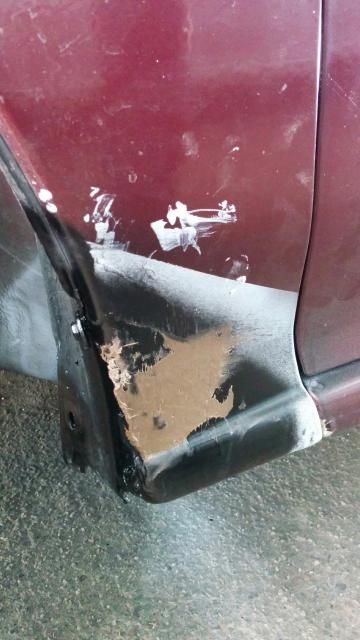
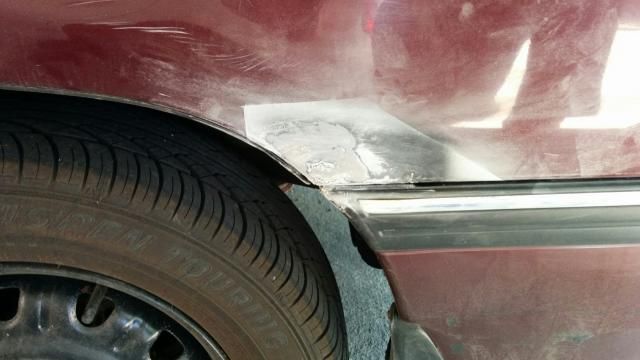
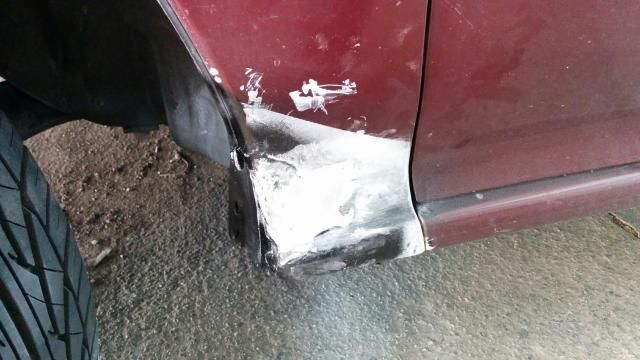
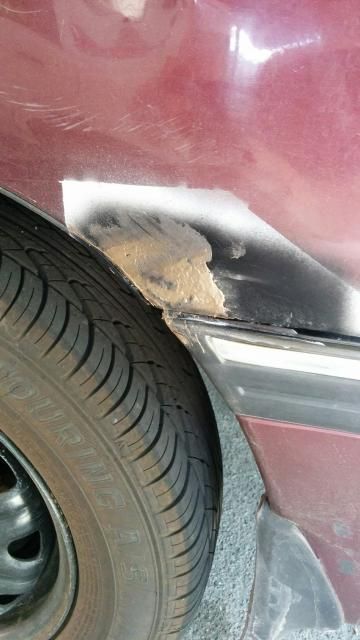
Decided to tackle the rust spots today, which may have been a mistake. The rust on the two front fenders was much worse than I thought. I started by taking off the mudguards, then the whole thing fell apart. Haha. Take a look...

Image
Image


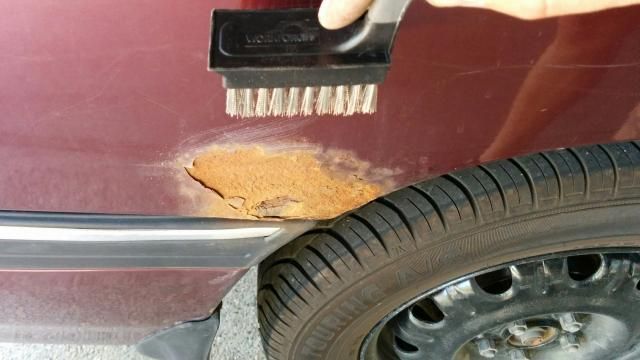
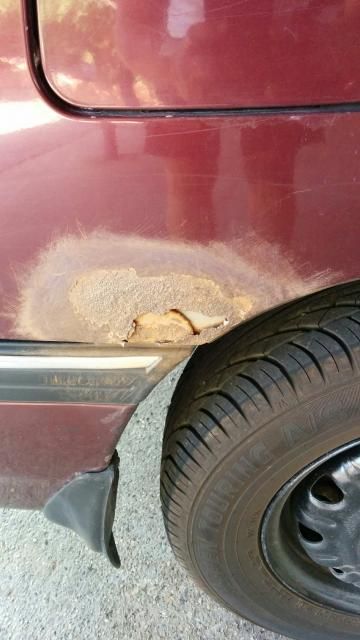
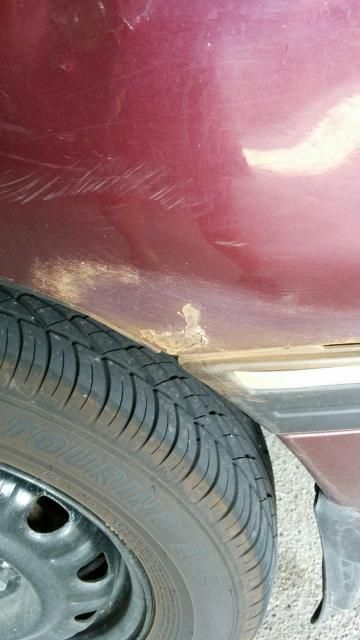
Ugh. Not stoked. I don't want to buy new fenders, either. Instead, I've got an idea. A VERY ghetto idea. But first, I should scrub off as much rust as I can. Thus, went to work.

Image
Image
Image

(front driver's side fender)
Image

(front passenger's side fender)
Image


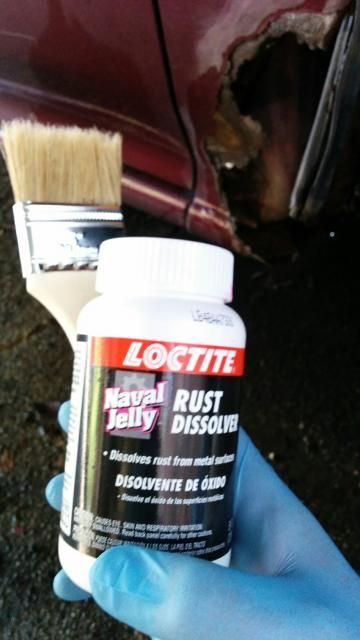
Next up, Naval Jelly.

Image
Image
Image
Image
Image


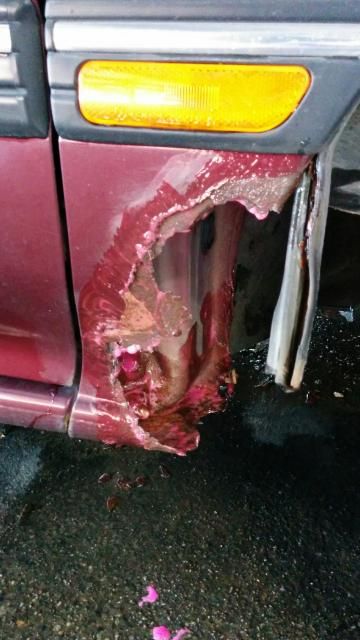
And here it all is, after the rust treatment...

Image
Image
Image
Image


Next, I primed everything and sprayed it with a ghetto topcoat in hopes of sealing it from rusting more. In reality, my work will only slow the spread of rust....maybe....if I'm EXTREMELY lucky. Haha.

(back 1/4, pass side)
Image

(front 1/4, pass side....or, what's left of it - haha)
Image

(front 1/4, driver's side)
Image

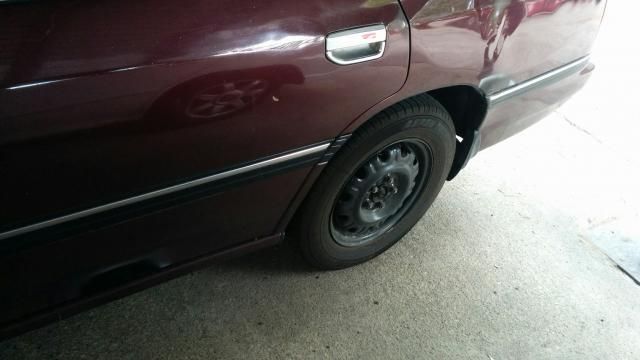
(back 1/4, driver's side)
Image


I'm in the process of the next step right now. I'll post when I'm finished with that. Get ready to cringe, laugh, etc.
Legacy777
Site Admin
Site Admin
Posts: 27884
Joined: Tue Oct 15, 2002 11:37 am
Location: Houston, Tx
Contact:

Re: Progress from ghetto beater, to something...better?

Post by Legacy777 »

Didn't you hear....the mud guards were structural components ;)
Josh

surrealmirage.com/subaru
1990 Legacy (AWD, 6MT, & EJ22T Swap)
2020 Outback Limted XT

If you need to get a hold of me please email me rather then pm
Nohbdy
First Gear
Posts: 89
Joined: Fri Nov 15, 2013 4:04 pm
Location: Hampton Roads, VA

Re: Progress from ghetto beater, to something...better?

Post by Nohbdy »

Haha I agree with Josh, those cars are held together by those things its ridiculous. You went with a different way then I had imagined, I would have cut out the bad spots and welded in (or actually more like have my dad weld in) clean metal so then all the rust is gone.
91 Legacy L (AT, FWD)-crashed 2/3/14
95 Legacy L (AT)
05 Outback XT (AT)
92 Legacy L (MT,AWD)
MrTodd
First Gear
Posts: 67
Joined: Wed Apr 30, 2014 6:52 pm
Location: OR

Re: Progress from ghetto beater, to something...better?

Post by MrTodd »

Haha, yeah, should've just left it. Haha. Oh well.

And Nohbdy, I completely agree. Thing is, I SUCK at welding, and I don't have access to a welder - aaaaannnd it's not really worth it to me (to pay to rent one, and screw up attempting to tack on the sheet metal), so I'm ghetto rigging it. Hah. Even so, welding would be awesome, cheap (if i owned one, or knew someone with one), and would be the correct way to go.

In the meantime, my slop job will have to do. Pics will be up tomorrow when I finish my cheap, unorthodox band aid fix.
James614
Fourth Gear
Posts: 1744
Joined: Sun Jun 10, 2007 4:35 am
Location: Arkansas

Re: Progress from ghetto beater, to something...better?

Post by James614 »

I did something similar to me rear quarters. Would have looked 10x better if I never touched it. Unless youre prepared to remove and replace material, its a lost cause :(
93 Touring Wagon (EJ20G 5spd Swap) -- Finally back and running strong as ever!

05 Outback 2.5XT 5spd -- Now the wife can have her SUV and get in on the turbo Legacy goodness at the same time.
MrTodd
First Gear
Posts: 67
Joined: Wed Apr 30, 2014 6:52 pm
Location: OR

Re: Progress from ghetto beater, to something...better?

Post by MrTodd »

Alright, sorry for the long delay.. Now, for an update. Let me show you my ghetto fix.

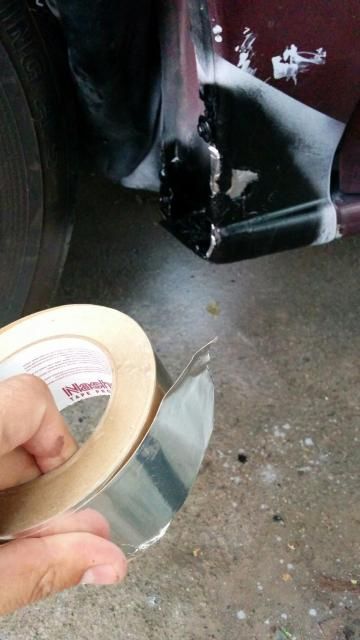
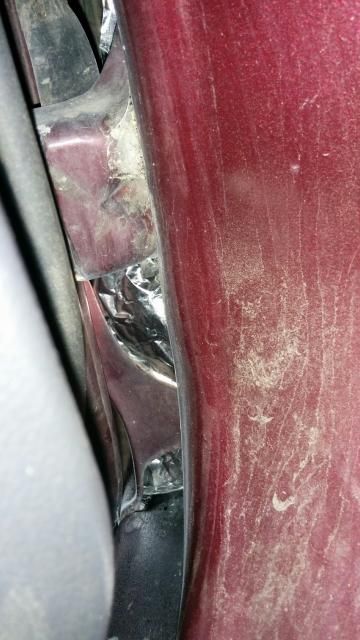
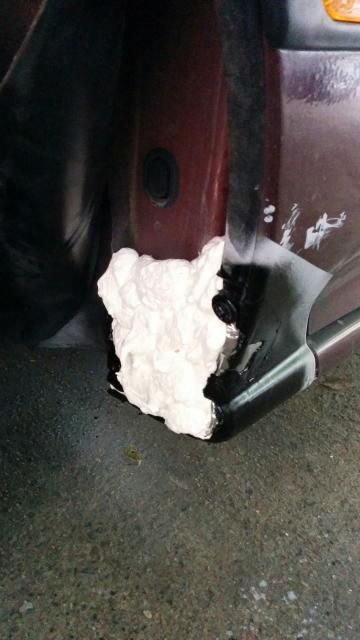
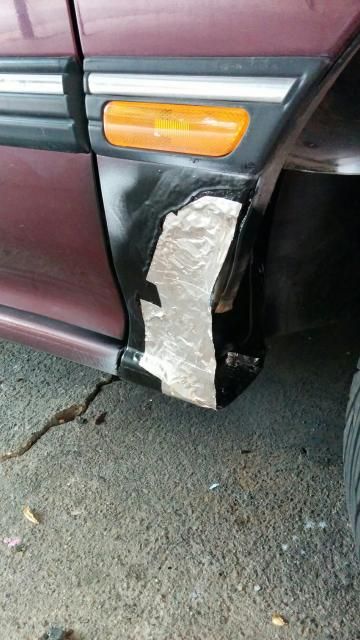
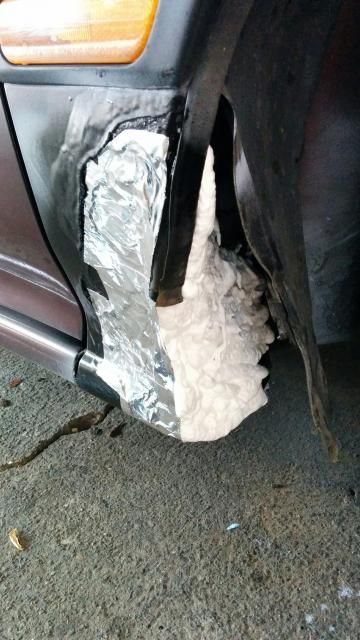
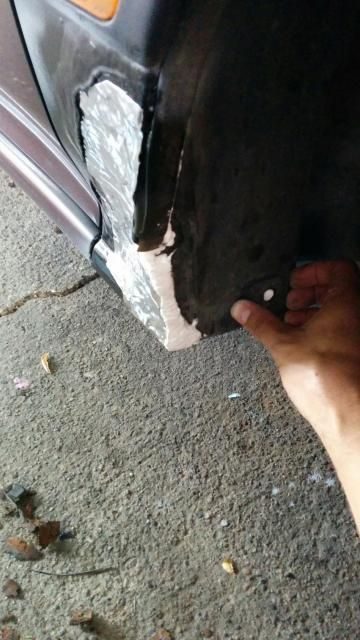
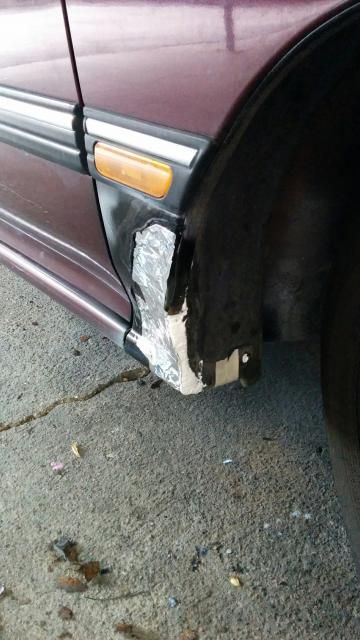
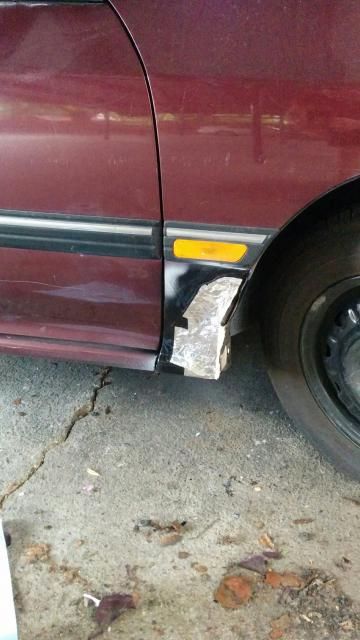
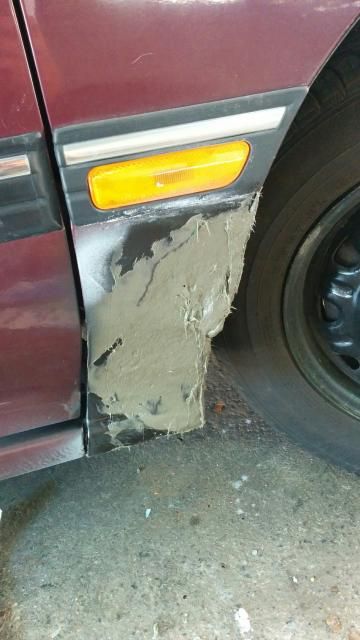
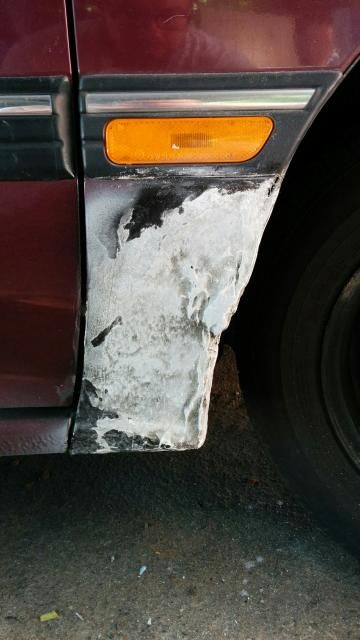
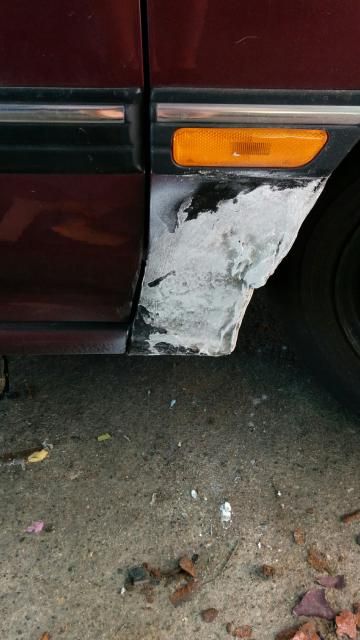
I coated the rusty spots with primer and paint, then went to filling in the holes/gaps. I first used aluminum tape, then filled with expansion/insulation foam, then used bondo glass. I did a horrible job, but I wasn't really expecting it to look great. Haha.

Take a look...

Image

(covered the gaps leading into the door jam)
Image

(expansion/insulation foam)
Image

(used the foam to sort of glue on the wheel well splash guard)
Image

Didn't turn out too bad, but the hole on the driver's side was tiny compared to the passenger's side. Onward.

Image

Image

Image

(taped it down while the foam dries/expands)
Image

Image


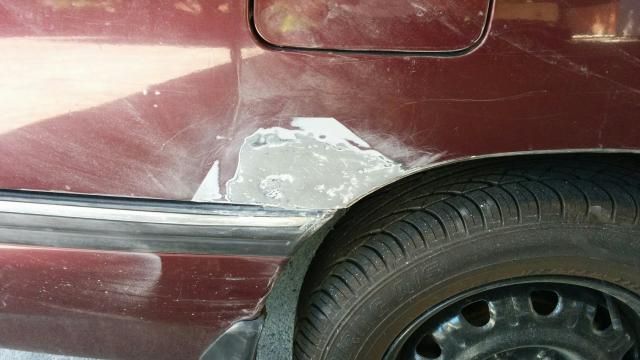
I wasn't expecting very much, but it's not completely horrible; although, it is laughable. Haha. Anyway, after that ghetto job, I went to use the bondo. I SUUUUCK at using bondo, mostly because I'm impatient and I don't have a proper file and block sander to get things nice and smooth. Here are the results...

(1st step, bondo glass applied with a spreader)
Image
Image
Image
Image

(2nd step, used coarse sandpaper, then went down to a higher grit)
Image
Image
Image
Image
Image


The passenger's front fender doesn't have much support, so I didn't dare to sand it very aggressively. It looks like garbage. Hahaha. Even so, whatever. I've had my plasti-dip rattle cans come in the mail and I just want to spray the damn thing now. I'm doing individual panels at a time. I ordered the wider spray nozzles from dipyourcar.com, along with the spray grip for ease of use. I only got 2 panels down yesterday, but it actually turned out pretty good! Plasti-Dip seems to level and cover VERY nicely. I'm genuinely impressed!


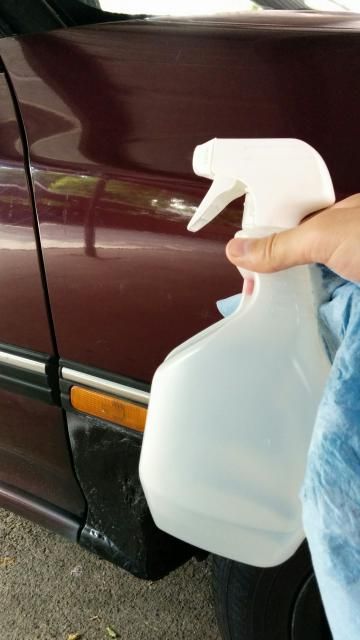
(For prep, I cleaned off the surface with rubbing alcohol via a spray bottle)
Image

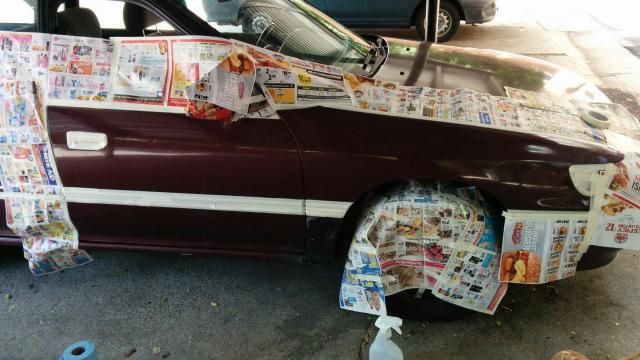
(masked off and ready to spray)
Image

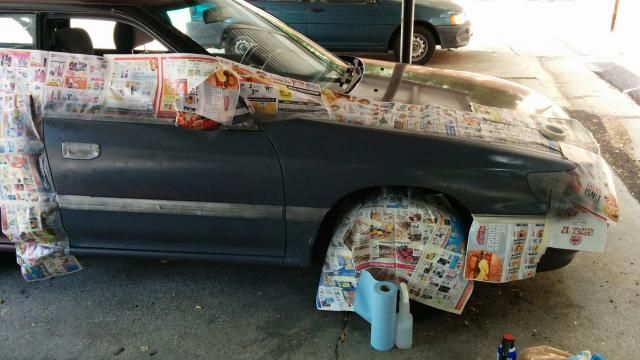
(1st coat)
Image

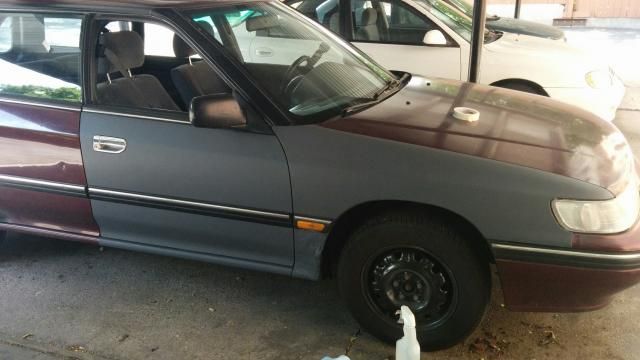
(put down a total of 4 coats, peeled the tape and paper, and boom - results!)
Image


Obviously, you can still see my cottage cheese Bondo Glass job on that front fender, but the Plasti-Dip certainly makes it less noticeable. I'm excited to finish it! I'll post more progress pics as I complete each panel at a time. Haha.
MrTodd
First Gear
Posts: 67
Joined: Wed Apr 30, 2014 6:52 pm
Location: OR

Re: Progress from ghetto beater, to something...better?

Post by MrTodd »

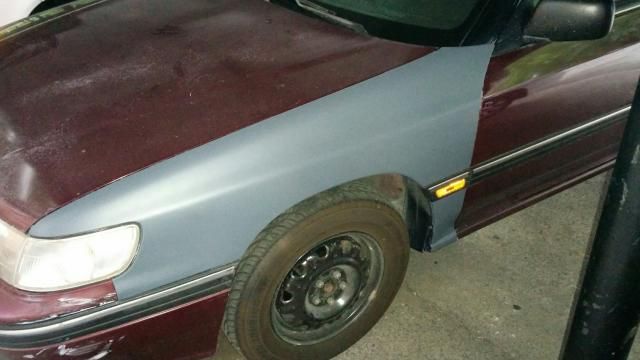
Coming along, slooooowly but surely! Just finished the front, driver's side fender...

Image


I'll do another panel or two tomorrow. :-)
rallyak
Third Gear
Posts: 896
Joined: Wed Oct 26, 2011 7:02 am
Location: Anchorage,Alaska

Re: Progress from ghetto beater, to something...better?

Post by rallyak »

It looks a lot better, but unfortunately that foam is going to soak up water and start rusting in short order.
Charles

90' White/Gray Outback DD workhorse (670,xxx) miles
92' Onyx Metallic (430,xxx) Wife's DD
68' Barracuda formula S 340 4spd coupe (ongoing project)
66' Mustang 2+2 4spd wife's (ongoing project)
MrTodd
First Gear
Posts: 67
Joined: Wed Apr 30, 2014 6:52 pm
Location: OR

Re: Progress from ghetto beater, to something...better?

Post by MrTodd »

That's what I'm worried about. I picked this specific weather sealant foam because it stated that it is weather proof. Even so, I'm not counting on it to last. *shrugs*

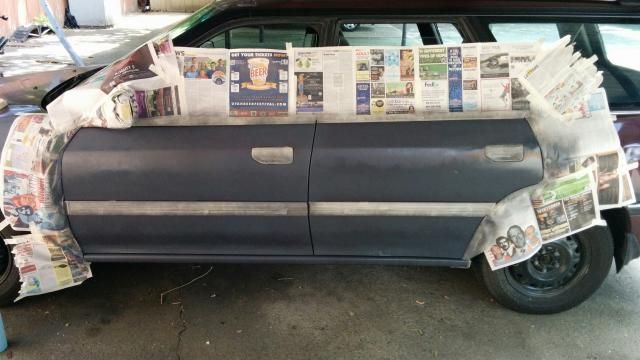
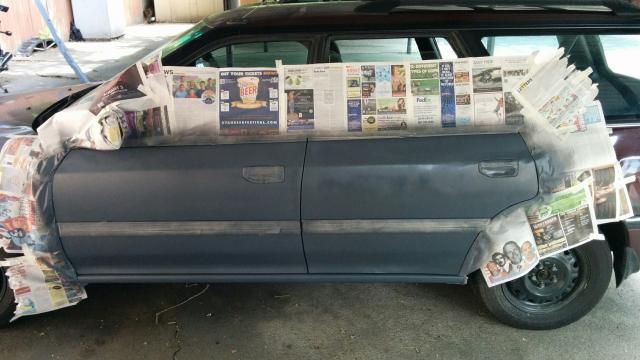
Here is some more progress. Apparently I'm doing this in no particular order. Hahah. Just randomly spraying panels/doors.

(1st coat!)
Image

(2nd coat)
Image


(After 4 coats)
Image

Getting there, slowly but surely.


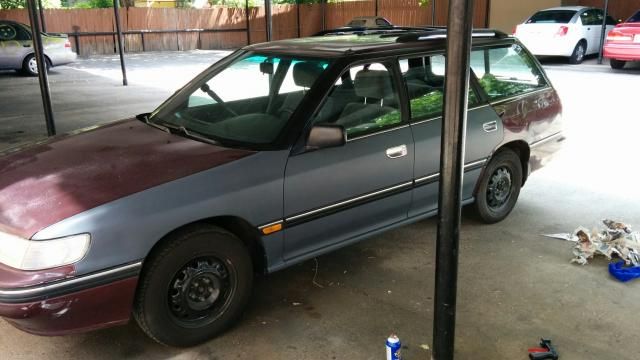
EDIT: Got some more done today. Here is the passenger's side as of now... (8/5/14)

Image
Post Reply