

hahaha
Mesoslow6969's 1994 Touring Wagon EJ257 swap
Moderator: Moderators
Re: Mesoslow6969's 1994 Touring Wagon EJ257 swap
Everything causes cancer in California 
hahaha
hahaha
Josh
surrealmirage.com/subaru
1990 Legacy (AWD, 6MT, & EJ22T Swap)
2020 Outback Limted XT
If you need to get a hold of me please email me rather then pm
surrealmirage.com/subaru
1990 Legacy (AWD, 6MT, & EJ22T Swap)
2020 Outback Limted XT
If you need to get a hold of me please email me rather then pm
Re: Mesoslow6969's 1994 Touring Wagon EJ257 swap
Yeah, must be something that activates cancer causing materials there haha
-
mesoslow6969
- First Gear
- Posts: 206
- Joined: Wed Dec 08, 2010 4:58 am
- Location: Chicago, IL
Re: Mesoslow6969's 1994 Touring Wagon EJ257 swap
I decided to install my KillerB Windage Tray and Oil pick up tube. I already drained all the fluids prior to doing this. =)
Unbolted Dipstick tube (on top of engine) and pulled up to separated from the oil pan (1 bolt - 10mm)

Unbolted Oil Pan (14 bolts - 10mm or phillips)

Unbolted Oem Oil Pickup tube (3 bolts - 10mm; 2 bolts are longer which bolts the tube itself; 1 short bolt goes to oem windage tray) NOTE: make sure the o ring comes off with old pick up tube; when installing Killer B pickup tube, a new o ring was already supplied
Unbolted Oem Windage Tray (6 bolts - 10mm or phillips)
While nothing was in the way I used a razor blade to remove any old gasket stuck to the block

Bolted 2 rear windage tray bolts
Bolted oil pickup tube bolts (2 long ones for the actual tube)
Bolted front 2 windage tray bolts over the pickup tube brackets
I had 2 unused bolts, so I just screwed them back in.


Used razor blade to remove old gasket from pan; scrubbed the crap out of it to remove remaining gasket stuck in pan crevices
Applied Hondabond to pan; spread it all around mating surface; cleaned out bolt holes
Bolted pan back onto block
Put dipstick tube in, tightened down dip stick tube bolt.
(had Hondabond on gloves... didn't feel like taking off gloves to take pics...yes i am lazy today... lol)
Torque Specs:
Windage Tray bolts: 4.7 lbs
Oil Pickup Tube bolts: 7.2 lbs
Oil Pan bolts: 3.6 lbs
Thanks to Chris @ Killer B for answering my questions.
Unbolted Dipstick tube (on top of engine) and pulled up to separated from the oil pan (1 bolt - 10mm)
Unbolted Oil Pan (14 bolts - 10mm or phillips)
Unbolted Oem Oil Pickup tube (3 bolts - 10mm; 2 bolts are longer which bolts the tube itself; 1 short bolt goes to oem windage tray) NOTE: make sure the o ring comes off with old pick up tube; when installing Killer B pickup tube, a new o ring was already supplied
Unbolted Oem Windage Tray (6 bolts - 10mm or phillips)
While nothing was in the way I used a razor blade to remove any old gasket stuck to the block
Bolted 2 rear windage tray bolts
Bolted oil pickup tube bolts (2 long ones for the actual tube)
Bolted front 2 windage tray bolts over the pickup tube brackets
I had 2 unused bolts, so I just screwed them back in.
Used razor blade to remove old gasket from pan; scrubbed the crap out of it to remove remaining gasket stuck in pan crevices
Applied Hondabond to pan; spread it all around mating surface; cleaned out bolt holes
Bolted pan back onto block
Put dipstick tube in, tightened down dip stick tube bolt.
(had Hondabond on gloves... didn't feel like taking off gloves to take pics...yes i am lazy today... lol)
Torque Specs:
Windage Tray bolts: 4.7 lbs
Oil Pickup Tube bolts: 7.2 lbs
Oil Pan bolts: 3.6 lbs
Thanks to Chris @ Killer B for answering my questions.
Anti-Seize is my best friend.
Re: Mesoslow6969's 1994 Touring Wagon EJ257 swap
Very nice. How much was the killer b stuff?
1994 Legacy Sport Sedan.
1991 Legacy Sport Sedan.
1991 Legacy Sport Sedan.
-
mesoslow6969
- First Gear
- Posts: 206
- Joined: Wed Dec 08, 2010 4:58 am
- Location: Chicago, IL
Re: Mesoslow6969's 1994 Touring Wagon EJ257 swap
I got the pick up tube (brand new) from a nasioc member for $200 but the guy included a pair of head gaskets. The windage tray was $79.
Anti-Seize is my best friend.
Re: Mesoslow6969's 1994 Touring Wagon EJ257 swap
Good deal then.
1994 Legacy Sport Sedan.
1991 Legacy Sport Sedan.
1991 Legacy Sport Sedan.
-
mesoslow6969
- First Gear
- Posts: 206
- Joined: Wed Dec 08, 2010 4:58 am
- Location: Chicago, IL
Re: Mesoslow6969's 1994 Touring Wagon EJ257 swap
ya. i figured i will be using the head gaskets sooner or later... hopefully later. lol.
Anti-Seize is my best friend.
Re: Mesoslow6969's 1994 Touring Wagon EJ257 swap
Killer B's....brings me back :)
How's the tray going to help? Sorry, not sure what it would do exactly.
How's the tray going to help? Sorry, not sure what it would do exactly.
-
mesoslow6969
- First Gear
- Posts: 206
- Joined: Wed Dec 08, 2010 4:58 am
- Location: Chicago, IL
Re: Mesoslow6969's 1994 Touring Wagon EJ257 swap
The oem tray has huge gaps in it, so when turning or hard driving, the oil sloshes around the pan and will splatter all over the crank and other stuff. The killer b one prevents the splatter since it covers the crank a lot better. Also, i read somewhere about a "roping" effect from oil on the crank and it supposedly helps with oil starvation.
o ya by the way... C.R.E.A.M. .... dolla dolla bills ya'll... lol
o ya by the way... C.R.E.A.M. .... dolla dolla bills ya'll... lol
Anti-Seize is my best friend.
Re: Mesoslow6969's 1994 Touring Wagon EJ257 swap
I see. Interesting. Will you feel gains from it or just know that it's doing a good job? haha
Re: Mesoslow6969's 1994 Touring Wagon EJ257 swap
I doubt you'd see or feel any gains from it.
Josh
surrealmirage.com/subaru
1990 Legacy (AWD, 6MT, & EJ22T Swap)
2020 Outback Limted XT
If you need to get a hold of me please email me rather then pm
surrealmirage.com/subaru
1990 Legacy (AWD, 6MT, & EJ22T Swap)
2020 Outback Limted XT
If you need to get a hold of me please email me rather then pm
Re: Mesoslow6969's 1994 Touring Wagon EJ257 swap
That's what I figured. Still pretty cool looking though haha
-
mesoslow6969
- First Gear
- Posts: 206
- Joined: Wed Dec 08, 2010 4:58 am
- Location: Chicago, IL
Re: Mesoslow6969's 1994 Touring Wagon EJ257 swap
only reason i put it on there is for added insurance. lol. i also decided to get bigger injectors, fuel rail, and fpr just to be safe. There is a lot of information that i have read and i just want to play it safe, even though it might not be necessary. yes it does hurt my wallet... alot actually... but if it keeps my engine healthy once i get it tuned, then so be it. everything i'm putting in my car is about reliability first, then power. Truthfully, if I can't hit 350 to the wheels safely, then screw the numbers. This is my daily driver =)
Anti-Seize is my best friend.
-
mesoslow6969
- First Gear
- Posts: 206
- Joined: Wed Dec 08, 2010 4:58 am
- Location: Chicago, IL
Re: Mesoslow6969's 1994 Touring Wagon EJ257 swap
Yesterday I put a sti front lip, and side skirts from the liberties on my car... still have to figure out how to remove the bumper to put the rear lips on... i have heard sad stories about wagon bumpers... hopefully its not too hard... pictures to come. =)
Anti-Seize is my best friend.
Re: Mesoslow6969's 1994 Touring Wagon EJ257 swap
Awesome! And what stories? I have a wagon haha I may need to know these things one day.
Can you take pictures of the process of the removal?
Can you take pictures of the process of the removal?
-
mesoslow6969
- First Gear
- Posts: 206
- Joined: Wed Dec 08, 2010 4:58 am
- Location: Chicago, IL
Re: Mesoslow6969's 1994 Touring Wagon EJ257 swap
i'll try my best with the pics and removal process or the rear bumper. The stories i heard were about the clips rusting through, etc. i still need to search for diagrams with an exploded view or try to google a diy or something.
Anti-Seize is my best friend.
-
evolutionmovement
- Knowledgeable

- Posts: 9809
- Joined: Mon Jun 16, 2003 11:20 pm
- Location: Beverly, MA
Re: Mesoslow6969's 1994 Touring Wagon EJ257 swap
The clips attach to plastic tabs, so if they're rusted, they'll just be easier to remove. Pretty much everything can be gotten to from access holes and such. It's really not the bad.
Re: Mesoslow6969's 1994 Touring Wagon EJ257 swap
Awesome! Thanks guys :D Never know when this information may have to be used.
-
mesoslow6969
- First Gear
- Posts: 206
- Joined: Wed Dec 08, 2010 4:58 am
- Location: Chicago, IL
Re: Mesoslow6969's 1994 Touring Wagon EJ257 swap
I'm going to attempt to remove my bumper tonite. Wish me luck! lol
Last edited by mesoslow6969 on Fri Jun 24, 2011 11:31 am, edited 1 time in total.
Anti-Seize is my best friend.
-
mesoslow6969
- First Gear
- Posts: 206
- Joined: Wed Dec 08, 2010 4:58 am
- Location: Chicago, IL
Re: Mesoslow6969's 1994 Touring Wagon EJ257 swap
cool thanks for the heads up. I have my trusty haynes manual with me, so hopefully that will help make things easier. I have never taken a bumper off a car before... or any kind of body panel for that matter. TIME TO LEARN SOMETHING NEW!evolutionmovement wrote:The clips attach to plastic tabs, so if they're rusted, they'll just be easier to remove. Pretty much everything can be gotten to from access holes and such. It's really not the bad.
Anti-Seize is my best friend.
-
mesoslow6969
- First Gear
- Posts: 206
- Joined: Wed Dec 08, 2010 4:58 am
- Location: Chicago, IL
Re: Mesoslow6969's 1994 Touring Wagon EJ257 swap
6 hours later... and its done. process was easy. rust and stupid plastic bumper screws made it take forever... for..e..ver..
Here goes:
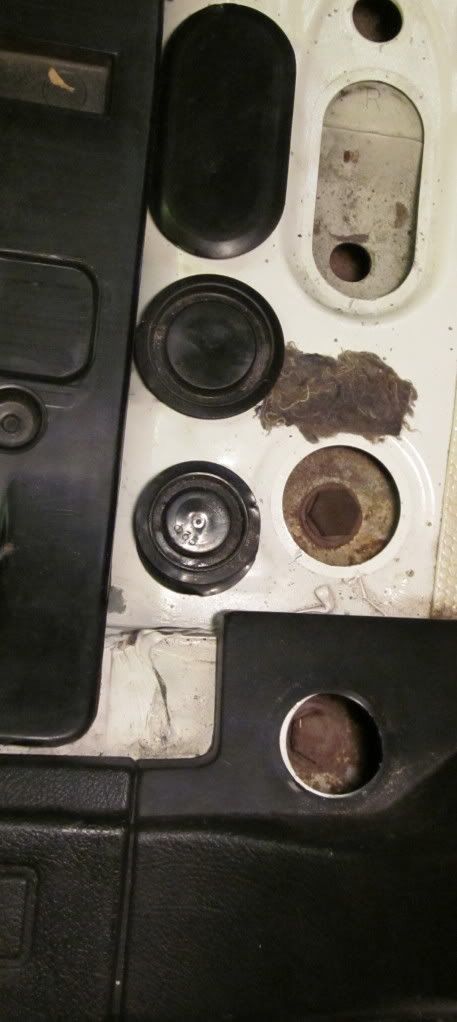
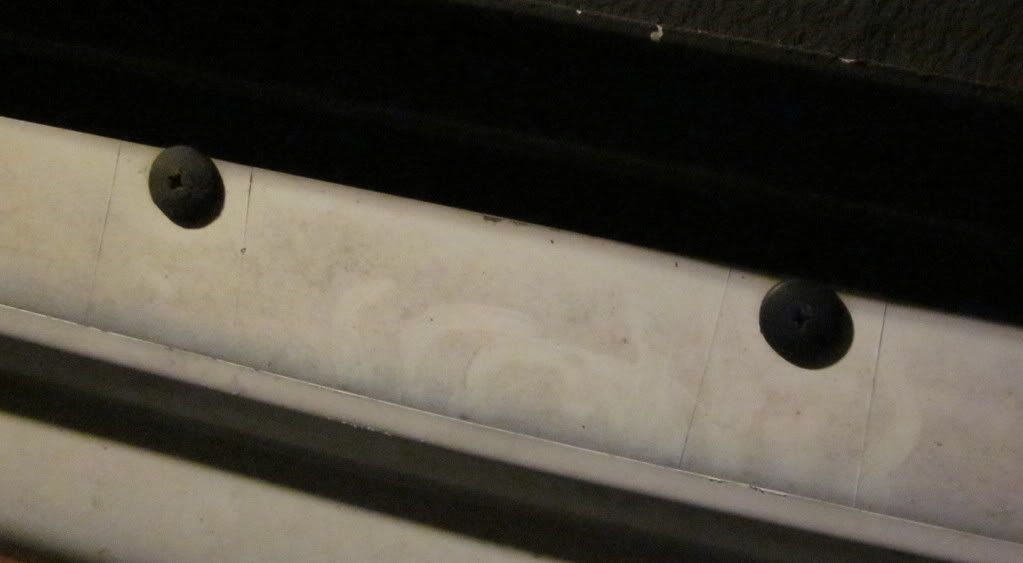
popped of the circles that hide the bumper bolts
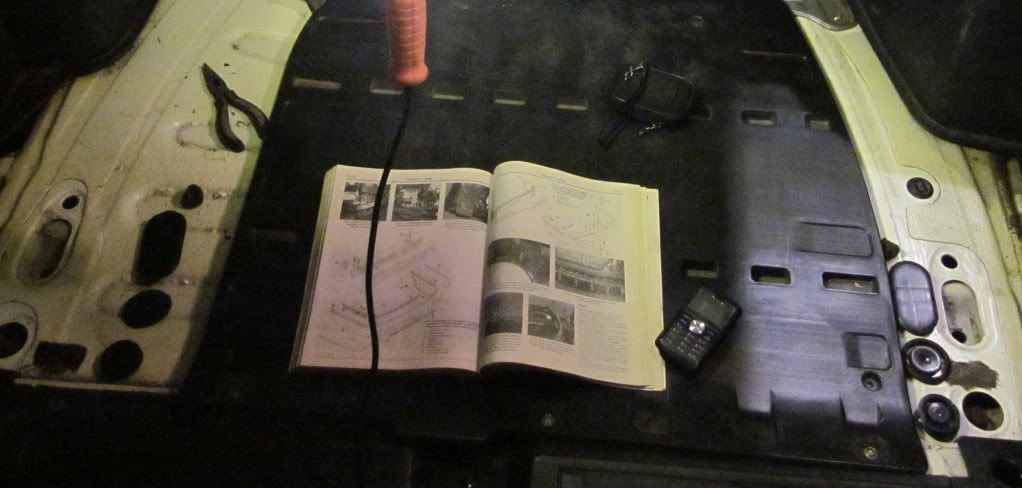
Loosened (did not remove yet) 4 bumper bolts 2 on each side- 17mm
Unscrewed 2 screws on tailgate piece (Looking back I don't think i had to remove this piece, but when I was doing it I just wanted to make sure nothing got in my way when i was trying to get at the top bumper screws)
Popped off the squares to remove tailgate piece
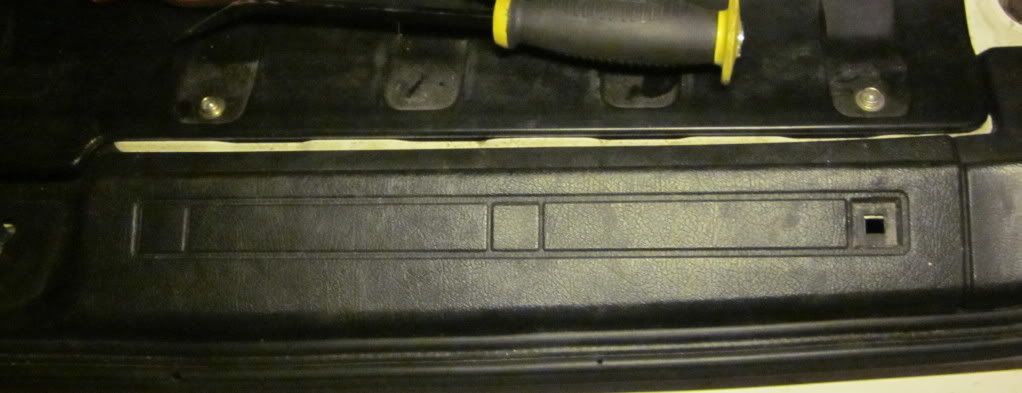
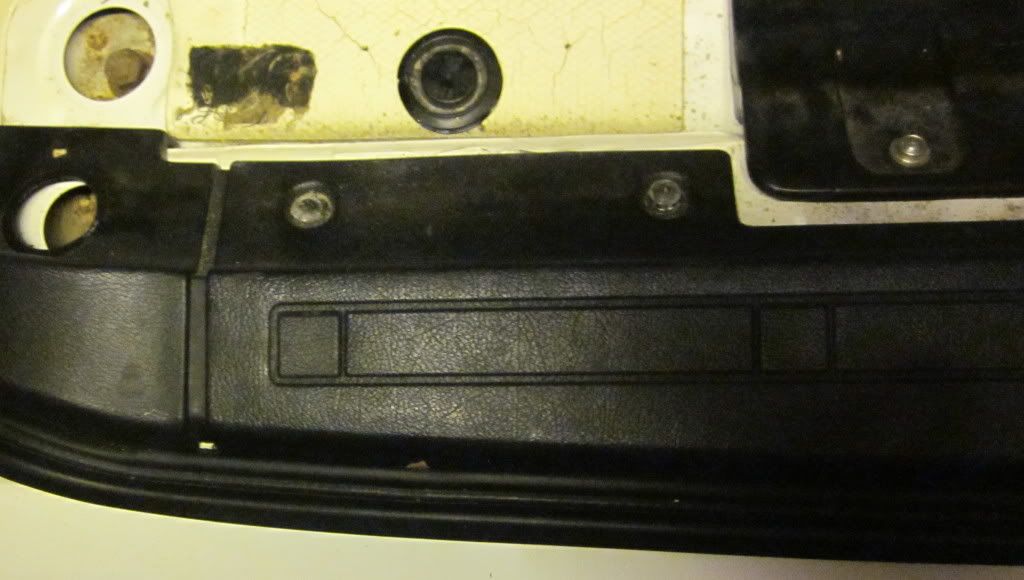
Unscrew all plastic screws underneath bumper (half of them I had to tear off... i hate plastic screws)
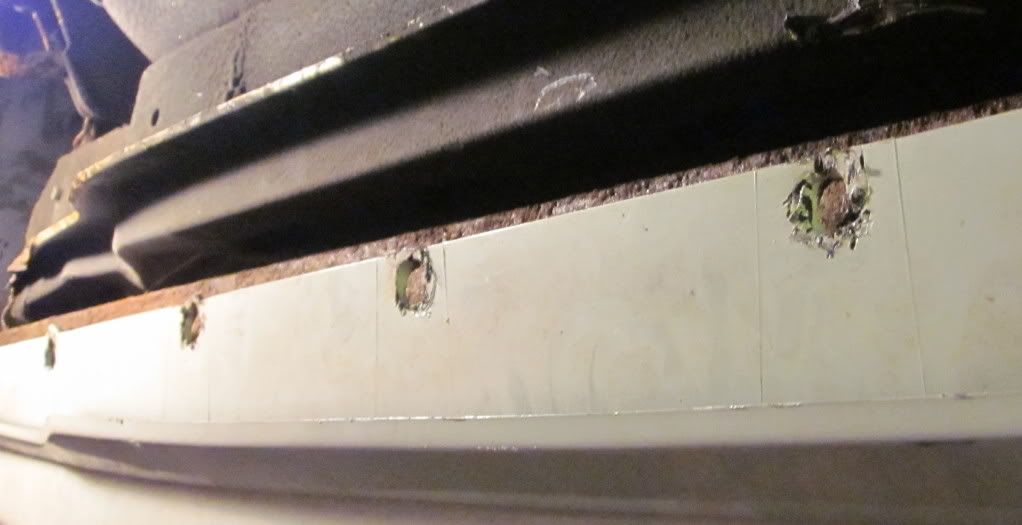
Unbolt both bumper screws that connect to the rear quarter panel - 10mm(mine were rusted to hell. =( sigh..)
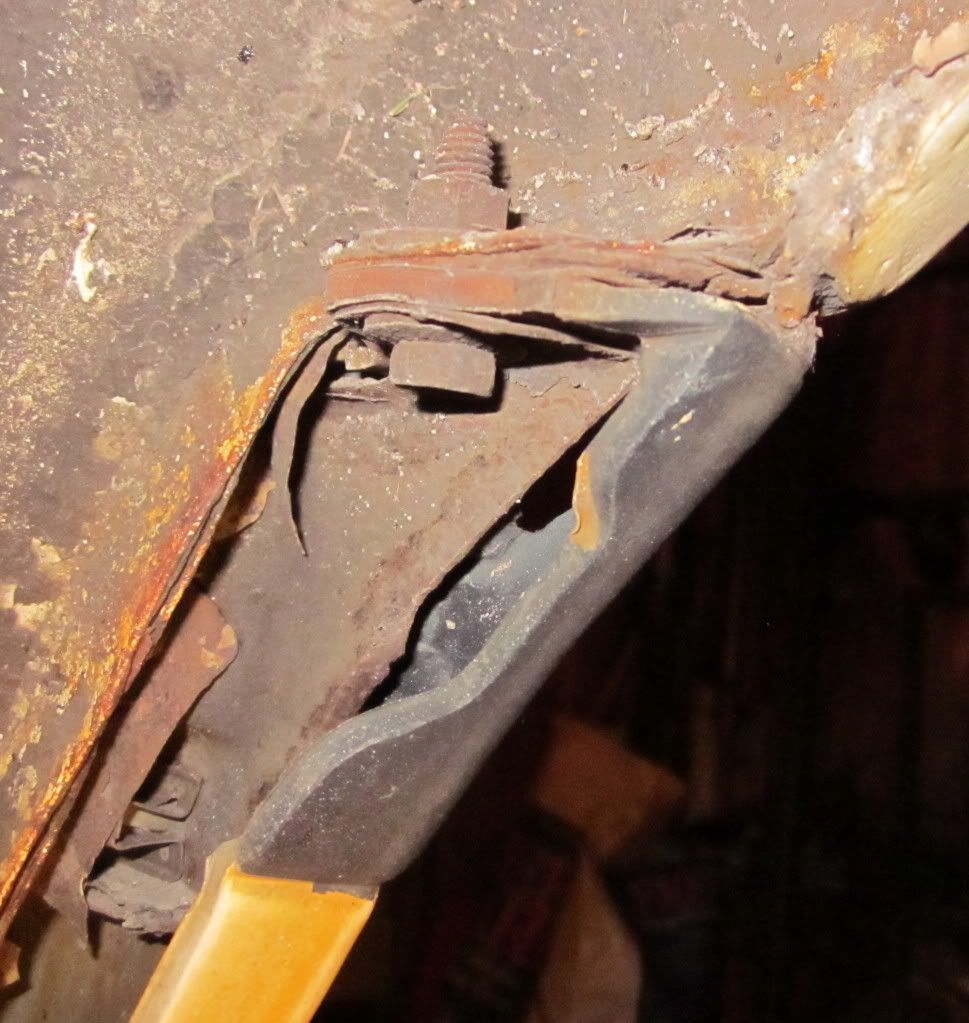
Unbolt 2 bolts (1 on each side) holding the underside of the bumper to what i think is a bumper bracket - 10mm
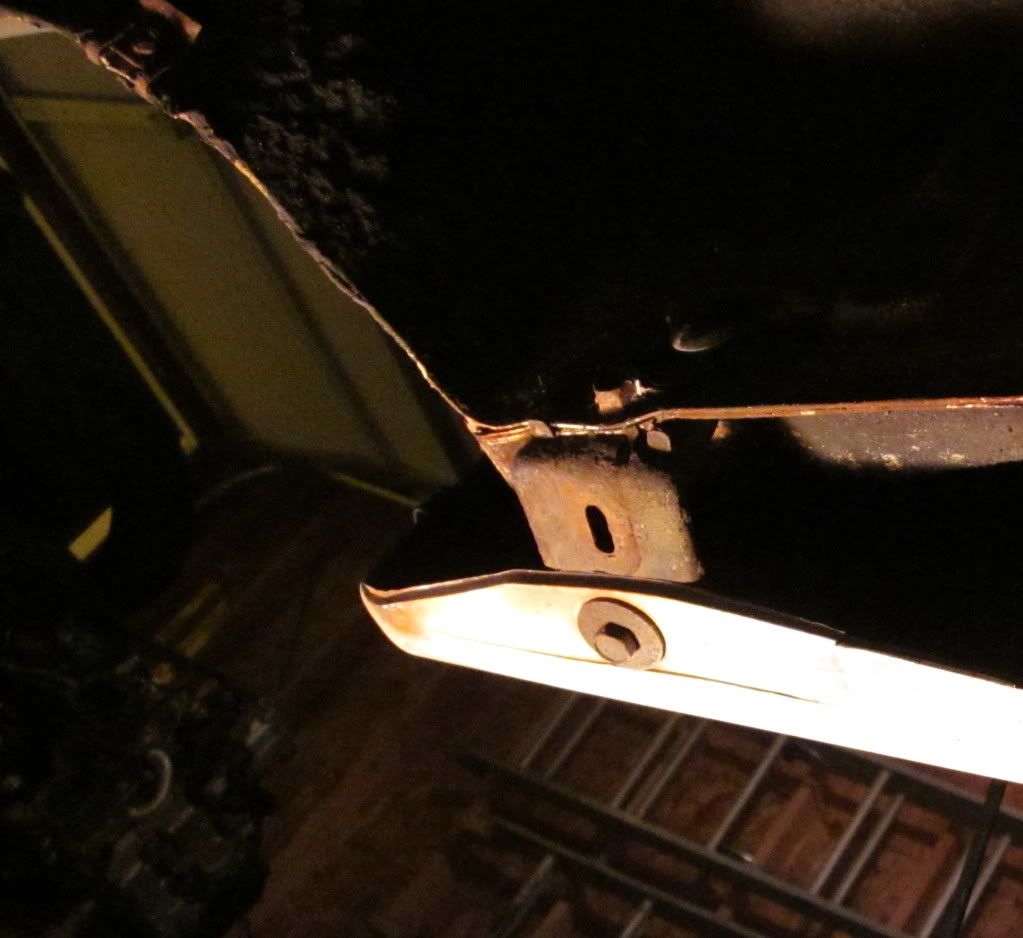
Popped of the sides of the bumper with the stupid clips that all broke off (so rusty...)
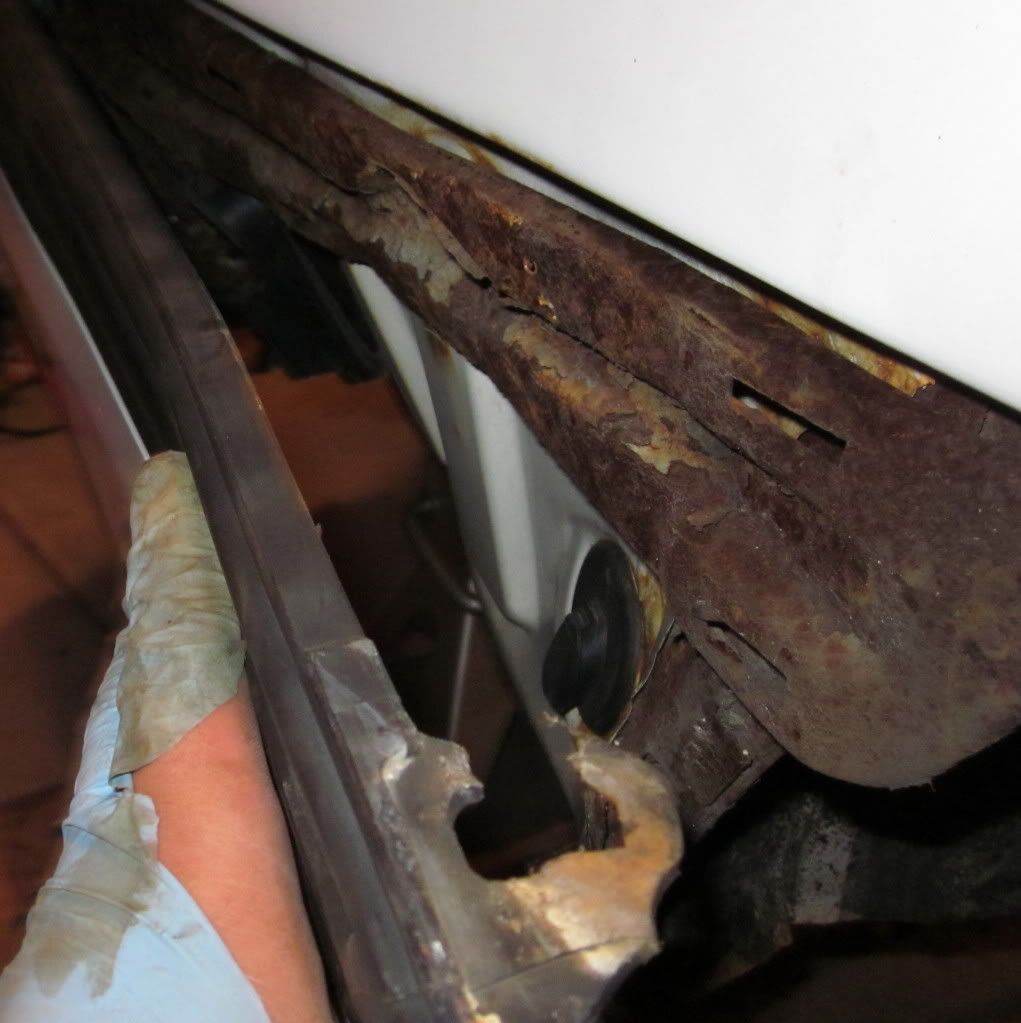
Once everything was pretty much loosened on the underside and the sides of the bumper I removed the 4 - 17mm bolts
Next I pulled the weather stripping back
Then pulled the bumper towards the rear of the car to expose the top bumper screws

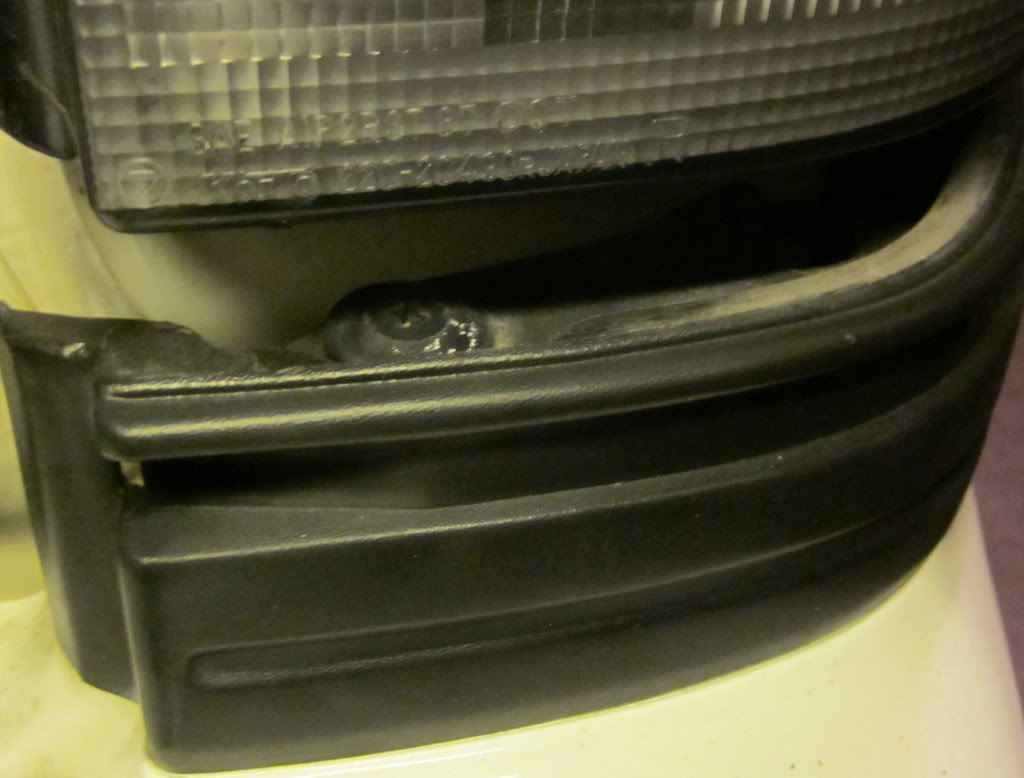
Under each tail light there is a hidden plastic screw - unscrewed them
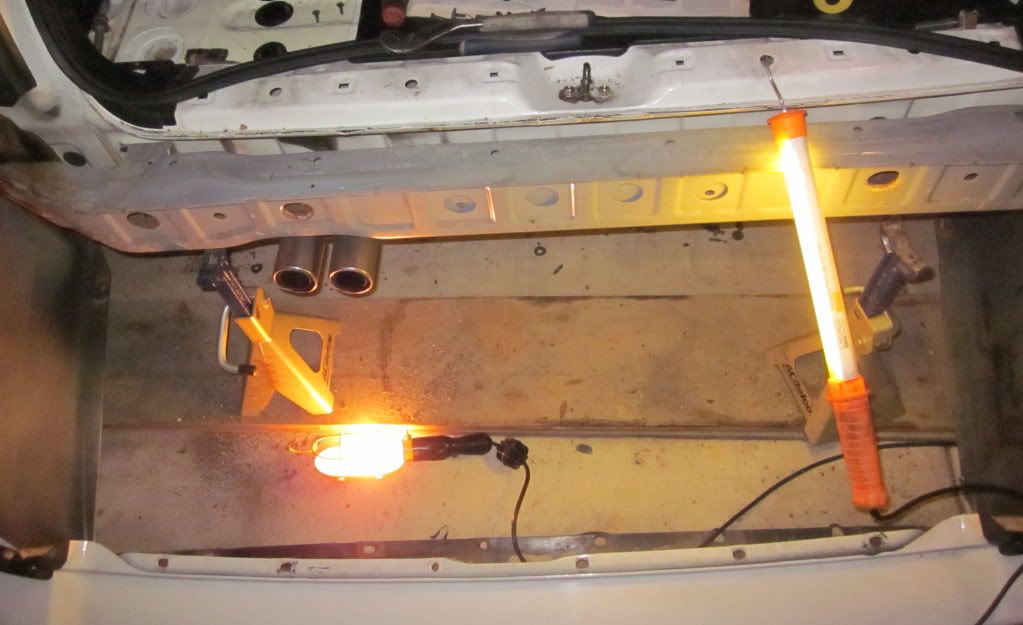
Next unscrewed all the top bumper screws
With a little bit of tugging I was able to remove the bumper from the car ( I used jack stands to hold the bumper beam thingie up)
Putting the rear lips are self explanatory:
1) lined up the lips
2) drilled holes through the bumper and a little into the lips (made it easier to start the screws)
3) drilled self tapping screws with tiny washers
To put it back together, I just went backwards.
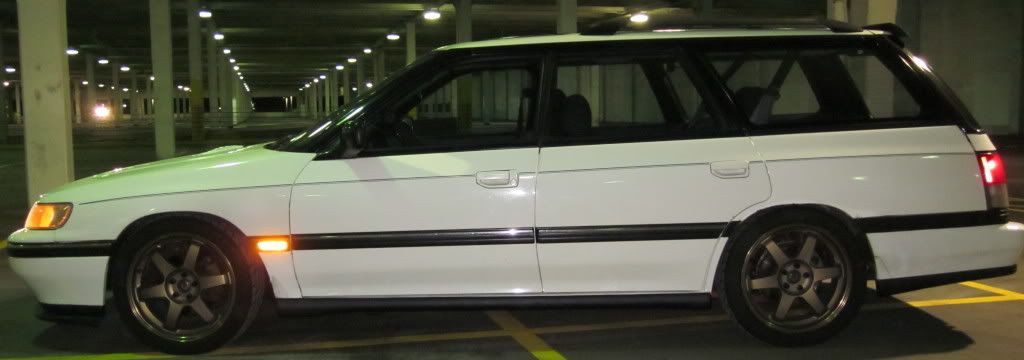
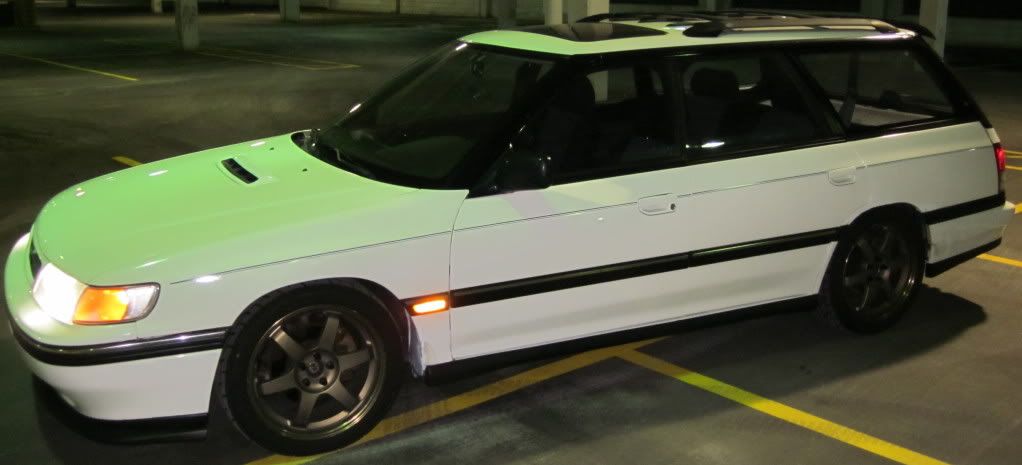
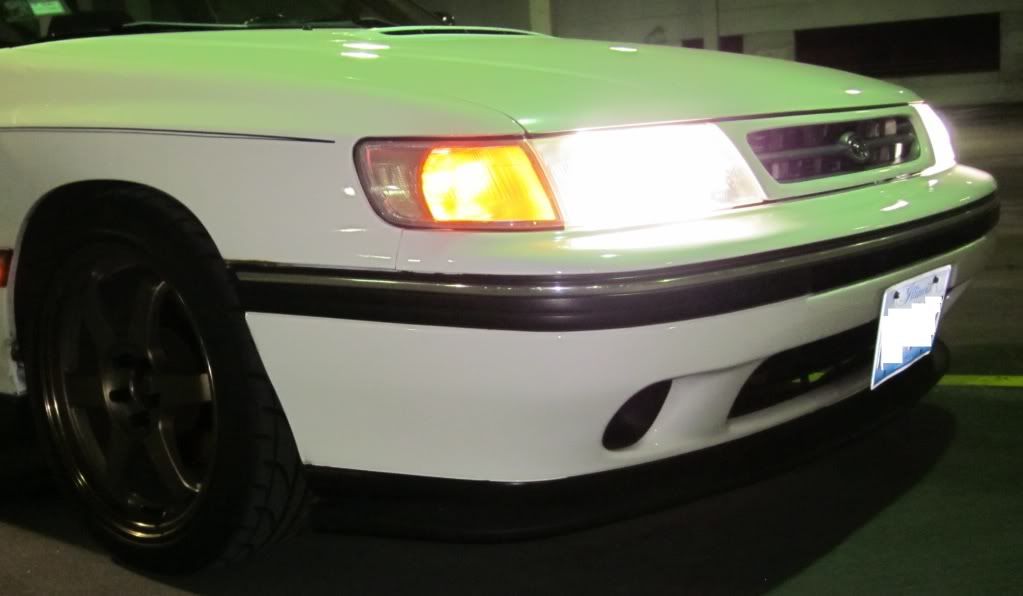
Here is how my car looks now with the lips. (Sorry, I haven't gotten around to doing a diy on my suspension yet.. sooner or later...)
Front Lip: Sti Front Lip (had to cut to make it fit)
Side Skirts: First generation Liberty Wagon
Rear Lips: First generation Liberty Wagon
Here goes:
popped of the circles that hide the bumper bolts
Loosened (did not remove yet) 4 bumper bolts 2 on each side- 17mm
Unscrewed 2 screws on tailgate piece (Looking back I don't think i had to remove this piece, but when I was doing it I just wanted to make sure nothing got in my way when i was trying to get at the top bumper screws)
Popped off the squares to remove tailgate piece
Unscrew all plastic screws underneath bumper (half of them I had to tear off... i hate plastic screws)
Unbolt both bumper screws that connect to the rear quarter panel - 10mm(mine were rusted to hell. =( sigh..)
Unbolt 2 bolts (1 on each side) holding the underside of the bumper to what i think is a bumper bracket - 10mm
Popped of the sides of the bumper with the stupid clips that all broke off (so rusty...)
Once everything was pretty much loosened on the underside and the sides of the bumper I removed the 4 - 17mm bolts
Next I pulled the weather stripping back
Then pulled the bumper towards the rear of the car to expose the top bumper screws
Under each tail light there is a hidden plastic screw - unscrewed them
Next unscrewed all the top bumper screws
With a little bit of tugging I was able to remove the bumper from the car ( I used jack stands to hold the bumper beam thingie up)
Putting the rear lips are self explanatory:
1) lined up the lips
2) drilled holes through the bumper and a little into the lips (made it easier to start the screws)
3) drilled self tapping screws with tiny washers
To put it back together, I just went backwards.
Here is how my car looks now with the lips. (Sorry, I haven't gotten around to doing a diy on my suspension yet.. sooner or later...)
Front Lip: Sti Front Lip (had to cut to make it fit)
Side Skirts: First generation Liberty Wagon
Rear Lips: First generation Liberty Wagon
Anti-Seize is my best friend.
-
evolutionmovement
- Knowledgeable
- Posts: 9809
- Joined: Mon Jun 16, 2003 11:20 pm
- Location: Beverly, MA
Re: Mesoslow6969's 1994 Touring Wagon EJ257 swap
I couldn't tell how rusty the strips were that supported the weird wide-head screws that secure the underside of the bumper cover on yours, but some of mine were pretty bad. I replaced mine with aluminum strips using the old ones as a template and spraying them with a rubberized paint to reduce possible galvanic corrosion problems.
Re: Mesoslow6969's 1994 Touring Wagon EJ257 swap
Wow. Your car looks amazing! That paint is pretty sweet too. I usually hate the 93-94 style cause I think they ruined the front fascia and lights, but yours looks incredible! Those lips and side skirts look awesome too and usually I'm against when people dont color match, but the black looks freakin awesome on there. Nice enough car to save the pictures :D
-
mesoslow6969
- First Gear
- Posts: 206
- Joined: Wed Dec 08, 2010 4:58 am
- Location: Chicago, IL
Re: Mesoslow6969's 1994 Touring Wagon EJ257 swap
I don't really trust myself with body work. lol. If I feel up to the challenge, maybe I'll try to tackle it.evolutionmovement wrote:I couldn't tell how rusty the strips were that supported the weird wide-head screws that secure the underside of the bumper cover on yours, but some of mine were pretty bad. I replaced mine with aluminum strips using the old ones as a template and spraying them with a rubberized paint to reduce possible galvanic corrosion problems.
and to SWRT: Thanks =)
Anti-Seize is my best friend.
-
cj91legss
- Fifth Gear
- Posts: 6322
- Joined: Fri Jun 20, 2008 8:17 am
- Location: Lakewood, Wa 98439
- Contact:
Re: Mesoslow6969's 1994 Touring Wagon EJ257 swap
we need a like buttonmesoslow6969 wrote:o ya by the way... C.R.E.A.M. .... dolla dolla bills ya'll... lol
91 L-TW Wagon with a full Swap -RIP
92 SS Prefaced, GD dash swapped, 22T/205 Hybrid 20 psi - BEAST!
93 SS Bone Stock Gone!
94 TW Bone Stock Gone!
91 SS 4EAT Sold!
98 LGT 4EAT
98 LGT Wagon 4EAT
92 SS Prefaced, GD dash swapped, 22T/205 Hybrid 20 psi - BEAST!
93 SS Bone Stock Gone!
94 TW Bone Stock Gone!
91 SS 4EAT Sold!
98 LGT 4EAT
98 LGT Wagon 4EAT