Full install guide for 2006 WRX IC, little different

Front, Top, Air, Water.

Moderators: Helpinators, Moderators

Post Reply
joshm
First Gear
Posts: 81
Joined: Wed Jul 02, 2008 10:35 pm

Full install guide for 2006 WRX IC, little different

Post by joshm »

Alright my 06 wrx install was bit different from others ive seen. I Got my TMIC from the guy i bought my car off of. I cant believe i made the IC fit in there. Its a lot of work to do, and for me it took an especially long time to do because i had no plans to follow, so hopefully this thread will help people out. I'll try to outline everything i had to move/relocate/fix/fab, Not sure if your going to like how i made my IC work, but it works good, no boost leaks or any of that nasty stuff.

Alright, so heres my parts list and costs of parts, I get an exceptionally good deal on parts because my cousin is the manager at one of the local auto parts store, ive gotten a minimum of 30% off on each part, so expect to pay a bit more. All parts are priced in CAD

2006 WRX Intercooler : Free with car
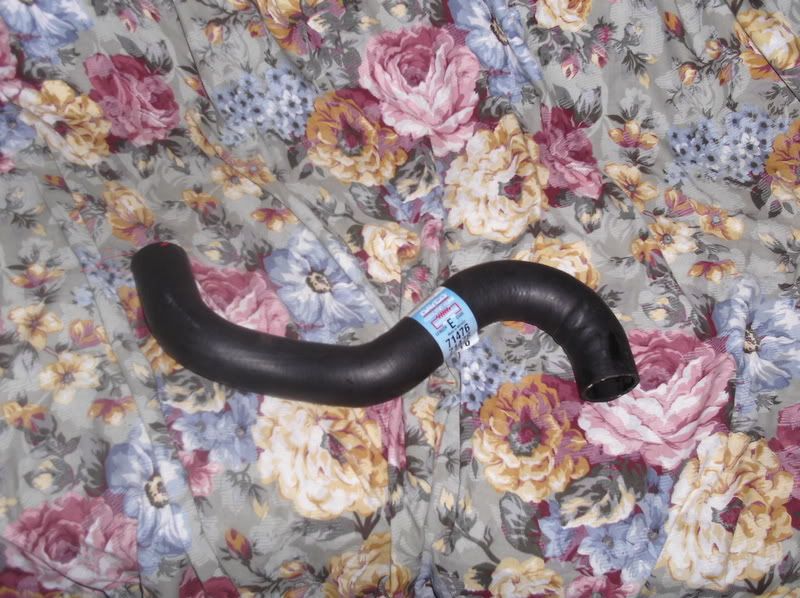
Hose to make the turbo inlet/outlet connector: $40
Silicone fitting to go from TB to IC: $10
Coolant hoses and clamps to relocate tank : $5
Scrap steel to flanges, y pipe, coolant res bracket : Free
Mr gasket high quality gasket paper : $5

To do it how i did, a welder is nessicary. Your also going to need a grinder, vice, basic wrenches, and pliers.

I did an AC delete at the same time i did my TMIC, so my coolant resovoir is where my AC pump used to be. Heres how i did my AC delete :

Drain the freon out of the system. You can take it to a shop to get it properly done, or just loosen a bolt on one of the lines going to the compressor (theres 2 lines). Turn on a good fan and go away for a good 20 minutes. Come back, when theres no hissing you can take the lines completly off. Be aware this is bad for the environment, so just go to a shop to get it drained.

With the freon gone, remove the 4 bolts holding the compressor onto engine, and voila, no more AC. Theres a thing that looks like a radiator, sitting in front of your rad, this is called a condensor. Theres a few bolts holding it onto the car, take out the grille to get at them. With those bolts gone, take the two bolts off that hold brackets (which rubber mount the rad to the car) off. Pull back the rad a bit and slide the condensor out. Voila, your AC is gone.

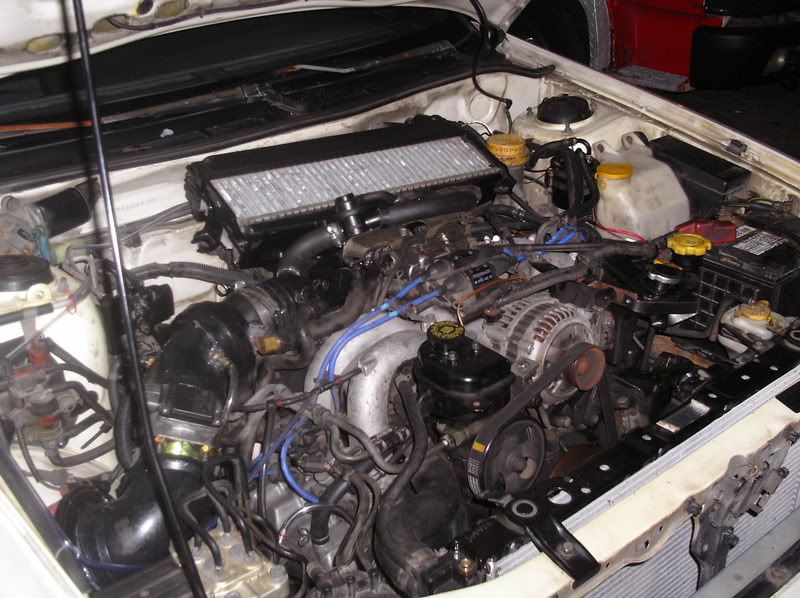
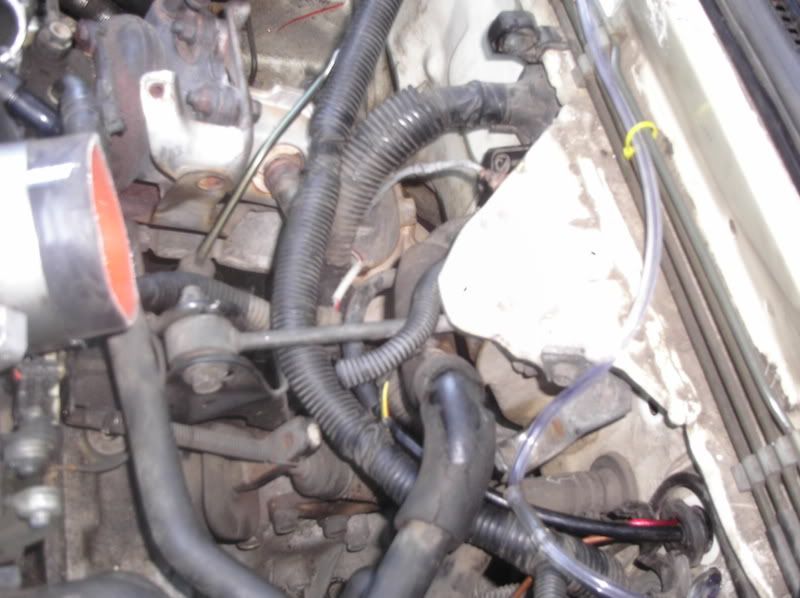
Now for your coolant res mount. First off drain your coolant (little wignut type thing on passenger side at bottom of rad, mine is plastic). Unbolt the res from the engine (4 bolts or so), and begin to make your bracket for the mount. I just made one flat bar, with two holes in it to mount it to your stock AC mount. Then i took another strip of steel, put one 90 degree bend in it, and twisted it, then did another 90 (on the other side). This allows you to use two of the stock mounting holes in the coolant res. Heres what my coolant res looks like, remounted.. almost like factory eh ? Make sure to extend your lines, i used barbed fittings and hose clamps. Keep in mind theres excess coolant on my res because i overflowed it, and forgot about it when taking pics :

Image


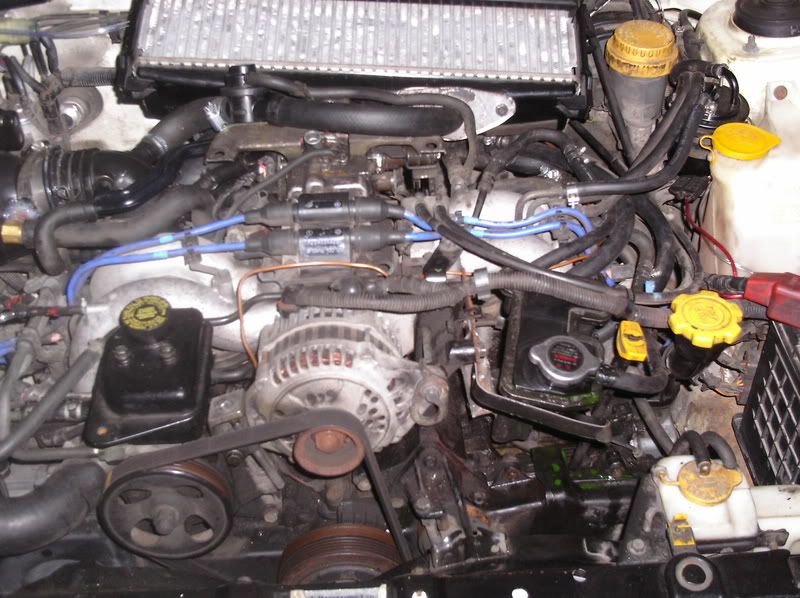
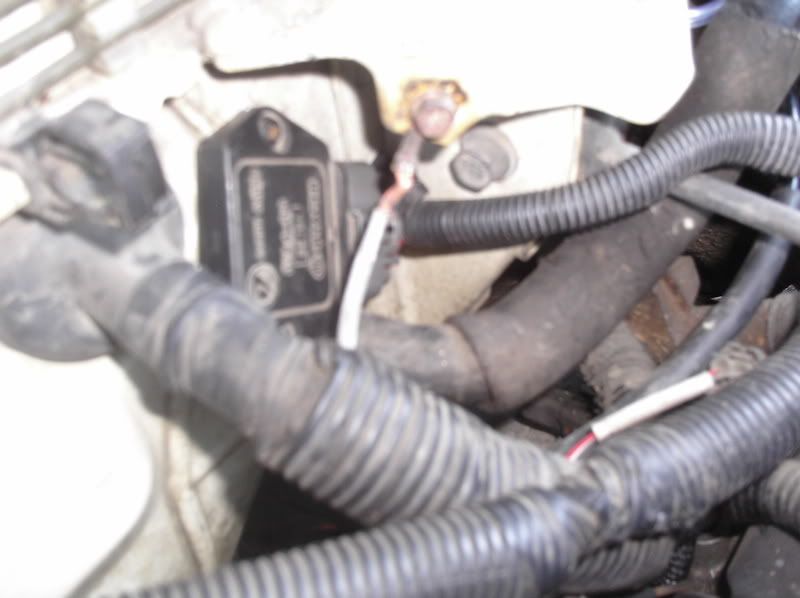
Next thing i did, is repositioned a bunch of wires. I put them under the "dog bone". These wires HAVE to be moved or they will interfear with your y pipe and intercooler. Simply take the bolt out that mounts dogbone to engine, and tuck wires underneath. There are a few clips mounting the wires to the body. Also, before moving the wires, take off the ignitor (In center of engine compartment, little black box, mine says hitachi, we'll remount that later. Should look something like this :

Image

Alright, then i remounted my ignitor to under where it used to be, beside the wishbone :

Image

You also have to cut your clutch resovoir, i cut mine down approx. 2". Use a syringe to take the fluid out of your clutch res. At the bottom of the plastic cut that holds fluid for the res, there is a clamp. Remove the clamp, pull the plastic cup off, cut it down 1.5"-2" and put it back on, clamp it back, put the fluid back in and your done.

Also, you have to take the chimney off the turbo, and chimney inlet off as well. Theres a few bolts holding the chimney to the turbo. To get the inlet off the hood, remove the black heat protectant layer from the hood (remove big circle clips, look like big smarties, i used a flathead), and unbolt the metal piece (Bunch of phillips head screws hold it on)

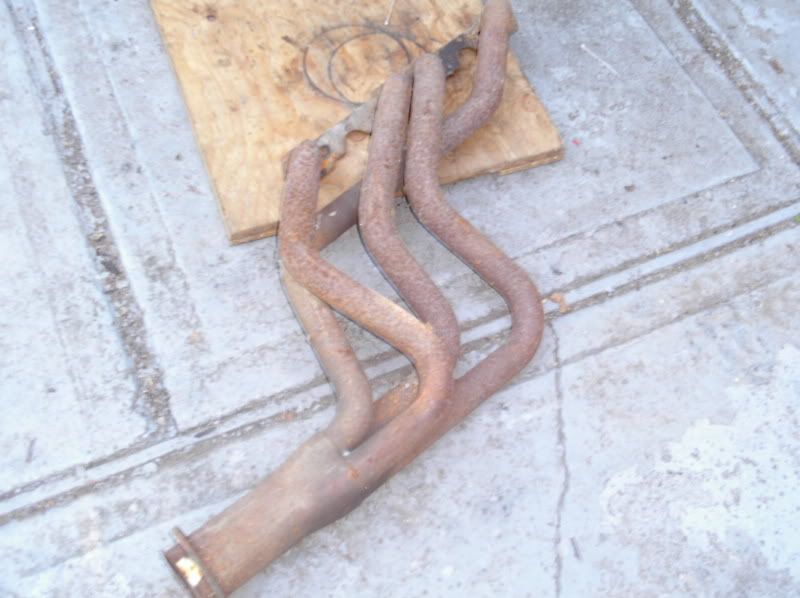
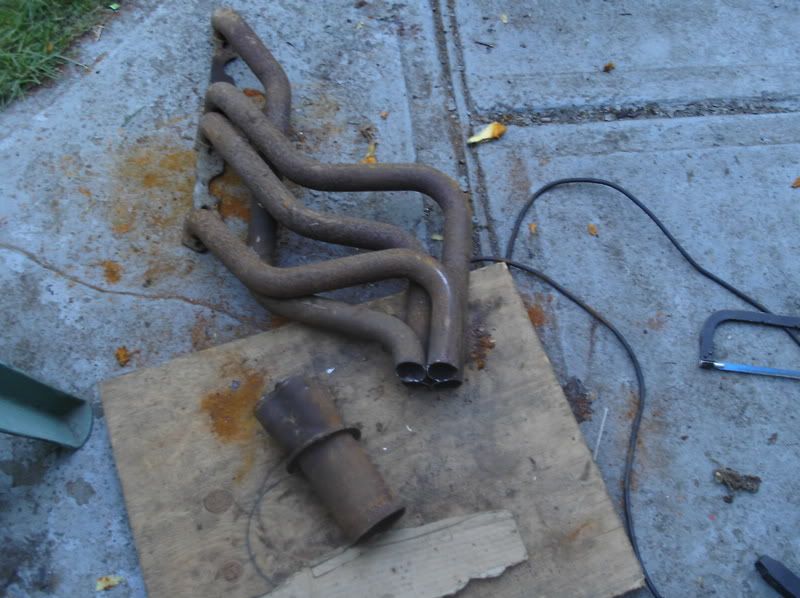
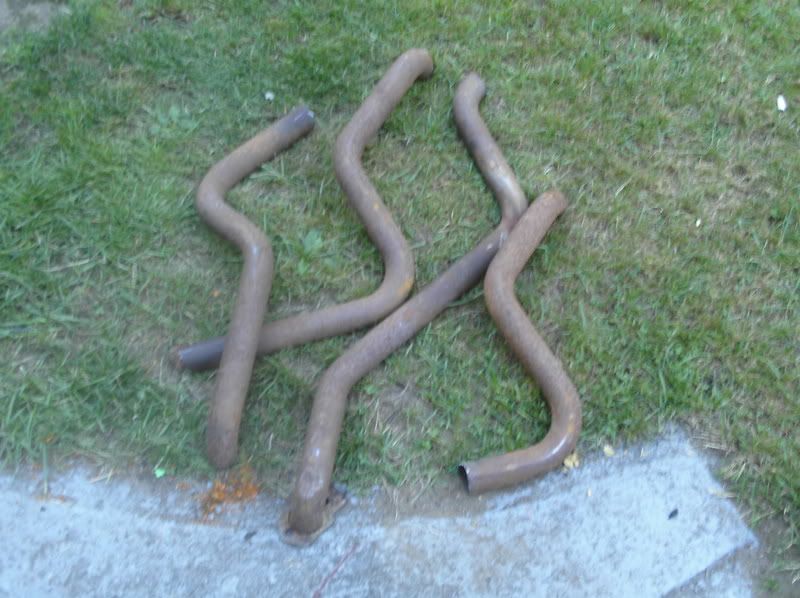
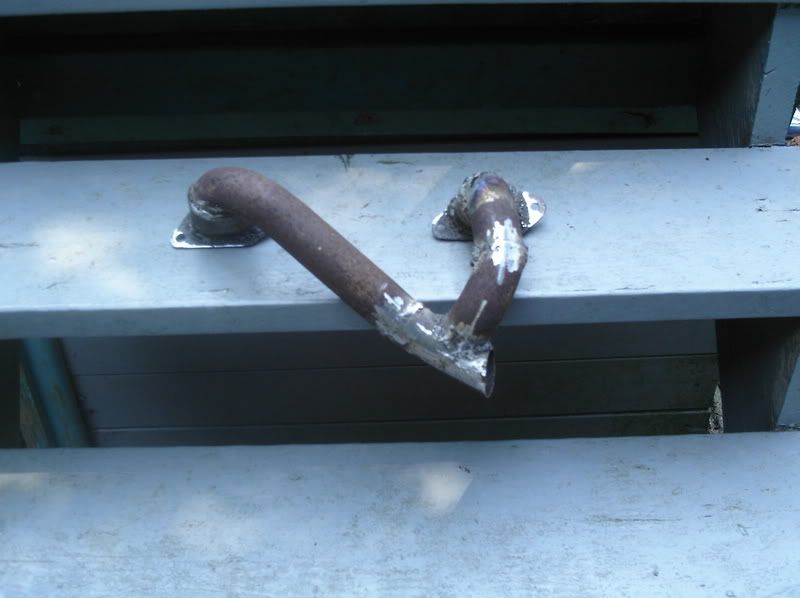
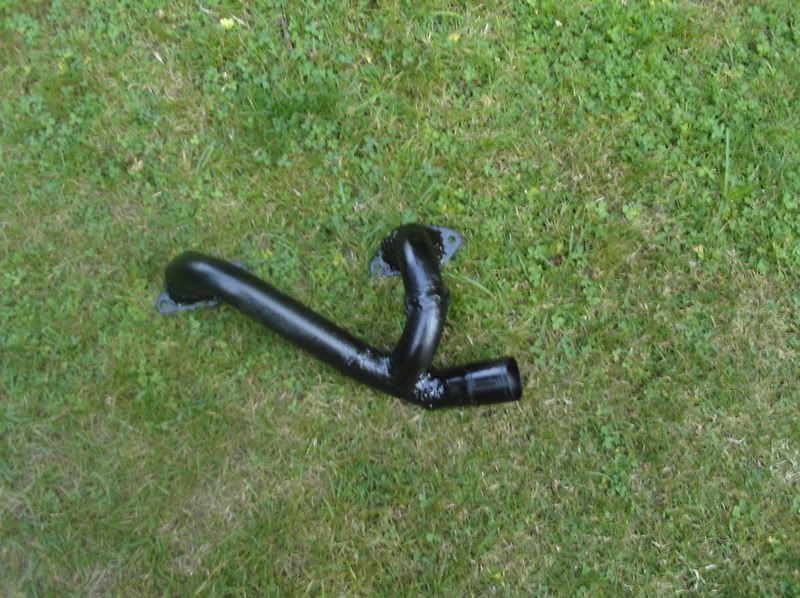
Now for the "fun" and labour intensive process of fabbing your Y pipe, we'll discuss that in the next post.
Last edited by joshm on Fri Aug 08, 2008 7:18 am, edited 1 time in total.
joshm
First Gear
Posts: 81
Joined: Wed Jul 02, 2008 10:35 pm

Post by joshm »

Alright, so i found the piping for my Y pipe in an old header :

Image

Cut off the collector:

Image

And zing, 4 pipes with tons of bends and a proper diameter for a y pipe !

Image

Make 2 flanges for your y pipe :
Image

I had to make constant trips back and forth to my car and my shop to find out angles, but the y pipe started coming together :

Image

My welder is a 110v flux core mig, so it welds like popcorn. If this is the case, grind down all welds, and check for holes. After the welds all looked good i coated them all in JB weld to ensure NO boost leaks. Make sure before you install it on the car, you clean out the pipes, you dont want dirt or anything inside your engine. Painted it with some engine enamel, and bam, one y pipe :

Image

Keep in mind, that pic of my y pipe is a preliminary stage, i had to take off the piece at the end of the pipe (where it will go to turbo outlet). I rotated it 90 degrees, so it pointed out like the throttle body, this makes it MUCH easier to mount your hose from turbo outlet.

Now, go mount the IC to your TB, ensure that everything clears and your hood will somewhat close with the IC under there. Look at the intercooler inlet (on y pipe) and turbo outlet. Get a GOOD look, because your going to cut up a $40 hose. I took a piece of paper, put it over both flanges, and just drew lines on each piece of paper to see where the flanges where. Then i conected lines with a curve to simulate the angle of each pipe. I added about an inch and a half to either size.

This is the hose i started with :

Image

This is how I cut it :

Image

I used a very expensive 1 7/8" rad hose, because it was the only one i could find that would be able to match the curve of the turbo outlet to the y pipe inlet, wilst staying continuous (No kinks in the line).

Now its time to mount it all together. I used expensive T-clamps ($5 a pop my price), these will insure no hoses get blown off from the pressure. Heres how she looks all mounted :

Image

For the BPV, i made a flange. Inside the flange i shoved a piece of hose (got it from my AC delete) and siliconed it. Got it onto the stock BPV (with great difficulty).

So there you go, 06 wrx TMIC install, with the factory bov, for around $80.
Last edited by joshm on Fri Aug 08, 2008 7:21 am, edited 1 time in total.
joshm
First Gear
Posts: 81
Joined: Wed Jul 02, 2008 10:35 pm

Post by joshm »

Front shot pretty radiator ;)

Image

And the scoop, hey, whats that under there :D :
Image
joshm
First Gear
Posts: 81
Joined: Wed Jul 02, 2008 10:35 pm

Post by joshm »

Any comments ?
what huh
Second Gear
Posts: 307
Joined: Sat Jan 05, 2008 1:55 am
Location: Salisbury, Maryland

Post by what huh »

nice DIY this will help many people and answer a lot of questions they may have
1998 Legacy GT-T ... sold
2000 Legacy GT Wagon 5-speed ... heck yeah
1994 Legacy SS ABM Wagon ... project http://bbs.legacycentral.org/viewtopic.php?t=35107&start=0
Help http://bbs.legacycentral.org/viewtopic.php?t=35210
joshm
First Gear
Posts: 81
Joined: Wed Jul 02, 2008 10:35 pm

Post by joshm »

Yea thats why i made it, i had so many little questions to ask and thats what slowed me down..
A1Fiddler
First Gear
Posts: 71
Joined: Tue Jul 08, 2008 10:11 pm
Location: Kent, WA

Post by A1Fiddler »

Very nice. I want to get one on mine someday.
wtdash
Fifth Gear
Posts: 2345
Joined: Fri May 04, 2007 4:09 pm
Location: N. ID

Post by wtdash »

Thanks...I'm headed this way w/my TD04 and '06 TMIC in the next few weeks, and this will help.
RJ93SS
Third Gear
Posts: 853
Joined: Mon Jan 14, 2008 7:55 am
Location: Vancouver, Canada

Post by RJ93SS »

i'll be starting td04 an ic first week of sept.
93SS 04 wrx brakes/slotted w/ hawks--TD05 -- 06 I/C -- 20mm n/a fsb -- Stage 2 -- 550's -- Perrin DIV DP -- 2-3/4 Tit Exhaust -- K&N -- C/C -- A/C Delete -- Grounded -- GT Leather Interior -- WRX/STI Strut Setup -- 17" 225's -- 2 Kids Seats ;)
Spitfire999
First Gear
Posts: 71
Joined: Fri Aug 10, 2007 3:53 pm

Post by Spitfire999 »

Now you just need to get rid of that old coolant tank and you're in business.

http://bbs.legacycentral.org/viewtopic.php?t=34608

Ben
n2x4
Fourth Gear
Posts: 1522
Joined: Tue Oct 18, 2005 3:52 pm
Location: Massillon, Ohio

Post by n2x4 »

I suggest replacing the radiator hose you used with something silicone. After a while, the heat and oil blowby starts to get to the hose. I know it did on mine...
SUBARUEHS Racing
Spitfire999
First Gear
Posts: 71
Joined: Fri Aug 10, 2007 3:53 pm

Post by Spitfire999 »

n2x4 wrote:I suggest replacing the radiator hose you used with something silicone. After a while, the heat and oil blowby starts to get to the hose. I know it did on mine...
Apparently, when I was looking for some silicon hose for my turbo setup, I went to one of the chain auto stores (advanced auto or something), and asked about possibly using radiator hose because I could not find silicon hose of the right size. The guy said that he ran it on one of his turbo setups, and that the pipe would just expand almost to the point of bursting under slightly higher boost...Just a thought.
wtdash
Fifth Gear
Posts: 2345
Joined: Fri May 04, 2007 4:09 pm
Location: N. ID

Post by wtdash »

n2x4 wrote:I suggest replacing the radiator hose you used with something silicone. After a while, the heat and oil blowby starts to get to the hose. I know it did on mine...
Was this days/weeks/months before yours deteriorated?

On the other hand if it's gonna burst if the boost spikes, maybe just stay w/the silicone.
Turbo Subies:
'87 GL-10 Turbo - SOLD
'90 BJ EJ22T/DOHC & 5speed swap - SOLD
'04 FXT, Forged internals, VF39, STI TMIC, Cobb AP- SOLD
'93 Legacy SS - 5-speed, SOLD :-(
'02 WRX -SOLD
'96 BD-turbo'd-SOLD
'98 SF - NA-T
n2x4
Fourth Gear
Posts: 1522
Joined: Tue Oct 18, 2005 3:52 pm
Location: Massillon, Ohio

Post by n2x4 »

wtdash wrote: Was this days/weeks/months before yours deteriorated?

On the other hand if it's gonna burst if the boost spikes, maybe just stay w/the silicone.
It's been about a year/ 20k miles with the hose on it. It's not falling apart but the rubber inside the hose is breaking down. I took it off a month ago because of a leak and all the rubber inside was gummy.
SUBARUEHS Racing
joshm
First Gear
Posts: 81
Joined: Wed Jul 02, 2008 10:35 pm

Post by joshm »

Meh, ive got at least 4 more replacement pieces of hose. When those are gone, i'll buy silicone :D
Post Reply