
Stereo system build thread
Moderators: Helpinators, Moderators
-
evolutionmovement
- Knowledgeable

- Posts: 9809
- Joined: Mon Jun 16, 2003 11:20 pm
- Location: Beverly, MA
Re: Stereo system build thread
I've never figured out what that metal is for either. I was going to replace my speakers at one point and was going to do the same thing.
Midnight in a Perfect World on Amazon or order anywhere. The first book in a quartet chronicling the rise of a man from angry criminal to philanthropist. Midnight... is a distopic noirish novel featuring 'Duchess', a modified 1990 Subaru Legacy wagon.
Re: Stereo system build thread
Day 22?
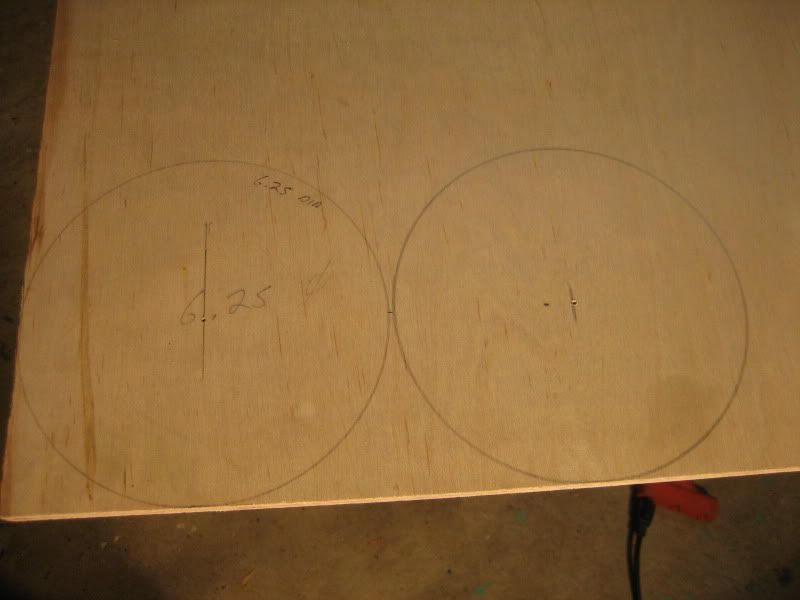
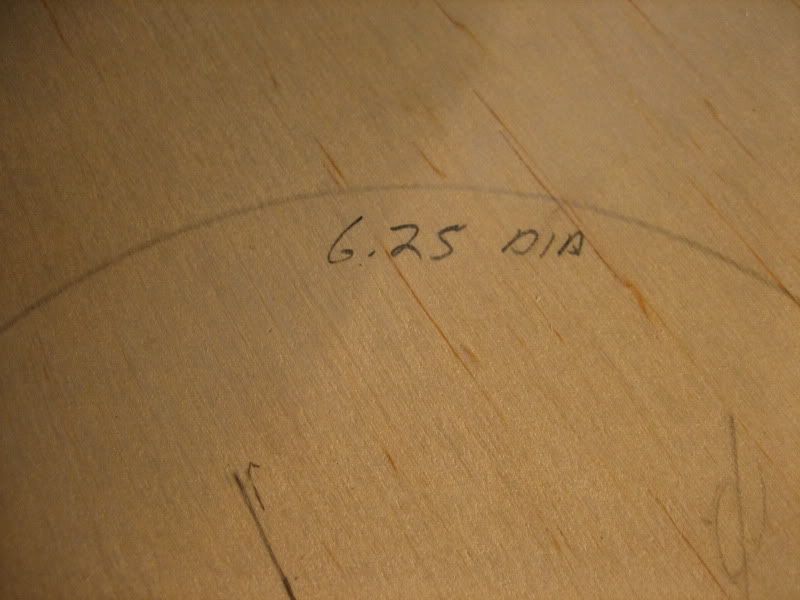
OK rear speaker time. Started off with a .5 inch piece of birch plywood and measured out the outer diameter for the ring: (6.25" by the way)
I cut the hole for the 4":
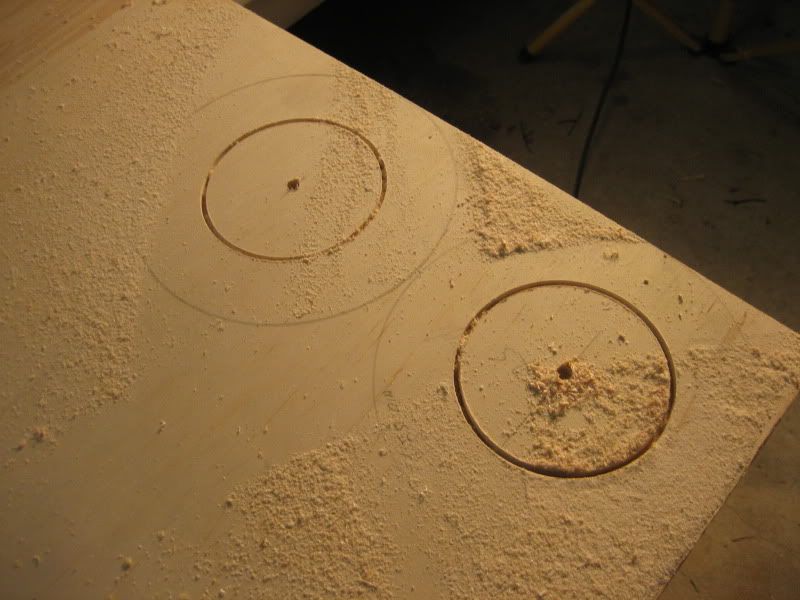
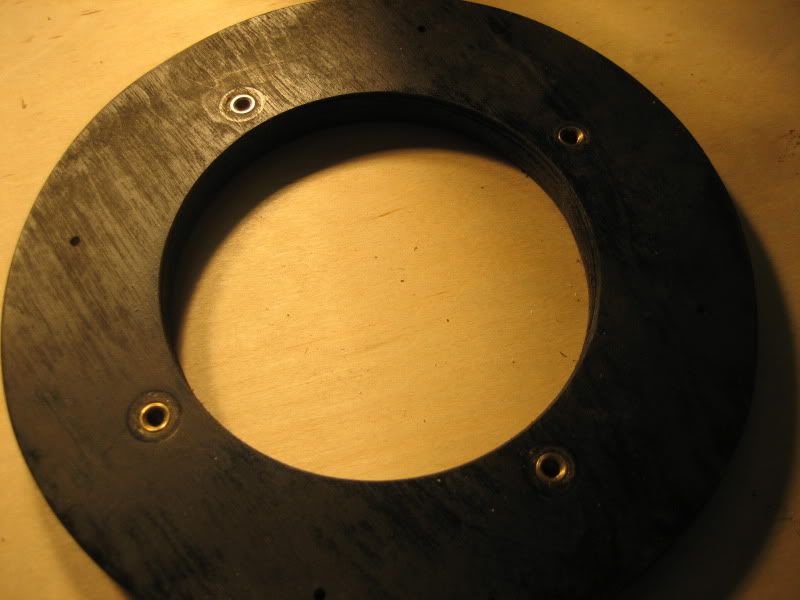
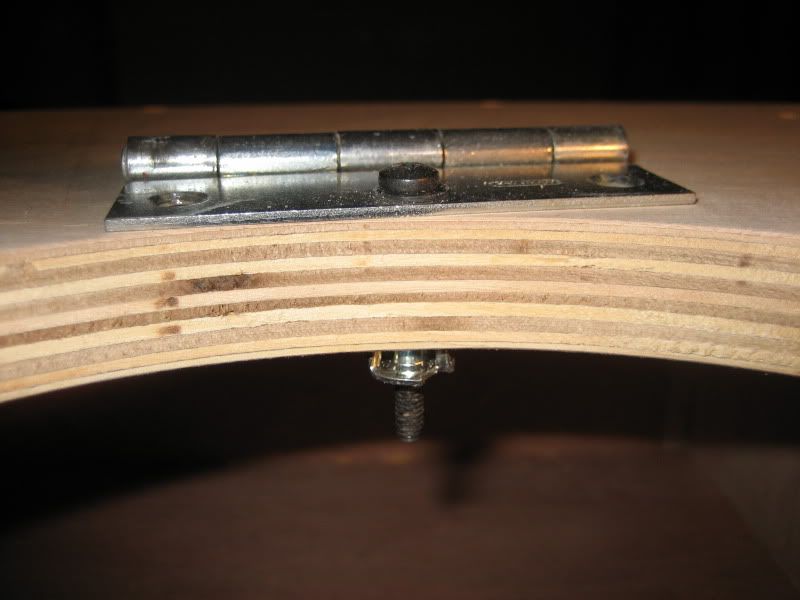
Then I clamped a scrap piece of wood to the underside to try and avoid spliting when drilling through for the threadserts like I had experienced on the front door plates:
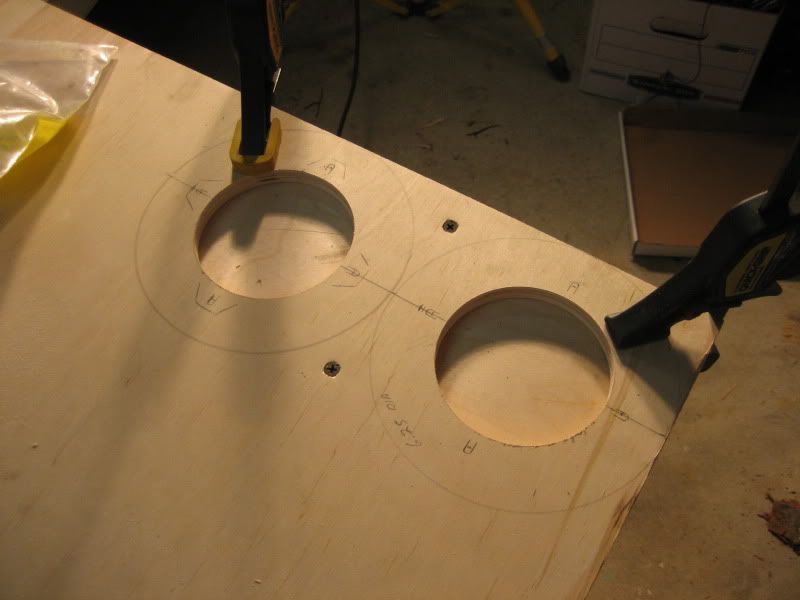
I had to cut the outer diameter with a jig saw because I dont have a 6.25 hole saw and I did not want to make a huge mess with my router and circle jig:
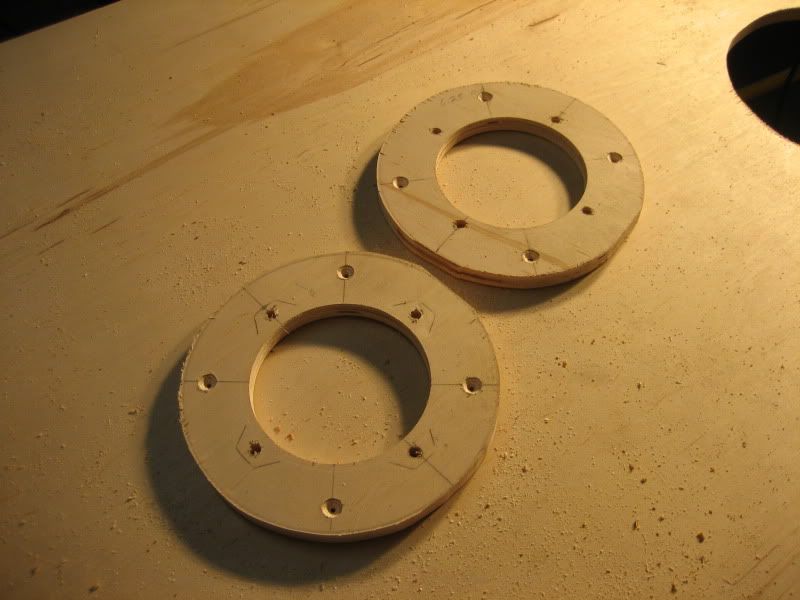
After some sanding I just used paint and not the undercoating because these wont be exposed to moisture:
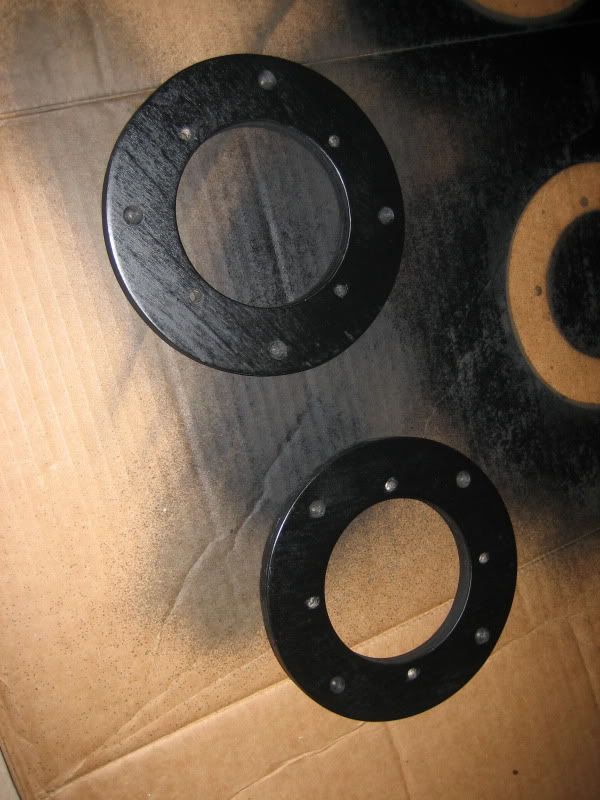
Threadserts installed:
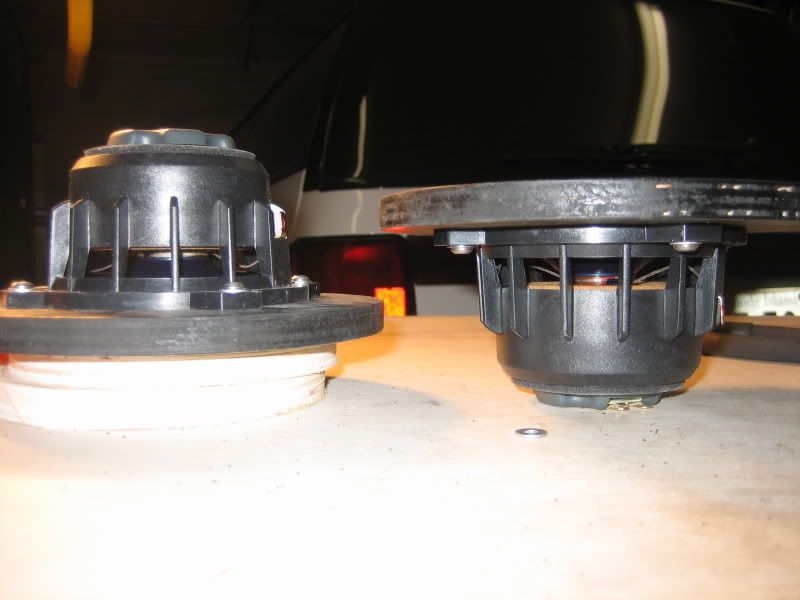
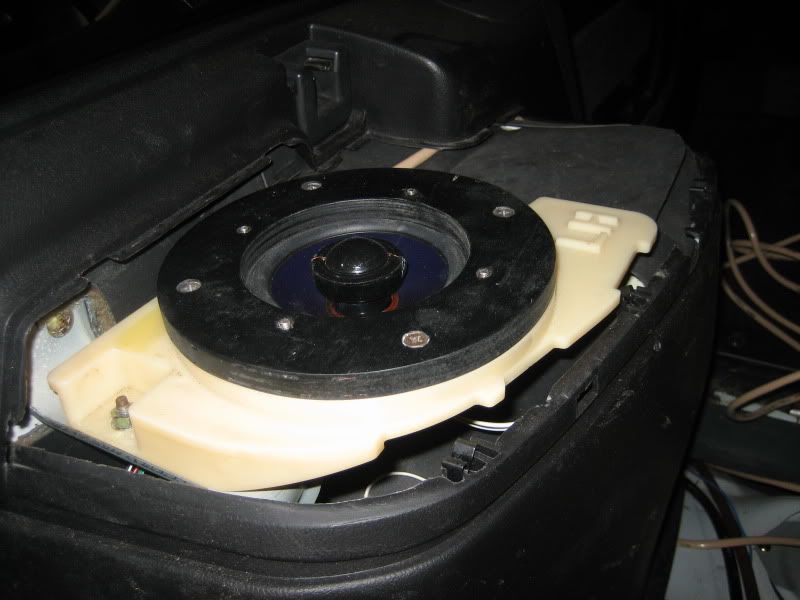
Speakers installed. Had to mount from underneath to get the tweeter clearance:
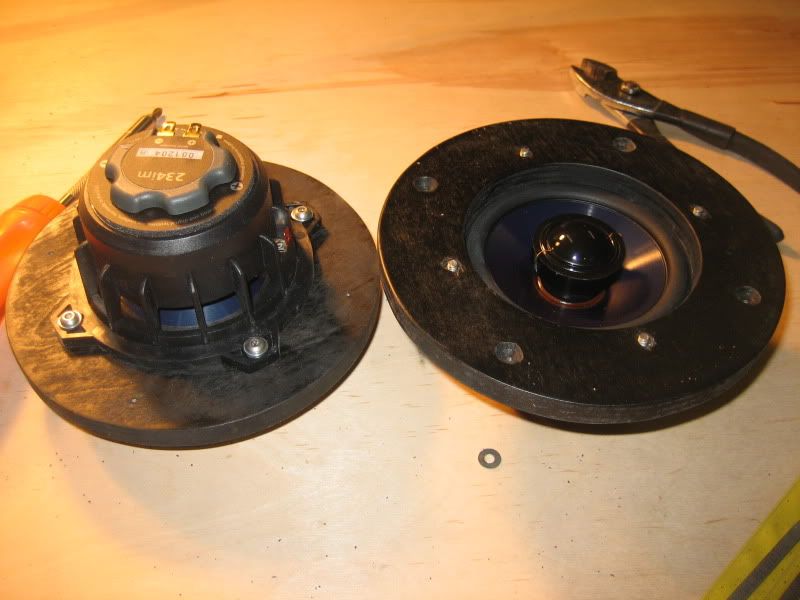
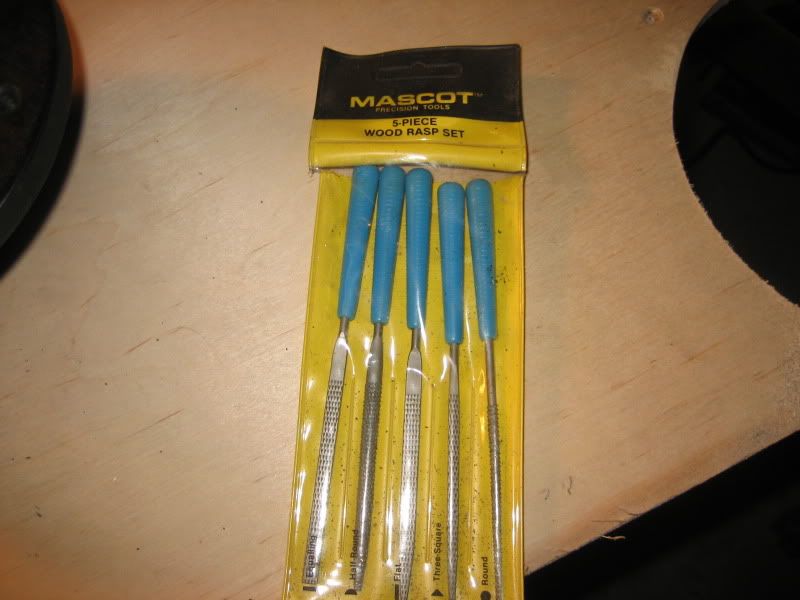
Also one of my threadserts was off slightly so I had to trim the speaker monting hole slightly. This mini rasp set is the balls and cuts through plastic like buttah:
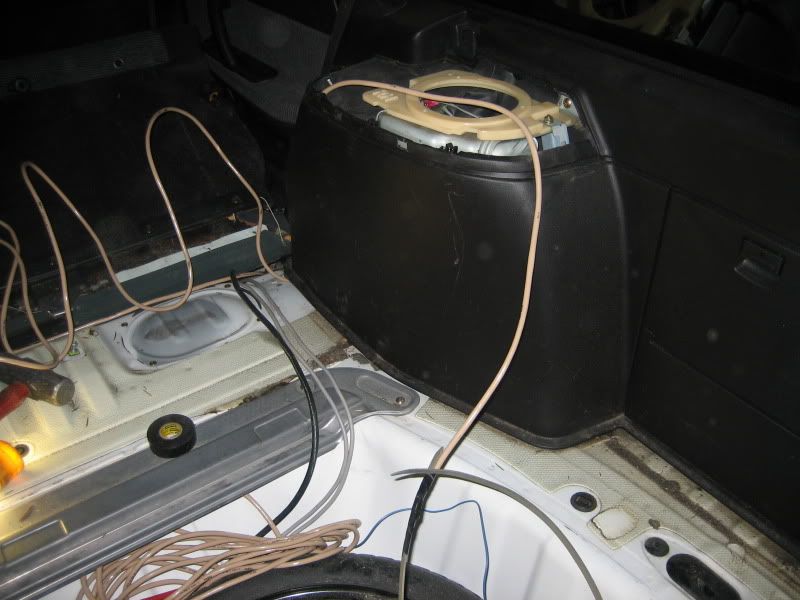
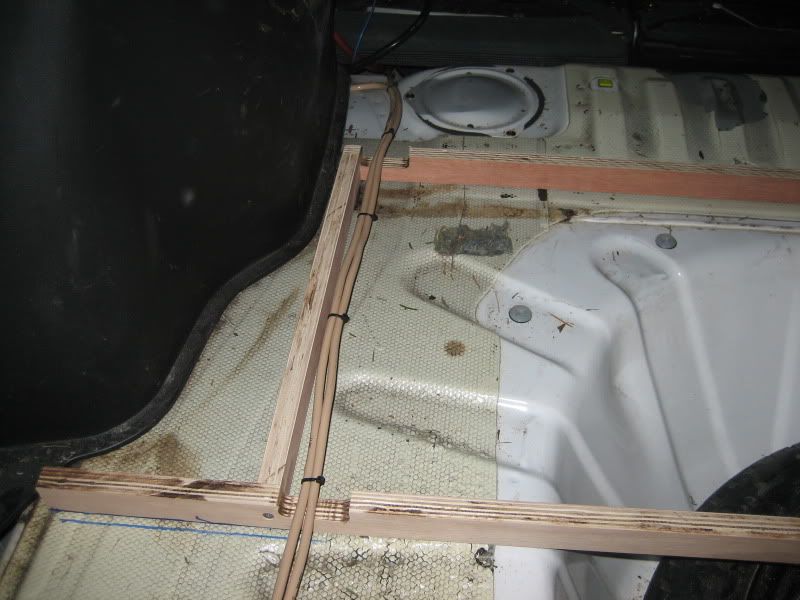
OK now for the wiring. I left the front speaker wire extremely long on purpose. This way I can wire the other end of the front speakers right to the back speakers and then after getting the loop to where I want it I can cut off the excess and I'm left with one piece to reuse and not two short pieces that are scrap.
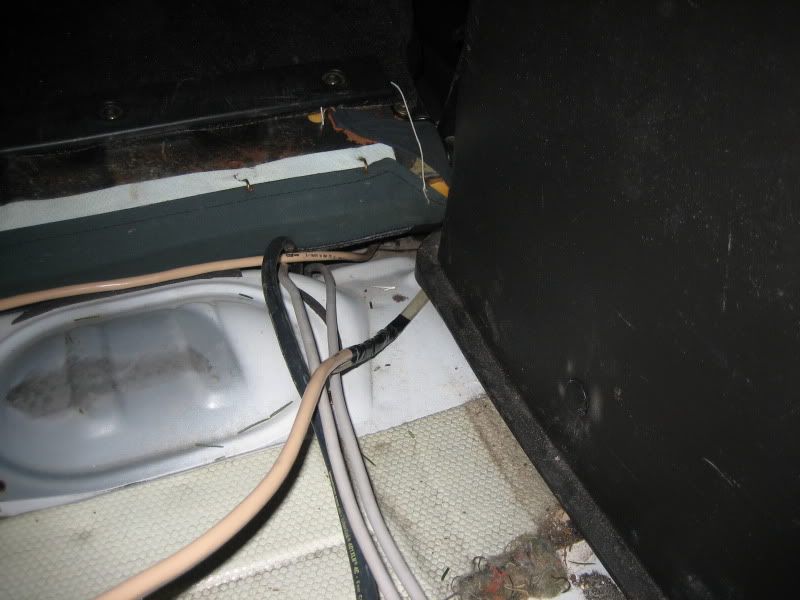
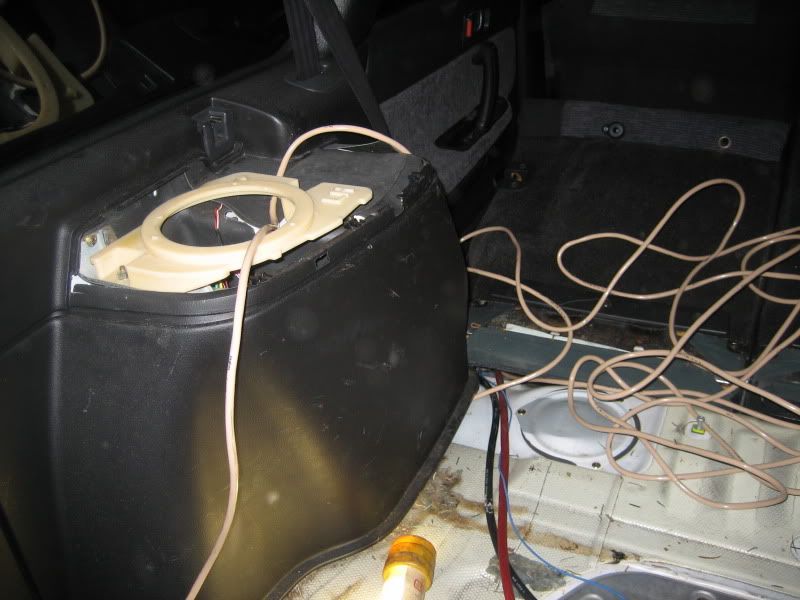
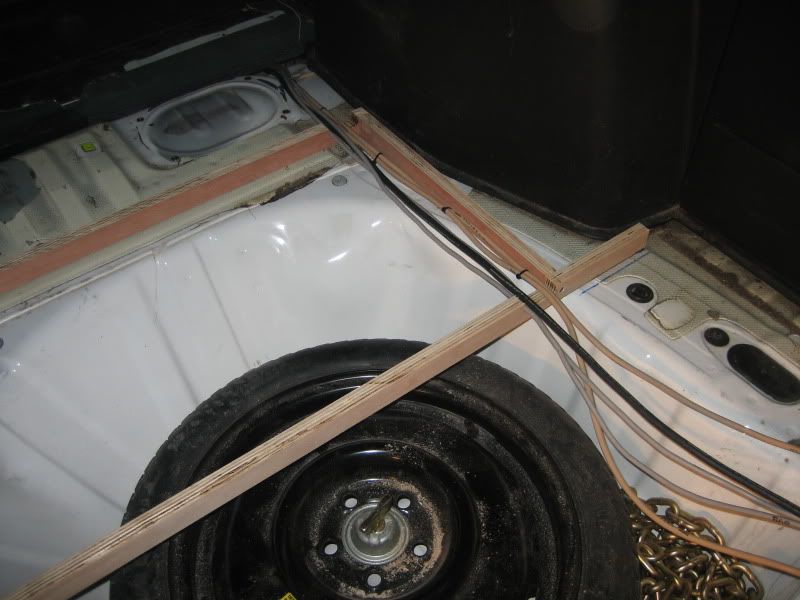
Used my 3' wiretie snake to get from the opening down to the where the back seats hinge:
Tape the wire to it:
Pull :
:
Repeat on other side:
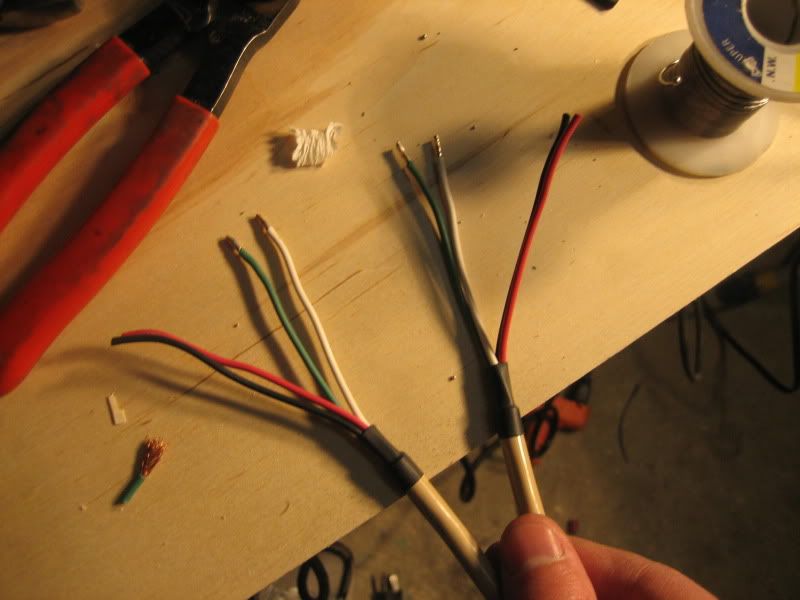
Now I had enough speaker cable to just pul it right out of the car and I could solder the terminals on the bench so I opted for that than to work in the hatch space :
:
I trimmed back the sheath and added some heat shrink for aesthetics:
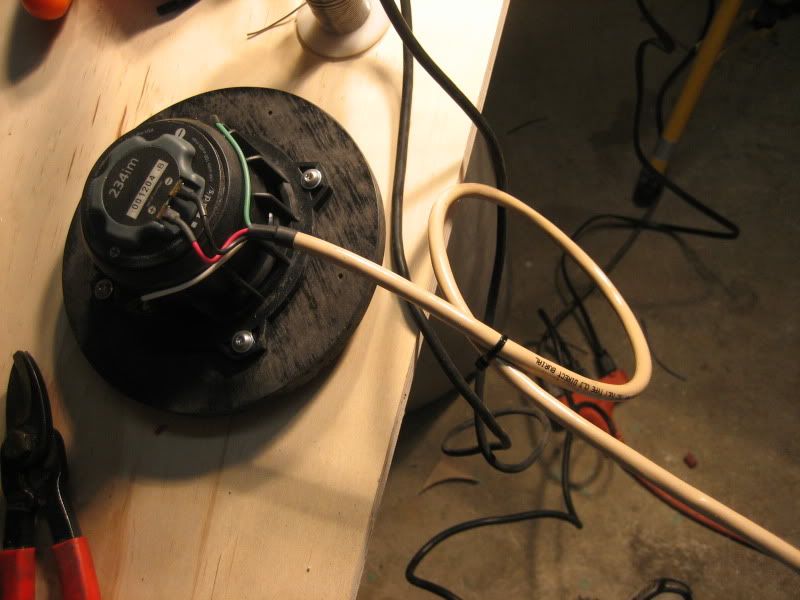
1 Down:

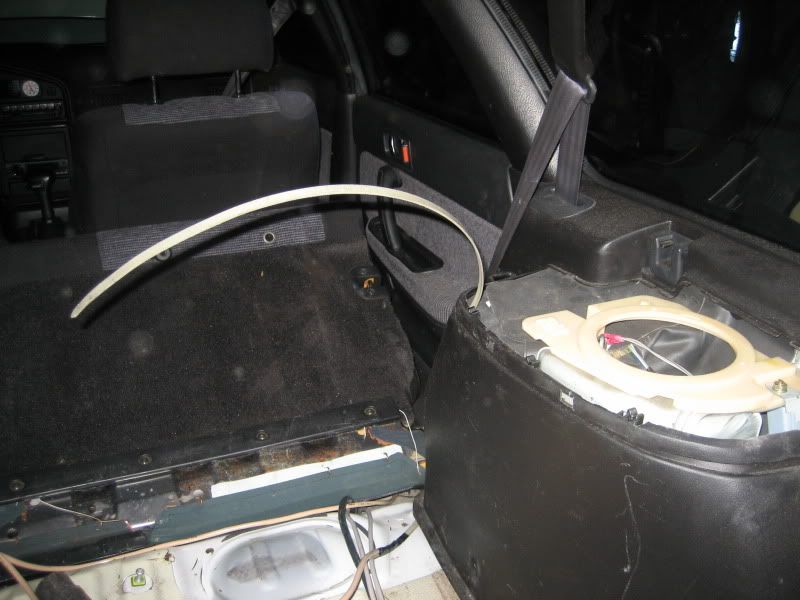
This part is important for newbie installers so pay attention! Look at this pic below. Do you see that loop with the wiretie? This is called a "service loop" you do this when you are putting speakers in so that if and when you need to remove the speaker you have enough extra wire to work with. You would not believe how many times I had to extend wiring from past installs on customer cars.
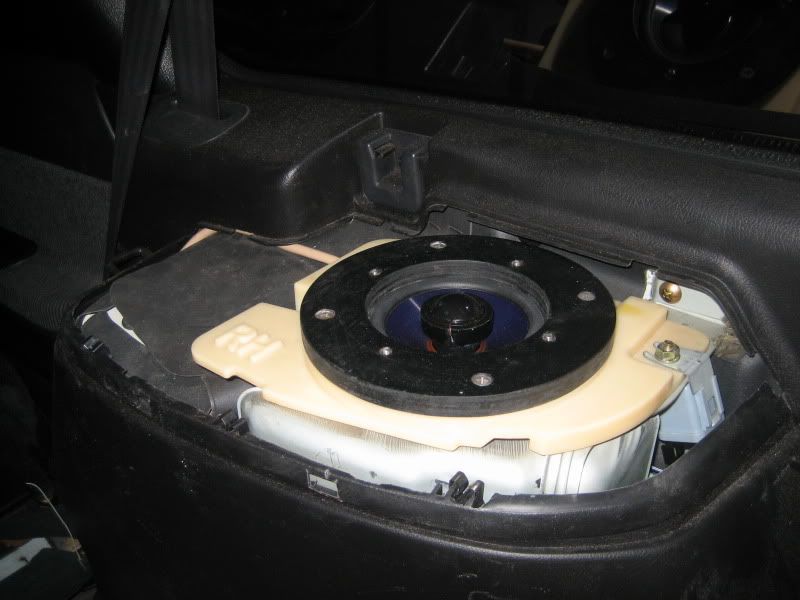
Installed:

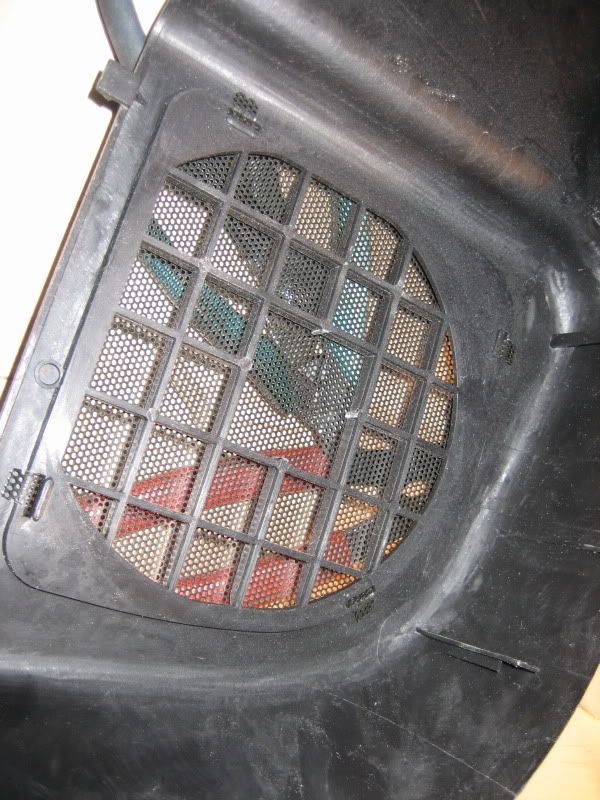
It was pretty close but I trimmed the plastic grid on the covers just to be safe. I dont want the exposed tweeter domes to e damaged:
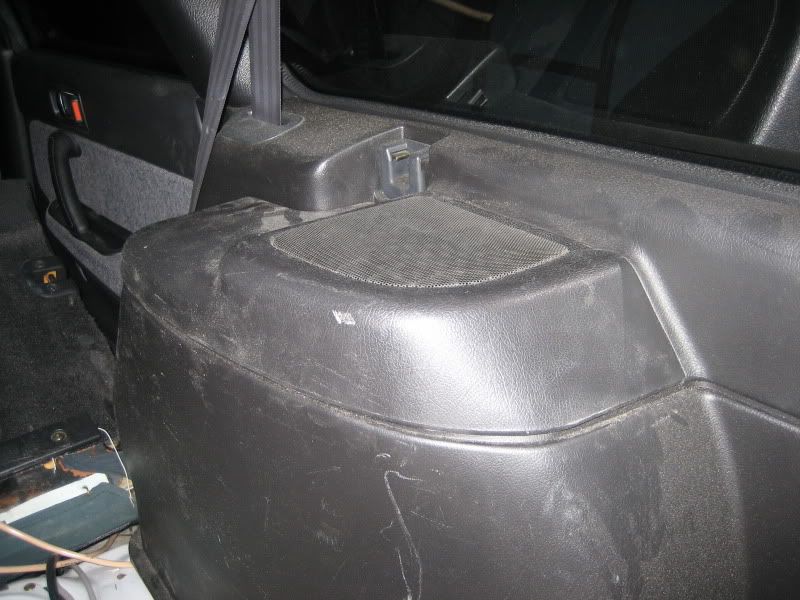
And done: Completely stock appearance!
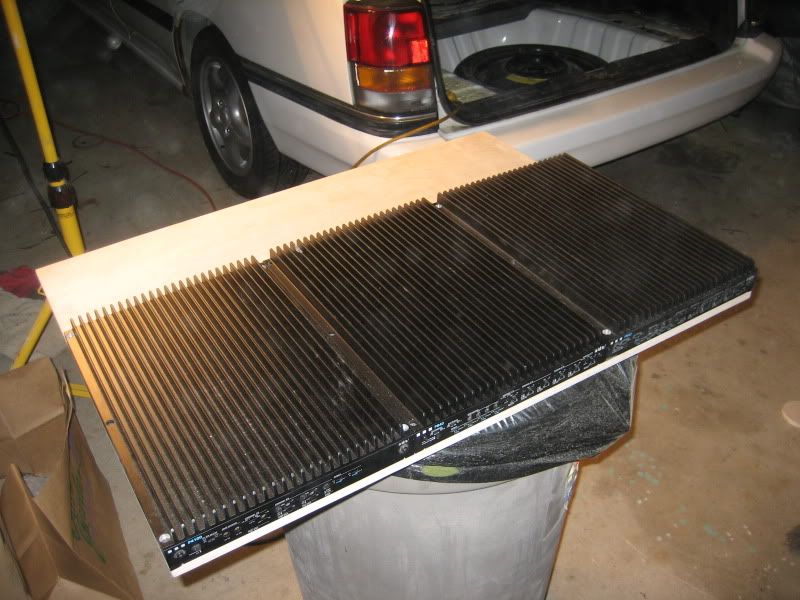
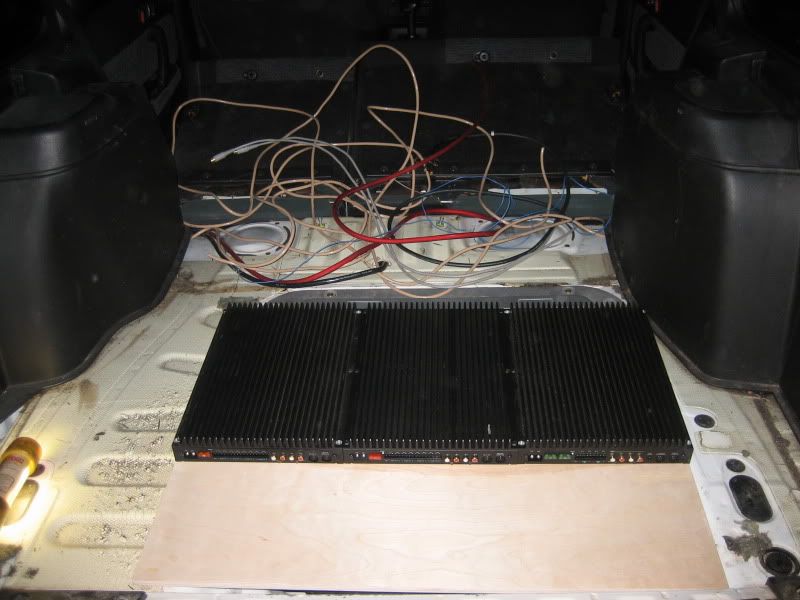
So on to the amp rack. It was past 9PM last night so I couldn't go scope out the steel and aluminum over at Lowe's so I decided to just cut the .5 inch birch plywood and mount the amp to that and see how sturdy that was. I was pretty shocked to see that when only supported on the very ends the deflection was almost nil at the center.
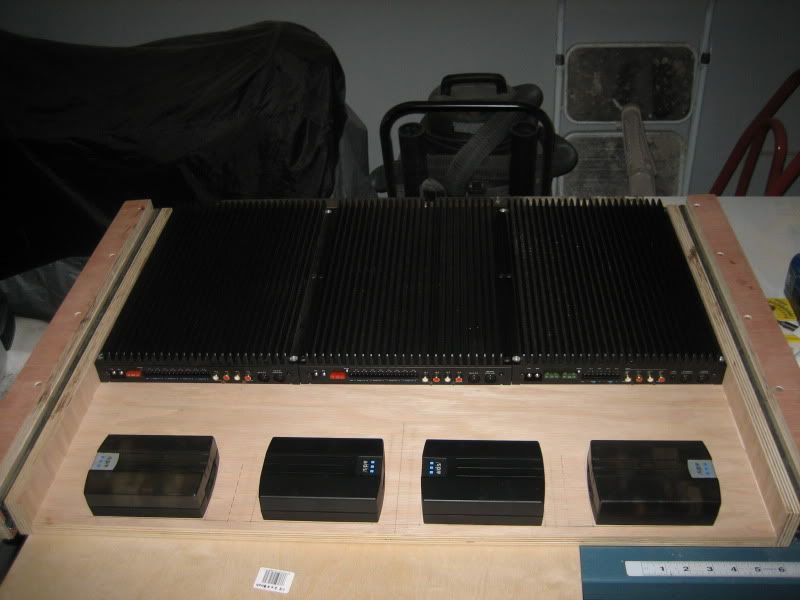
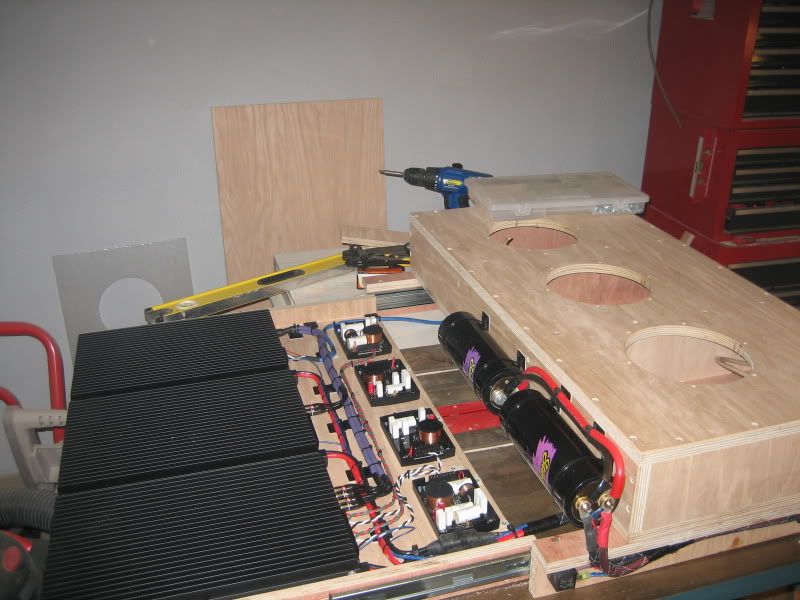
I think I'm going to go with the amp rack below the box for the 8's. Still on drawer slides more to come on that as I go but heres a pic of the amps on the board:
ok more to come later
OK rear speaker time. Started off with a .5 inch piece of birch plywood and measured out the outer diameter for the ring: (6.25" by the way)
I cut the hole for the 4":
Then I clamped a scrap piece of wood to the underside to try and avoid spliting when drilling through for the threadserts like I had experienced on the front door plates:
I had to cut the outer diameter with a jig saw because I dont have a 6.25 hole saw and I did not want to make a huge mess with my router and circle jig:
After some sanding I just used paint and not the undercoating because these wont be exposed to moisture:
Threadserts installed:
Speakers installed. Had to mount from underneath to get the tweeter clearance:
Also one of my threadserts was off slightly so I had to trim the speaker monting hole slightly. This mini rasp set is the balls and cuts through plastic like buttah:
OK now for the wiring. I left the front speaker wire extremely long on purpose. This way I can wire the other end of the front speakers right to the back speakers and then after getting the loop to where I want it I can cut off the excess and I'm left with one piece to reuse and not two short pieces that are scrap.
Used my 3' wiretie snake to get from the opening down to the where the back seats hinge:
Tape the wire to it:
Pull
Repeat on other side:
Now I had enough speaker cable to just pul it right out of the car and I could solder the terminals on the bench so I opted for that than to work in the hatch space
I trimmed back the sheath and added some heat shrink for aesthetics:
1 Down:
This part is important for newbie installers so pay attention! Look at this pic below. Do you see that loop with the wiretie? This is called a "service loop" you do this when you are putting speakers in so that if and when you need to remove the speaker you have enough extra wire to work with. You would not believe how many times I had to extend wiring from past installs on customer cars.
Installed:
It was pretty close but I trimmed the plastic grid on the covers just to be safe. I dont want the exposed tweeter domes to e damaged:
And done: Completely stock appearance!
So on to the amp rack. It was past 9PM last night so I couldn't go scope out the steel and aluminum over at Lowe's so I decided to just cut the .5 inch birch plywood and mount the amp to that and see how sturdy that was. I was pretty shocked to see that when only supported on the very ends the deflection was almost nil at the center.
I think I'm going to go with the amp rack below the box for the 8's. Still on drawer slides more to come on that as I go but heres a pic of the amps on the board:
ok more to come later
-Mike
2011 Infiniti G37x Sedan - Current
2007 Ducati 800ss - Current
1994 Subaru Legacy Sport Wagon (White)
1994 Subaru Legacy Sport Wagon (Silver)
2003 Infiniri G35
1998 Infiniti I30t
1995 Honda Civic DX
1987 Subaru GL Wagon
1987 Subaru Loyale
2011 Infiniti G37x Sedan - Current
2007 Ducati 800ss - Current
1994 Subaru Legacy Sport Wagon (White)
1994 Subaru Legacy Sport Wagon (Silver)
2003 Infiniri G35
1998 Infiniti I30t
1995 Honda Civic DX
1987 Subaru GL Wagon
1987 Subaru Loyale

Re: Stereo system build thread
Mike,
I think if you run a lot of juice to the fronts, you'll just have to turn down the gain and probably have cleaner power, vs. if you bridge the 8 ohm down to 4 ohm. Also, the amp will probably run cooler @ the 8 ohm load.
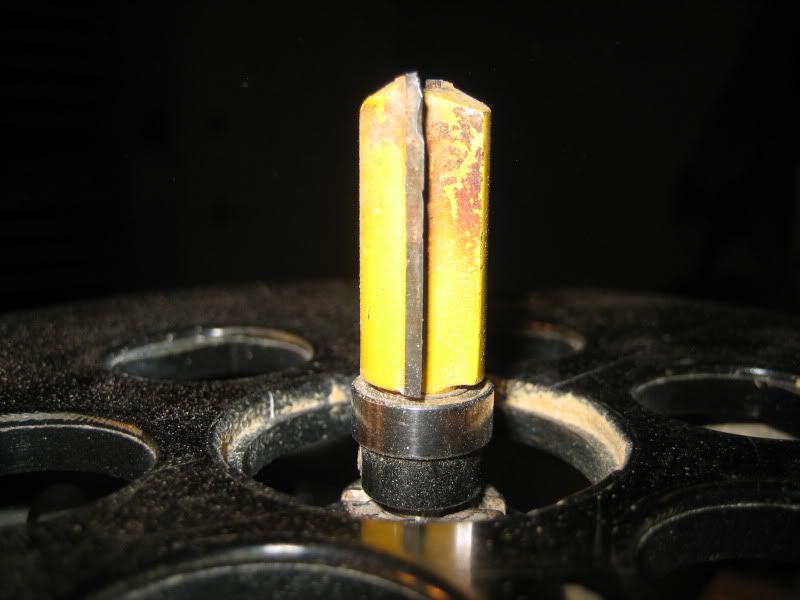
That metal piece in the corner is the fuel separator.
http://www.surrealmirage.com/subaru/ima ... P_3092.JPG
http://www.surrealmirage.com/subaru/ima ... P_3093.JPG
http://www.surrealmirage.com/subaru/ima ... P_3097.JPG
http://www.surrealmirage.com/subaru/ima ... P_3098.JPG
I think if you run a lot of juice to the fronts, you'll just have to turn down the gain and probably have cleaner power, vs. if you bridge the 8 ohm down to 4 ohm. Also, the amp will probably run cooler @ the 8 ohm load.
That metal piece in the corner is the fuel separator.
http://www.surrealmirage.com/subaru/ima ... P_3092.JPG
http://www.surrealmirage.com/subaru/ima ... P_3093.JPG
http://www.surrealmirage.com/subaru/ima ... P_3097.JPG
http://www.surrealmirage.com/subaru/ima ... P_3098.JPG
Josh
surrealmirage.com/subaru
1990 Legacy (AWD, 6MT, & EJ22T Swap)
2020 Outback Limted XT
If you need to get a hold of me please email me rather then pm
surrealmirage.com/subaru
1990 Legacy (AWD, 6MT, & EJ22T Swap)
2020 Outback Limted XT
If you need to get a hold of me please email me rather then pm
Re: Stereo system build thread
I know what you are saying here but you are a little off so let me correct you (with all due respectLegacy777 wrote:Mike,
I think if you run a lot of juice to the fronts, you'll just have to turn down the gain and probably have cleaner power, vs. if you bridge the 8 ohm down to 4 ohm. Also, the amp will probably run cooler @ the 8 ohm load.
At any rate. I'm leaning towards just bridging the 8 channel to 4 and using 1 bridged channel per corner and using the passive xovers for simplicity. I would rather not be spending the next 3 months in my garage every night tweaking gains and x-over points quite frankly and I'm pretty sure this will be one of the best sounding systems I've heard even with the passives.
This leaves the other 8 channel amp to run in 5 channel mode and the last two channels unused. Maybe later I'll add in some kick panel pods or something but I doubt it.
Ahh, I didn't smell gas so I didn't rupture the plastic tankLegacy777 wrote: That metal piece in the corner is the fuel separator.
http://www.surrealmirage.com/subaru/ima ... P_3092.JPG
http://www.surrealmirage.com/subaru/ima ... P_3093.JPG
http://www.surrealmirage.com/subaru/ima ... P_3097.JPG
http://www.surrealmirage.com/subaru/ima ... P_3098.JPG
-Mike
2011 Infiniti G37x Sedan - Current
2007 Ducati 800ss - Current
1994 Subaru Legacy Sport Wagon (White)
1994 Subaru Legacy Sport Wagon (Silver)
2003 Infiniri G35
1998 Infiniti I30t
1995 Honda Civic DX
1987 Subaru GL Wagon
1987 Subaru Loyale
2011 Infiniti G37x Sedan - Current
2007 Ducati 800ss - Current
1994 Subaru Legacy Sport Wagon (White)
1994 Subaru Legacy Sport Wagon (Silver)
2003 Infiniri G35
1998 Infiniti I30t
1995 Honda Civic DX
1987 Subaru GL Wagon
1987 Subaru Loyale
Re: Stereo system build thread
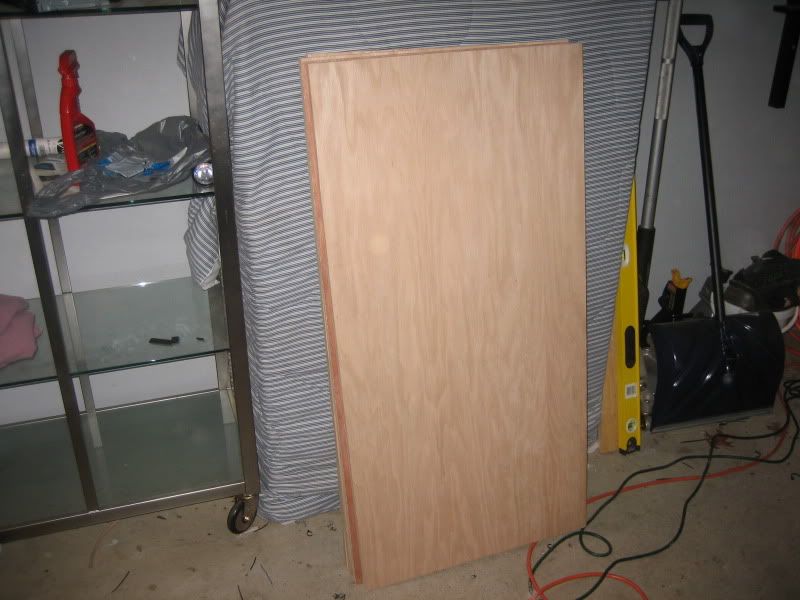
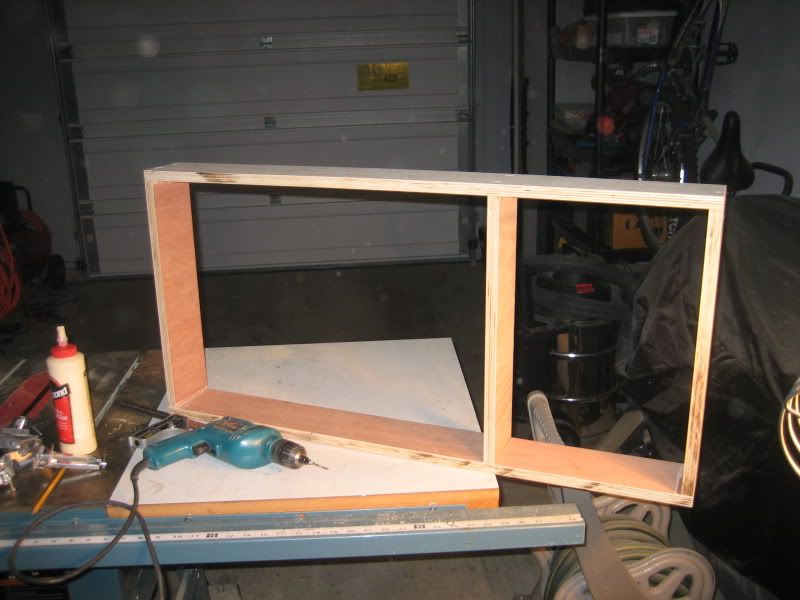
Started the 8"midbase box this weekend. I went over to lowes and picked up a 4X8 sheet of 3/4 birch plywood (I thought!) turned out that it was slightly thinner and I think they had it labeled wrong those a-holes. They have some new plywood that is in millimeters now so I think I got that by accident. Not a huge deal but I'll show you how it affected my box towards the end of the photos (sinse I didn't realize it was thinner til the end).
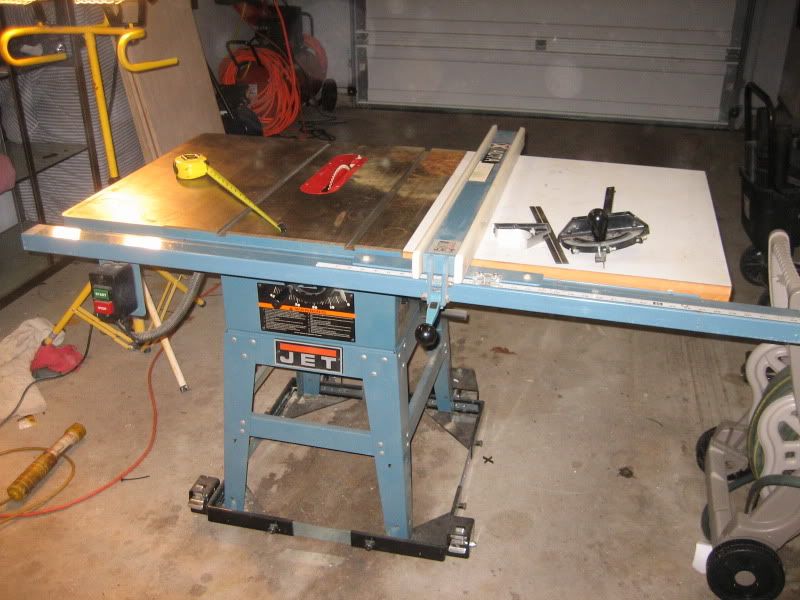
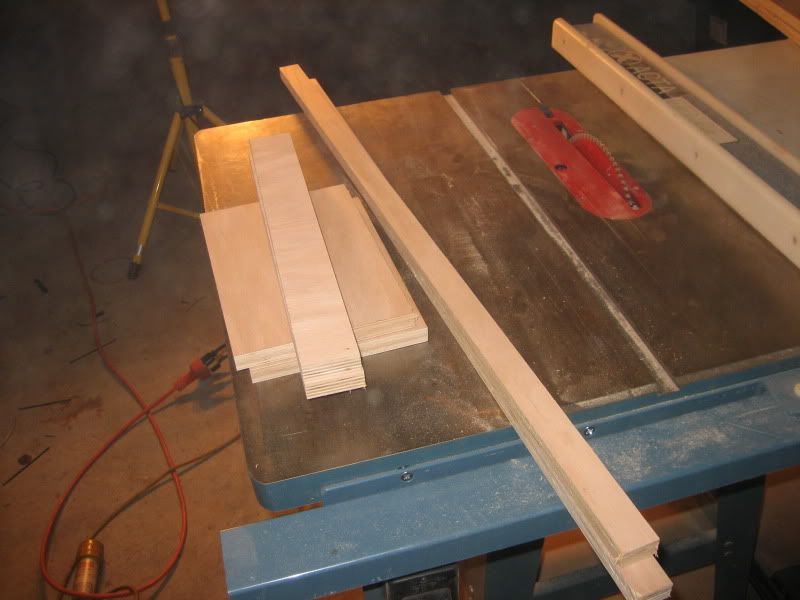
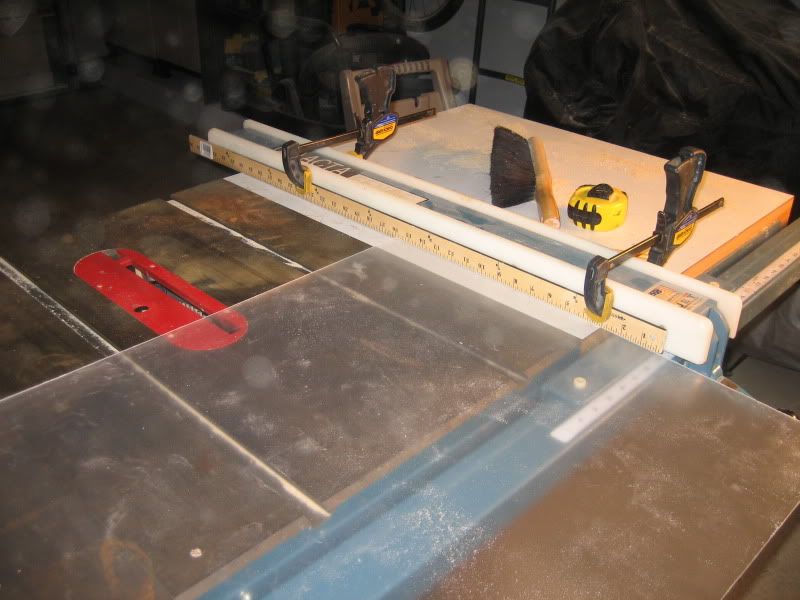
Step one, break out the table saw:
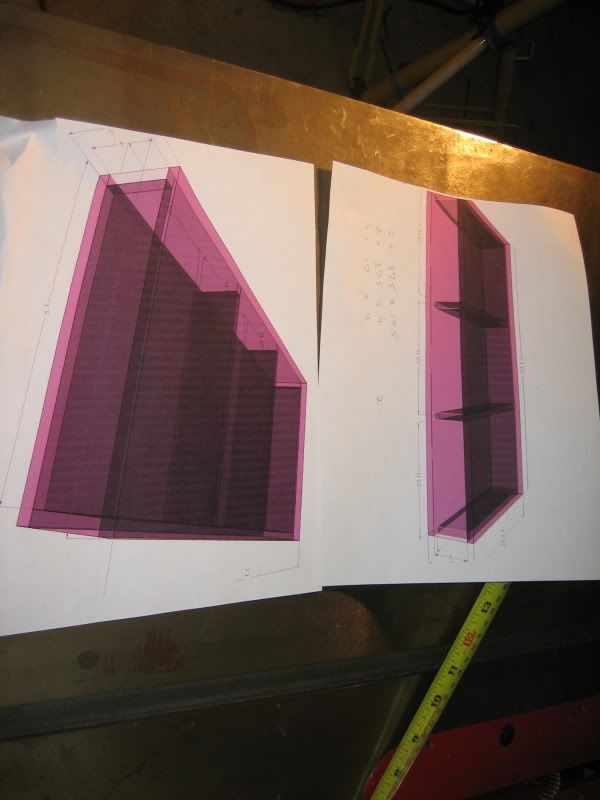
Print out the design with some dimensions on it:
I had the guy cut the sheet into quarters so it would fit in the wagon:
ok here are all the pieces already cut:
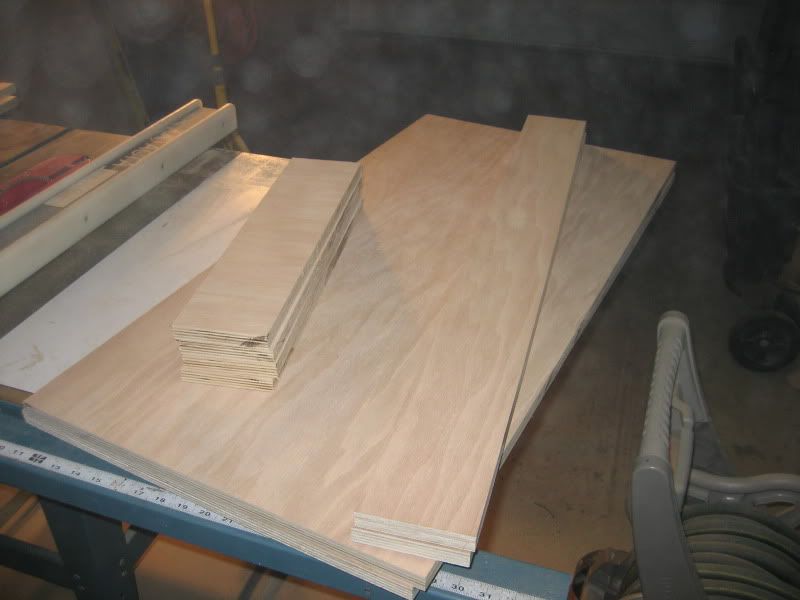
Heres the scrap :
Glue screws and clamps :
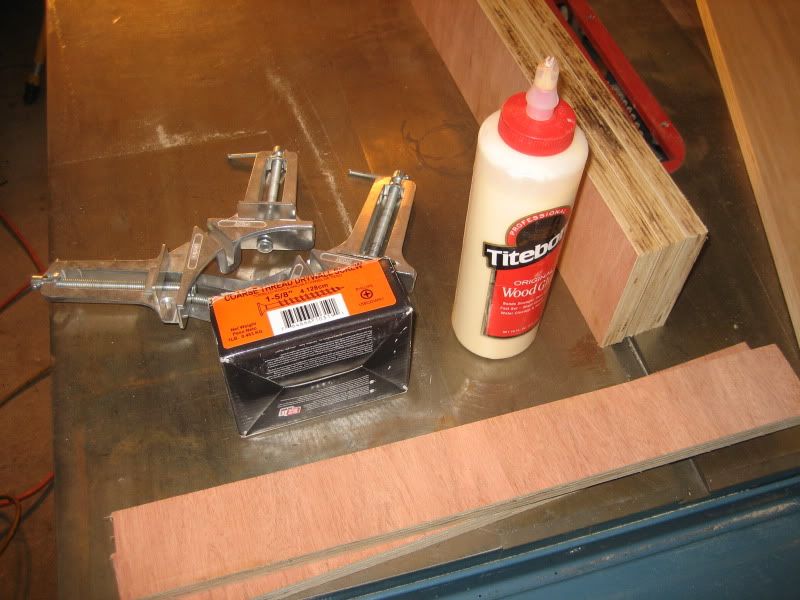
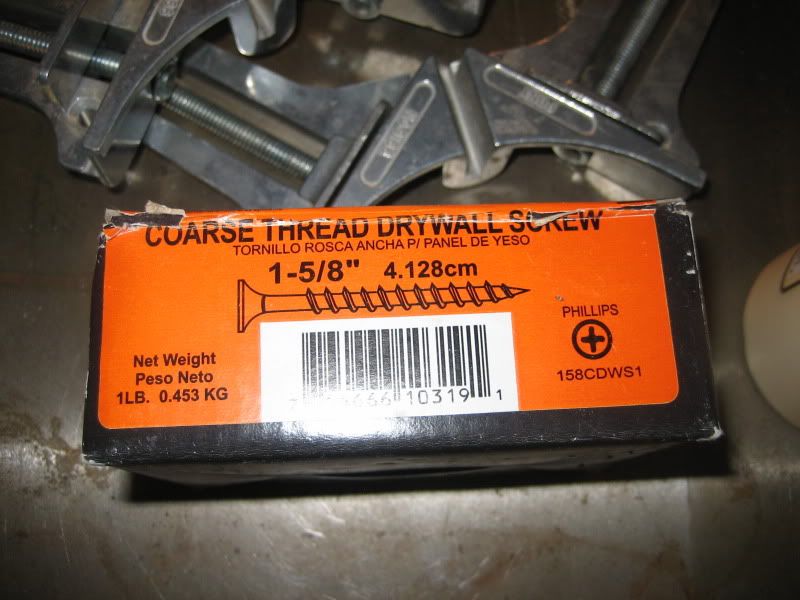
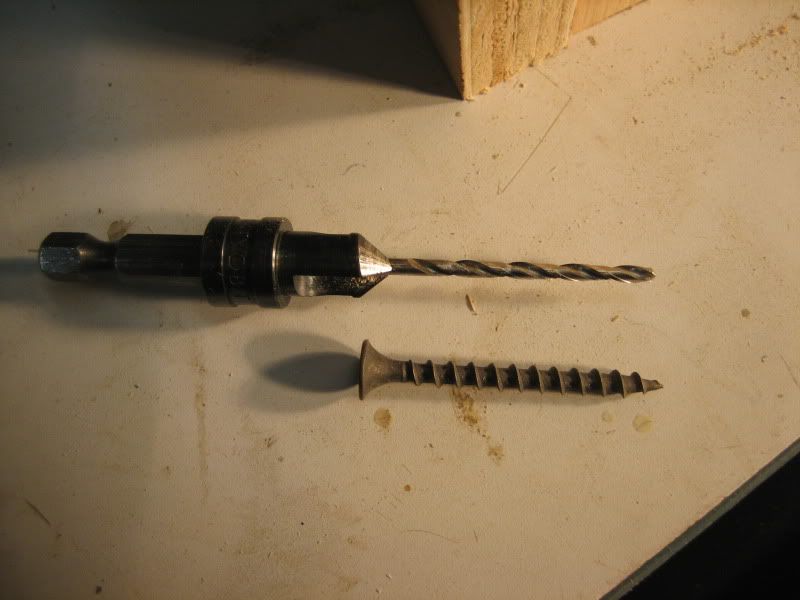
I use 1 5/8 screws for 3/4 inch wood:

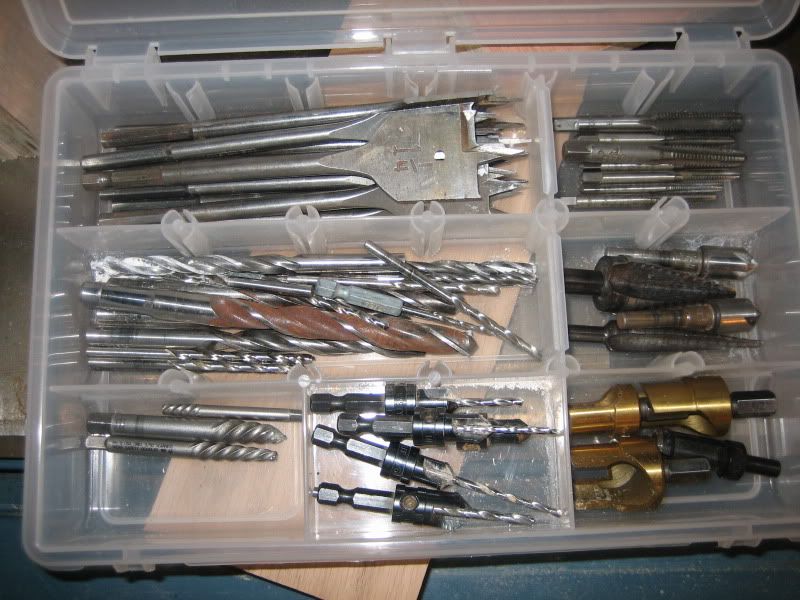
Grab my countersink bits:
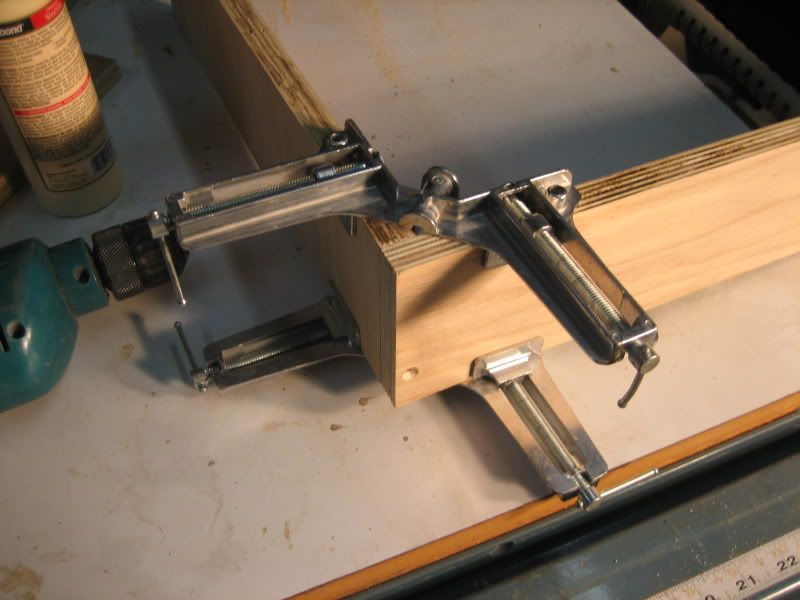
I use corner clamps to prevent the back piece from "walking" when pre-drilling the holes:
I start with a front/back piece and 1 side:
Then the other side:
Then the other front/back:
Now measure in on the insides of the front and back pieces for the chamber deviders. In this case 11.25 inches makes all 3 chambers equidistant. (should point out that I did not measure this at the time of build but this was part of the design phase. If anyone has any questions on how I designed the box please ask).
One divider:
Two dividers:
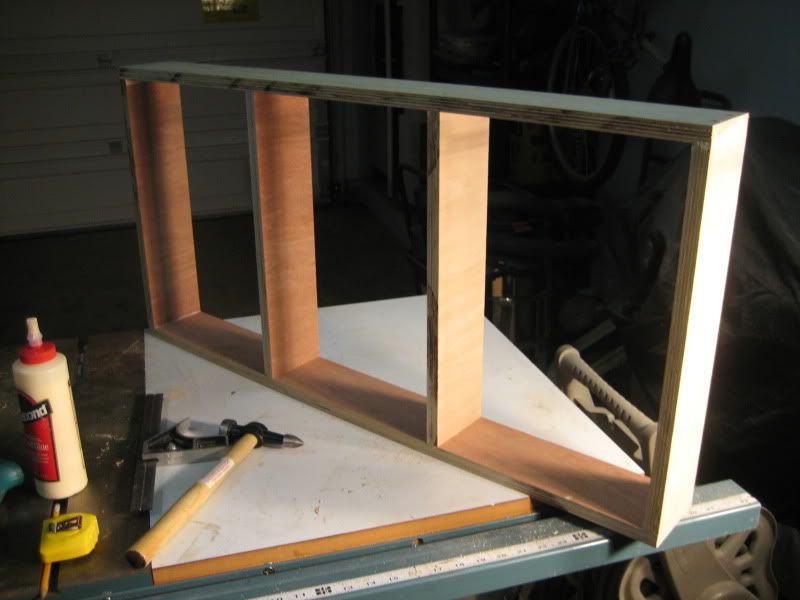
Top/bottom installed:
Other side installed. Now you can see how the thickness of the wood hurt me. The front and back as seen here are slightly less than the .75 inches so my top and bottom pieces were a hair longer on one side.
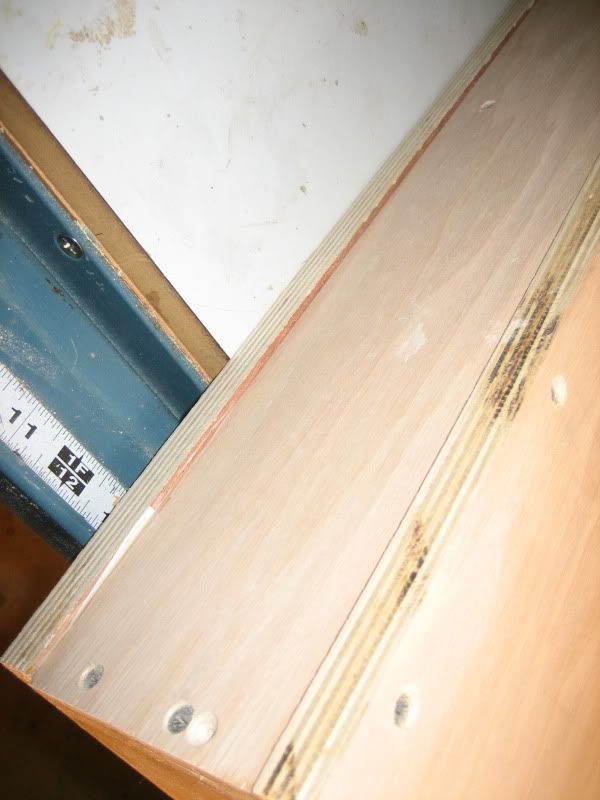
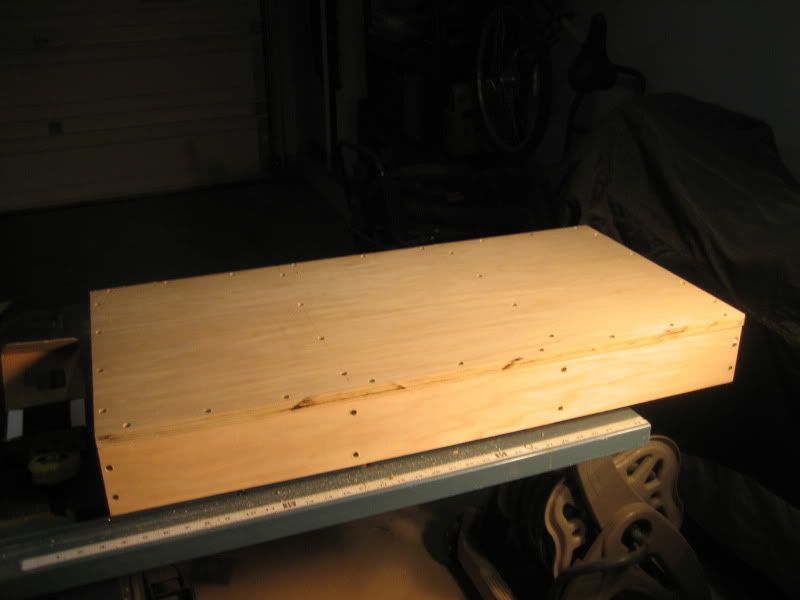
To clean this up I got the router with a flush cutting bit:
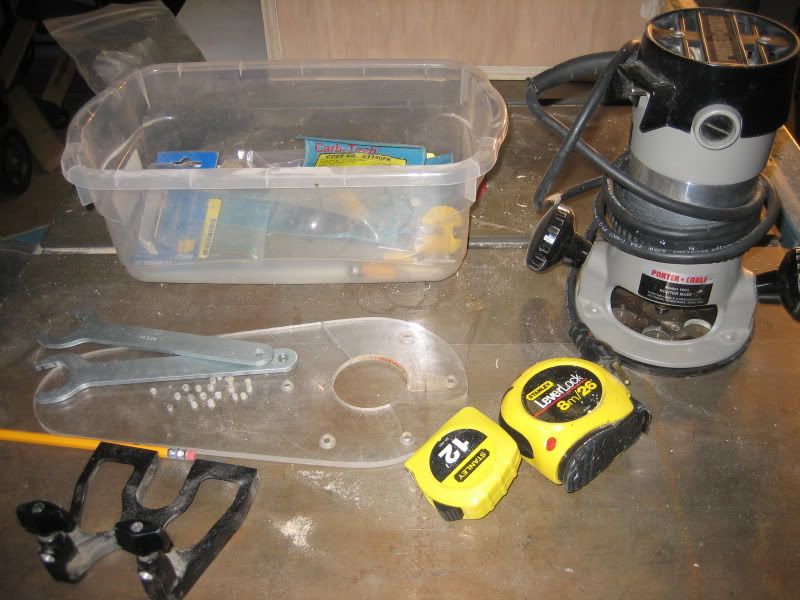
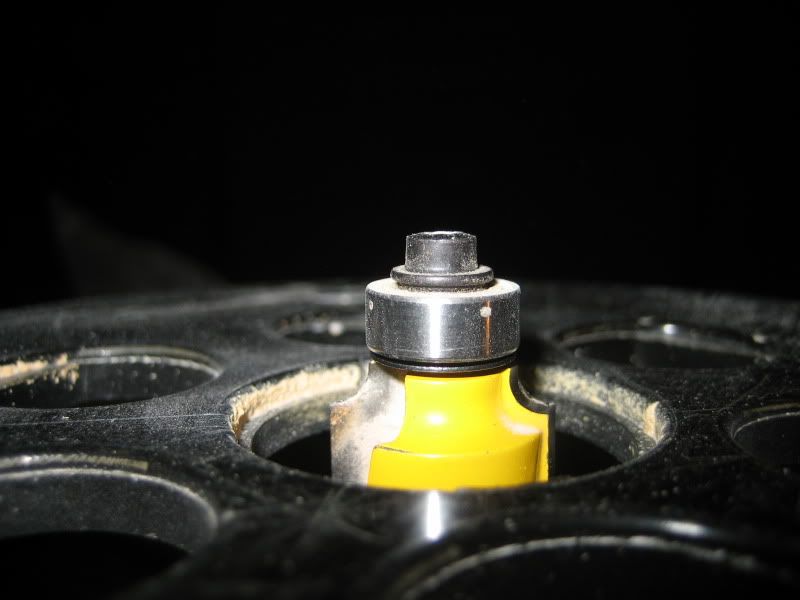
Because this box will be covered by trim panels I used a 1/4 round off bit to smooth the edges (puts a nice clean edge on the box that isn't sharp.
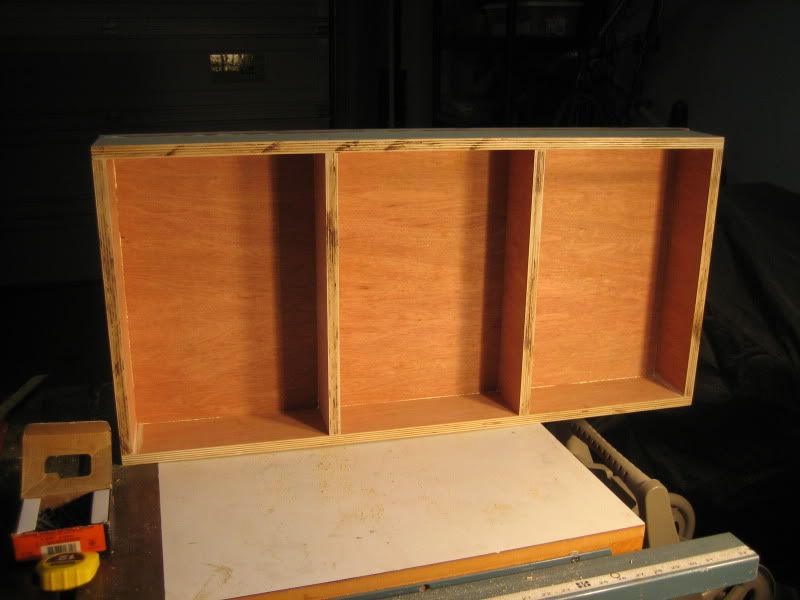
Finished (minus the speaker holes). Will get to the tonight
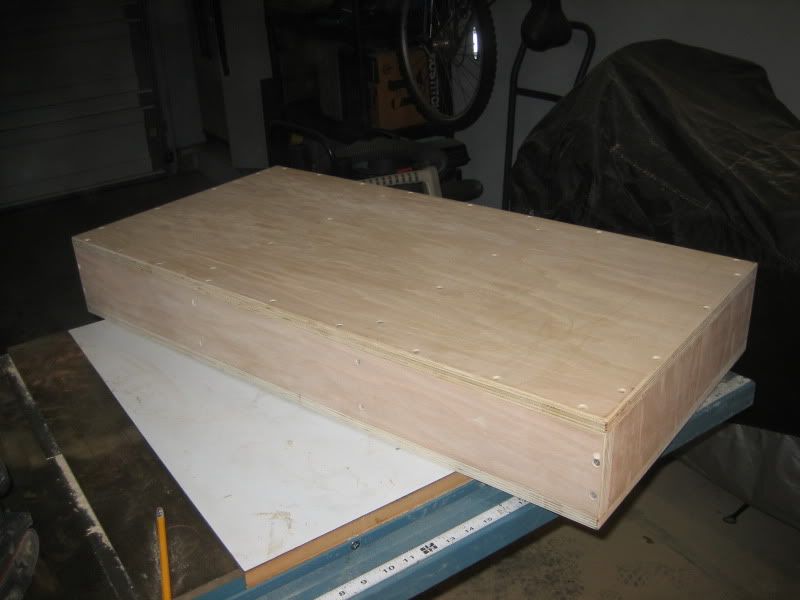
More to come...
Step one, break out the table saw:
Print out the design with some dimensions on it:
I had the guy cut the sheet into quarters so it would fit in the wagon:
ok here are all the pieces already cut:
Heres the scrap
Glue screws and clamps
I use 1 5/8 screws for 3/4 inch wood:
Grab my countersink bits:
I use corner clamps to prevent the back piece from "walking" when pre-drilling the holes:
I start with a front/back piece and 1 side:
Then the other side:
Then the other front/back:
Now measure in on the insides of the front and back pieces for the chamber deviders. In this case 11.25 inches makes all 3 chambers equidistant. (should point out that I did not measure this at the time of build but this was part of the design phase. If anyone has any questions on how I designed the box please ask).
One divider:
Two dividers:
Top/bottom installed:
Other side installed. Now you can see how the thickness of the wood hurt me. The front and back as seen here are slightly less than the .75 inches so my top and bottom pieces were a hair longer on one side.
To clean this up I got the router with a flush cutting bit:
Because this box will be covered by trim panels I used a 1/4 round off bit to smooth the edges (puts a nice clean edge on the box that isn't sharp.
Finished (minus the speaker holes). Will get to the tonight
More to come...
-Mike
2011 Infiniti G37x Sedan - Current
2007 Ducati 800ss - Current
1994 Subaru Legacy Sport Wagon (White)
1994 Subaru Legacy Sport Wagon (Silver)
2003 Infiniri G35
1998 Infiniti I30t
1995 Honda Civic DX
1987 Subaru GL Wagon
1987 Subaru Loyale
2011 Infiniti G37x Sedan - Current
2007 Ducati 800ss - Current
1994 Subaru Legacy Sport Wagon (White)
1994 Subaru Legacy Sport Wagon (Silver)
2003 Infiniri G35
1998 Infiniti I30t
1995 Honda Civic DX
1987 Subaru GL Wagon
1987 Subaru Loyale
Re: Stereo system build thread
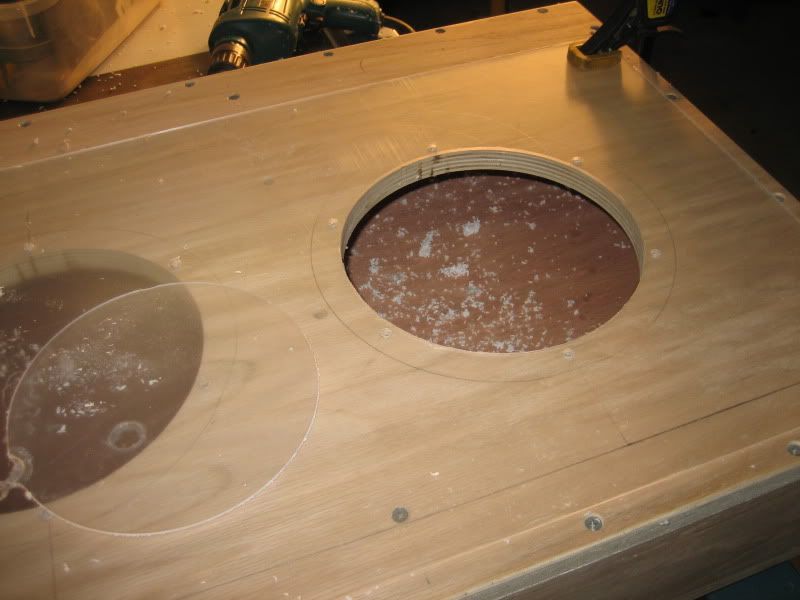
ok, got the speaker holes laid out and cut last night. What a pain
I grabbed one of the speakers to work out how I wanted the layout of the drivers to be:
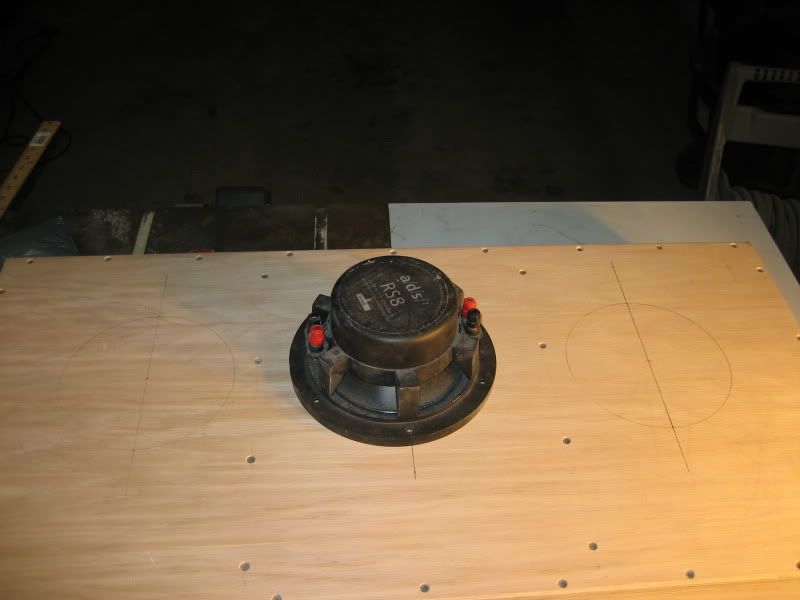
I decided to go in a straight line and to move the outside two speakers to the dividers so the 3 speakers sat a little closer together and it was more esthetically pleasing than just each speaker centered in each cavity.
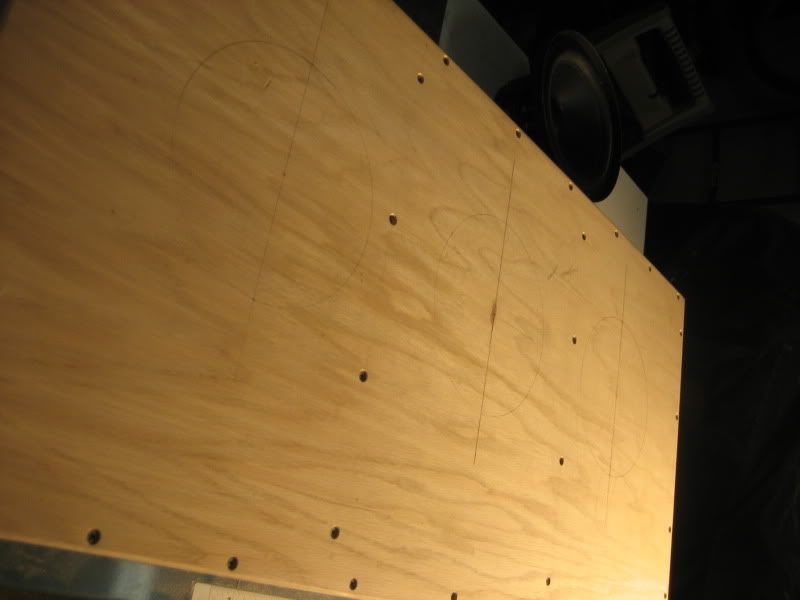
Its a little hard to see the lines but here they are drawn out with center marks:
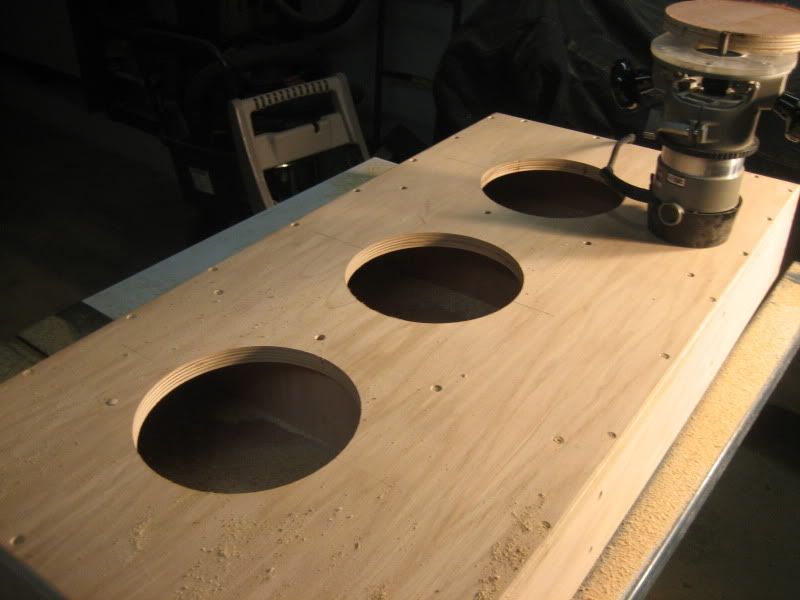
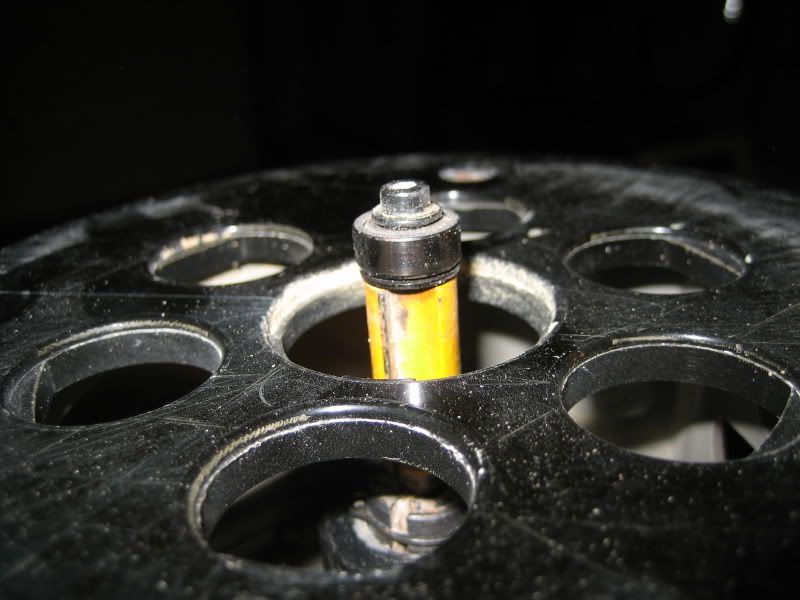
Next, grab my router with a trimming bit and my circle gig. I place the outer edge on the diameter of the circle and check to see if I have a hole already in the jig (which I know I do because I had these in another car before :
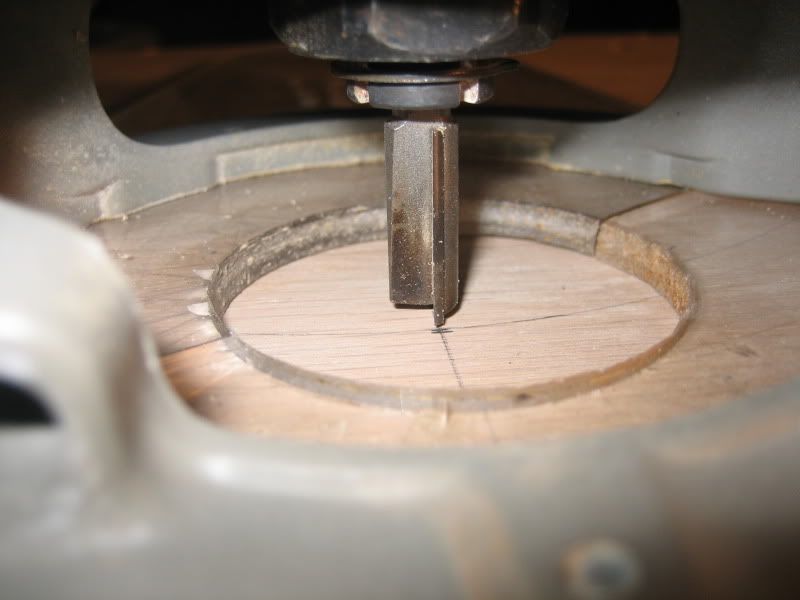
Put a screw through that hole to hole the center position:
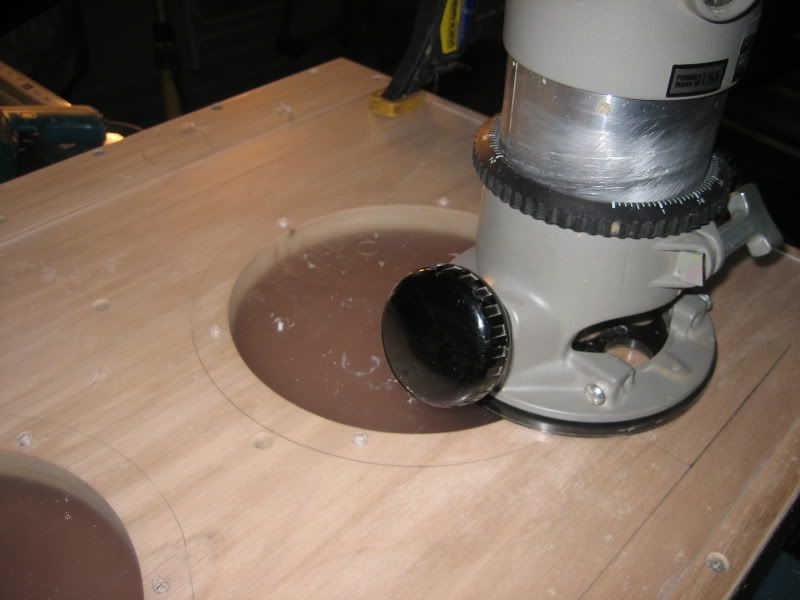
Turn router on and spiiiiiiiiiin, doing 3 passes lowing the depth each time:

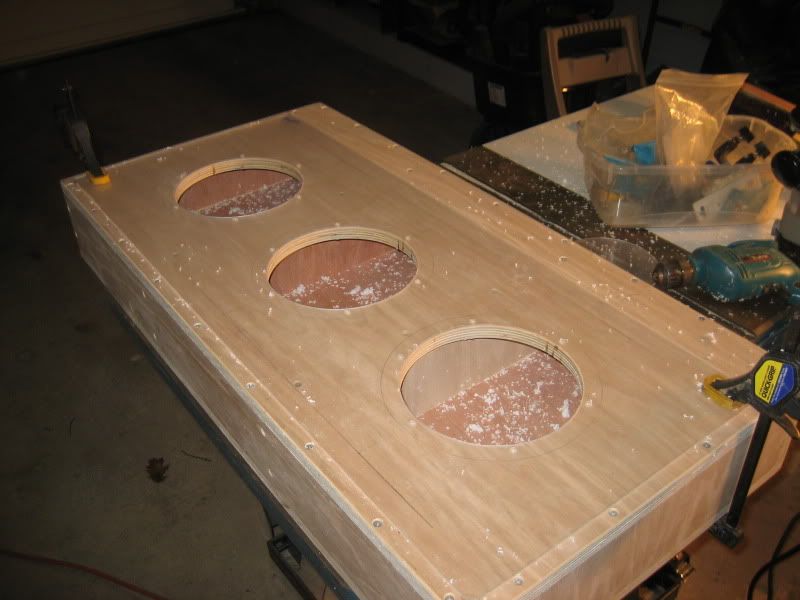
holes cut:
...just as I was finished and had removed my circle jig and placed it on the edge of the table saw/workbench I heard a cracking sound and something hit the floor:
I'll have to make another one for when I build the box for the 12's
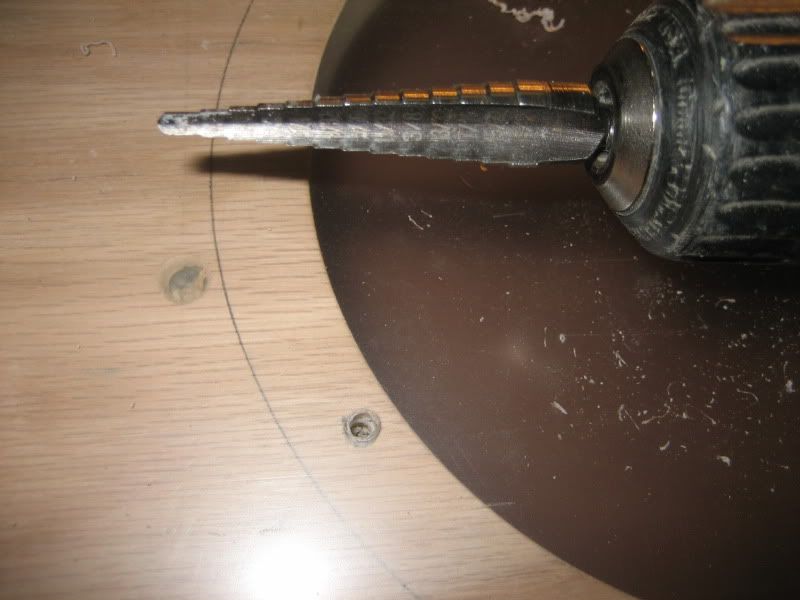
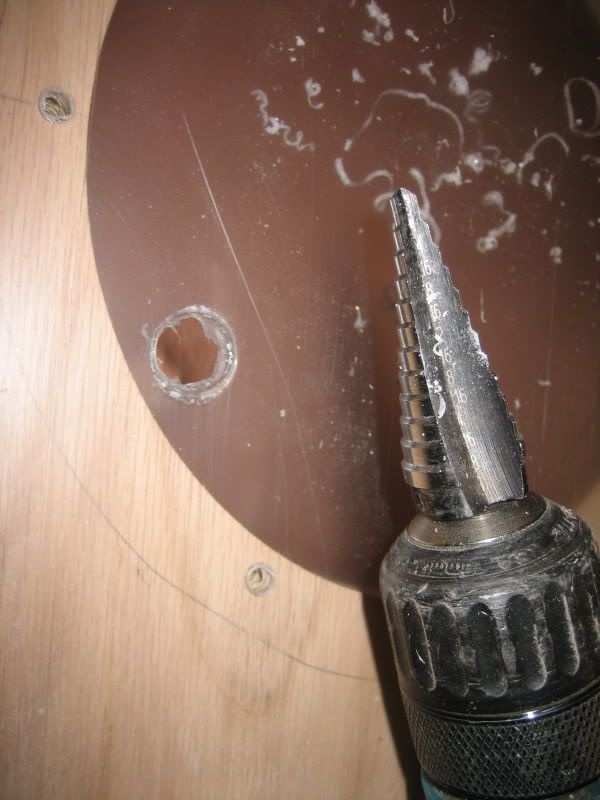
Back to the holes. when you go through the last layer of cutting the disk (aka your center point) breaks free so your left with a nipple on the bottom edge of your hole at one spot:
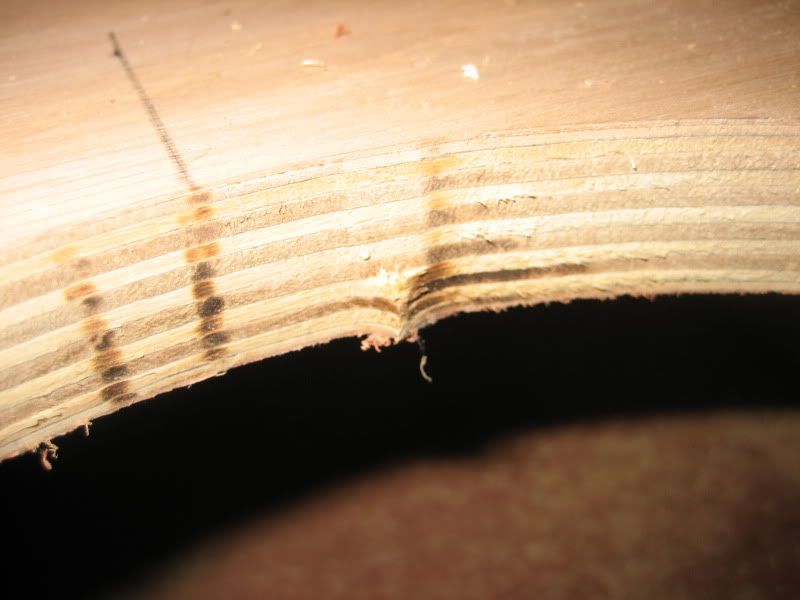
a quick change to a different bit cleans this up quick:
No after picture because its just smooth
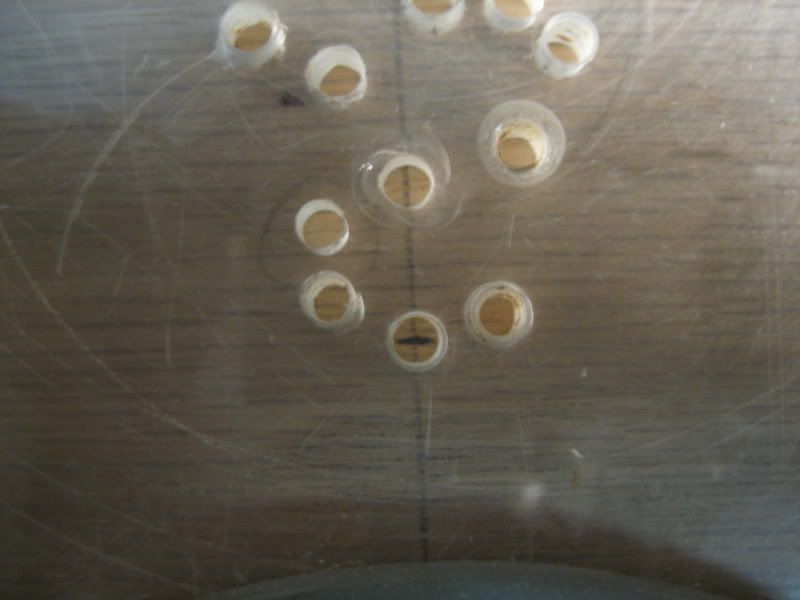
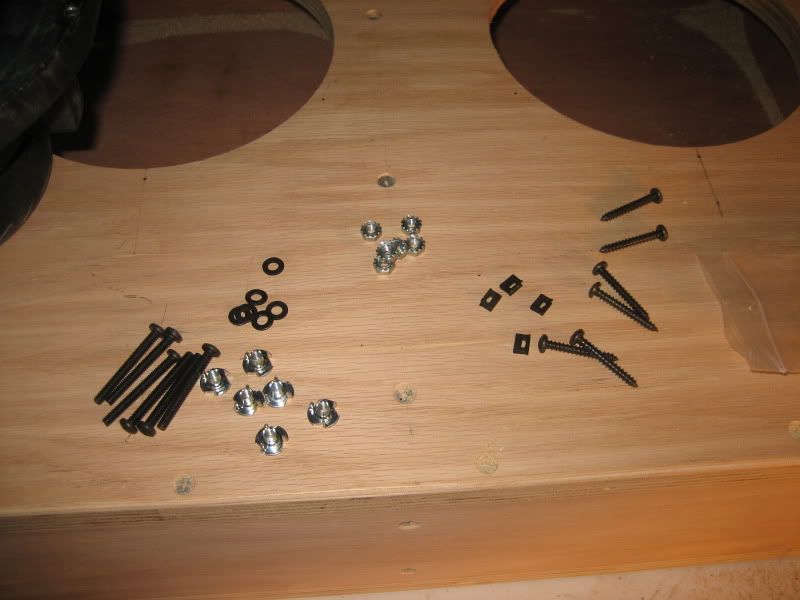
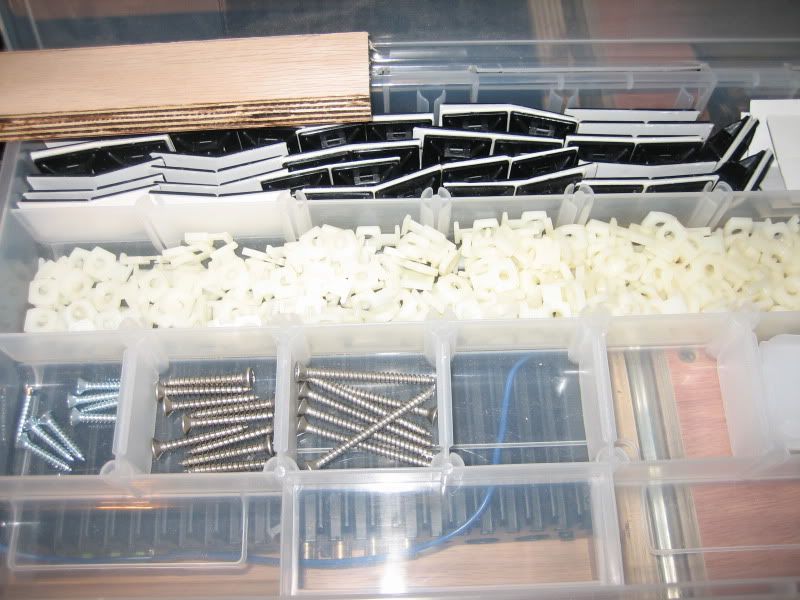
Now for the mounting hardware. I have to say that a/d/s still impresses me to this day. I had nver noticed the little baggie in the box containing the grill because I had never used the grills before. They give you screws, bolts with nutserts, washers, and even nuts with locking washers for mounting where you have access from behind. They supply you with all the hardware you need for any type of installation. Pretty impressive so I thought I'd make note of that since you dont ever see that.
So now the tedious task of installing all these damn nutserts:
ok, the box is done for now with the exception of chalking and adding speaker cables. I'll get to that later.
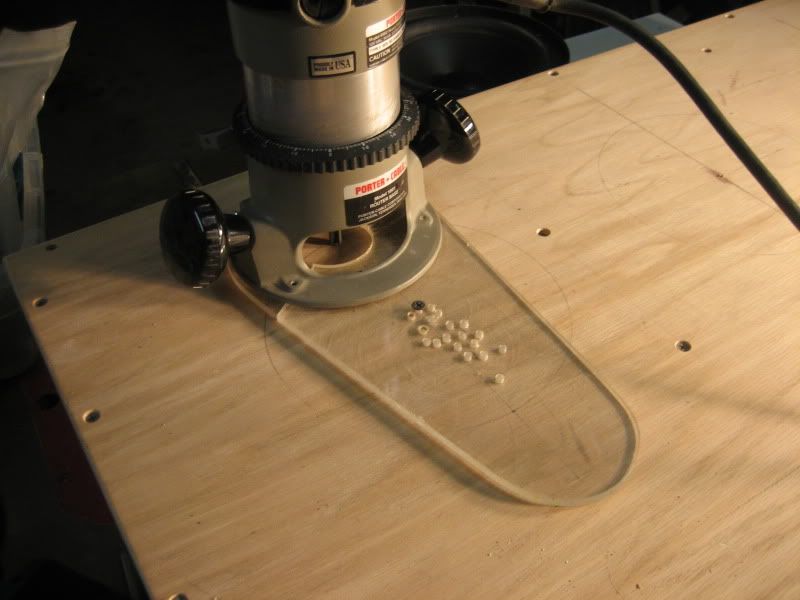
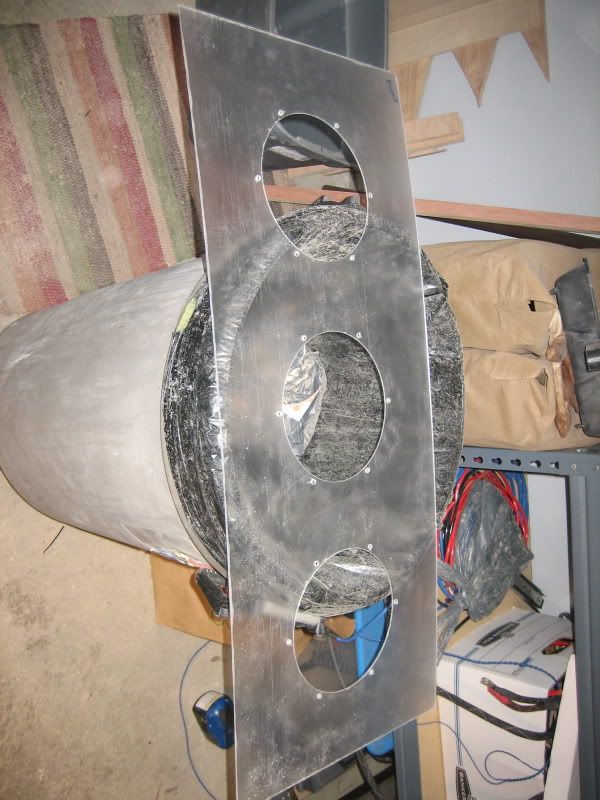
While I have the speakers out however I need to lay out for my final trim piece. A little trick that I do rather than to bondo prime and paint (because that a hell of a lotta work for a flat piece of material) is to use very thin acrylic and paint the reverse side. When its all done it will look like a painted surface. This is my trick by the way, I've never seen anyone doing this in car audio before.
So here is the preparation og the acrylic sheet that will sit on the top of the box and the speakers will sit on this:
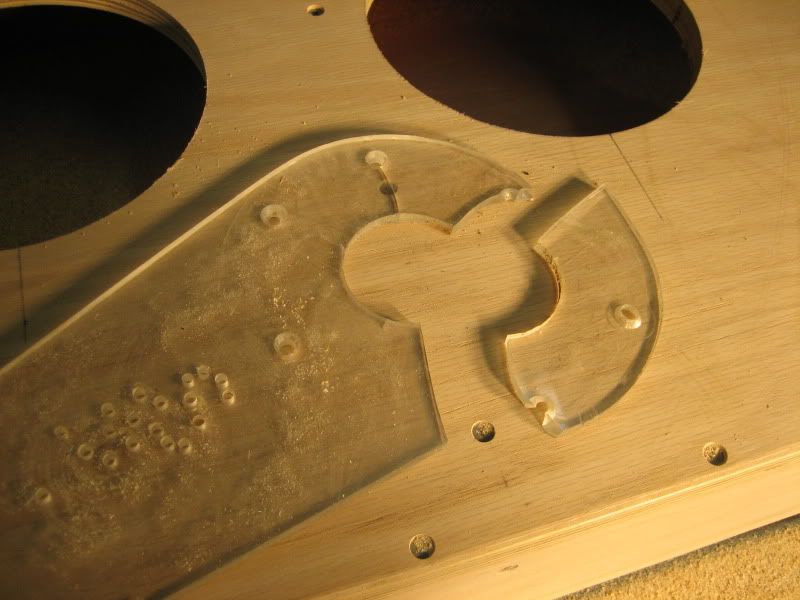
Cutting all the speaker holes:
Large hole for the router bit:
Flush cut bit:
Trim out the holes:
Almost done:
Cutting done, going to hold off on painting till later:
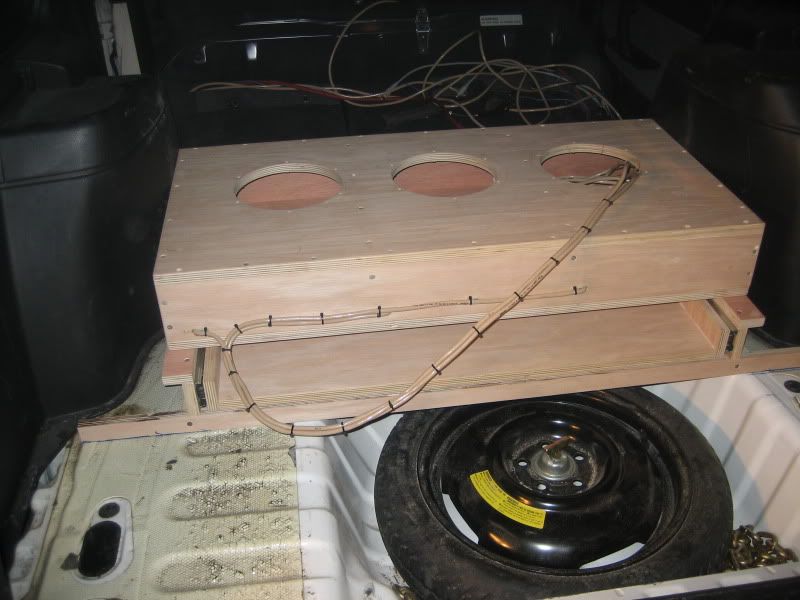
As for the layout, The amp rack is going to be under the box so I elevated the box slightly b about 2 inches to get an idea of how its going to look:

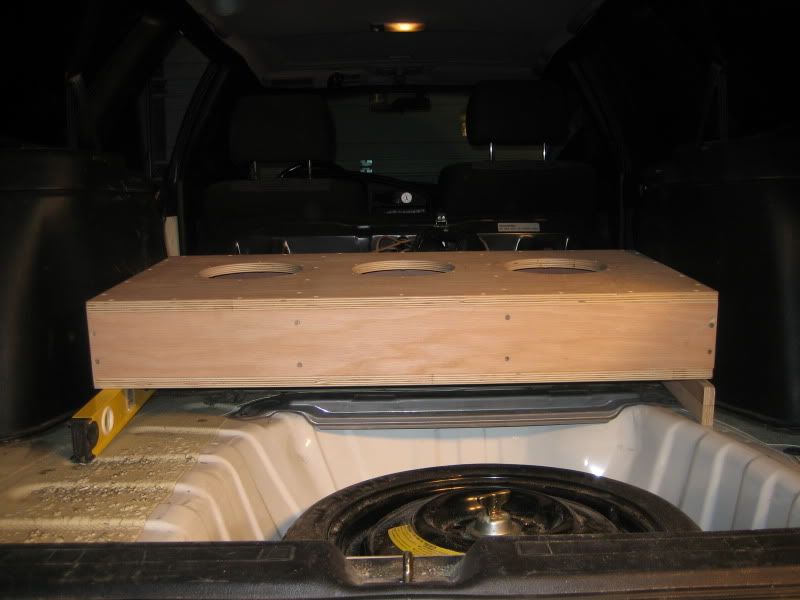
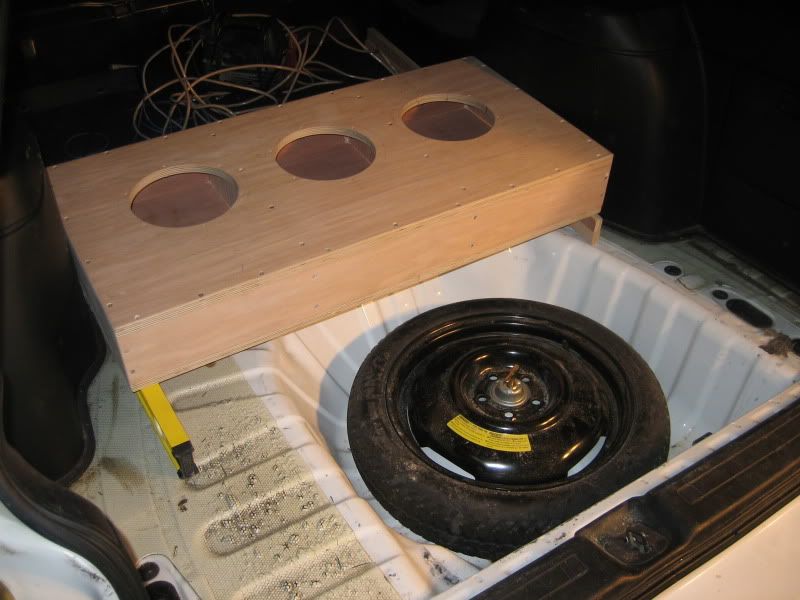
I need to spend a little time working on the design for the 2 step motorization of the amp rack. Basically the front part of the box (the part facing the front of the car) will jack itself up about 2 inches, a door will open and the amp rack will slide out from under the box onto the lowered rear seats. The amp rack will be completely hidden under the speaker box so it will be pretty cool I think.
More to come...
I grabbed one of the speakers to work out how I wanted the layout of the drivers to be:
I decided to go in a straight line and to move the outside two speakers to the dividers so the 3 speakers sat a little closer together and it was more esthetically pleasing than just each speaker centered in each cavity.
Its a little hard to see the lines but here they are drawn out with center marks:
Next, grab my router with a trimming bit and my circle gig. I place the outer edge on the diameter of the circle and check to see if I have a hole already in the jig (which I know I do because I had these in another car before
Put a screw through that hole to hole the center position:
Turn router on and spiiiiiiiiiin, doing 3 passes lowing the depth each time:
holes cut:
...just as I was finished and had removed my circle jig and placed it on the edge of the table saw/workbench I heard a cracking sound and something hit the floor:
I'll have to make another one for when I build the box for the 12's
Back to the holes. when you go through the last layer of cutting the disk (aka your center point) breaks free so your left with a nipple on the bottom edge of your hole at one spot:
a quick change to a different bit cleans this up quick:
No after picture because its just smooth
Now for the mounting hardware. I have to say that a/d/s still impresses me to this day. I had nver noticed the little baggie in the box containing the grill because I had never used the grills before. They give you screws, bolts with nutserts, washers, and even nuts with locking washers for mounting where you have access from behind. They supply you with all the hardware you need for any type of installation. Pretty impressive so I thought I'd make note of that since you dont ever see that.
So now the tedious task of installing all these damn nutserts:
ok, the box is done for now with the exception of chalking and adding speaker cables. I'll get to that later.
While I have the speakers out however I need to lay out for my final trim piece. A little trick that I do rather than to bondo prime and paint (because that a hell of a lotta work for a flat piece of material) is to use very thin acrylic and paint the reverse side. When its all done it will look like a painted surface. This is my trick by the way, I've never seen anyone doing this in car audio before.
So here is the preparation og the acrylic sheet that will sit on the top of the box and the speakers will sit on this:
Cutting all the speaker holes:
Large hole for the router bit:
Flush cut bit:
Trim out the holes:
Almost done:
Cutting done, going to hold off on painting till later:
As for the layout, The amp rack is going to be under the box so I elevated the box slightly b about 2 inches to get an idea of how its going to look:
I need to spend a little time working on the design for the 2 step motorization of the amp rack. Basically the front part of the box (the part facing the front of the car) will jack itself up about 2 inches, a door will open and the amp rack will slide out from under the box onto the lowered rear seats. The amp rack will be completely hidden under the speaker box so it will be pretty cool I think.
More to come...
-Mike
2011 Infiniti G37x Sedan - Current
2007 Ducati 800ss - Current
1994 Subaru Legacy Sport Wagon (White)
1994 Subaru Legacy Sport Wagon (Silver)
2003 Infiniri G35
1998 Infiniti I30t
1995 Honda Civic DX
1987 Subaru GL Wagon
1987 Subaru Loyale
2011 Infiniti G37x Sedan - Current
2007 Ducati 800ss - Current
1994 Subaru Legacy Sport Wagon (White)
1994 Subaru Legacy Sport Wagon (Silver)
2003 Infiniri G35
1998 Infiniti I30t
1995 Honda Civic DX
1987 Subaru GL Wagon
1987 Subaru Loyale
Re: Stereo system build thread
You should make the tray for your amps with a linear drive mechanism.Use the thread rod and block out of the factory jack...to keep it all subaru. 
94SS.Wiseco forged pistons,TD04,TMIC,WALBRO 225,440's,3" all the way,revtronix stage 2,enough other crap to fill the internet.
THE TRIBUTE BUILD>>>LINKY LINK>>> http://bbs.legacycentral.org/viewtopic.php?p=295455#295455
THE TRIBUTE BUILD>>>LINKY LINK>>> http://bbs.legacycentral.org/viewtopic.php?p=295455#295455
Re: Stereo system build thread
lol that would be funnygijonas wrote:You should make the tray for your amps with a linear drive mechanism.Use the thread rod and block out of the factory jack...to keep it all subaru.
-Mike
2011 Infiniti G37x Sedan - Current
2007 Ducati 800ss - Current
1994 Subaru Legacy Sport Wagon (White)
1994 Subaru Legacy Sport Wagon (Silver)
2003 Infiniri G35
1998 Infiniti I30t
1995 Honda Civic DX
1987 Subaru GL Wagon
1987 Subaru Loyale
2011 Infiniti G37x Sedan - Current
2007 Ducati 800ss - Current
1994 Subaru Legacy Sport Wagon (White)
1994 Subaru Legacy Sport Wagon (Silver)
2003 Infiniri G35
1998 Infiniti I30t
1995 Honda Civic DX
1987 Subaru GL Wagon
1987 Subaru Loyale
-
evolutionmovement
- Knowledgeable
- Posts: 9809
- Joined: Mon Jun 16, 2003 11:20 pm
- Location: Beverly, MA
Re: Stereo system build thread
Mike, if you want clear material for the circle jig, you might want to try polycarbonate as it doesn't shatter. Also easier to machine and cut.
That looks really good. Did you get the idea to paint the acrylic cover from R/C cars?
Great idea about the linear drive and would be cheaper than buying a screw, too.
That looks really good. Did you get the idea to paint the acrylic cover from R/C cars?
Great idea about the linear drive and would be cheaper than buying a screw, too.
Midnight in a Perfect World on Amazon or order anywhere. The first book in a quartet chronicling the rise of a man from angry criminal to philanthropist. Midnight... is a distopic noirish novel featuring 'Duchess', a modified 1990 Subaru Legacy wagon.
Re: Stereo system build thread
I'm just going to see how much they cost now. Might just pick one up for 20 bucks rather than go through the trouble of making another one but I'll definately look into the poly if I do make one myself, thanks!evolutionmovement wrote:Mike, if you want clear material for the circle jig, you might want to try polycarbonate as it doesn't shatter. Also easier to machine and cut.
Thanks, I only did this a few other times on systems, before doing this I used to vinyl wrap everything but I'm not going for that look now. As for the idea maybe it was from my rc days but I think I recall people color matching truck hood lip protectors by painting them on the inside so maybe thats where I thought if it.evolutionmovement wrote:That looks really good. Did you get the idea to paint the acrylic cover from R/C cars?
I'm not claiming to have invented painting plastic from the inside but what I'm saying is that I've never seen it in car audio
-Mike
2011 Infiniti G37x Sedan - Current
2007 Ducati 800ss - Current
1994 Subaru Legacy Sport Wagon (White)
1994 Subaru Legacy Sport Wagon (Silver)
2003 Infiniri G35
1998 Infiniti I30t
1995 Honda Civic DX
1987 Subaru GL Wagon
1987 Subaru Loyale
2011 Infiniti G37x Sedan - Current
2007 Ducati 800ss - Current
1994 Subaru Legacy Sport Wagon (White)
1994 Subaru Legacy Sport Wagon (Silver)
2003 Infiniri G35
1998 Infiniti I30t
1995 Honda Civic DX
1987 Subaru GL Wagon
1987 Subaru Loyale
Re: Stereo system build thread
magicmike wrote:I know what you are saying here but you are a little off so let me correct you (with all due respect
Mike,
I was making the assumption the THD increased when bridged, since on most lower quality amps it does. However it doesn't, by all means, use the extra power.
Josh
surrealmirage.com/subaru
1990 Legacy (AWD, 6MT, & EJ22T Swap)
2020 Outback Limted XT
If you need to get a hold of me please email me rather then pm
surrealmirage.com/subaru
1990 Legacy (AWD, 6MT, & EJ22T Swap)
2020 Outback Limted XT
If you need to get a hold of me please email me rather then pm
Re: Stereo system build thread
Mike,
Also, is the acrylic sheet sunk into the face of the box? One of the pictures look like the acrylic doesn't cover the entire front surface of the box....maybe it was just the picture.
Also, is the acrylic sheet sunk into the face of the box? One of the pictures look like the acrylic doesn't cover the entire front surface of the box....maybe it was just the picture.
Josh
surrealmirage.com/subaru
1990 Legacy (AWD, 6MT, & EJ22T Swap)
2020 Outback Limted XT
If you need to get a hold of me please email me rather then pm
surrealmirage.com/subaru
1990 Legacy (AWD, 6MT, & EJ22T Swap)
2020 Outback Limted XT
If you need to get a hold of me please email me rather then pm
Re: Stereo system build thread
No its not sunken in. its 1/8 inch thick and will eventually have another cover over that with a cutout for the drivers later. It might be hard to imagine now because I'm taking photos as I go so you are seeing things which will require future processes in the future before its complete. Stay tuned...Legacy777 wrote:Mike,
Also, is the acrylic sheet sunk into the face of the box? One of the pictures look like the acrylic doesn't cover the entire front surface of the box....maybe it was just the picture.
-Mike
2011 Infiniti G37x Sedan - Current
2007 Ducati 800ss - Current
1994 Subaru Legacy Sport Wagon (White)
1994 Subaru Legacy Sport Wagon (Silver)
2003 Infiniri G35
1998 Infiniti I30t
1995 Honda Civic DX
1987 Subaru GL Wagon
1987 Subaru Loyale
2011 Infiniti G37x Sedan - Current
2007 Ducati 800ss - Current
1994 Subaru Legacy Sport Wagon (White)
1994 Subaru Legacy Sport Wagon (Silver)
2003 Infiniri G35
1998 Infiniti I30t
1995 Honda Civic DX
1987 Subaru GL Wagon
1987 Subaru Loyale
Re: Stereo system build thread
OK had all last week off for the holidays and got a lot of work done on the system. I was hoping to have sound going before I came back to work but I got a bit carried away with the wiring and ended up reverting back to my OCD ways... I did get the amp rack completely built (minus trim panels and motorization), the box wired (minus the midbases) and the crossovers and caps installed.
Here are the pics with descriptions. Hit me up with any questions
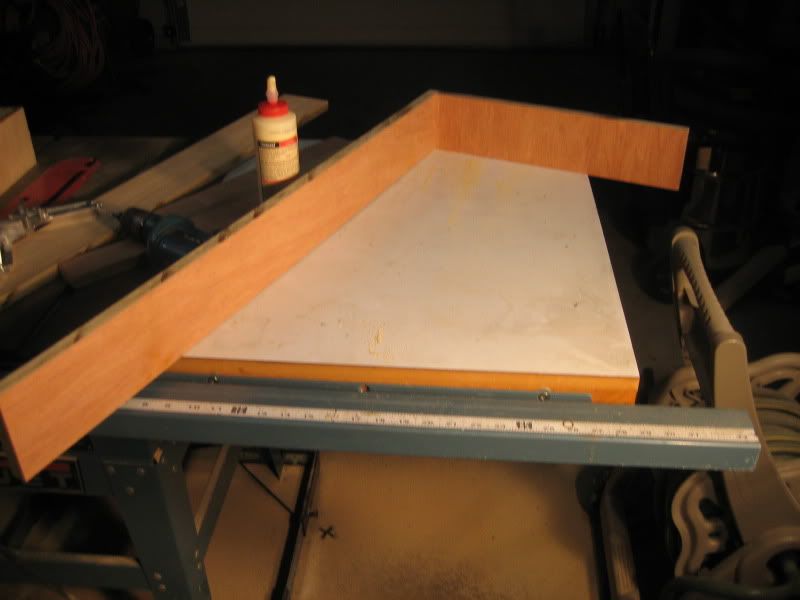
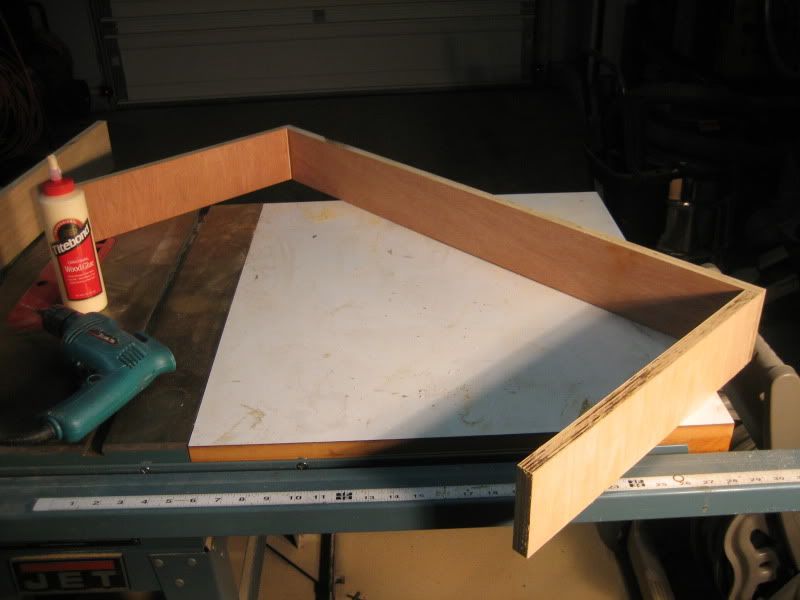
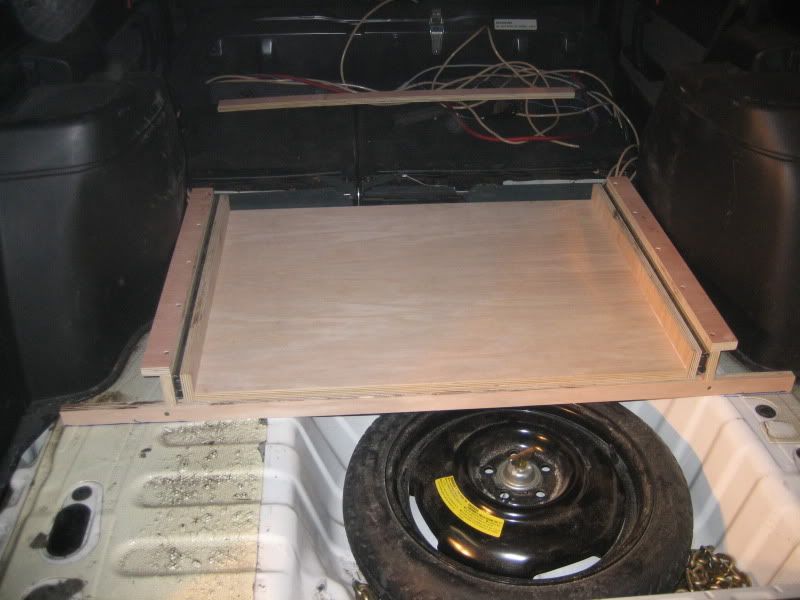
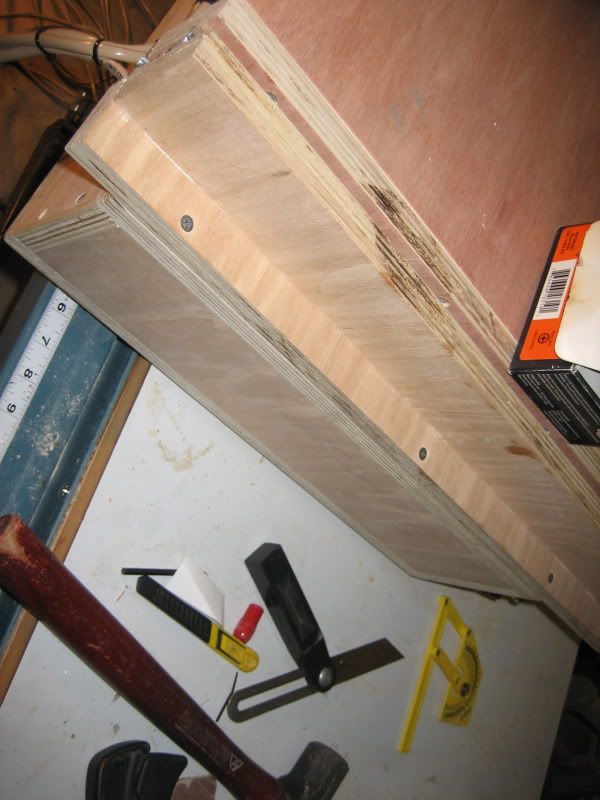
ok, after designing the amp rack I took all the dims and cut up some 3/4" plywood.
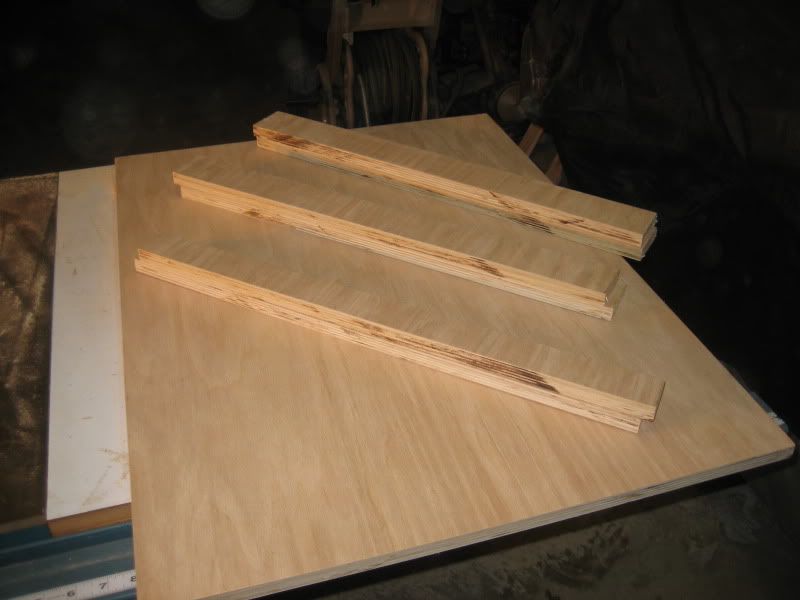
Glued and screwed the side pieces to the main piece where the amps will be mounted. The main section is only a bottom and 2 sides.
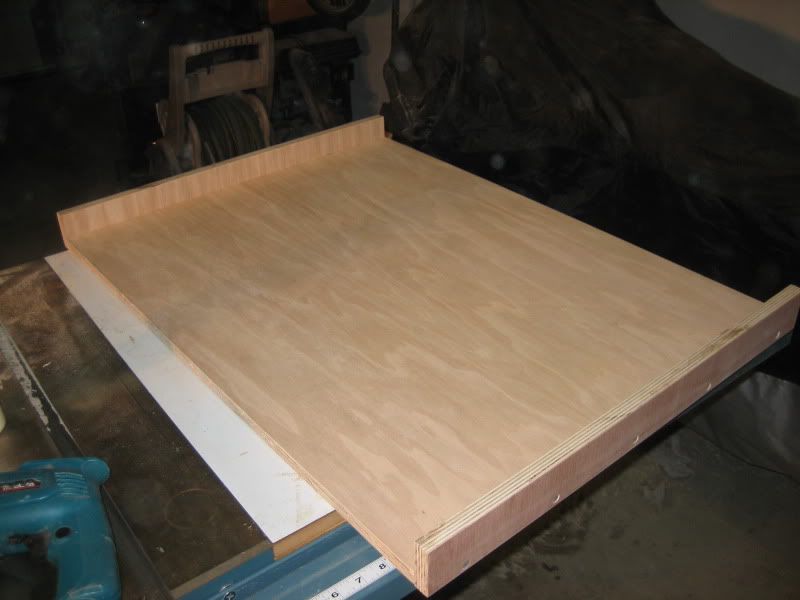
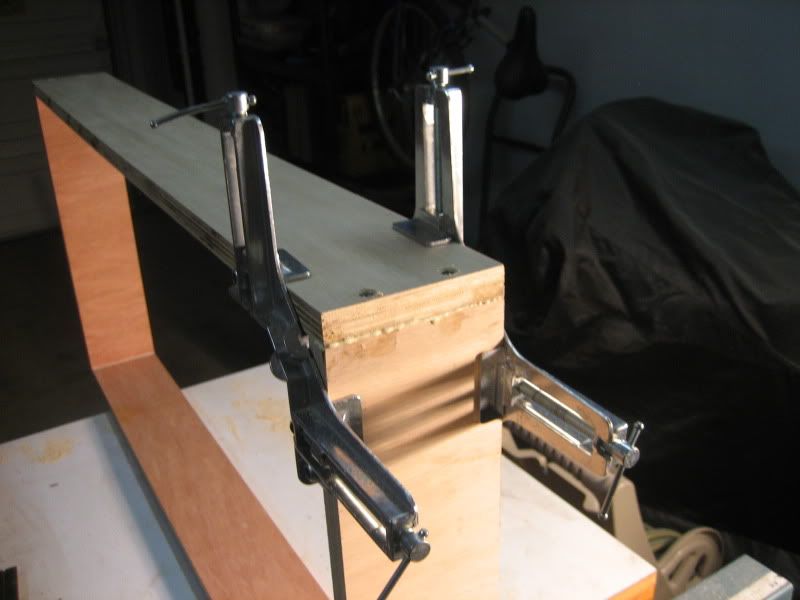
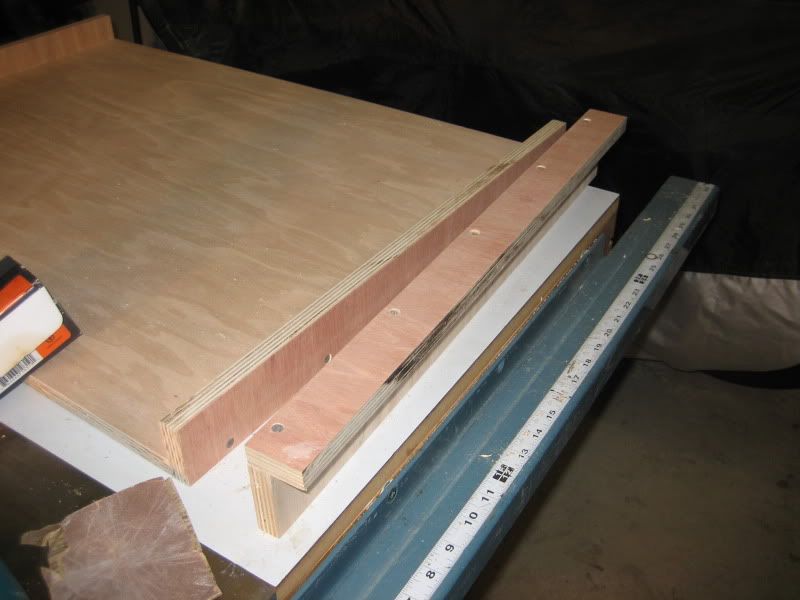
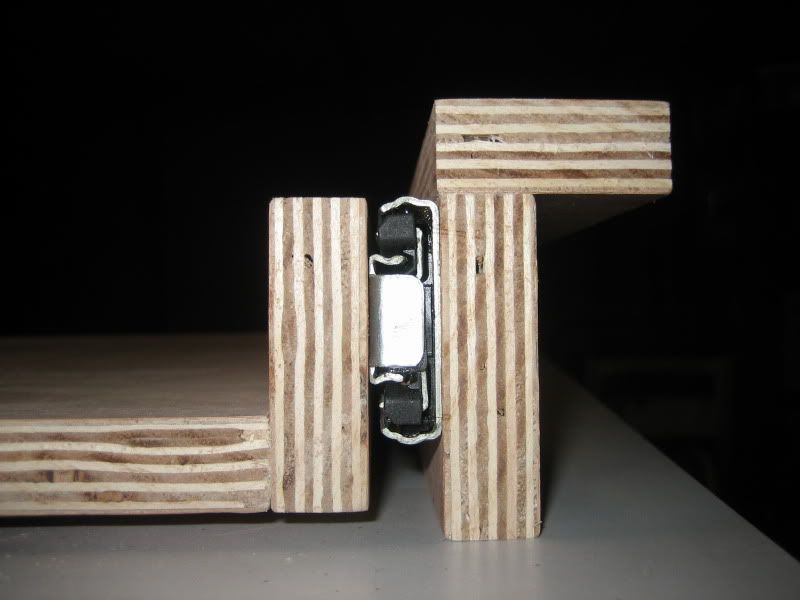
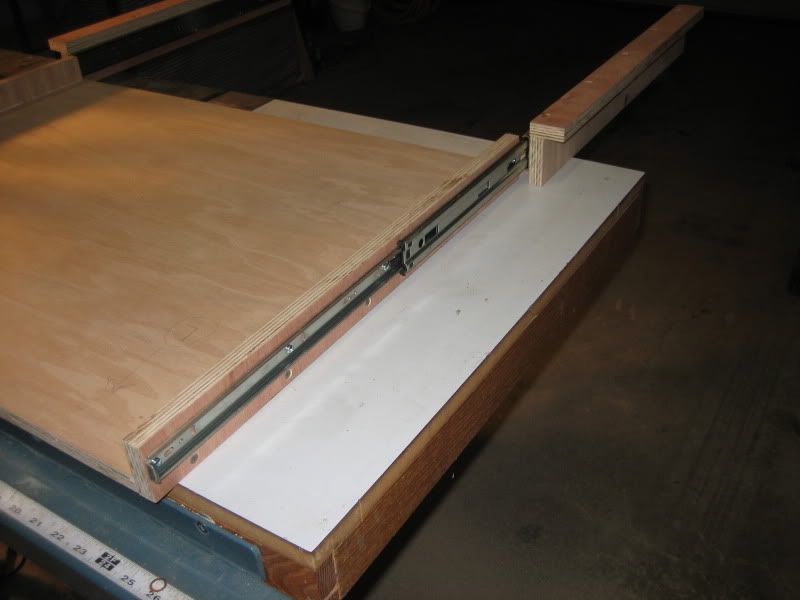
Then I made up the two supports for the drawer slides that also mount the rack to the box later.
Minus the drawer slides
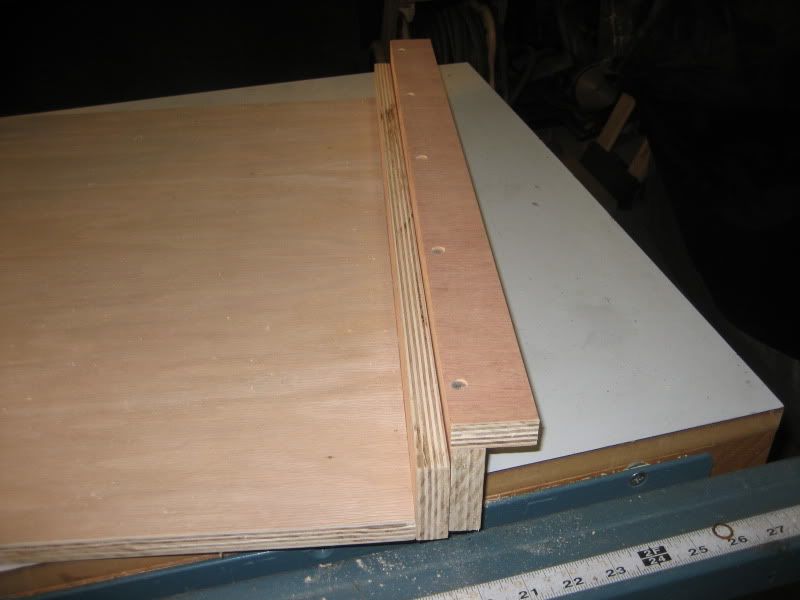
Plus the drawer slides
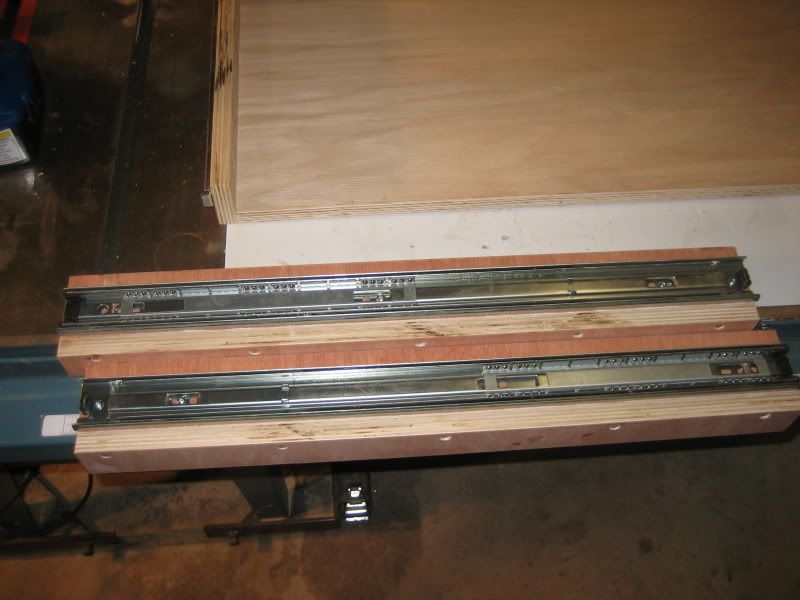
All mounted, giving extatly 1/4" above and 1/4" below the rack for travel.
Retracted:
Extended:
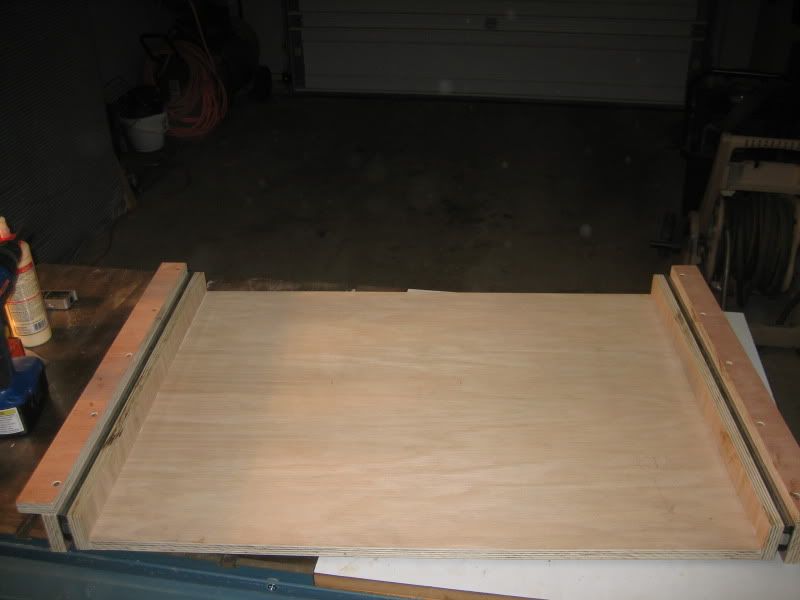
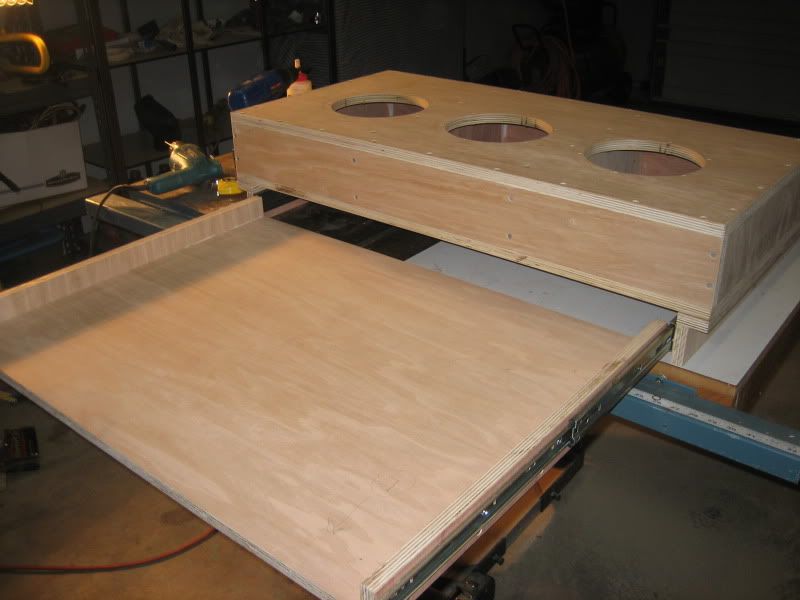
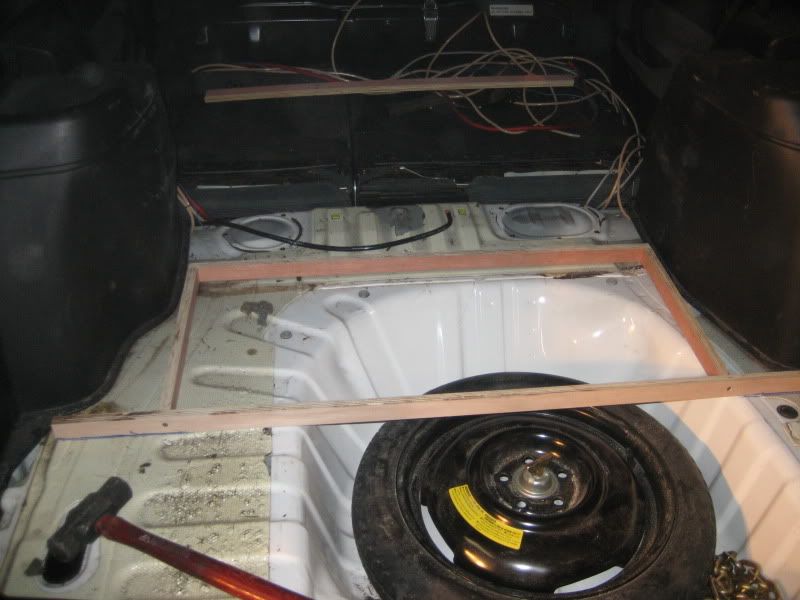
ok, just laying out how the box will sit on the rack:
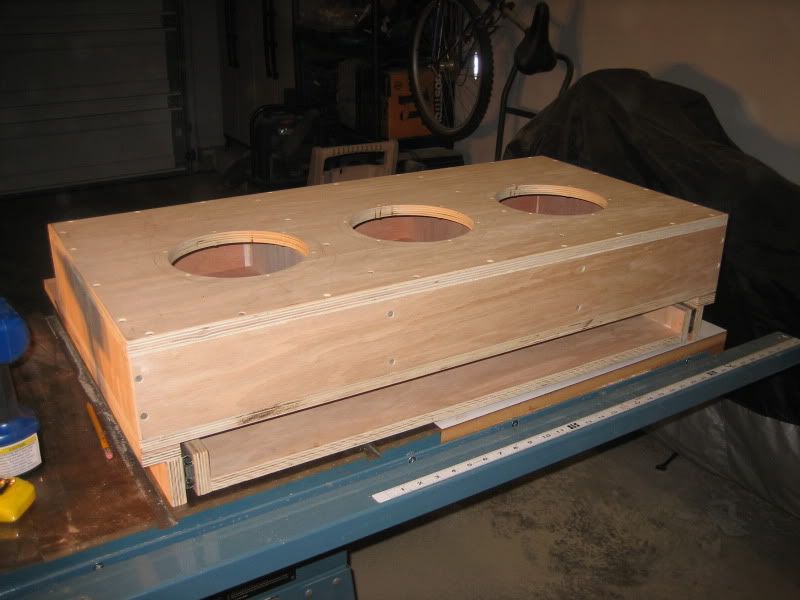
Rack sliding out:
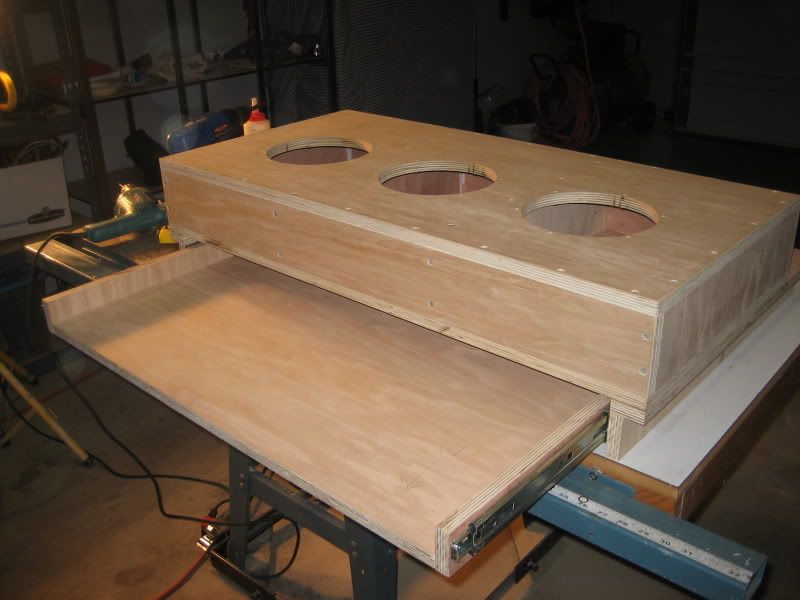
Fully extended (24" by the way )
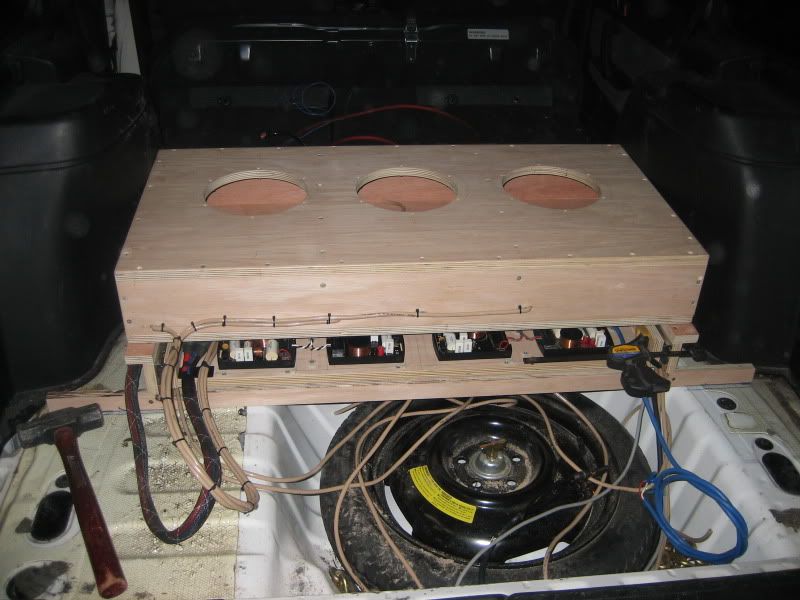
OK, now I go to install this thing in the hatch space and much to my chagrin I see that the forward edge of the floor is raised by a little over an inch so the bottom of the rack was hitting. I had to make up a 1.25" spacer to raise the whole thing and keep it level to the floor:
Rack installed on the spacer:
Box temporarily installed on rack:
I was toying with placing the x-overs here but then changed my mind and installed them on the sliding rack instead:
Oh yes, I wired the mid bass box:
OK onto the amp rack wiring Oy Vey! Go grab a beer if you dont already have one
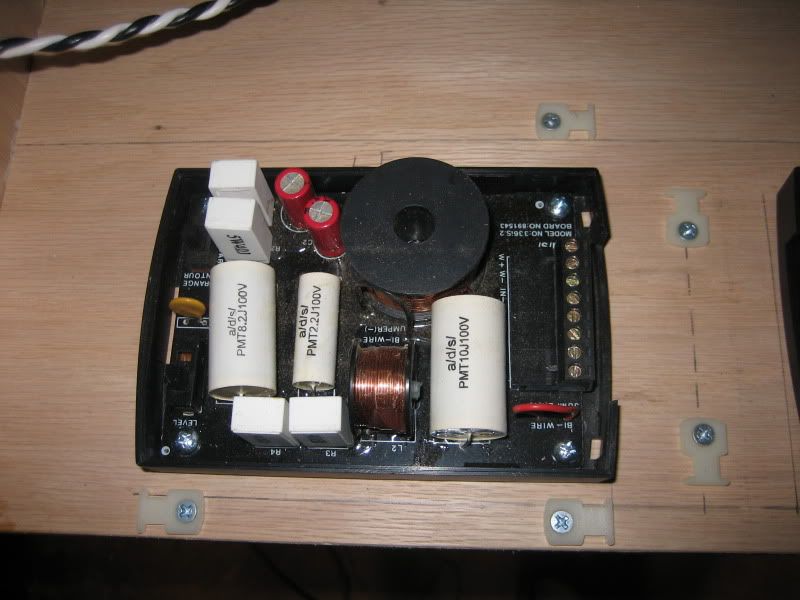
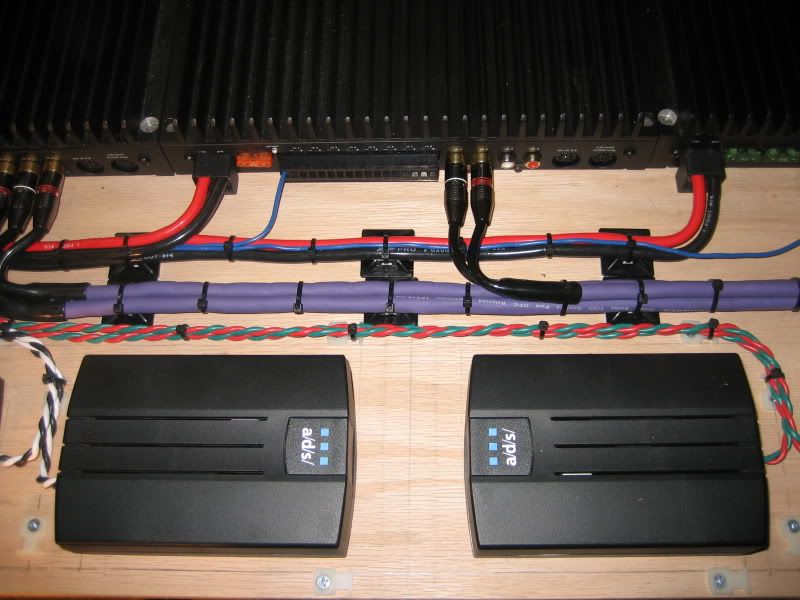
After much deliberation (with myself), I decided to stick the x-overs here:
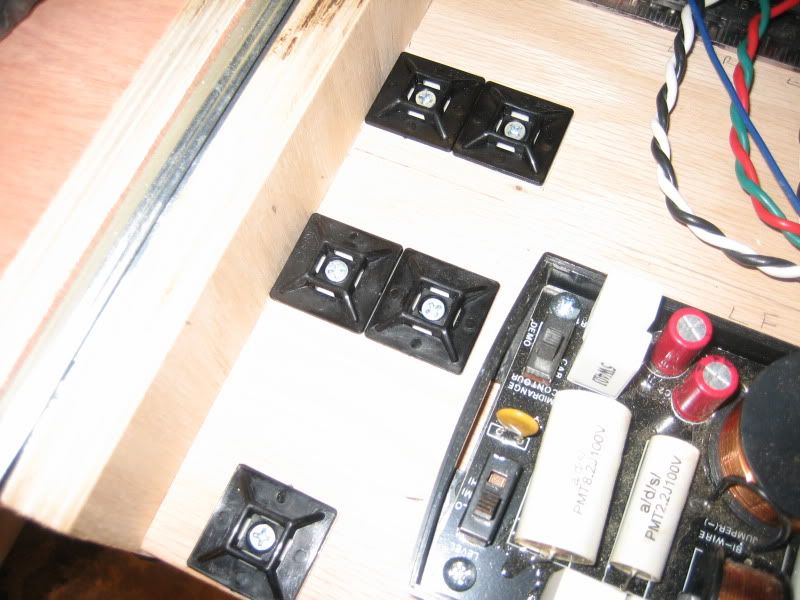
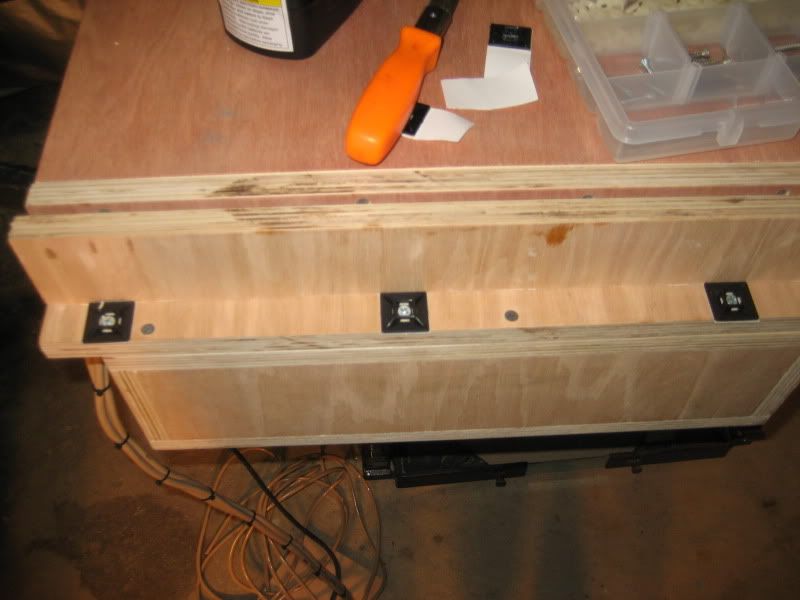
Grabbed my trusty wiring anchors:
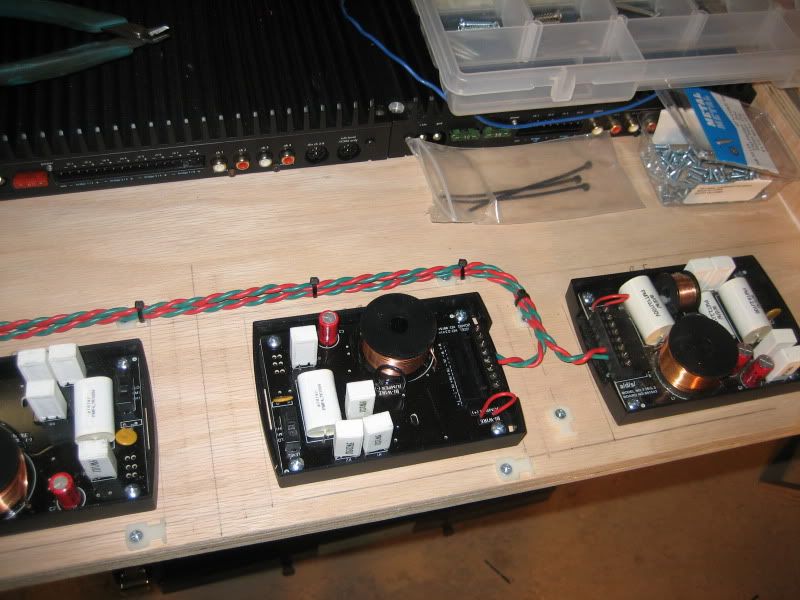
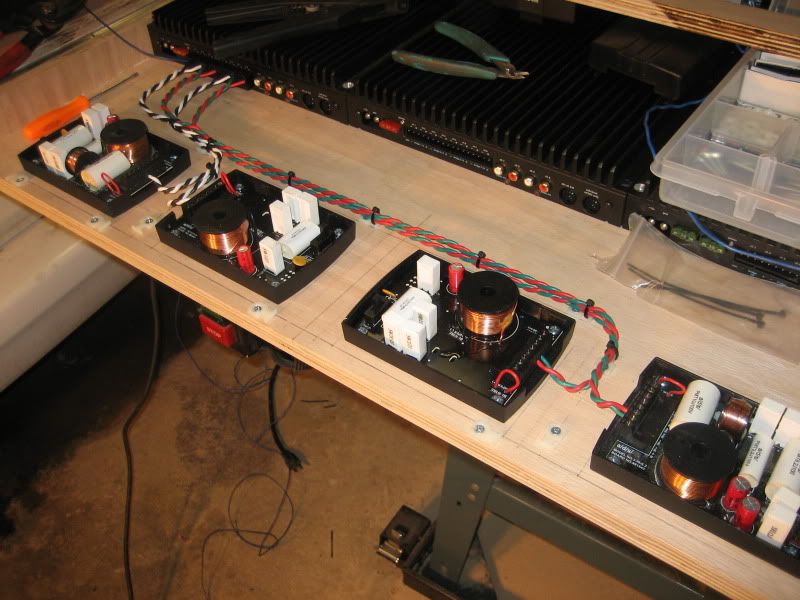
Screwed the x-overs down after measuring out the spacing so they are all 2 inched apart:
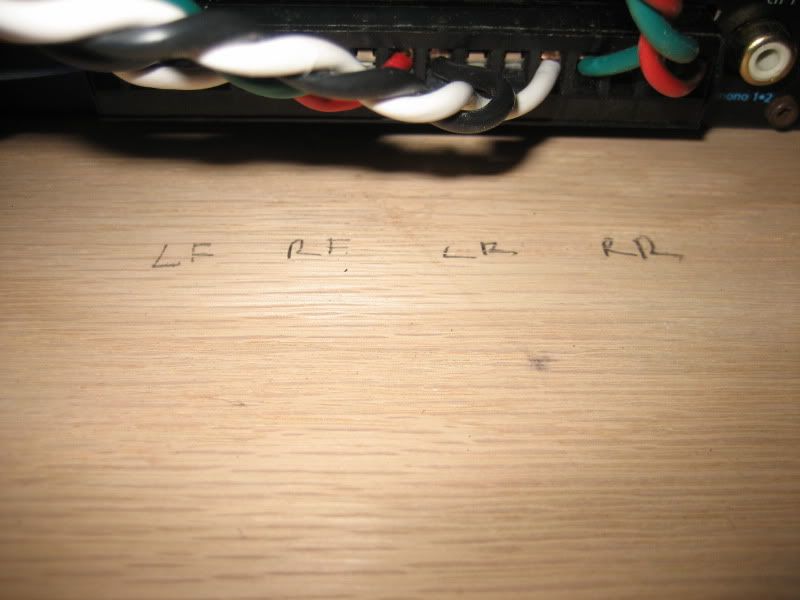
Careful marking so I didn't get screwed up with what goes to where
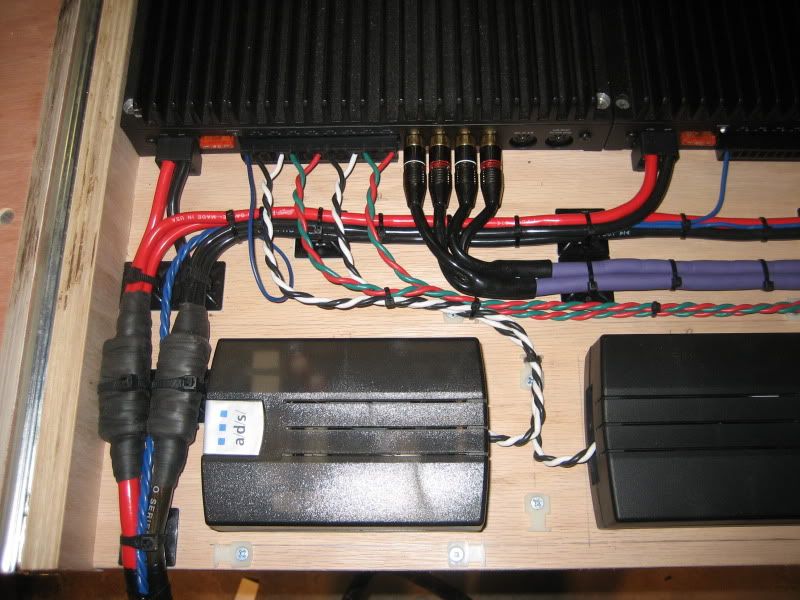
Wiring:
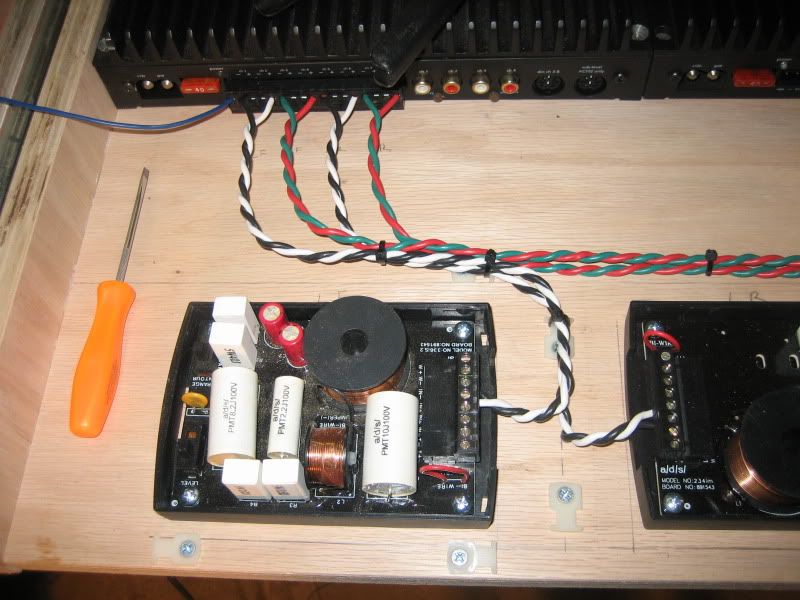
inputs done:
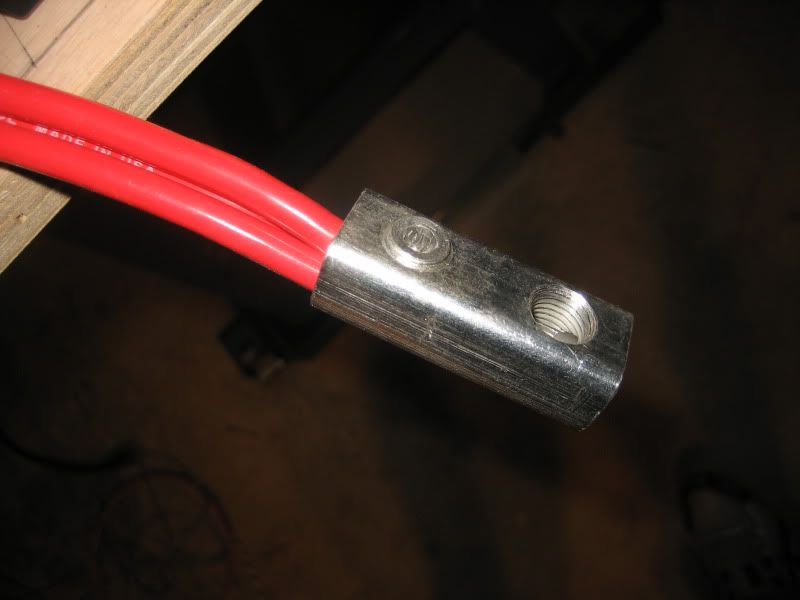
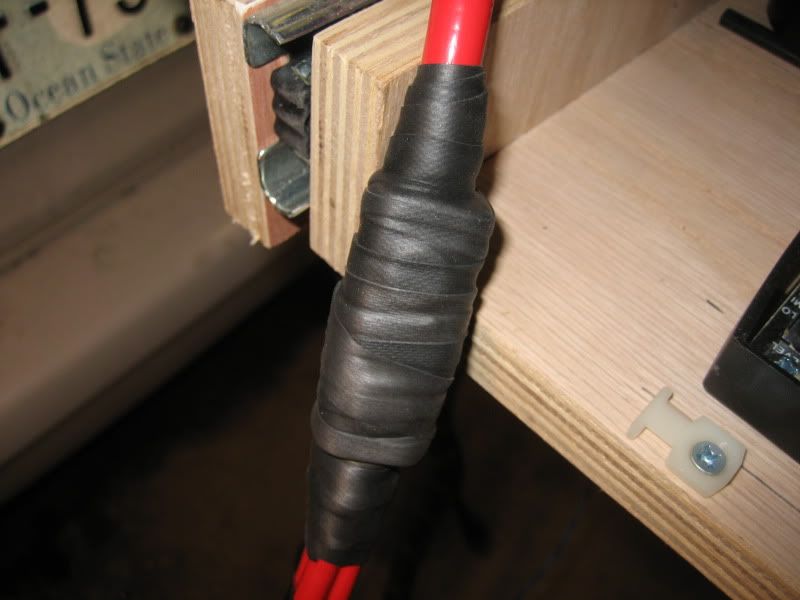
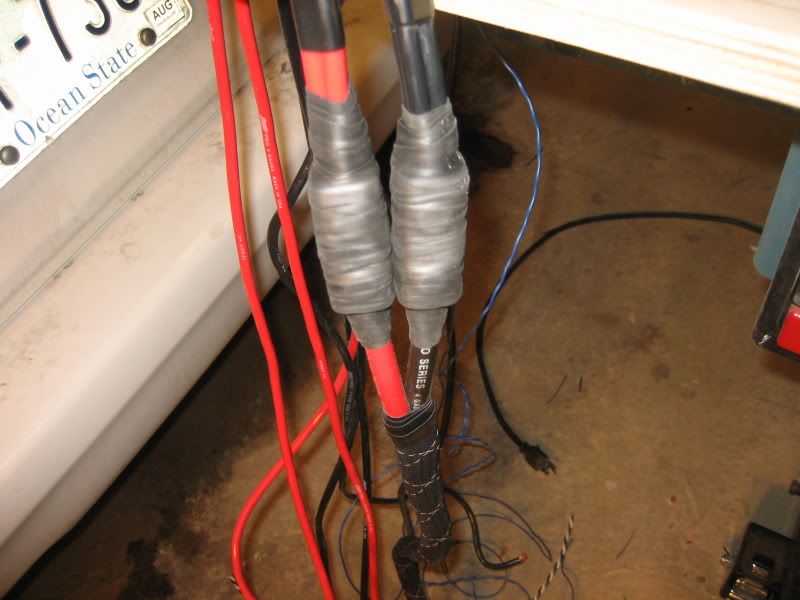
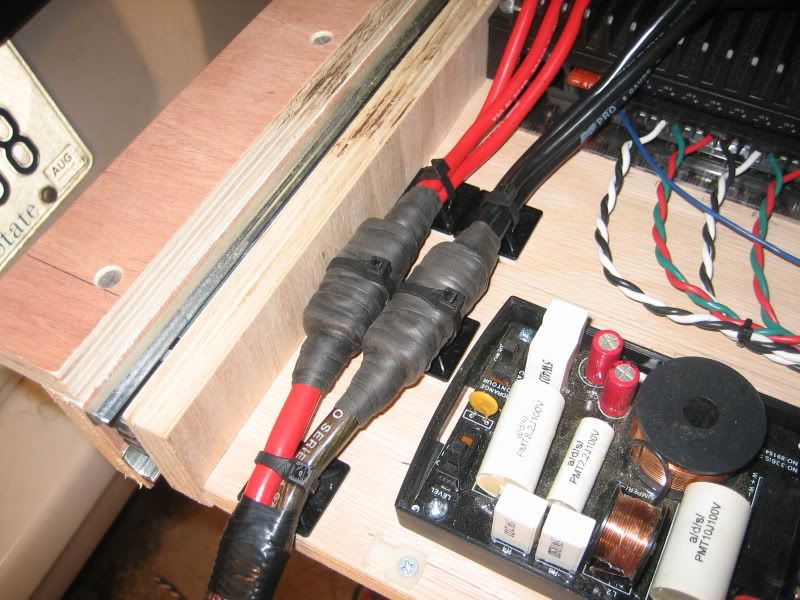
OK onto the main power and ground. The amps take a 8AWG input so I got some wire splicing block things from Lowes so I could take a 4AWG to three 8AWG wires:
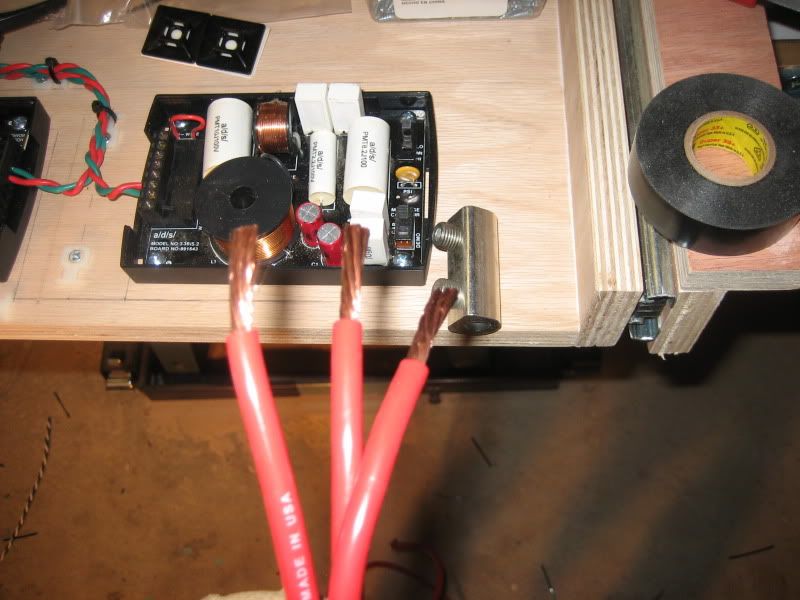
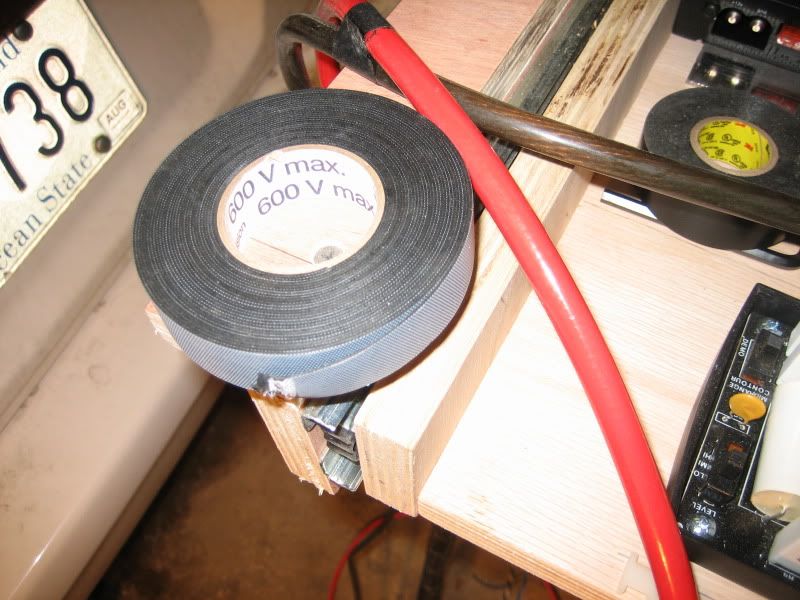
This is Splicing Compound. It basically bonds to istelf after applied and creates a sheath similar to heat shrink tubing:
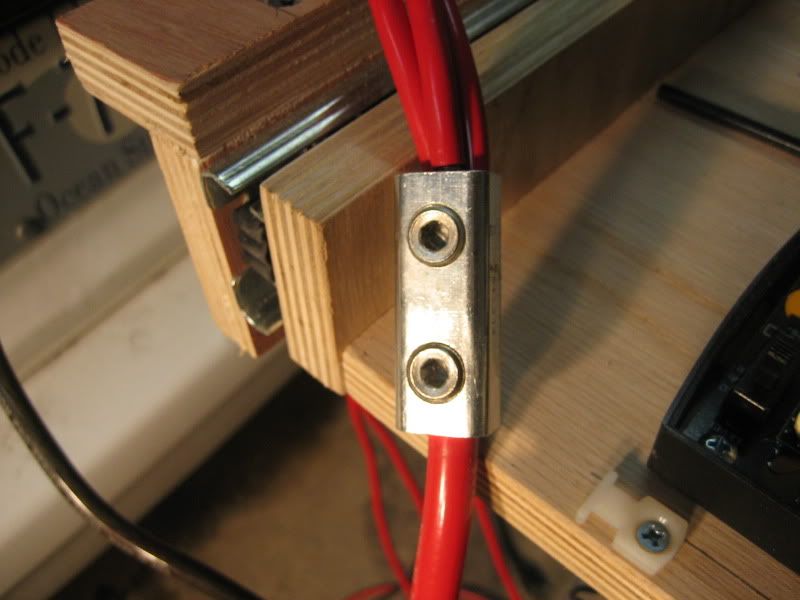
Power done:
Ground Done:
Installed the Tie downs:
Wire ties ready
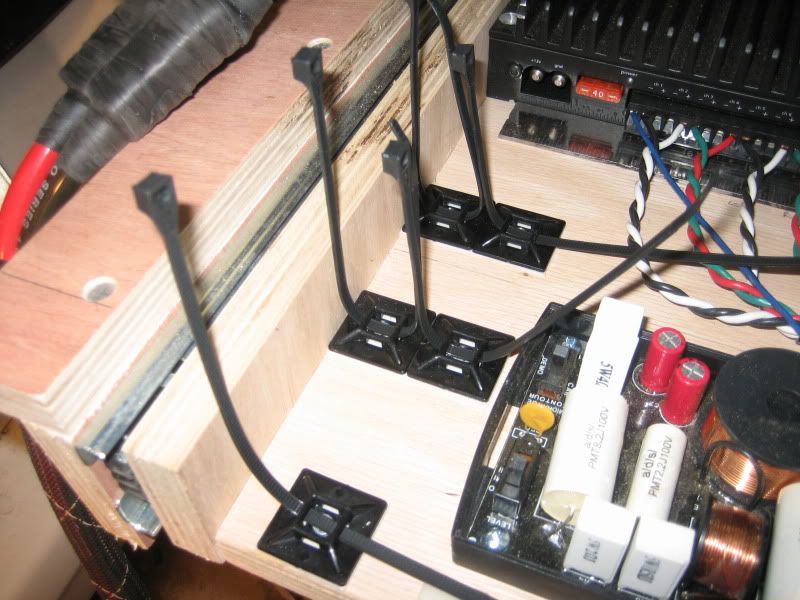
Done:
I realized I didn't take any pictures of the 8AWG routing but you will see that in the next series of pics
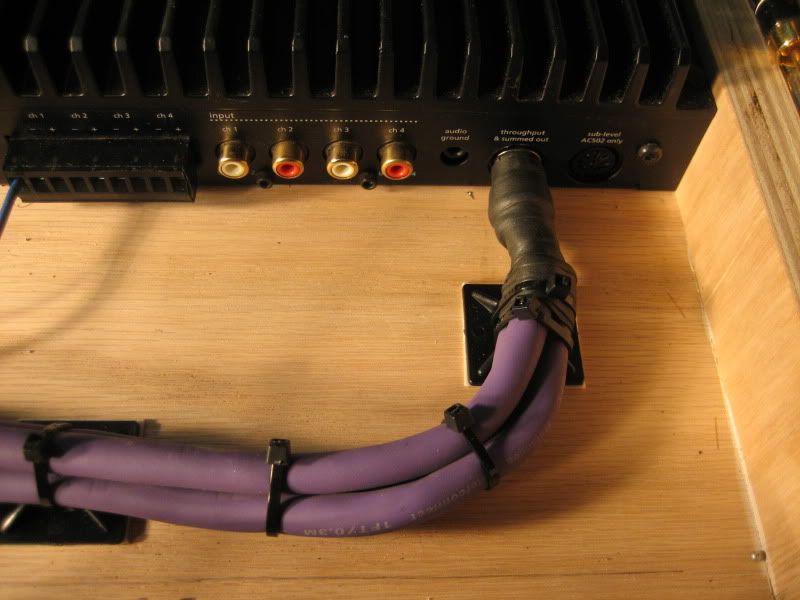
OK for my next dilemma the signal cables. Now I have 3 amps that need all four signals, thats left front right front left rear and right rear. I need the amps to get the following signals:
P840 running separates: 4 channel mode 4 signals needed for left front right front left rear and right rear for proper balance and fade
P840 running mid basses: 4 channel mode (only using 3 though ), Here I need a bridged or summed input so the midbasses wont degrade when the fader is used.
P4100 running woofers (later): 2 channel mode also need summed input due to fading abilities.
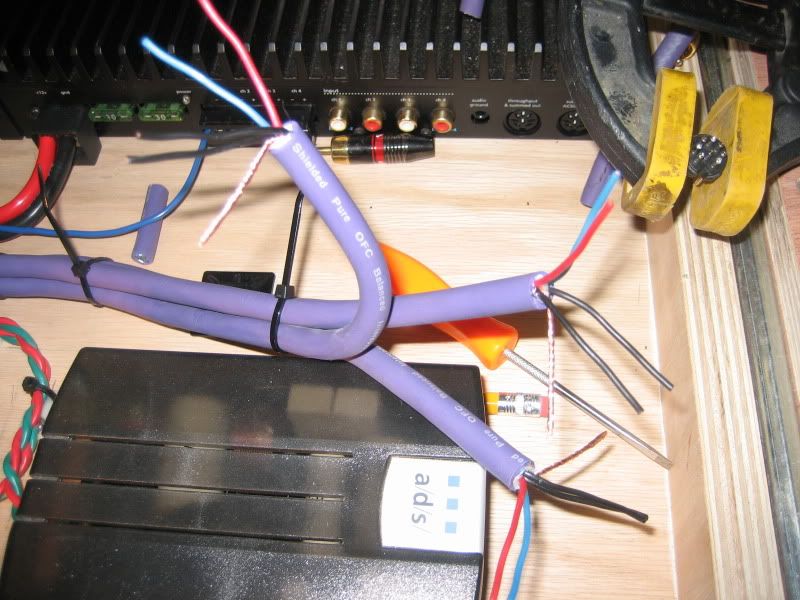
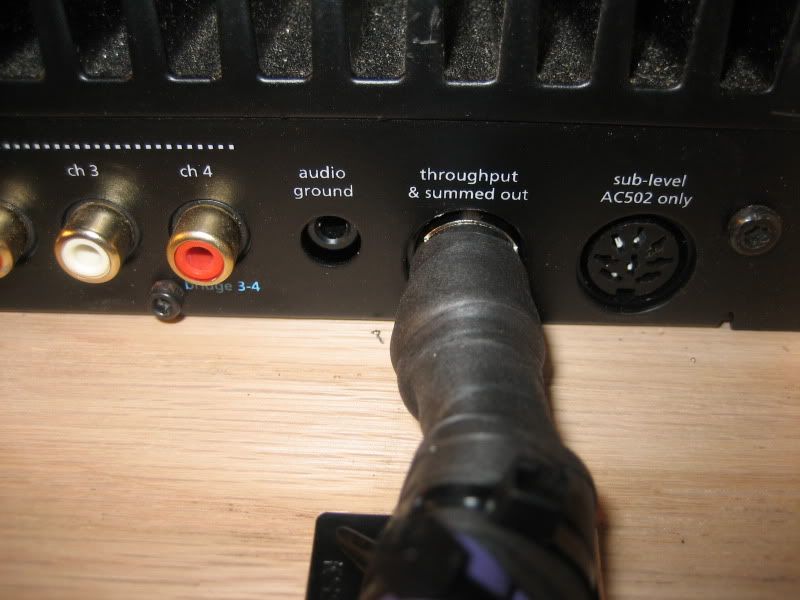
so heres what I did. The P4100 has a din connector that allows for channels 1-4 to be OUTPUTTED from the amp to connect to other amps. (pretty cool huh, yes I know), even cooler still is that it ALSO gives you outputs for channel 1&3 and 2&4. So I took 3 pairs of my 30+ dollar signal cables and cut the ends off
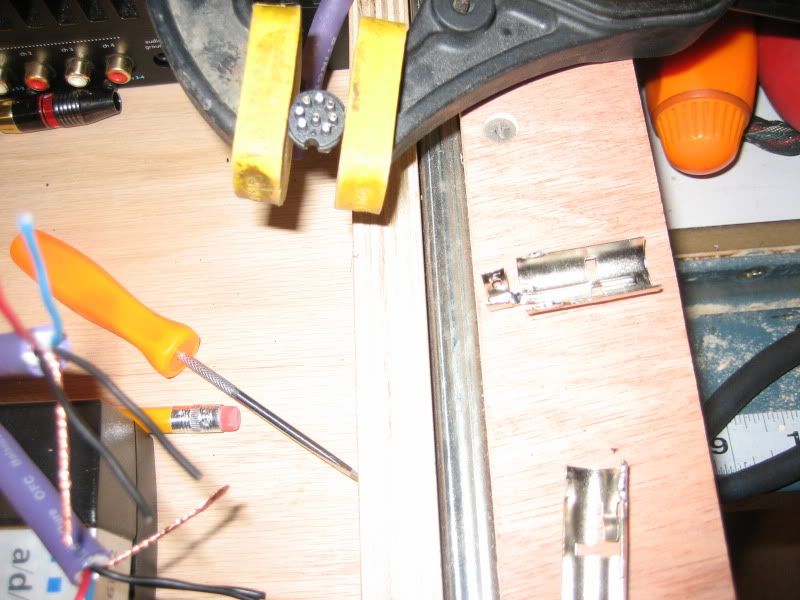
Heres the tiny din pins I had to solder to:
So, I connected the cable going to the 4 channel amp that needs to be balanced and faded to outputs 1,2,3,4 and connected the remaining 2 channel cable to the summed outputs of 1&3 and 2&4 for the midbass amp. The sub amp (P4100 is where the main cable from the stereo will connect.
Heres the connector complete:
Almost done:

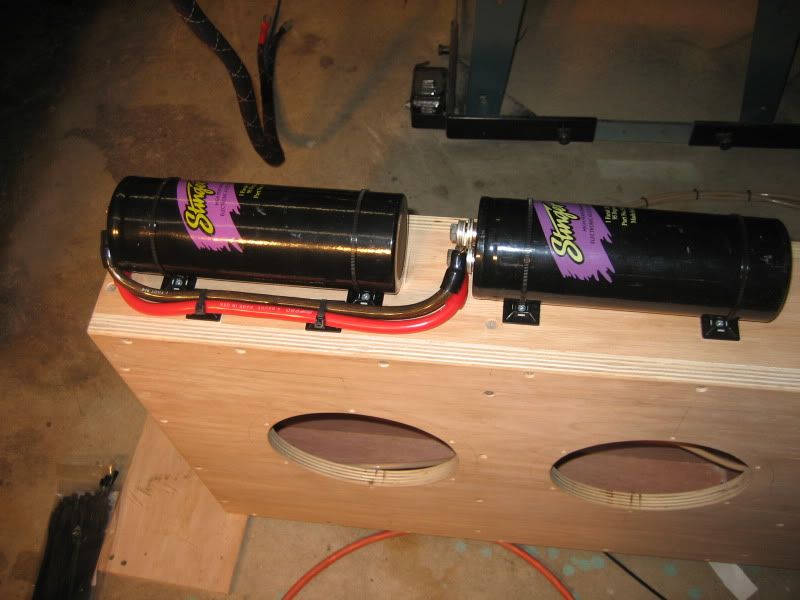
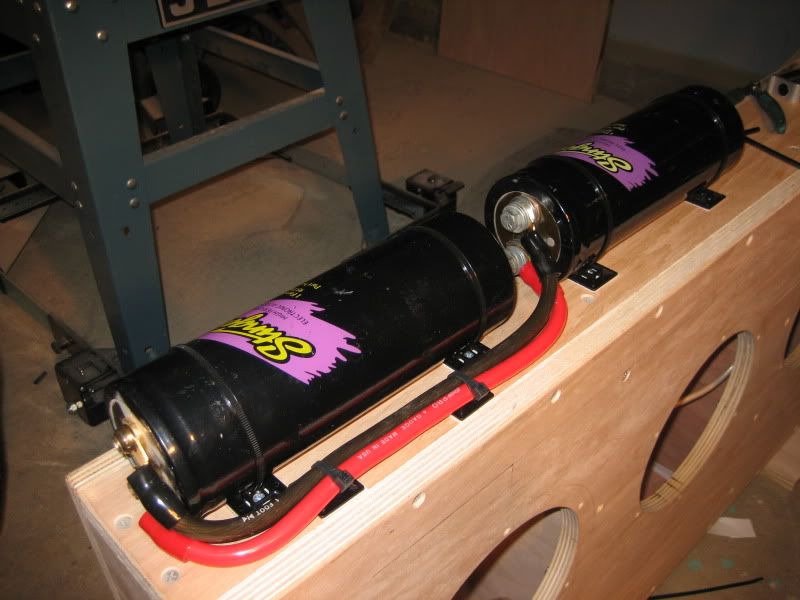
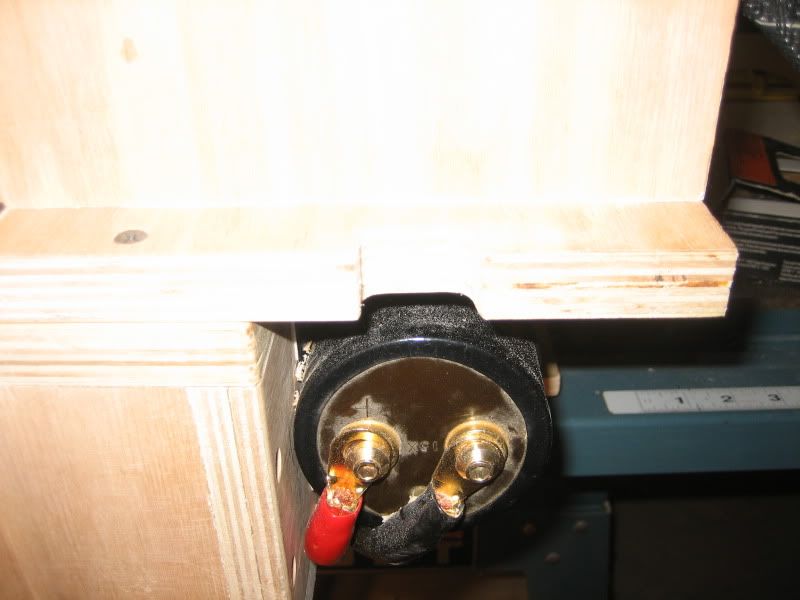
OK whew! onto the caps. I have 2 1 farrad caps and figured I'd use them both. I mounted them to the midbass box on the front side and these will be hidden with a cover later.
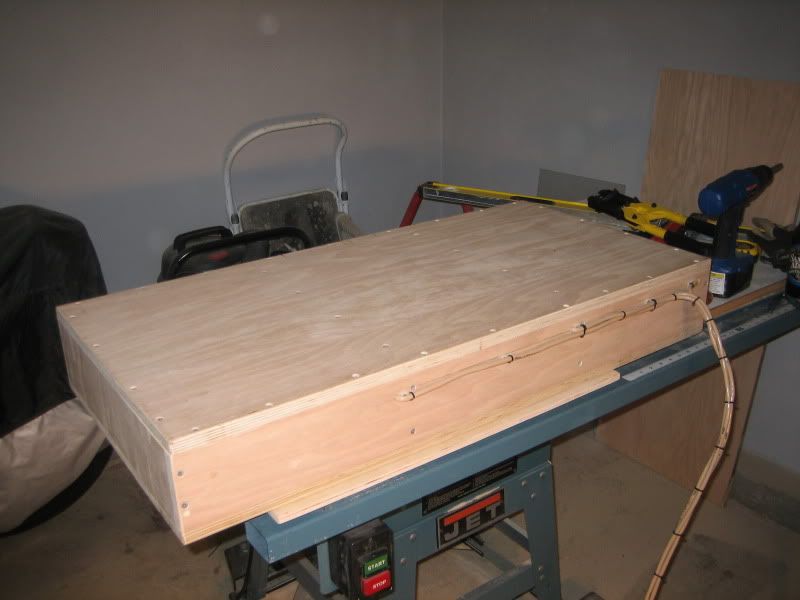
With those mounted I can now attach the box to the rack permanently:
Box first upside down:
Amp rack upside down too:
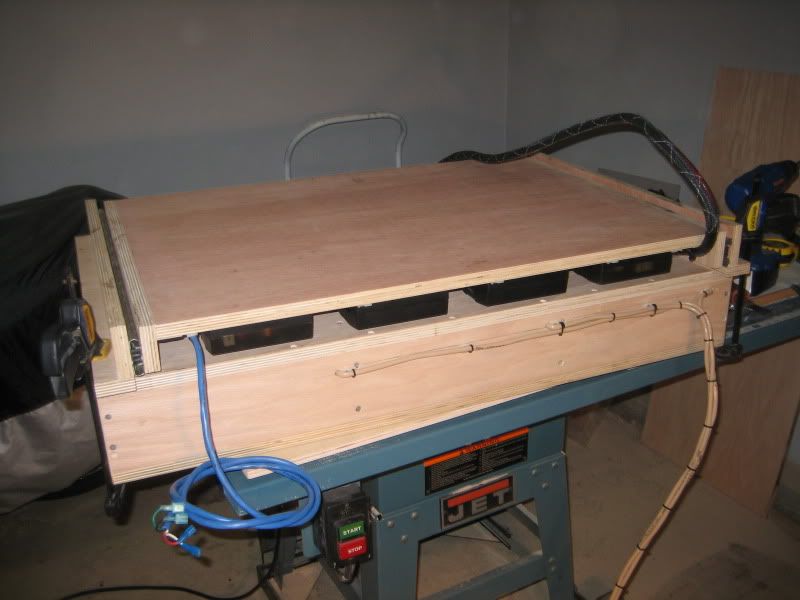
Couple of screws so it wont move:
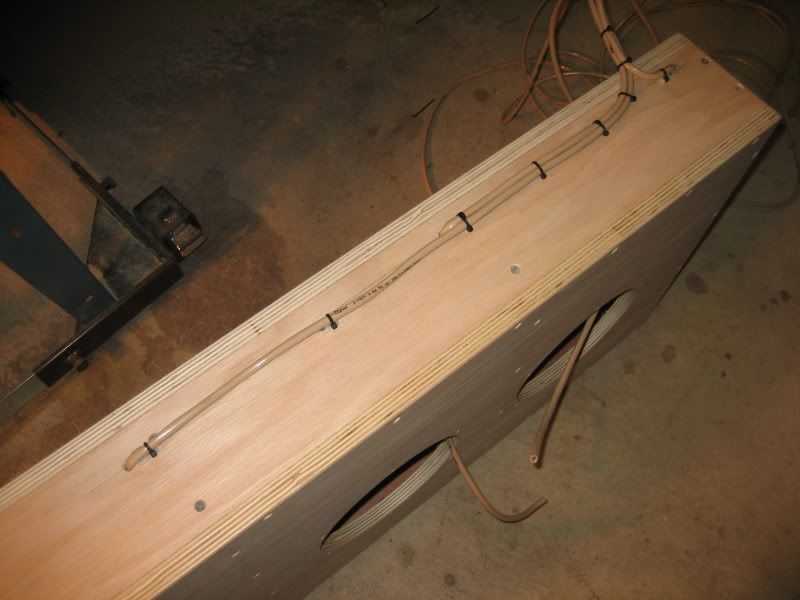
Now to wire the 4AWG from the rack to the caps on the box. Later I will wire the 4AWG from the car to the caps:
Its a tight fit so I had to cut a notch for the cable to pass:
More tie downs:
Connected:
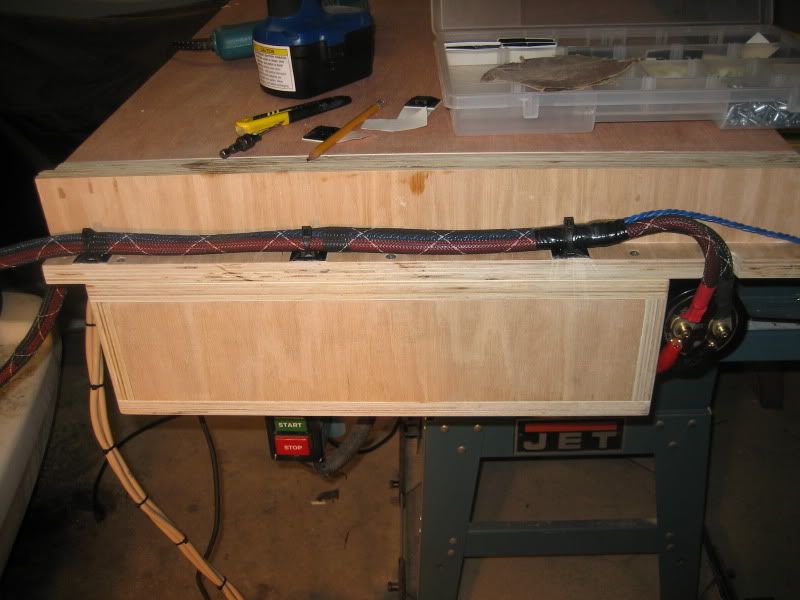
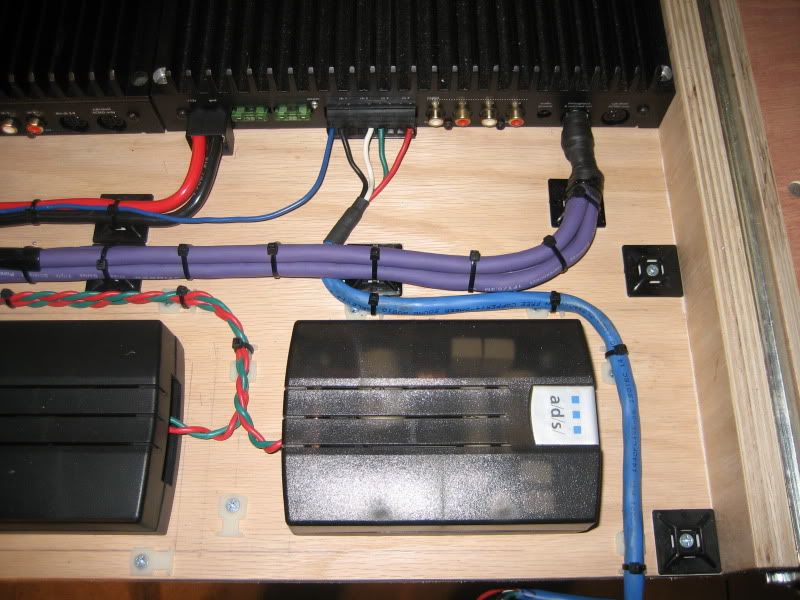
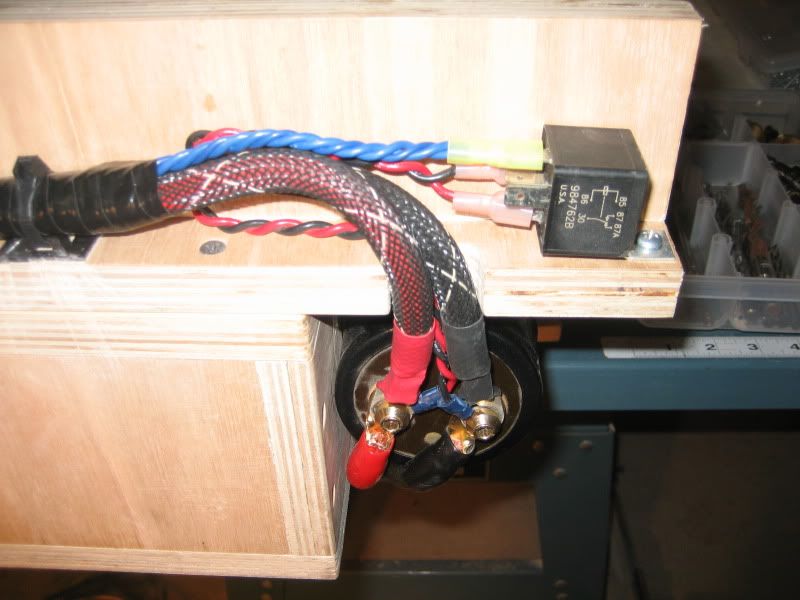
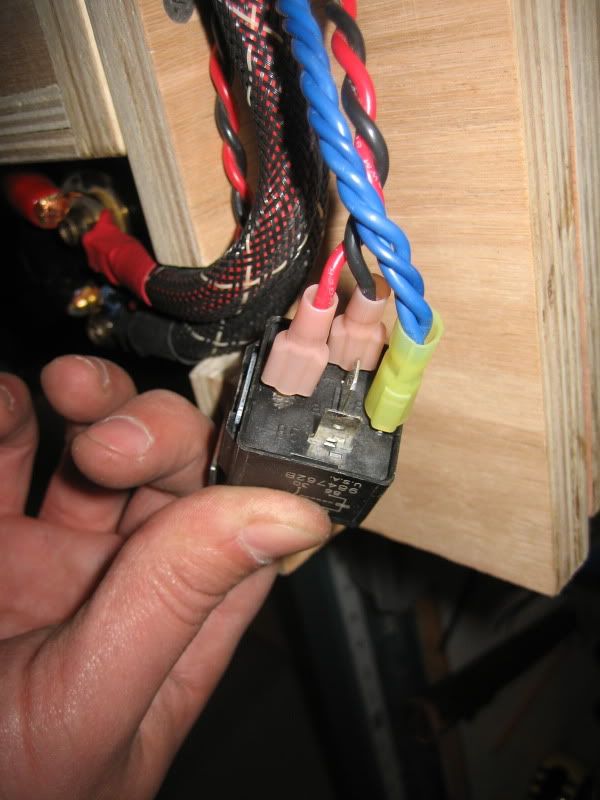
At this time I thought it might be a good idea to add a relay for the remote turn ons. Its a good idea when using multiple amps as the head unit might not have enough nut to turn on 3 amps. I grabbed power and ground right off the cap.

I had to make some notches in the rack support piece spacer thingy for the wiring to pass underneath the rack. I whipped those out with the router real quick:
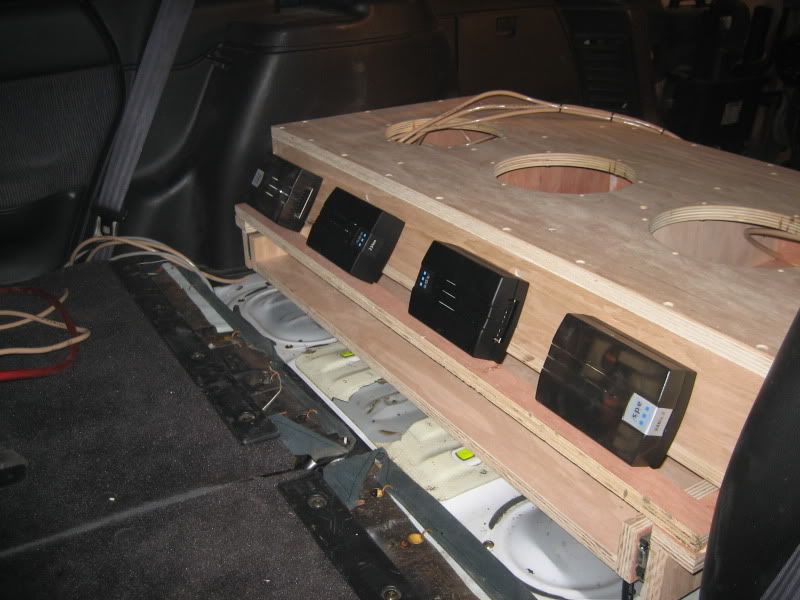
Heres the rack with the box assembled and ready to go in:
Installed:
Whats left??
-Wire the 4 separates to the 4 x-overs
-Plug in the midbass and sub remote level controls
-Plug in the main signal cable
-Install ring terminals on the main 12V and Ground and install on Cap
-Paint acrylic sheet and install midbasses
-System power on and initial tune
Stay tuned...
Here are the pics with descriptions. Hit me up with any questions
ok, after designing the amp rack I took all the dims and cut up some 3/4" plywood.
Glued and screwed the side pieces to the main piece where the amps will be mounted. The main section is only a bottom and 2 sides.
Then I made up the two supports for the drawer slides that also mount the rack to the box later.
Minus the drawer slides
Plus the drawer slides
All mounted, giving extatly 1/4" above and 1/4" below the rack for travel.
Retracted:
Extended:
ok, just laying out how the box will sit on the rack:
Rack sliding out:
Fully extended (24" by the way
OK, now I go to install this thing in the hatch space and much to my chagrin I see that the forward edge of the floor is raised by a little over an inch so the bottom of the rack was hitting. I had to make up a 1.25" spacer to raise the whole thing and keep it level to the floor:
Rack installed on the spacer:
Box temporarily installed on rack:
I was toying with placing the x-overs here but then changed my mind and installed them on the sliding rack instead:
Oh yes, I wired the mid bass box:
OK onto the amp rack wiring Oy Vey! Go grab a beer if you dont already have one
After much deliberation (with myself), I decided to stick the x-overs here:
Grabbed my trusty wiring anchors:
Screwed the x-overs down after measuring out the spacing so they are all 2 inched apart:
Careful marking so I didn't get screwed up with what goes to where
Wiring:
inputs done:
OK onto the main power and ground. The amps take a 8AWG input so I got some wire splicing block things from Lowes so I could take a 4AWG to three 8AWG wires:
This is Splicing Compound. It basically bonds to istelf after applied and creates a sheath similar to heat shrink tubing:
Power done:
Ground Done:
Installed the Tie downs:
Wire ties ready
Done:
I realized I didn't take any pictures of the 8AWG routing but you will see that in the next series of pics
OK for my next dilemma the signal cables. Now I have 3 amps that need all four signals, thats left front right front left rear and right rear. I need the amps to get the following signals:
P840 running separates: 4 channel mode 4 signals needed for left front right front left rear and right rear for proper balance and fade
P840 running mid basses: 4 channel mode (only using 3 though
P4100 running woofers (later): 2 channel mode also need summed input due to fading abilities.
so heres what I did. The P4100 has a din connector that allows for channels 1-4 to be OUTPUTTED from the amp to connect to other amps. (pretty cool huh, yes I know), even cooler still is that it ALSO gives you outputs for channel 1&3 and 2&4. So I took 3 pairs of my 30+ dollar signal cables and cut the ends off
Heres the tiny din pins I had to solder to:
So, I connected the cable going to the 4 channel amp that needs to be balanced and faded to outputs 1,2,3,4 and connected the remaining 2 channel cable to the summed outputs of 1&3 and 2&4 for the midbass amp. The sub amp (P4100 is where the main cable from the stereo will connect.
Heres the connector complete:
Almost done:
OK whew! onto the caps. I have 2 1 farrad caps and figured I'd use them both. I mounted them to the midbass box on the front side and these will be hidden with a cover later.
With those mounted I can now attach the box to the rack permanently:
Box first upside down:
Amp rack upside down too:
Couple of screws so it wont move:
Now to wire the 4AWG from the rack to the caps on the box. Later I will wire the 4AWG from the car to the caps:
Its a tight fit so I had to cut a notch for the cable to pass:
More tie downs:
Connected:
At this time I thought it might be a good idea to add a relay for the remote turn ons. Its a good idea when using multiple amps as the head unit might not have enough nut to turn on 3 amps. I grabbed power and ground right off the cap.
I had to make some notches in the rack support piece spacer thingy for the wiring to pass underneath the rack. I whipped those out with the router real quick:
Heres the rack with the box assembled and ready to go in:
Installed:
Whats left??
-Wire the 4 separates to the 4 x-overs
-Plug in the midbass and sub remote level controls
-Plug in the main signal cable
-Install ring terminals on the main 12V and Ground and install on Cap
-Paint acrylic sheet and install midbasses
-System power on and initial tune
Stay tuned...
-Mike
2011 Infiniti G37x Sedan - Current
2007 Ducati 800ss - Current
1994 Subaru Legacy Sport Wagon (White)
1994 Subaru Legacy Sport Wagon (Silver)
2003 Infiniri G35
1998 Infiniti I30t
1995 Honda Civic DX
1987 Subaru GL Wagon
1987 Subaru Loyale
2011 Infiniti G37x Sedan - Current
2007 Ducati 800ss - Current
1994 Subaru Legacy Sport Wagon (White)
1994 Subaru Legacy Sport Wagon (Silver)
2003 Infiniri G35
1998 Infiniti I30t
1995 Honda Civic DX
1987 Subaru GL Wagon
1987 Subaru Loyale
Re: Stereo system build thread
That's freakin AWESOME!
Do you have enough room to fully extend the amp rack? Does it extend outside of the vehicle, or does it stay all the way in the vehicle?
Do you have enough room to fully extend the amp rack? Does it extend outside of the vehicle, or does it stay all the way in the vehicle?
Josh
surrealmirage.com/subaru
1990 Legacy (AWD, 6MT, & EJ22T Swap)
2020 Outback Limted XT
If you need to get a hold of me please email me rather then pm
surrealmirage.com/subaru
1990 Legacy (AWD, 6MT, & EJ22T Swap)
2020 Outback Limted XT
If you need to get a hold of me please email me rather then pm
Re: Stereo system build thread
lol thanks.Legacy777 wrote:That's freakin AWESOME!
Do you have enough room to fully extend the amp rack? Does it extend outside of the vehicle, or does it stay all the way in the vehicle?
The design is such that the front end of the box (towards the front of the car not the back) will motorize and angle upward about 4 inches or so or maybe 10 degrees off horizontal. Then the amp rack will completely slide out the full 24 inches and come to rest directly behind the front seats. All of course with the back seats lowered first.
The point of this is that I will be able to sit in the drivers seat and tune the system gains and x-over points from the sweet spot and alone.
-Mike
2011 Infiniti G37x Sedan - Current
2007 Ducati 800ss - Current
1994 Subaru Legacy Sport Wagon (White)
1994 Subaru Legacy Sport Wagon (Silver)
2003 Infiniri G35
1998 Infiniti I30t
1995 Honda Civic DX
1987 Subaru GL Wagon
1987 Subaru Loyale
2011 Infiniti G37x Sedan - Current
2007 Ducati 800ss - Current
1994 Subaru Legacy Sport Wagon (White)
1994 Subaru Legacy Sport Wagon (Silver)
2003 Infiniri G35
1998 Infiniti I30t
1995 Honda Civic DX
1987 Subaru GL Wagon
1987 Subaru Loyale
Re: Stereo system build thread
Ahhh ok, that makes sense.
Are you painting/covering the wood where you have the wires tied down or just leaving it bare?
Are you painting/covering the wood where you have the wires tied down or just leaving it bare?
Josh
surrealmirage.com/subaru
1990 Legacy (AWD, 6MT, & EJ22T Swap)
2020 Outback Limted XT
If you need to get a hold of me please email me rather then pm
surrealmirage.com/subaru
1990 Legacy (AWD, 6MT, & EJ22T Swap)
2020 Outback Limted XT
If you need to get a hold of me please email me rather then pm
Re: Stereo system build thread
Do you mean on the rack itself? If so, no, you wont see that. I'm making a cover that goes over the rack and only has holes cut for the tops of the amps and the tops of the z-overs to poke through. No one will see that nice wiring but I'll know its thereLegacy777 wrote:Ahhh ok, that makes sense.
Are you painting/covering the wood where you have the wires tied down or just leaving it bare?
If you think this is cool wait to you see my idea I am floating around for the box with the 2 12's
-Mike
2011 Infiniti G37x Sedan - Current
2007 Ducati 800ss - Current
1994 Subaru Legacy Sport Wagon (White)
1994 Subaru Legacy Sport Wagon (Silver)
2003 Infiniri G35
1998 Infiniti I30t
1995 Honda Civic DX
1987 Subaru GL Wagon
1987 Subaru Loyale
2011 Infiniti G37x Sedan - Current
2007 Ducati 800ss - Current
1994 Subaru Legacy Sport Wagon (White)
1994 Subaru Legacy Sport Wagon (Silver)
2003 Infiniri G35
1998 Infiniti I30t
1995 Honda Civic DX
1987 Subaru GL Wagon
1987 Subaru Loyale
Re: Stereo system build thread
Yeah that's what I referring to.
How are you planning to use the linear actuator to extend the amp rack AND tilt it up several degrees?
When I was getting my windows tinted on the Legacy back in 97 there was a Honda guy at the tint place and he had a motorized amp rack that pivoted out of the trunk to allow access for "golf clubs" to be put in. That was about all he could fit in there though due to the big sub box.
Are you thinking about having a motorized sub box that moves out of the way so you can access your spare tire? If not, that'd be kind of cool
Josh
surrealmirage.com/subaru
1990 Legacy (AWD, 6MT, & EJ22T Swap)
2020 Outback Limted XT
If you need to get a hold of me please email me rather then pm
surrealmirage.com/subaru
1990 Legacy (AWD, 6MT, & EJ22T Swap)
2020 Outback Limted XT
If you need to get a hold of me please email me rather then pm
Re: Stereo system build thread
I'm in the process of designing that now. It will be a two step process. the first motion will be to lift the rack to the correct angle which will notify the second action via a switch once its in the correct place. Then the second stage is a screw drive mechanism to move the rack on the slide outward. The second stage will be equipped with a switch so the rack cannot lower if the drawer slides are not fully retracted in the home position. I really wanted to avoid using steel but now that I see how heavy this rack is with the box, I'm going to have to build a steel frame to get a strong enough jacking point on the rack.Legacy777 wrote:Yeah that's what I referring to.
How are you planning to use the linear actuator to extend the amp rack AND tilt it up several degrees?
I'm going to get creative on the screw drive also lol, I'm not about to buy 300 dollar linear actuators. You'd be surprised where yo can find 12volt motors when you are on a budget
Stay tuned, its going to get crazy soon lol
The sub box may not be motorized but at a minimum I'll hinge it on one end and use one or two gas struts to hold it up.Legacy777 wrote:Are you thinking about having a motorized sub box that moves out of the way so you can access your spare tire? If not, that'd be kind of cool
-Mike
2011 Infiniti G37x Sedan - Current
2007 Ducati 800ss - Current
1994 Subaru Legacy Sport Wagon (White)
1994 Subaru Legacy Sport Wagon (Silver)
2003 Infiniri G35
1998 Infiniti I30t
1995 Honda Civic DX
1987 Subaru GL Wagon
1987 Subaru Loyale
2011 Infiniti G37x Sedan - Current
2007 Ducati 800ss - Current
1994 Subaru Legacy Sport Wagon (White)
1994 Subaru Legacy Sport Wagon (Silver)
2003 Infiniri G35
1998 Infiniti I30t
1995 Honda Civic DX
1987 Subaru GL Wagon
1987 Subaru Loyale
Re: Stereo system build thread
You're definitely going all out
Josh
surrealmirage.com/subaru
1990 Legacy (AWD, 6MT, & EJ22T Swap)
2020 Outback Limted XT
If you need to get a hold of me please email me rather then pm
surrealmirage.com/subaru
1990 Legacy (AWD, 6MT, & EJ22T Swap)
2020 Outback Limted XT
If you need to get a hold of me please email me rather then pm
Re: Stereo system build thread
WOW!!!!
your equipment and install methods show your age lol! Been installing for 17 years so all this looks very nostalgic to me. Very cool stuff. I miss those A/D/S amps A LOT.
I'll post up mine once its done in a few months.
your equipment and install methods show your age lol! Been installing for 17 years so all this looks very nostalgic to me. Very cool stuff. I miss those A/D/S amps A LOT.
I'll post up mine once its done in a few months.
94 tleggy wagon, 22t with 2.5 dohc heads, pp6, tdo4, fmic, 3inch catless bpm turbo back, wrx brakes, MANY interior mods to list
Re: Stereo system build thread
__TT__ wrote:WOW!!!!
your equipment and install methods show your age lol! Been installing for 17 years so all this looks very nostalgic to me. Very cool stuff. I miss those A/D/S amps A LOT.
I'll post up mine once its done in a few months.
lol, how are they installing now??? I'm interested to know what methods you are speaking of
-Mike
2011 Infiniti G37x Sedan - Current
2007 Ducati 800ss - Current
1994 Subaru Legacy Sport Wagon (White)
1994 Subaru Legacy Sport Wagon (Silver)
2003 Infiniri G35
1998 Infiniti I30t
1995 Honda Civic DX
1987 Subaru GL Wagon
1987 Subaru Loyale
2011 Infiniti G37x Sedan - Current
2007 Ducati 800ss - Current
1994 Subaru Legacy Sport Wagon (White)
1994 Subaru Legacy Sport Wagon (Silver)
2003 Infiniri G35
1998 Infiniti I30t
1995 Honda Civic DX
1987 Subaru GL Wagon
1987 Subaru Loyale
-
kimokalihi
- Fifth Gear
- Posts: 8360
- Joined: Mon Nov 06, 2006 3:41 am
- Location: Tenino, WA
Re: Stereo system build thread
They now use special space age materials! lol
98 Metro Hatch Daily Driver :)
91 SS EJ20G Engine/Tranny/Diff Swap Build Thread Here
"Your testes are close to your bottom but you still play with them all the time." Jeremy Clarkson
91 SS EJ20G Engine/Tranny/Diff Swap Build Thread Here
"Your testes are close to your bottom but you still play with them all the time." Jeremy Clarkson
-
evolutionmovement
- Knowledgeable
- Posts: 9809
- Joined: Mon Jun 16, 2003 11:20 pm
- Location: Beverly, MA
Re: Stereo system build thread
They probably just slap it in there and use the minimum amount of tape to keep stuff from moving out of place until the short warranty on the work is up. Isn't that how they make everything now?
Midnight in a Perfect World on Amazon or order anywhere. The first book in a quartet chronicling the rise of a man from angry criminal to philanthropist. Midnight... is a distopic noirish novel featuring 'Duchess', a modified 1990 Subaru Legacy wagon.