Page 1 of 1
My modified TMIC install on a EJ20G
Posted: Sat Nov 10, 2007 5:42 am
by All_talk
Figured I post my current setup just to give people ideas.
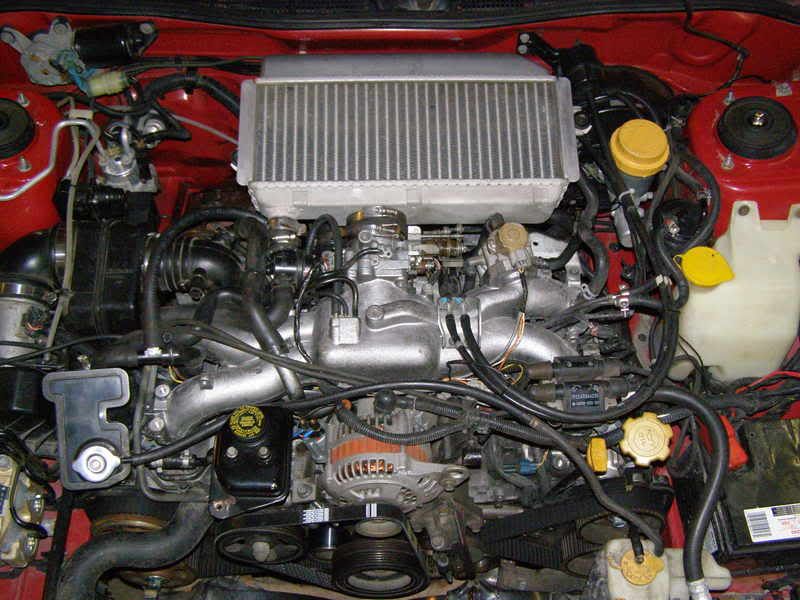
I filled the stock BOV location and added a fitting on the right side (forgive the ugly welding, my first time doing aluminum). TB is machined back for firewall clearance. The new fitting is not ideal for the stock inlet setup, but this install is only temporary tell my stroker build is done. Once I swap over the VF24 and under manifold inlet it will be in just the right place to connect 90deg WRX valve with a flange.
Gary
Posted: Sun Nov 11, 2007 2:41 am
by beatersubi
Why not just weld on a 90*? Thats what I plan to do w/ my V.2 slanty. Albeit, with a WRX style flange.
Posted: Mon Nov 12, 2007 2:28 am
by BXSS
I had to do something similar to fit a WRX I/C on my OBS-T.
I just chopped the t-body down (to 1 hose clamp width) with a sawz-all, & the I/C fit after that.
The WRX BPV fit & worked with no mods on that car.
Since it looks like you have access to a welder why don't you make a bracket for the coil-pack?
I made a bracket extending off the t-cable mount that placed the coil-pack in the center of the intake on my EJ20G'd LSS.
Posted: Mon Nov 12, 2007 3:20 am
by magicmike
beatersubi wrote:Why not just weld on a 90*? Thats what I plan to do w/ my V.2 slanty. Albeit, with a WRX style flange.
press and hold the alt key and type 248 then release he alt key and you have a degree symbol.
Alt + 248 = °
ok schools out

Posted: Mon Nov 12, 2007 6:49 am
by beatersubi
magicmike wrote:beatersubi wrote:Why not just weld on a 90*? Thats what I plan to do w/ my V.2 slanty. Albeit, with a WRX style flange.
press and hold the alt key and type 248 then release he alt key and you have a degree symbol.
Alt + 248 = °
ok schools out
Doesn't work for me. Maybe I'm a noob.

Posted: Mon Nov 12, 2007 8:34 pm
by All_talk
BXSS wrote:I had to do something similar to fit a WRX I/C on my OBS-T.
I just chopped the t-body down (to 1 hose clamp width) with a sawz-all, & the I/C fit after that.
The WRX BPV fit & worked with no mods on that car.
Since it looks like you have access to a welder why don't you make a bracket for the coil-pack?
I made a bracket extending off the t-cable mount that placed the coil-pack in the center of the intake on my EJ20G'd LSS.
The coil pack clears the hood ontop of the EJ20G manifold?
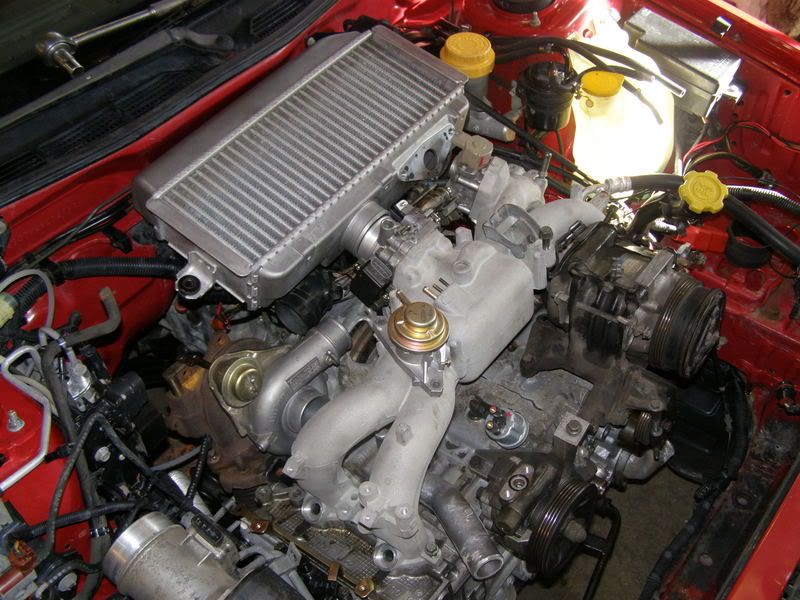
You can kinda see how I machined the TB in this pic, I cut in behind the boss that holds the pin for the throttle springs so I could take the coupling right up to the bleed screw. Then turned a new lip right where the old coupling stop were. Gives lots of room at the firewall, but the IC wont clear the IAC/throttle linkage unless you remove the stock BPV mount.
Pic also shows the manifold I will be running, it has extra threaded holes that would be perfect for a coil mount in the center if it will clear the hood.
Gary
Posted: Tue Nov 13, 2007 3:53 pm
by BXSS
You did a really good job modding the t-body - it looks like a stock piece. On the OBS-T there is no IAC so I had no clearance issues with the BPV, I just needed some more room to fit the I/C.
I have'nt had any problems with coil-pack clearance on the SS.
The bracket is welded from the throttle-cable mount to the center of the manifold right behind the alt.
I have pics, but am too lazy to figure out how to post them here.
PM me if you want to see what I did & post the pic(s).
I also had to make a bracket relocating the coolant tank about 1.5" up, as my FMIC piping would not clear the tank in its stock location.