Check this
LINK . I did this update and it's lasted a couple of years. The link is dead to the original site, and I 'think' there were pics.
And just to ensure it stays avl:
Repair of Door Locks on a Subaru Legacy
by Gary Friesen
November 4, 1996
If your Legacy's door locks insist on locking themselves every time you
try to open the door, you probably have a bad "Lock
Remote." The Lock Remote consists of a plastic rocker Toggle that
locks/unlocks, and a chrome handle that releases or opens
the door. Here is an explanation of what is causing the problem and two
ways to fix it.
In the Lock Remote there is a spring that brings the opener handle back
to the resting position after you have pulled it to open
the door. It is a coil spring with one end on the door opener handle and
the other end is held on a small piece of plastic that
holds it in place to keep spring tension against the opener handle. When
the small piece of plastic that holds the end of the
spring breaks, that end of the spring then pushes against the inside of
the forward end of the Toggle. When the handle is pulled,
the spring exerts a force against the Toggle and causes it to lock. You
can open the door when this happens by pressing on the
unlock button (forward end of Toggle) as you pull the opener handle.
The popular cure is to buy a new Lock Remote and install it. I have come
up with a way to repair the existing Lock Remote
and my fix should last longer than a new Lock Remote, since a new one
can be expected to break also.
I will explain how to remove it from the door for those of you who will
be doing this yourself, as well as how to repair the Lock
Remote. I will refer to each side of the Lock Remote mechanism as it is
oriented when installed in the car. The front is the end
toward the front of the car and the outside is the side that faces the
outside of the car, etc.
I recommend reading this text at least twice before using it as guidance
as you do the work. Some parts are fragile and I believe
that understanding what is printed here may save you from damaging some
parts.
Removal of Door Panel and Lock Remote:
Open the door. Open the window about 3 inches. Remove the upper and
lower screws that secure the armrest to the door that
have phillips heads and are concealed. The upper one is behind a black
foam plug that resembles one of those foam earplugs
and can be plucked out with a pair of sharp nose pliers. The lower one
is behind a square 1 inch plastic access panel that can
be pried away with a screwdriver.
Remove the rectangular trim piece that is around the Remote. This is
done by inserting a thin flat object such as a butter knife or
a thin flat blade screwdriver between the trim and the Remote at the
top-center and the bottom-center while gently pulling
inward on the trim piece. The clips on the trim piece are grasping on
the upper and lower outside edges of the Remote. They
need to be flexed upward (upper) and downward (lower) away from the
Remote. Be Careful, they are fragile. Once the two
clips mentioned are free of the Remote, apply a slight rearward pressure
to unclip the rear fastener that is clipped around the
rear side of the Remote.
Lift the edge of the perimeter of the door liner at all edges except the
top edge. There are about 3-4 plastic fastener snaps, per
edge, that will come unsnapped as you pull the liner away about 2
inches. When you pull part of the liner away from the door,
your fingers can be inserted between the door and liner so that you can
feel where the next fastener to be released is. Try to lift
close to each fastener as the door panel material is rather fragile on
most cars. When the liner is detached at the front, back,
and bottom edges, pull it away about 4 inches and lift it upwards to
unhook it from the top edge. It hangs by a lip at the top.
Now disconnect the wiring harness from the panel by pushing on the
release clip on the male (door) side of the plug and pulling
it out of the female (panel) side.
Remove the two rod linkages that are connected to the Remote. There is a
plastic clip that unclips from the rod and swings
away, then the rod is lifted out of the hole in the Remote. Leave them
attached if unable to easily remove them. Now remove
the Remote from the door by removing the one screw at the forward end of
the Remote and then slide the Remote forward
while lifting it gently away from the door.
Repair of the Lock Remote:
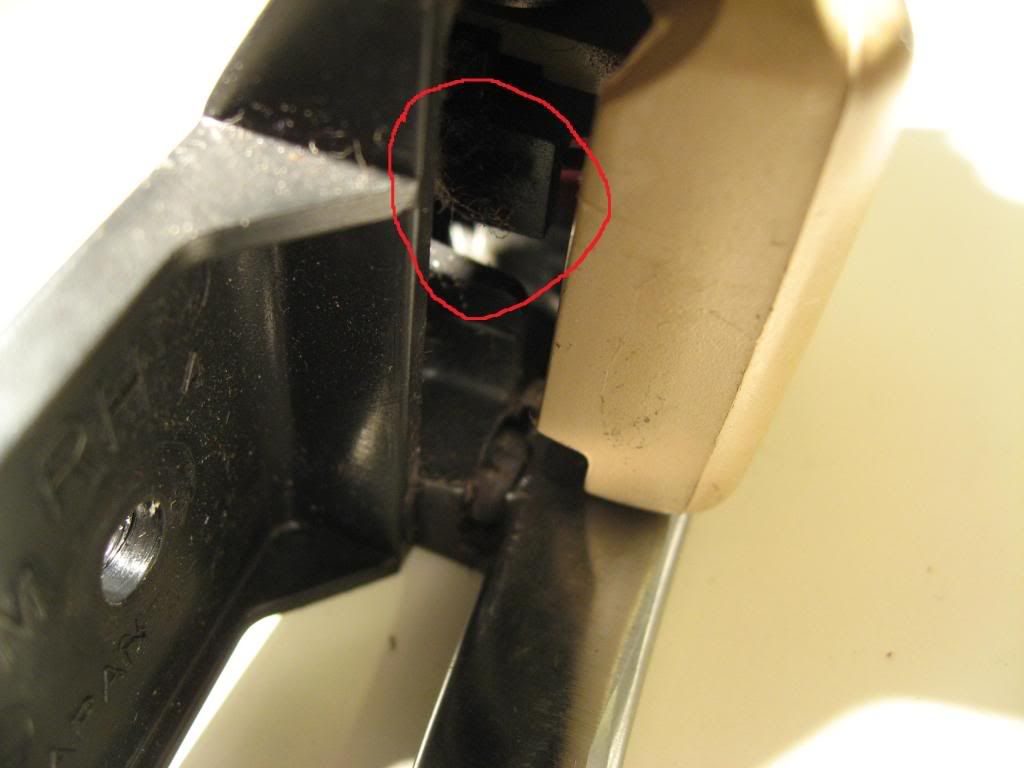
Identify the end of the coil spring that is pushing on the inside of the
forward end of the Toggle. It is on the inside of the
mechanism and is pushing the forward end of the Toggle toward the inside
of the car, especially when the opener handle is
pulled. The spring is about the diameter of a staple and has an "L"
shape bend on the end of it. The short side of the "L" is
about 1/4 inch long.
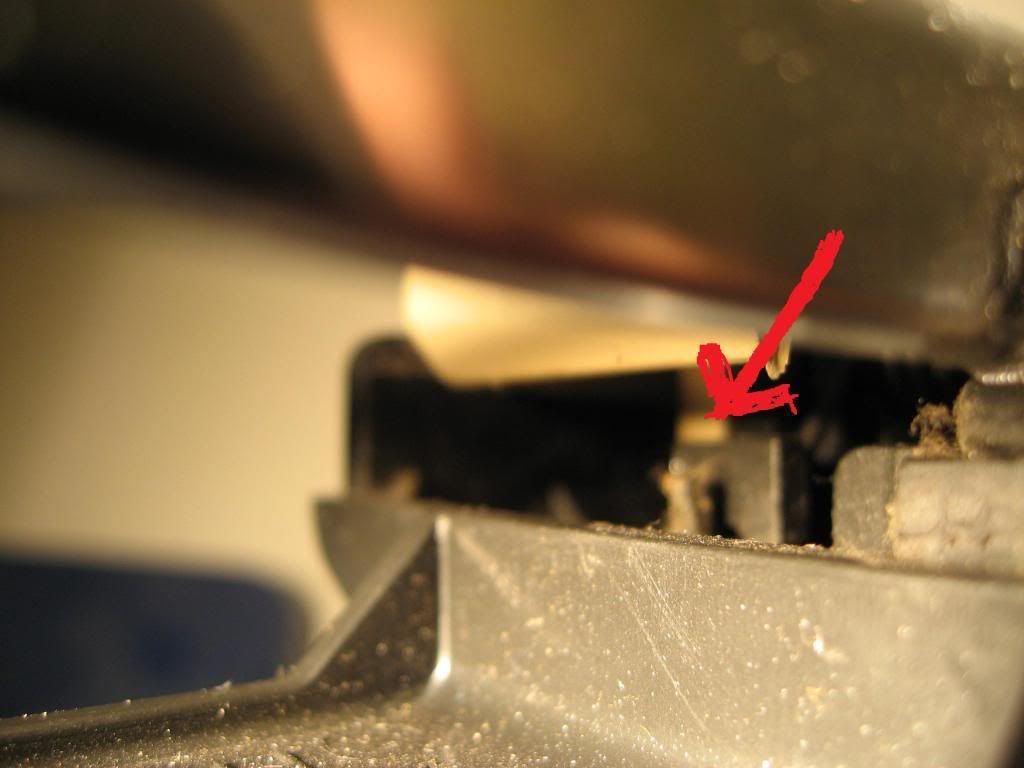
Note that there is a small, approximate 1/8 inch, square hole in the
plastic housing located just outward from the "L" end of the
spring. You will need to insert a piece of 16, 18, or 20 gauge iron or
copper wire (about the size of a paper-clip) up through
this hole and snag the "L" on the spring with it. Then you need to draw
the "L" outward until it touches the plastic housing. The
iron wire should then be routed around the outside of the housing, one
end up and one end down.
Here is how it is done: Take a piece of wire about 6 inches long and
fold it in half. At the fold, spread it at the fold to make a
loop that is still small enough to fit through the square hole in the
plastic back of the lock remote assembly. Lift the opener
handle, insert a small screwdriver or other narrow shaft tool into the
mechanism from the bottom or top and use it to lift the "L"
wire away from the toggle. Push the loop of the folded wire into the
mechanism from the outside, inward. Snag the "L" with the
loop in the folded wire. Once you have captured the "L" in the loop,
remove the screwdriver shaft. Now, pull outward on the
folded wire until the "L" hits the plastic on the inside of the outside
of the mechanism, right at the square hole. While holding the
folded wire in place, bend one side of the folded wire up the back side
and fold it over the top of the mechanism. Fold the
other side of the folded wire down the back side and fold it under the
bottom of the mechanism.
Now the mechanism should work properly. When you put the Toggle in the
unlock position and pull inward on the release
handle, the Toggle should stay put and the release handle should return
to rest when you let it go. The next steps are to modify
the door to accept the extra wire, cut the wire to size, and reinstall
everything.
The door has two square holes at the back of the Remote. With a
screwdriver or pliers, lift the back edge of each square hole
about 1/16 of an inch. This should allow the Remote to be installed with
the new piece of wire fitting between the Remote and
the door metal. You can also push the door metal in a little where the
wire will lay by placing the end of a screwdriver or chisel
there and giving one or two mild but sudden blows with a small hammer.
Replace the linkage from the lock to the Remote and
check for proper operation.
Reassemble everything in the reverse manner that it was disassembled.