
kimokalihi's 91 SS EJ20 Swap
Moderator: Moderators
-
Mattheww044
- Fourth Gear
- Posts: 2045
- Joined: Tue Nov 28, 2006 8:17 am
- Location: Spokane, WA
-
kimokalihi
- Fifth Gear
- Posts: 8360
- Joined: Mon Nov 06, 2006 3:41 am
- Location: Tenino, WA
Someone mentioned the grounding of the igniter via the mounting bracket. I don't think it grounds through that bracket. I think it has it's own ground wire in the connector and through the harness. So I doubt that mounting it wherever you want would be a problem.Binford wrote:When I installed my TMIC I never mounted my igniter to anything. I actally zip-tied it to the big wire harness that's right there. I ran it that way for over a year of hard abuse at 16-18 psi.
98 Metro Hatch Daily Driver :)
91 SS EJ20G Engine/Tranny/Diff Swap Build Thread Here
"Your testes are close to your bottom but you still play with them all the time." Jeremy Clarkson
91 SS EJ20G Engine/Tranny/Diff Swap Build Thread Here
"Your testes are close to your bottom but you still play with them all the time." Jeremy Clarkson
Ditto.Binford wrote:When I installed my TMIC I never mounted my igniter to anything. I actally zip-tied it to the big wire harness that's right there. I ran it that way for over a year of hard abuse at 16-18 psi.
-Aaron
2000 Audi S4 - 2.7L Twin-turbo, 6 Speed
[quote="evolutionmovement"]It was me. And those are my balls. Happy Sunday![/quote]
2000 Audi S4 - 2.7L Twin-turbo, 6 Speed
[quote="evolutionmovement"]It was me. And those are my balls. Happy Sunday![/quote]
-
Mattheww044
- Fourth Gear
- Posts: 2045
- Joined: Tue Nov 28, 2006 8:17 am
- Location: Spokane, WA
-
kimokalihi
- Fifth Gear
- Posts: 8360
- Joined: Mon Nov 06, 2006 3:41 am
- Location: Tenino, WA
Wrestled with the pitch mount again. I managed to get the bolt in one side of it but can't get it to line up with the other side to push it through all the way. And believe me I tried damn hard. Put so much effort into it I was shaking when I finally gave up. I don't know what to do about that for now.
Bought some vacuum hose and fuel hose and finished installing the fuel hoses.
I found in my box of spare EJ22T parts the stock charcoal canister and noticed it's different from the one on the car now from the forester motor. The forester motor only has 2 vacuum line fittings off the top and they both go to hard metal lines coming off the passenger side head. The EJ22T canister has 3 lines and I have no idea where the third one goes or if I can use the forester one and leave it the way it is or not.
I have 3 vacuum lines right now that have no hose on them and I don't know where they go. One on each side of the coil pack and one coming out of my silicone intake behind my power steering resevoir.
I found my turbo solenoid thingies. Don't know what they do and I have no idea where the vacuum lines go to but they are they're bolted up next to the airbox on the wheel well.
Maybe someone can help me figure that out or I'll try to look at some pictures and check out my FSM.
No pictures because I couldn't find my girlfriend's camera and she is asleep in her room where it probably is and I didn't want to wake her.
I need to buy another camera for myself, I hate borrowing and it's not a very nice camera because it's several years old. But I need a revtronix chip, gauges, swaybar, various other parts and to pay off some debt before I get another camera.
Plus I want a new gaming mouse and I'd love to build a new pc. Need to be rich somehow too....
98 Metro Hatch Daily Driver :)
91 SS EJ20G Engine/Tranny/Diff Swap Build Thread Here
"Your testes are close to your bottom but you still play with them all the time." Jeremy Clarkson
91 SS EJ20G Engine/Tranny/Diff Swap Build Thread Here
"Your testes are close to your bottom but you still play with them all the time." Jeremy Clarkson
line from cannnister
On your 22t cannister, one line goes to tank evaporation line on its way to a rollover valve
another lline goes to the auxiliary purge control solonoid
The other one, probably the one you don't know where it goes, does go to the auxiliary purge valve, which is tee'd off of the line right off of the intake mainfold. From the auxiliary purge valve it goes to the intake resonator, for you probably the nipple on your intake hose piece. All this is shown on the intake vacuum diagram, somewhere on here.
-
kimokalihi
- Fifth Gear
- Posts: 8360
- Joined: Mon Nov 06, 2006 3:41 am
- Location: Tenino, WA
Thanks, I'll just have to figure out what all those things are lol.
98 Metro Hatch Daily Driver :)
91 SS EJ20G Engine/Tranny/Diff Swap Build Thread Here
"Your testes are close to your bottom but you still play with them all the time." Jeremy Clarkson
91 SS EJ20G Engine/Tranny/Diff Swap Build Thread Here
"Your testes are close to your bottom but you still play with them all the time." Jeremy Clarkson
haha your telling mekimokalihi wrote:Thanks buddy! I only wish I worked on it more often. Modern Warfare 2 makes me a bit lazy the last few months though, lol. That and the cold but it's warmed up recently which explains the recent activity.
1993 Subaru Legacy L AWD Wagon R.I.P
1994 Subaru Legacy SS R.I.P :(
2004 Nissan Titan LE 4X4
2007 Subaru Legacy GT :)
1994 Subaru Legacy SS R.I.P :(
2004 Nissan Titan LE 4X4
2007 Subaru Legacy GT :)
-
Mattheww044
- Fourth Gear
- Posts: 2045
- Joined: Tue Nov 28, 2006 8:17 am
- Location: Spokane, WA
haha I get so sick of MW2 now after like 5 games. Stab someone like 3 times, but somehow they all miss then they stab you.... getting stabbed form like 15feet away as you watch the knife clearly not enter your body, shotgunning someone from 2feet away in the chest and it not killing them... I went back to play some nazi zombies the other night 
1991 Subaru Legacy SS 5MT: Revtronix Stage 2 Set-up with a few other "tasteful" mods :D
-
kimokalihi
- Fifth Gear
- Posts: 8360
- Joined: Mon Nov 06, 2006 3:41 am
- Location: Tenino, WA
It's so damn addicting. But I have been getting quite frustrated with that game the last couple weeks. So many nube tubers now. It's like all those guys who were using 1887s now use nube tubes instead. But what has really been frustrating me lately is all the lag. I keep shooting people in the face with my SPAS-12 with stopping power pro and FMJ and they knife me or shoot me and I die, not them even though I acted first. The lag is killing me. I think it's a combination of my DSL and wireless even though I have the fastest DSL package they offer which is $70/month! I was thinking maybe it was my PC but then I turned the graphics to the lowest settings and it still lags just as bad. My ping is almost always one bar less than everyone else.
Fuck you comcast for not providing cable where I live.
On a brighter note, I got my title in the mail for my subaru today! Yay! After nearly a year and a half Patrick's car is finally legally mine. Feels good to know I own that car now.
Fuck you comcast for not providing cable where I live.
On a brighter note, I got my title in the mail for my subaru today! Yay! After nearly a year and a half Patrick's car is finally legally mine. Feels good to know I own that car now.
98 Metro Hatch Daily Driver :)
91 SS EJ20G Engine/Tranny/Diff Swap Build Thread Here
"Your testes are close to your bottom but you still play with them all the time." Jeremy Clarkson
91 SS EJ20G Engine/Tranny/Diff Swap Build Thread Here
"Your testes are close to your bottom but you still play with them all the time." Jeremy Clarkson
-
Mattheww044
- Fourth Gear
- Posts: 2045
- Joined: Tue Nov 28, 2006 8:17 am
- Location: Spokane, WA
-
kimokalihi
- Fifth Gear
- Posts: 8360
- Joined: Mon Nov 06, 2006 3:41 am
- Location: Tenino, WA
That's how I know it's lag. I watch their killcam and my gun or knife never even go off. Yet they clearly do on my end. That person thinks they're just reacted quicker then I did and they really didn't.
98 Metro Hatch Daily Driver :)
91 SS EJ20G Engine/Tranny/Diff Swap Build Thread Here
"Your testes are close to your bottom but you still play with them all the time." Jeremy Clarkson
91 SS EJ20G Engine/Tranny/Diff Swap Build Thread Here
"Your testes are close to your bottom but you still play with them all the time." Jeremy Clarkson
-
kimokalihi
- Fifth Gear
- Posts: 8360
- Joined: Mon Nov 06, 2006 3:41 am
- Location: Tenino, WA
Re: kimokalihi's 91 SS EJ20 Swap
Didn't get much done today but some is better than none. My toes are numb still.
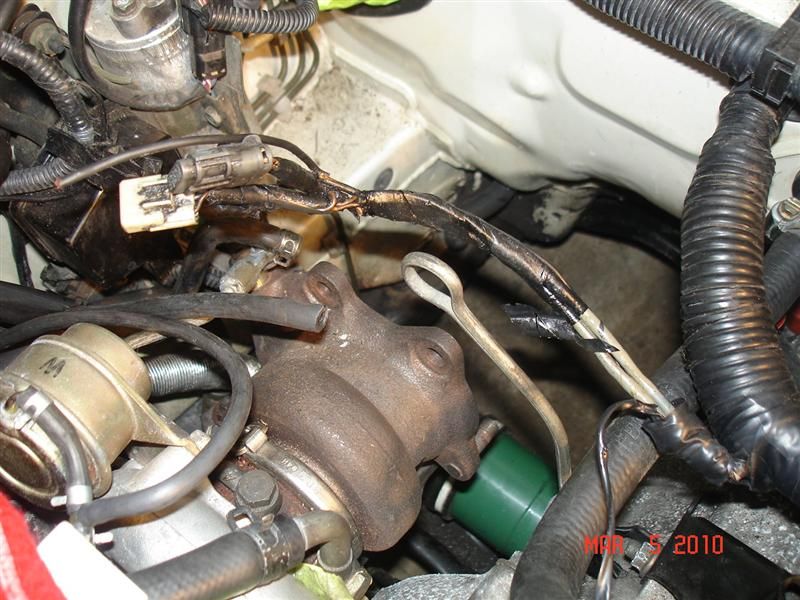
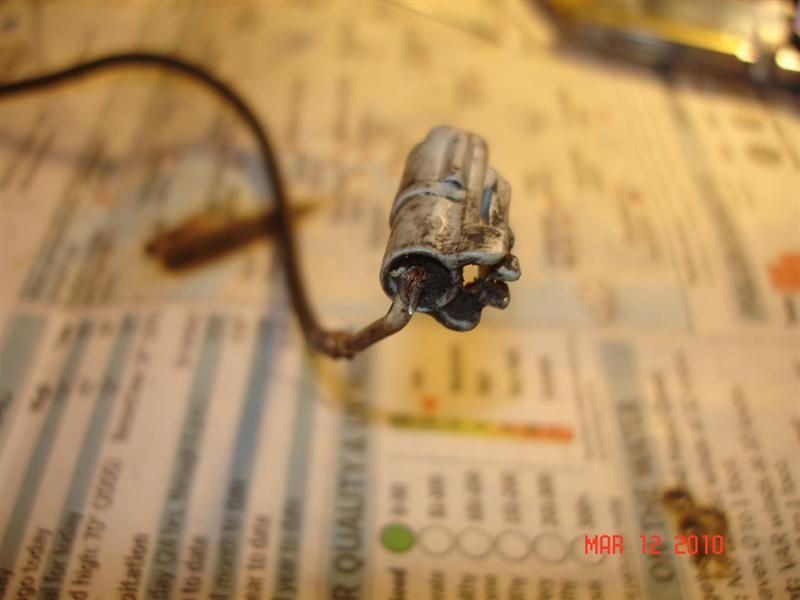
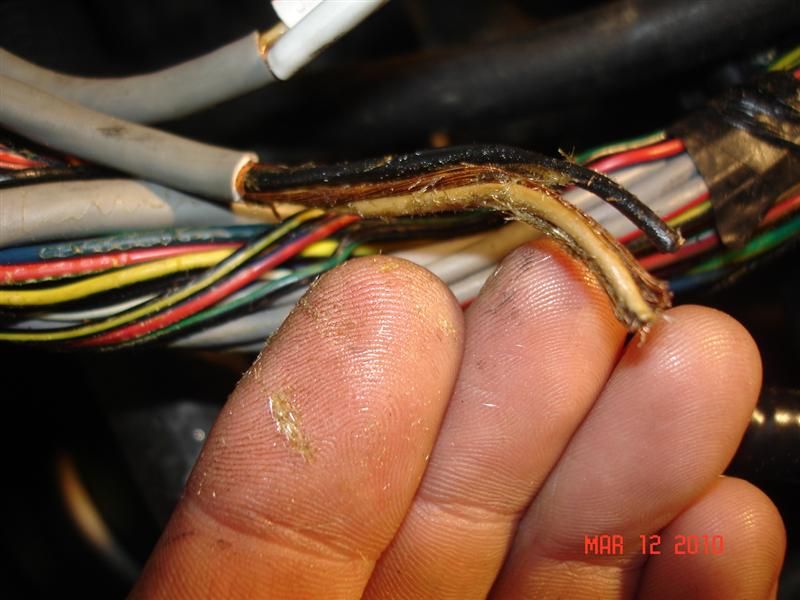
I was planning on doing the whole rewiring of the knock sensor, cam and crank sensor wires because I discovered they were cracked at the connectors and where they came out of the main harness. I got the tape and loom removed and that was tedious enough. It was all brittle and covered with oil.
At first I thought someone had done a haggard repair job on it already. Until I opened up my replacement harness I got from a junkyard legacy and found it was the exact same way meaning it must be factory like that. Seems odd that it would come out of the factory looking so crappy.
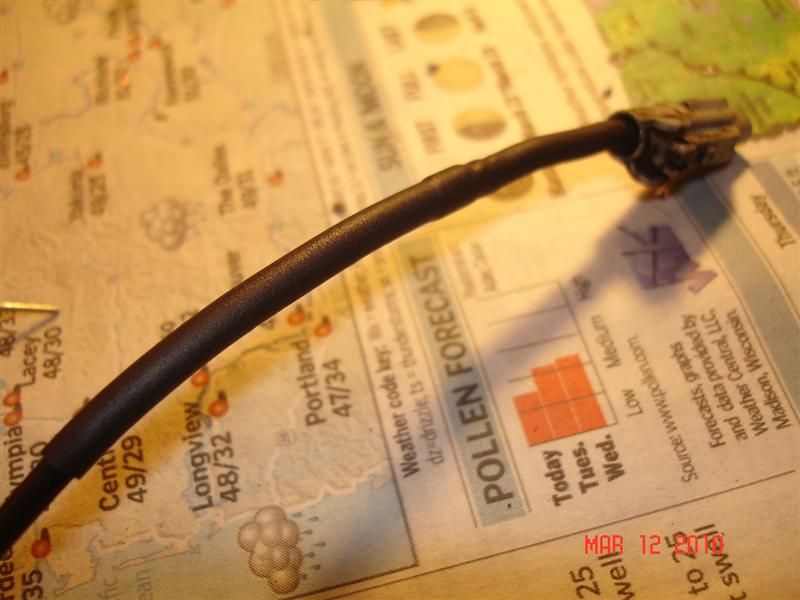
The stock wire jackets are so brittle you can't bend them at all or they break. The junkyard one is much nicer and I'm assuming it's because it wasn't covered in oil.
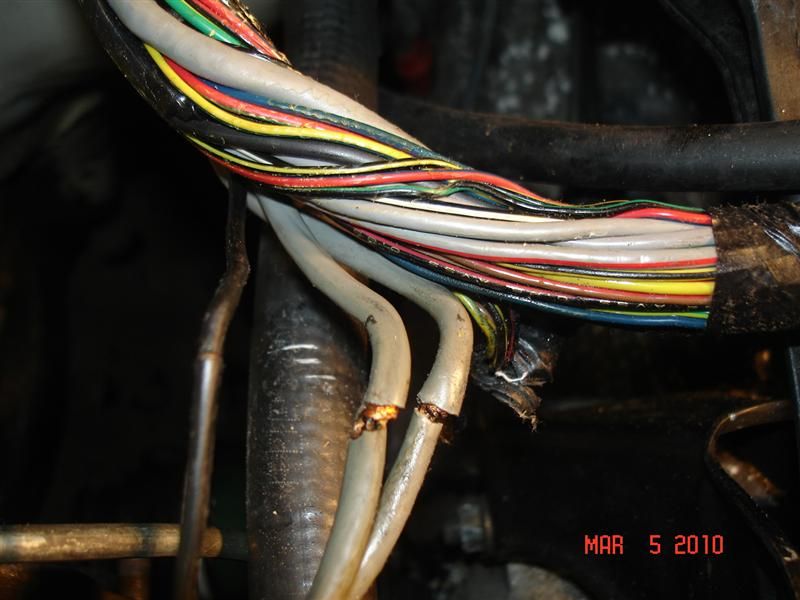
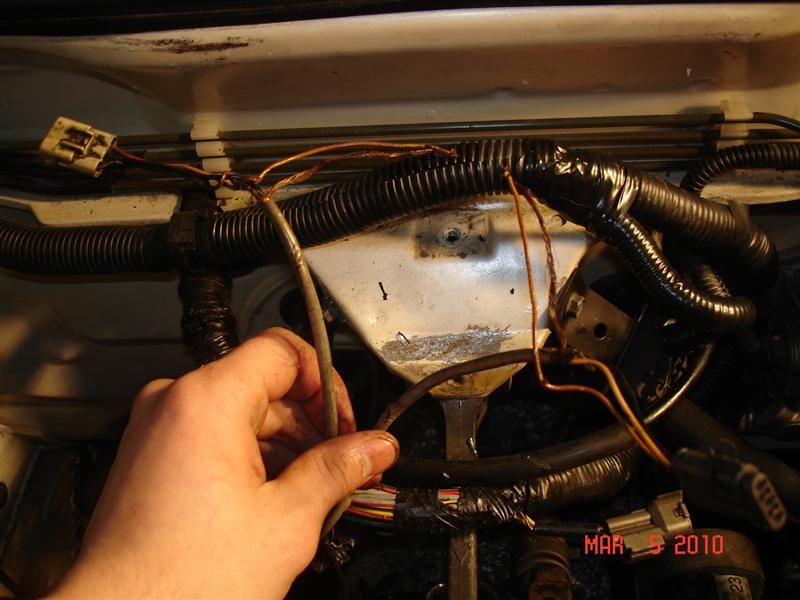
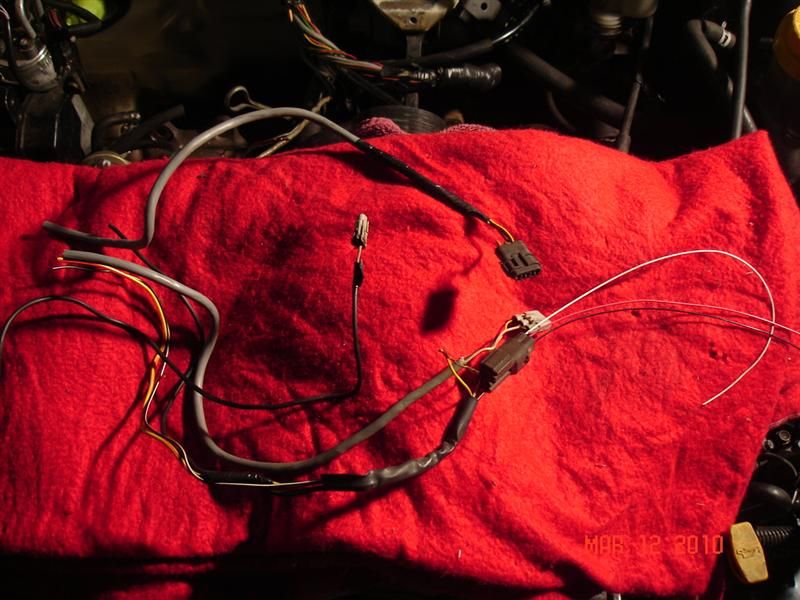
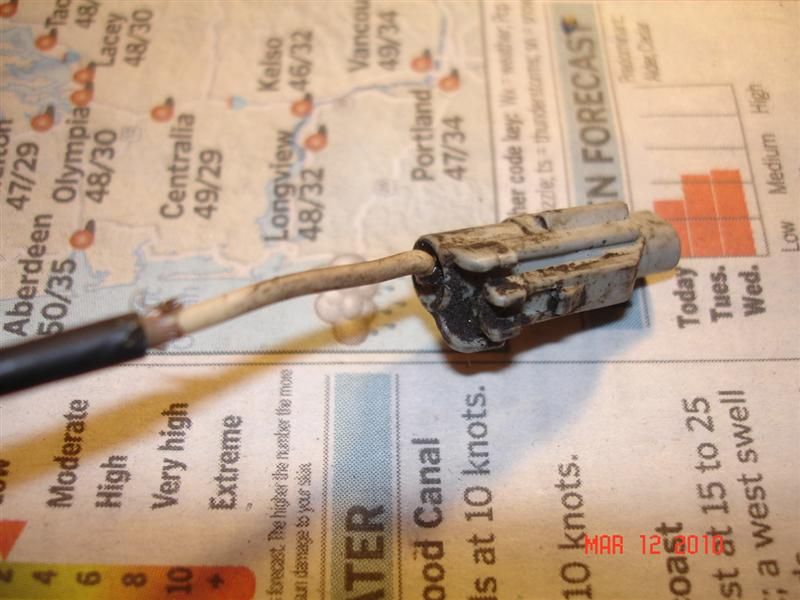
Here's the junkyard harness for comparison. Same shit but not brittle.
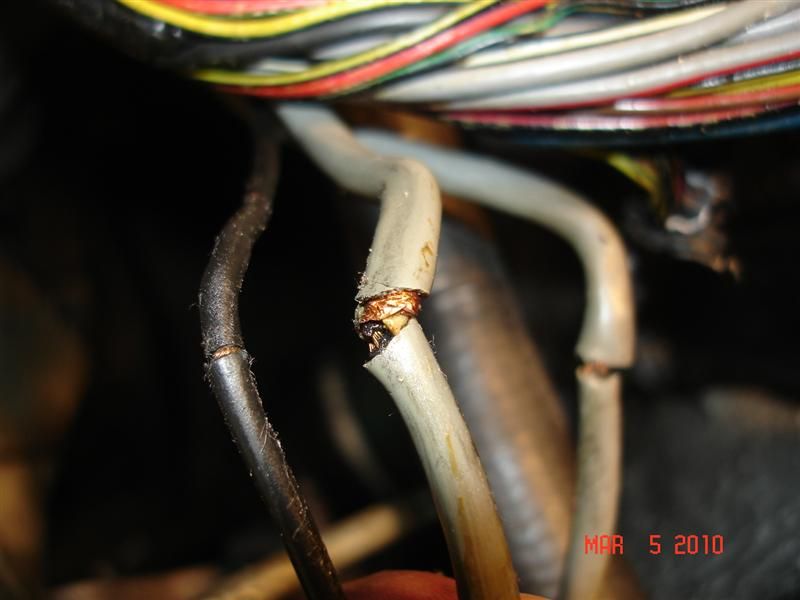
How should I go about repairing this mess? I'm going to have to cut those wires off way down in the harness before where they come out of the loom because that's where it's cracked and I think it's even broken the wires there. So I have to reconnect that shield as well. How important is that shield? Pretty important? Is it actually shielding the signals from the other wires and vice versa? It's probably only important to keep the shield prior to where it leaves the main harness so there's no interference from the other wires.
How do I repair connectors? The wires are broken right at the connectors. The jackets anyways and someone said on here hot glueing them won't work haha.
Anybody know a tutorial on the correct way to do this and if I need a special tool to remove the pins and fix them.
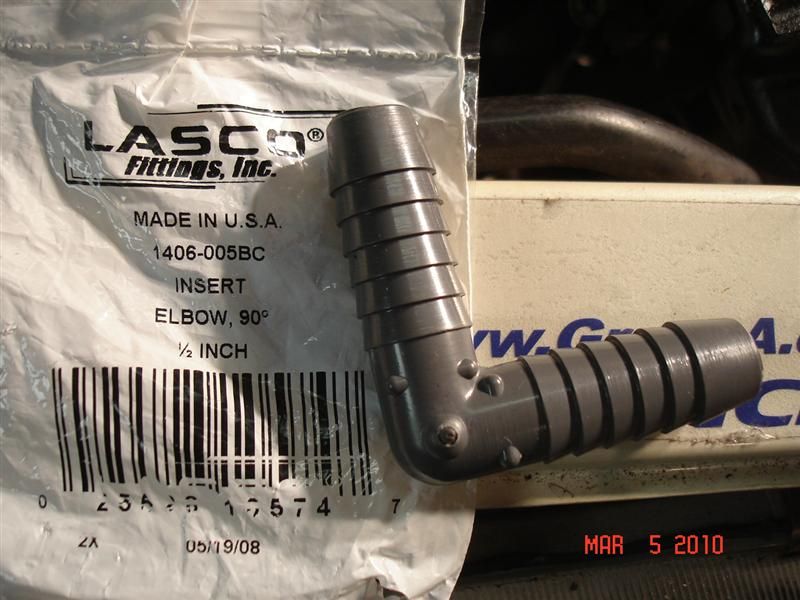
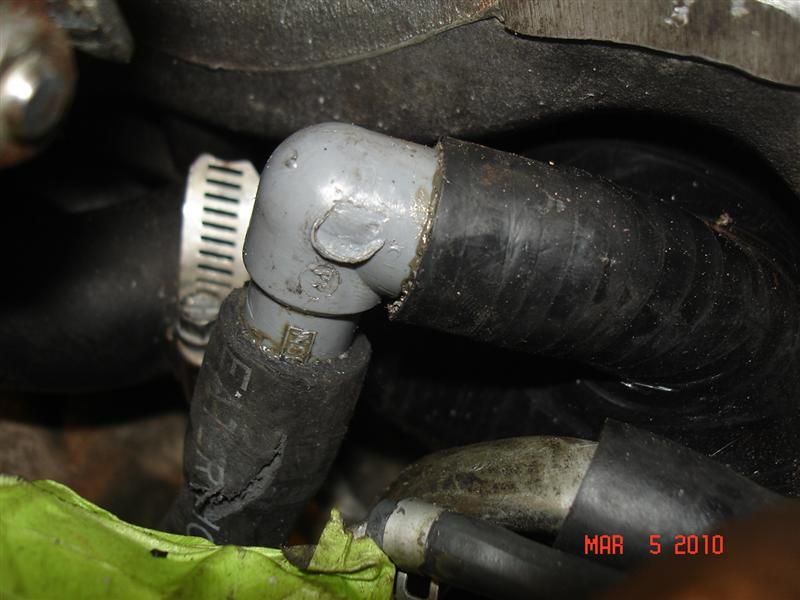
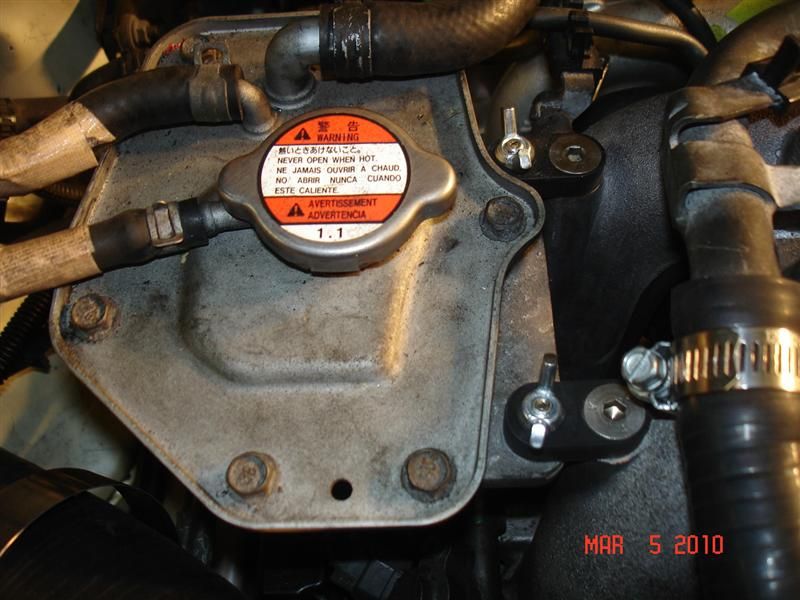
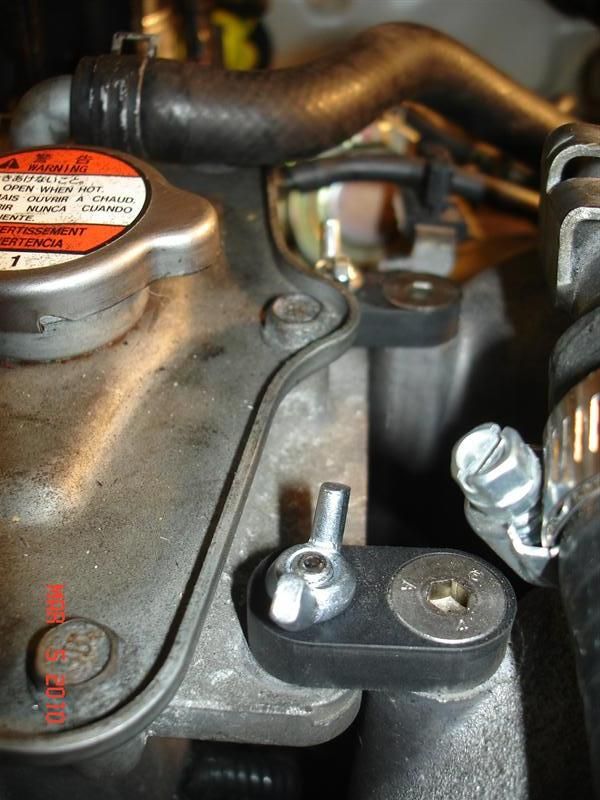
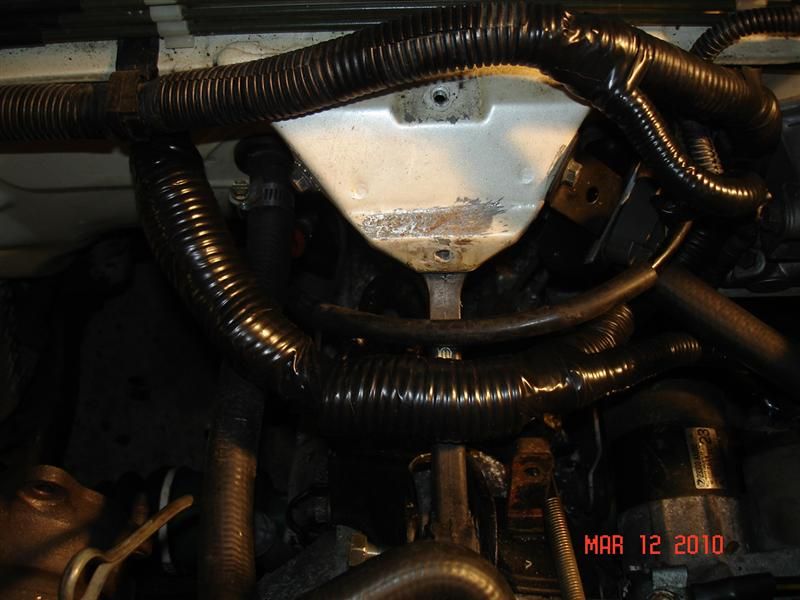
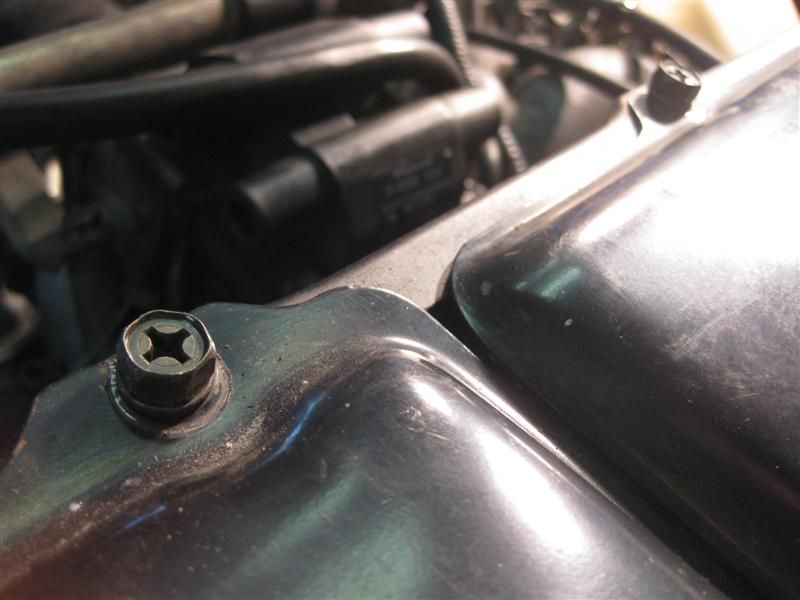
I put a new piece of hose on this PCV vent and had it hooked up to the silicone intake but since it wasn't molded with a 90* bend like the stock one it was putting a lot of stress on the silicone hose and the plastic piece of the PCV tube. I found this 90* PCV elbow at Ace Hardware. They have almost an identical one at Lowes. It's about $0.99. It was a bitch to get in all the way. Shoving it down into the PCV hose was so hard I could only get it halfway in. Then I had to cut off at least 1/2" off the other end because I could only get that end in halfway as well and the throttle linkage was hitting it when you open up the throttle.
It's in now though and I feel better knowing that plastic piece probably won't break from the stress.
Got some bolts and butterflly nuts just long enough to mount the water tank to the underside of these thermal decoupler mounting tabs because when mounted on the top the tank was hitting the hood.
I was planning on doing the whole rewiring of the knock sensor, cam and crank sensor wires because I discovered they were cracked at the connectors and where they came out of the main harness. I got the tape and loom removed and that was tedious enough. It was all brittle and covered with oil.
At first I thought someone had done a haggard repair job on it already. Until I opened up my replacement harness I got from a junkyard legacy and found it was the exact same way meaning it must be factory like that. Seems odd that it would come out of the factory looking so crappy.
The stock wire jackets are so brittle you can't bend them at all or they break. The junkyard one is much nicer and I'm assuming it's because it wasn't covered in oil.
Here's the junkyard harness for comparison. Same shit but not brittle.
How should I go about repairing this mess? I'm going to have to cut those wires off way down in the harness before where they come out of the loom because that's where it's cracked and I think it's even broken the wires there. So I have to reconnect that shield as well. How important is that shield? Pretty important? Is it actually shielding the signals from the other wires and vice versa? It's probably only important to keep the shield prior to where it leaves the main harness so there's no interference from the other wires.
How do I repair connectors? The wires are broken right at the connectors. The jackets anyways and someone said on here hot glueing them won't work haha.
Anybody know a tutorial on the correct way to do this and if I need a special tool to remove the pins and fix them.
I put a new piece of hose on this PCV vent and had it hooked up to the silicone intake but since it wasn't molded with a 90* bend like the stock one it was putting a lot of stress on the silicone hose and the plastic piece of the PCV tube. I found this 90* PCV elbow at Ace Hardware. They have almost an identical one at Lowes. It's about $0.99. It was a bitch to get in all the way. Shoving it down into the PCV hose was so hard I could only get it halfway in. Then I had to cut off at least 1/2" off the other end because I could only get that end in halfway as well and the throttle linkage was hitting it when you open up the throttle.
It's in now though and I feel better knowing that plastic piece probably won't break from the stress.
Got some bolts and butterflly nuts just long enough to mount the water tank to the underside of these thermal decoupler mounting tabs because when mounted on the top the tank was hitting the hood.
98 Metro Hatch Daily Driver :)
91 SS EJ20G Engine/Tranny/Diff Swap Build Thread Here
"Your testes are close to your bottom but you still play with them all the time." Jeremy Clarkson
91 SS EJ20G Engine/Tranny/Diff Swap Build Thread Here
"Your testes are close to your bottom but you still play with them all the time." Jeremy Clarkson
-
beatersubi
- Fifth Gear
- Posts: 2385
- Joined: Tue Mar 13, 2007 12:56 am
- Location: 10-9-oh(!), wa
Re: kimokalihi's 91 SS EJ20 Swap
Heat will do that to wires, as well. Try to route them as far from the exhaust and hot engine parts as possible. For the connectors, you can pull the pins out and solder the wires directly to them. Its tedious, but really the best way.
-
kimokalihi
- Fifth Gear
- Posts: 8360
- Joined: Mon Nov 06, 2006 3:41 am
- Location: Tenino, WA
Re: kimokalihi's 91 SS EJ20 Swap
I definately plan on repinning these things and soldering/heatshrinking them properly. Not looking forward to spending hours on top of my engine but it must be done. I don't even think my car would have run right with the wires in the condition they were in. Good thing I noticed they were damaged. Electrical work sucks. It's not bad when you can do it inside your house where it's warm and comfortable and the lighting is optimal but outside when it's freezing or close to it on top of your engine with cold hands...fun. 
98 Metro Hatch Daily Driver :)
91 SS EJ20G Engine/Tranny/Diff Swap Build Thread Here
"Your testes are close to your bottom but you still play with them all the time." Jeremy Clarkson
91 SS EJ20G Engine/Tranny/Diff Swap Build Thread Here
"Your testes are close to your bottom but you still play with them all the time." Jeremy Clarkson
-
kimokalihi
- Fifth Gear
- Posts: 8360
- Joined: Mon Nov 06, 2006 3:41 am
- Location: Tenino, WA
Re: kimokalihi's 91 SS EJ20 Swap
Made some progress last night. Feeling pretty good now that it's behind me.
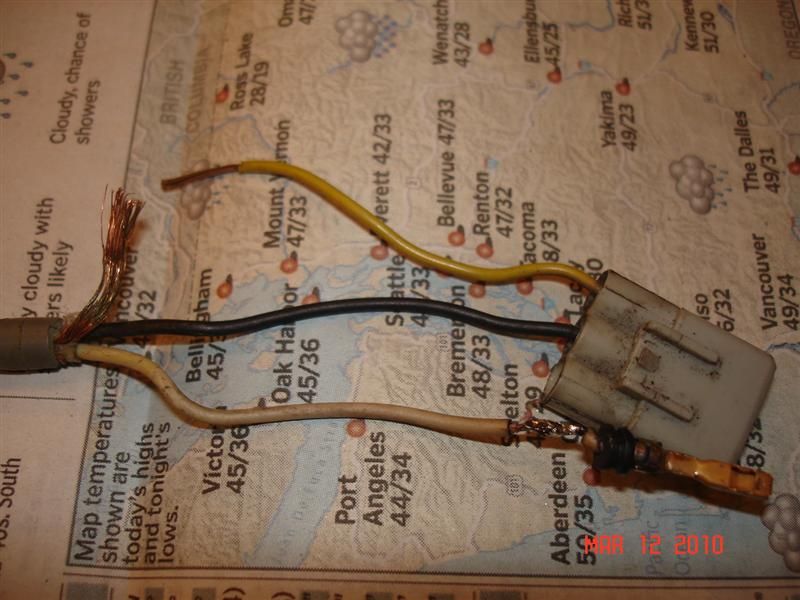
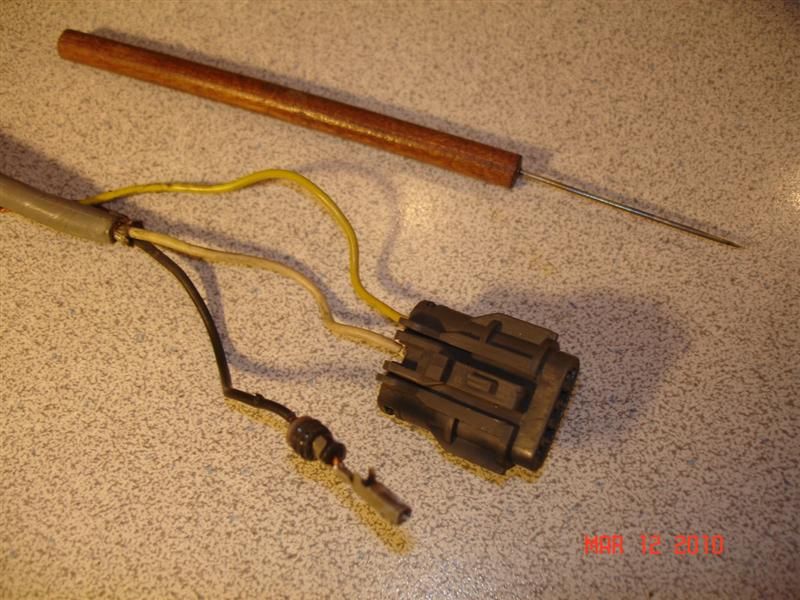
Here's the replacement wires and connectors I cut off the junkyard harness. They also have a few cracked wires at the connectors but at least the wires are still nice and flexible.
In order to remove the pins in the connectors you need a very small diameter tool that's strong and won't bend with a sharp point. Stick it in the connector on the business end and pry the little plastic tab away from the metal pin and gently pull on the corresponding wire to remove each pin.
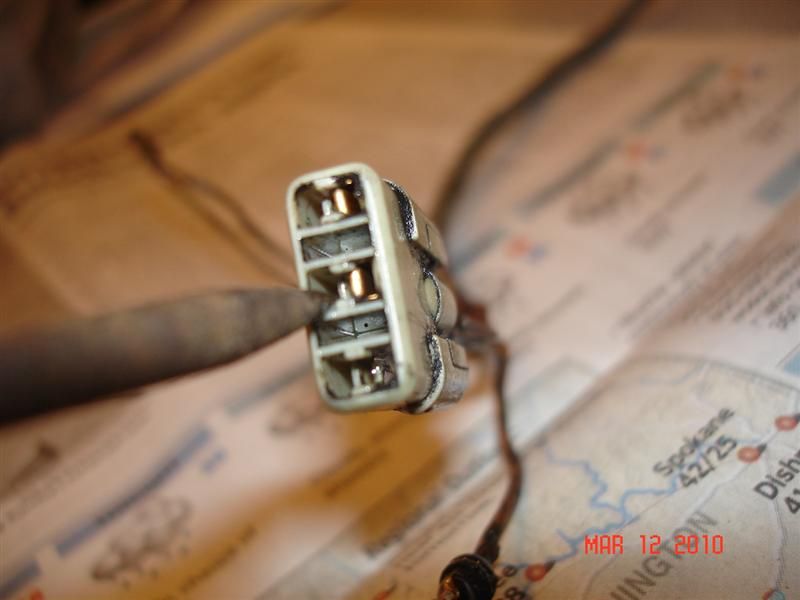
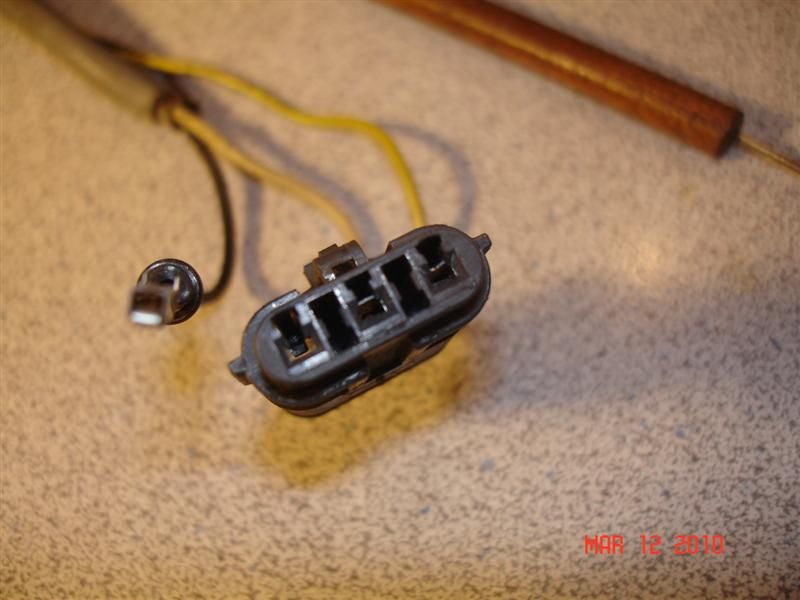
You can see the plastic tabs better in this picture.
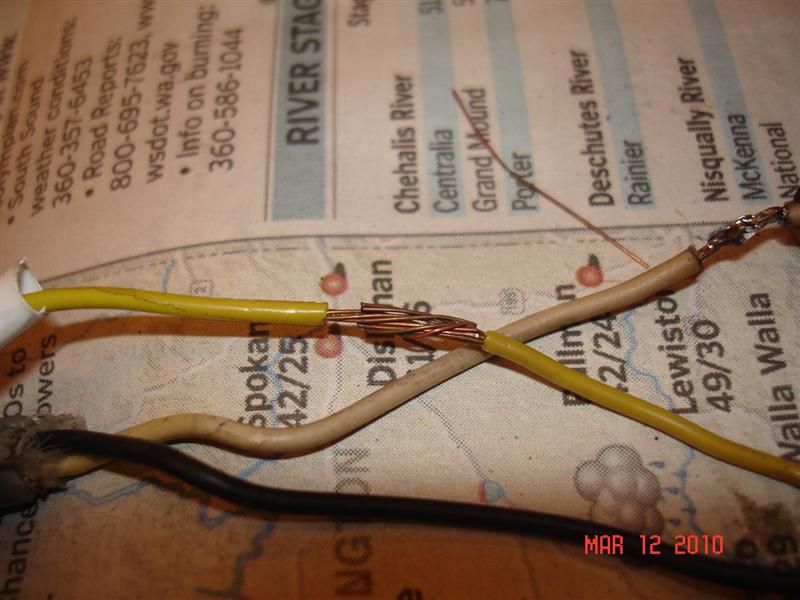
Here a pin is removed. I didn't have the tool to cimp it as it requires a very small crimping tool so I decided not to rewire the pins as I had planned to but instead cut the wires shortly after where they were cracked and remove the jacket and resolder them together again. The wire with the pin removed has already been cut and resoldered.
I also didn't like that crimp connection they had on the shield wiring and it was all corroded anyway so I cut it short and soldered it back together without the crimp connection.
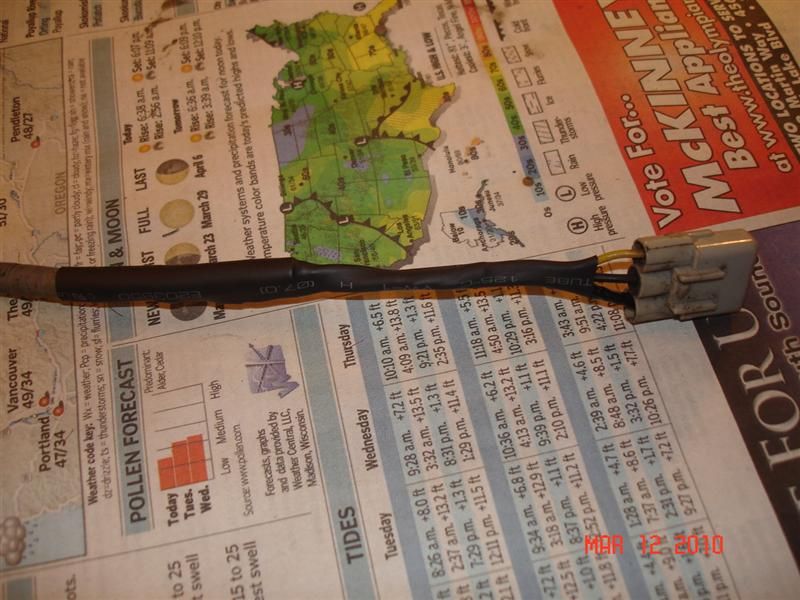
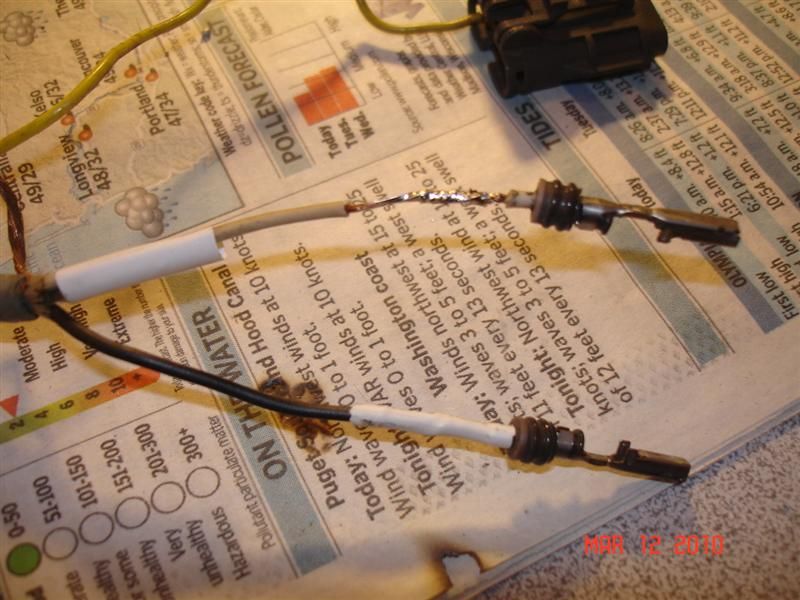
Here's the finished product with the individual heatshrink tubes and the larger heatshrink tube to sum it all up.
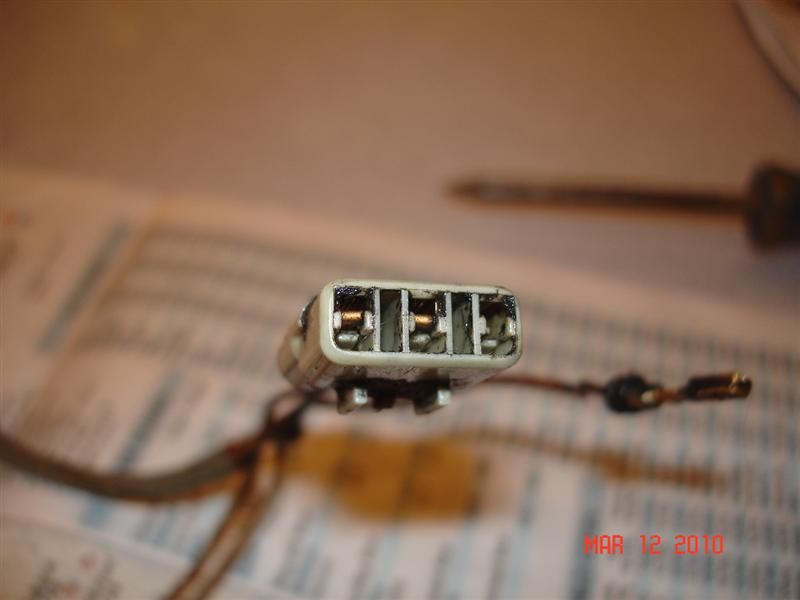
Next was the crank sensor connector. This connector for some reason had an extra piece here to keep the pins from coming out even though it still had the plastic tabs inside of it.

The crank sensor was a bitch. My custom philips screwdriver grinded down to a point which I found in the garage wouldn't fit into the crank sensor connector to pry the tabs open. I had to go searching the garage again and found this nifty little clay cutting tool I stole from pottery when I was in high school. Heh heh. It did the job quite well.
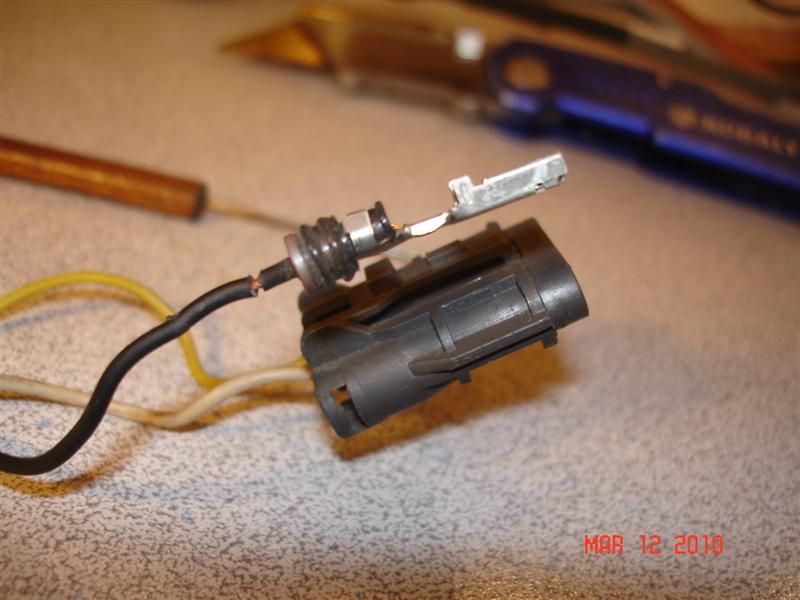
Cut and soldered the wires and removed the stupid crimp piece. Heatshrink and done.
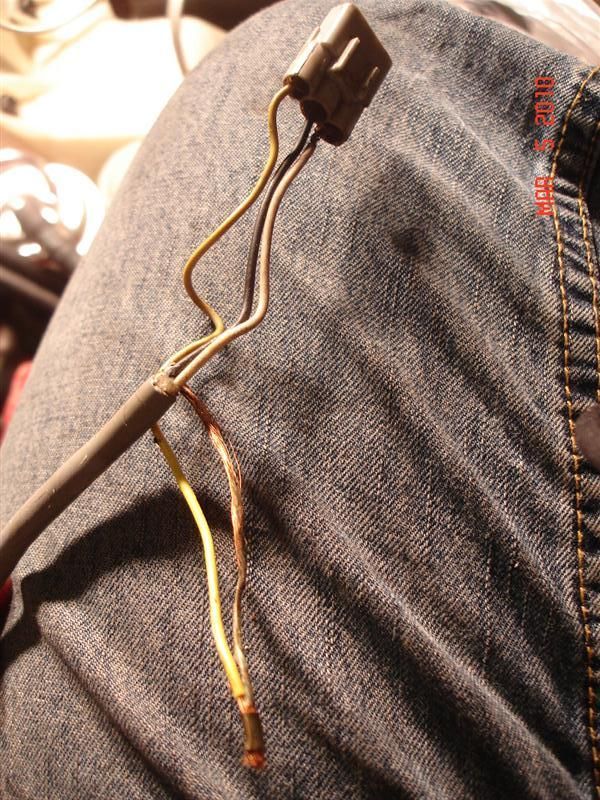
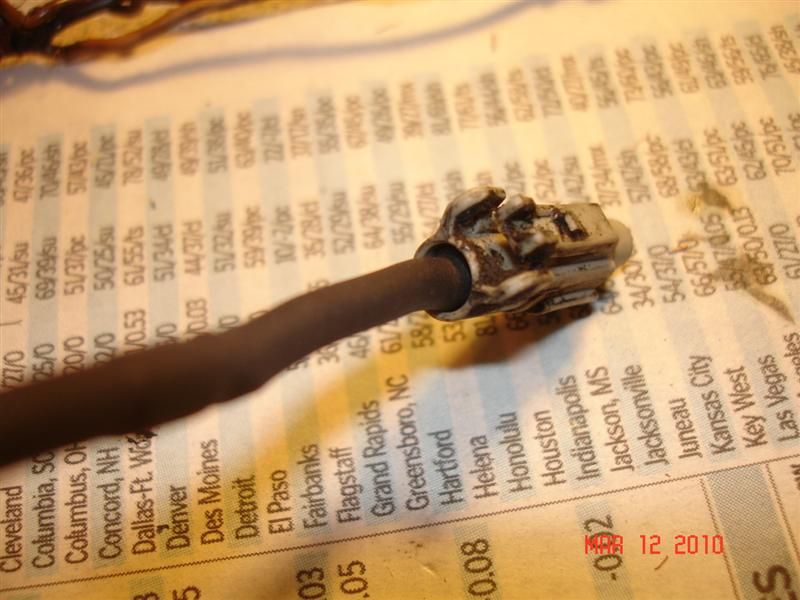
The knock sensor connector which I discovered recently that my car didn't even have. This one was cracked as well.
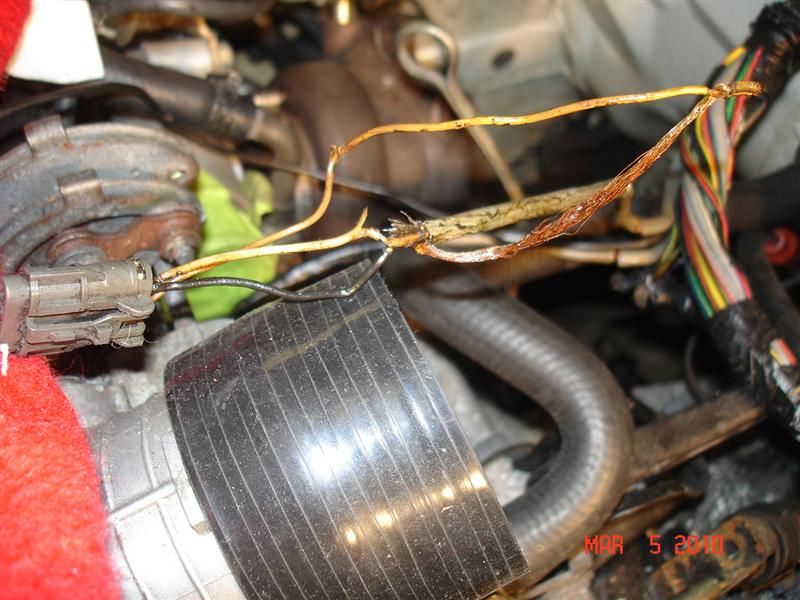
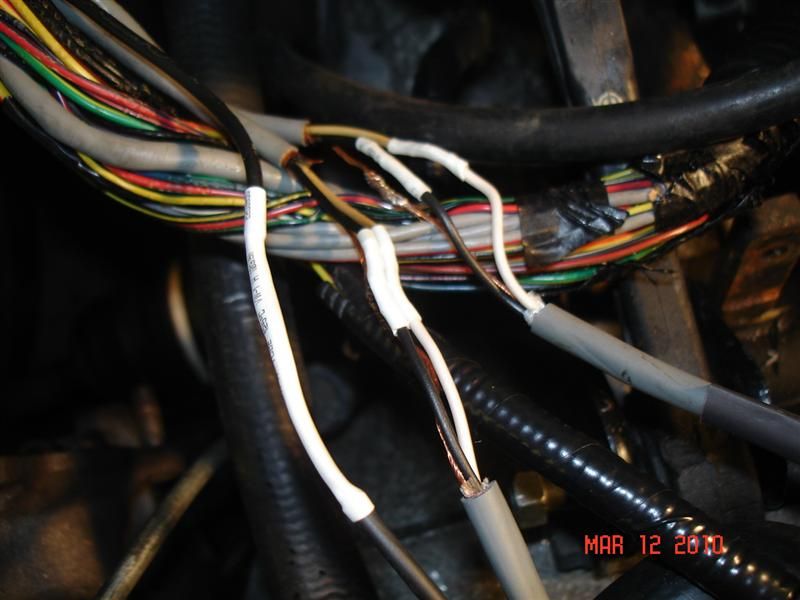
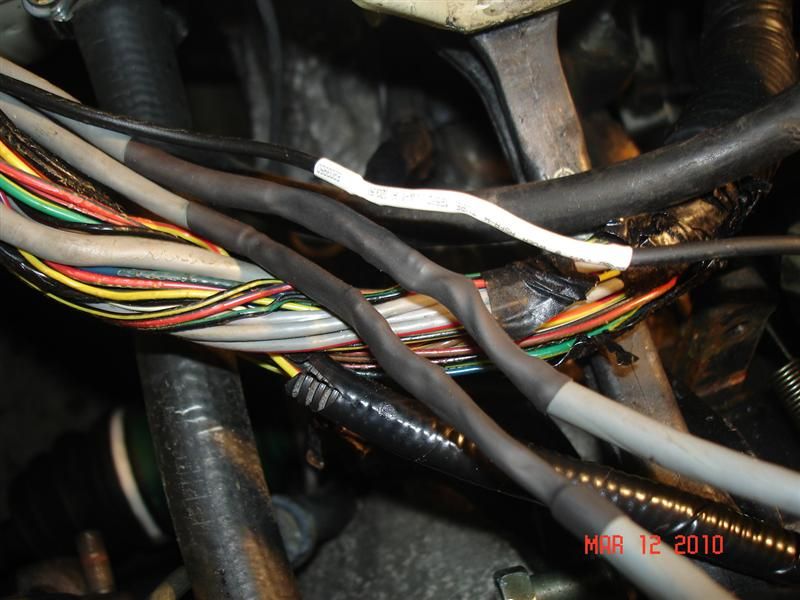
Then it was back out to the garage to wire it all into the main harness. Fun... The stock wiring was bad. Brittle, oily, cracked and ready to crack more with the slightest bend. Luckily it was all going to be in the stiff harness so it won't be bending again.
This shows the nasty condition the inside of the wires were in. Somehow they were oily inside the wiring which was inside the loom and taped up like crazy. The insulation or whatever you call those strands were basically disintegrated and came apart upon touching them. This same insulation was white and strong as hell in the junkyard harness which was a year older than mine!
Wiring all soldered up. Heatshrink ready for the heat gun.
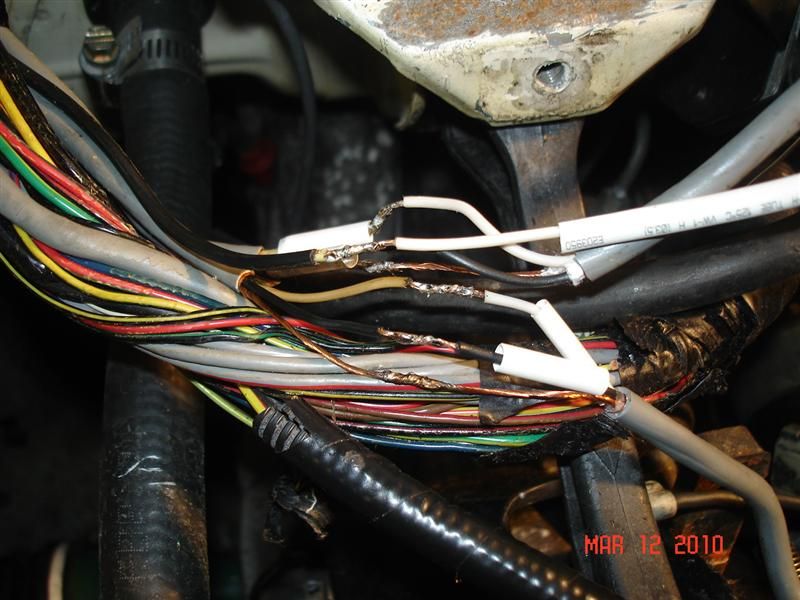
Done deal! Should last a long time. Electrical sucks.
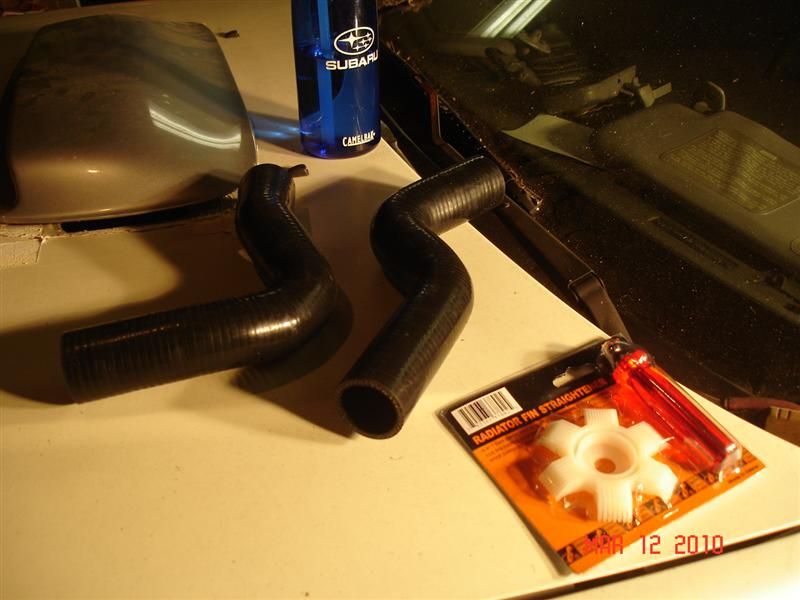
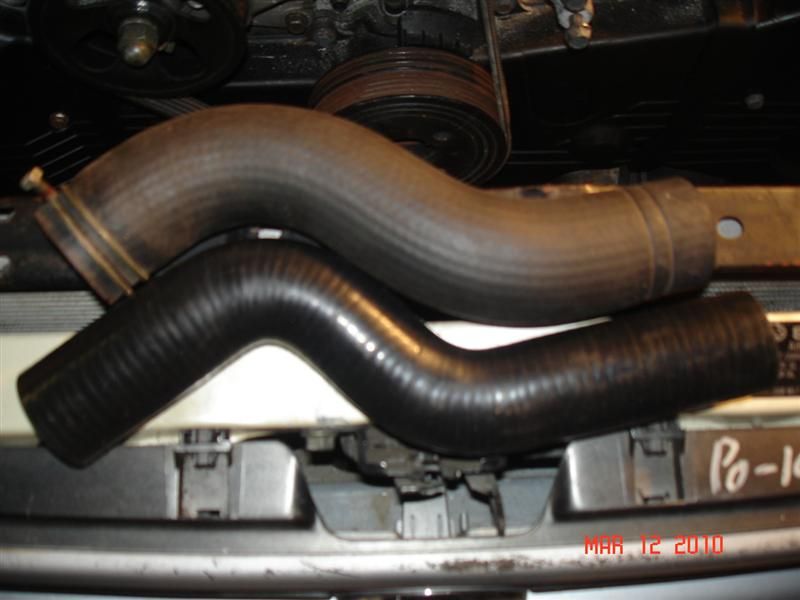
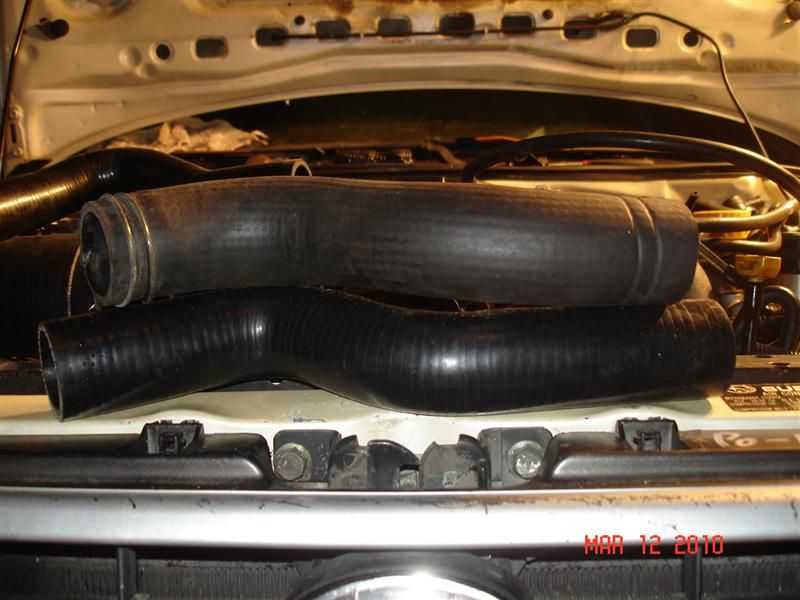
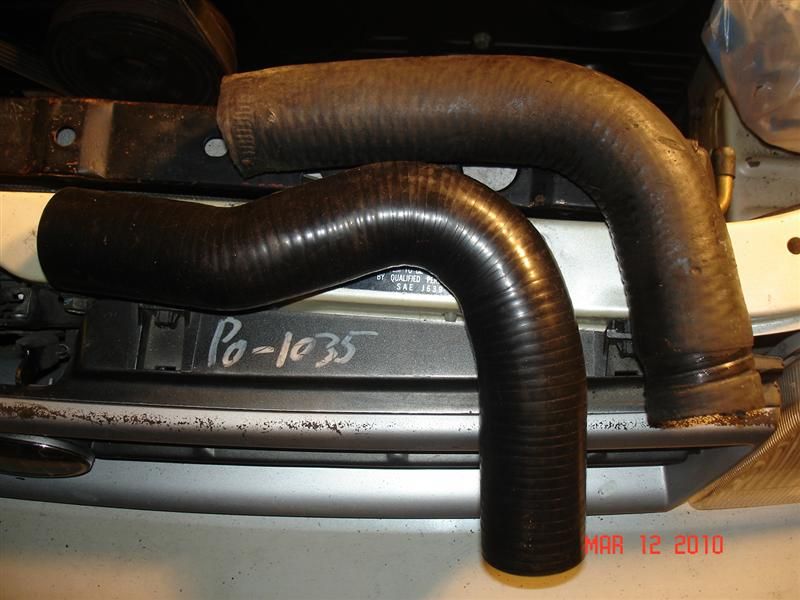
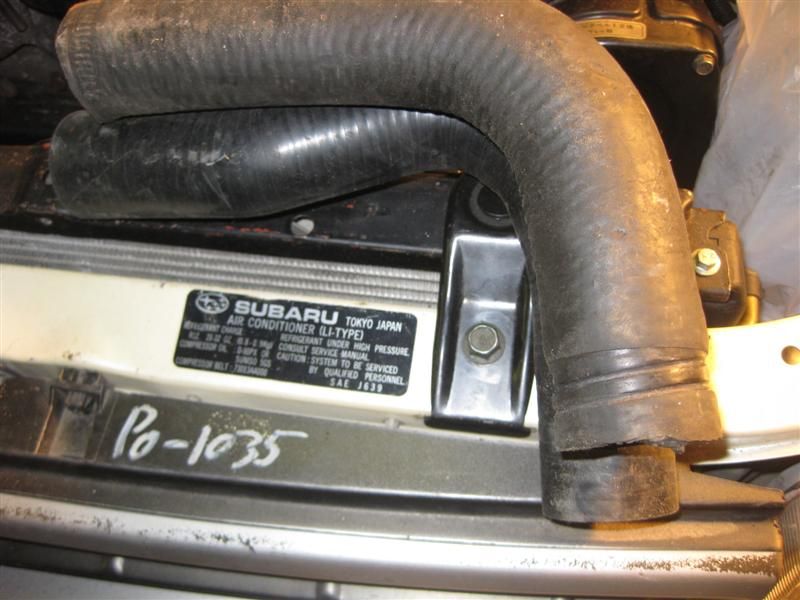
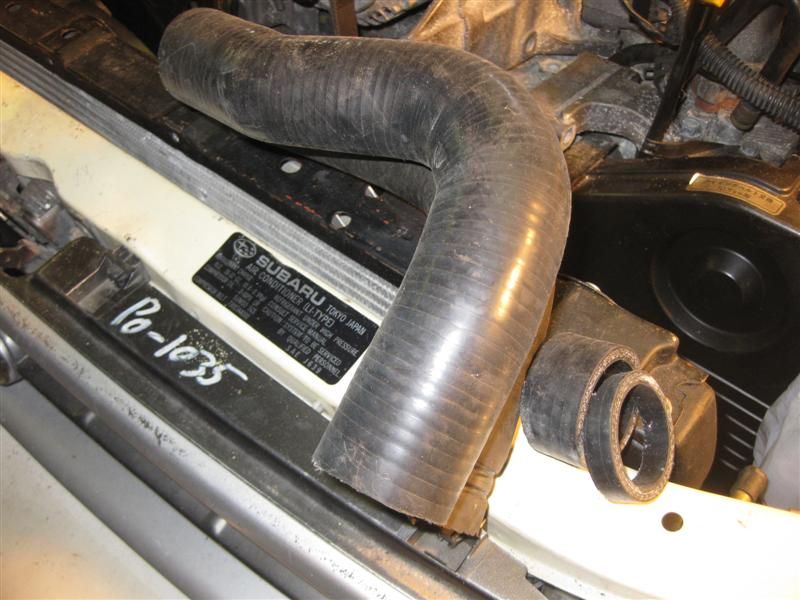
My new silicone radiator hoses for GC8 imprezas finally came in the mail after spending a couple days in US customs. They're similar but a bit different and somewhat longer. It looks as though I'll be able to cut the ends a little shorter and they should work fine. Then I realized I don't have hose clamps for them. Back to siliconeintakes.com and another week delay on putting in the radiator.
Here's the replacement wires and connectors I cut off the junkyard harness. They also have a few cracked wires at the connectors but at least the wires are still nice and flexible.
In order to remove the pins in the connectors you need a very small diameter tool that's strong and won't bend with a sharp point. Stick it in the connector on the business end and pry the little plastic tab away from the metal pin and gently pull on the corresponding wire to remove each pin.
You can see the plastic tabs better in this picture.
Here a pin is removed. I didn't have the tool to cimp it as it requires a very small crimping tool so I decided not to rewire the pins as I had planned to but instead cut the wires shortly after where they were cracked and remove the jacket and resolder them together again. The wire with the pin removed has already been cut and resoldered.
I also didn't like that crimp connection they had on the shield wiring and it was all corroded anyway so I cut it short and soldered it back together without the crimp connection.
Here's the finished product with the individual heatshrink tubes and the larger heatshrink tube to sum it all up.
Next was the crank sensor connector. This connector for some reason had an extra piece here to keep the pins from coming out even though it still had the plastic tabs inside of it.
The crank sensor was a bitch. My custom philips screwdriver grinded down to a point which I found in the garage wouldn't fit into the crank sensor connector to pry the tabs open. I had to go searching the garage again and found this nifty little clay cutting tool I stole from pottery when I was in high school. Heh heh. It did the job quite well.
Cut and soldered the wires and removed the stupid crimp piece. Heatshrink and done.
The knock sensor connector which I discovered recently that my car didn't even have. This one was cracked as well.
Then it was back out to the garage to wire it all into the main harness. Fun... The stock wiring was bad. Brittle, oily, cracked and ready to crack more with the slightest bend. Luckily it was all going to be in the stiff harness so it won't be bending again.
This shows the nasty condition the inside of the wires were in. Somehow they were oily inside the wiring which was inside the loom and taped up like crazy. The insulation or whatever you call those strands were basically disintegrated and came apart upon touching them. This same insulation was white and strong as hell in the junkyard harness which was a year older than mine!
Wiring all soldered up. Heatshrink ready for the heat gun.
Done deal! Should last a long time. Electrical sucks.
My new silicone radiator hoses for GC8 imprezas finally came in the mail after spending a couple days in US customs. They're similar but a bit different and somewhat longer. It looks as though I'll be able to cut the ends a little shorter and they should work fine. Then I realized I don't have hose clamps for them. Back to siliconeintakes.com and another week delay on putting in the radiator.
98 Metro Hatch Daily Driver :)
91 SS EJ20G Engine/Tranny/Diff Swap Build Thread Here
"Your testes are close to your bottom but you still play with them all the time." Jeremy Clarkson
91 SS EJ20G Engine/Tranny/Diff Swap Build Thread Here
"Your testes are close to your bottom but you still play with them all the time." Jeremy Clarkson
-
SubiePrice88
- Third Gear
- Posts: 617
- Joined: Thu Dec 13, 2007 5:41 am
- Location: Spokane,Wa
Re: kimokalihi's 91 SS EJ20 Swap
Nice! Looks good!
Those hoses should work fine
Those hoses should work fine
-
kimokalihi
- Fifth Gear
- Posts: 8360
- Joined: Mon Nov 06, 2006 3:41 am
- Location: Tenino, WA
Re: kimokalihi's 91 SS EJ20 Swap
Thanks!
They should fit alright. Just need to do some surgery on them first. I didn't think they'd be that much different.
They should fit alright. Just need to do some surgery on them first. I didn't think they'd be that much different.
98 Metro Hatch Daily Driver :)
91 SS EJ20G Engine/Tranny/Diff Swap Build Thread Here
"Your testes are close to your bottom but you still play with them all the time." Jeremy Clarkson
91 SS EJ20G Engine/Tranny/Diff Swap Build Thread Here
"Your testes are close to your bottom but you still play with them all the time." Jeremy Clarkson
Re: kimokalihi's 91 SS EJ20 Swap
Man, don't log the BBS for a while and Kimo gets a camera again!
Wiring looks great. Good job. Make sure you modify a turbo heatshield to fit around the new downpipe.
P.S.
You have a PM about the exhaust and my deadbeat ass.
Wiring looks great. Good job. Make sure you modify a turbo heatshield to fit around the new downpipe.
P.S.
You have a PM about the exhaust and my deadbeat ass.
-
kimokalihi
- Fifth Gear
- Posts: 8360
- Joined: Mon Nov 06, 2006 3:41 am
- Location: Tenino, WA
Re: kimokalihi's 91 SS EJ20 Swap
Damn Jess you have been gone a long time. I've been using my gf's camera for months now. I just went in the house to look for it cuz I'm thinking about going over to the parent's place to install my radiator with the new hoses but I don't see it anywhere. Must be in her room but I don't want to go wake her up. I wish my camera would work.
I'll check out the EJ20G heatshield and see how it fits. Should bolt right on I'd imagine.
I'll check out the EJ20G heatshield and see how it fits. Should bolt right on I'd imagine.
98 Metro Hatch Daily Driver :)
91 SS EJ20G Engine/Tranny/Diff Swap Build Thread Here
"Your testes are close to your bottom but you still play with them all the time." Jeremy Clarkson
91 SS EJ20G Engine/Tranny/Diff Swap Build Thread Here
"Your testes are close to your bottom but you still play with them all the time." Jeremy Clarkson
Re: kimokalihi's 91 SS EJ20 Swap
It will still bolt on, but you will need to trim the backside to fit over a bellmouth downpipe.
-
kimokalihi
- Fifth Gear
- Posts: 8360
- Joined: Mon Nov 06, 2006 3:41 am
- Location: Tenino, WA
Re: kimokalihi's 91 SS EJ20 Swap
Couldn't sleep anymore yesterday. Woke up 3 hours early and decided to go to my parents to have my mom help me with a credit issue that popped up on my credit report preventing me from qualifying for a loan when I would otherwise have had pretty good credit. Afterwards I had an hour or so left to install my radiator with new bushings, silicone hoses and Tbolt clamps!
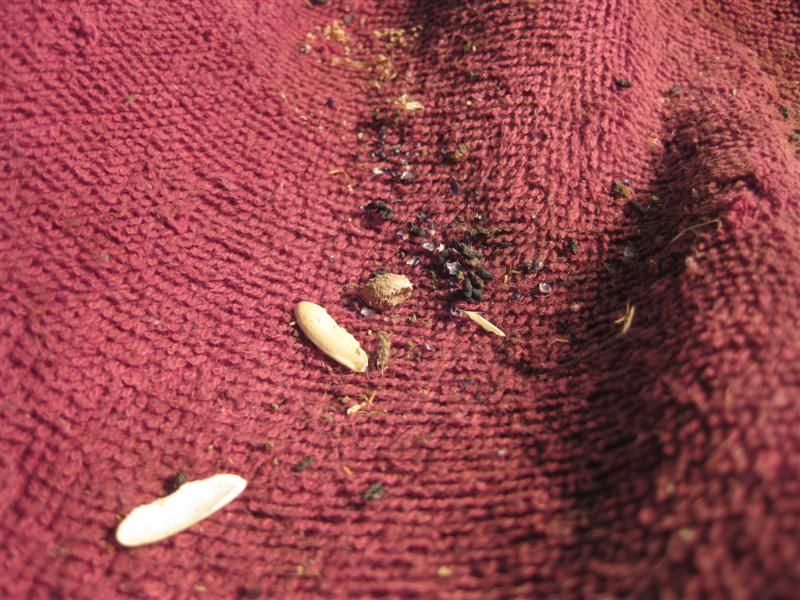
I left a towel covering my engine the last couple times I got done working on it. Both times I've now found empty seed shells and mouse turds on the towel on top of my engine. Bastards. If those things chew my wiring I'm gonna lose my mind. I don't know how the hell they discover these places to sleep. I have a sneaking suspicion that mice are the reason my other legacy is having all kinds of crazy electrical problems after sitting in a field for 2 years.
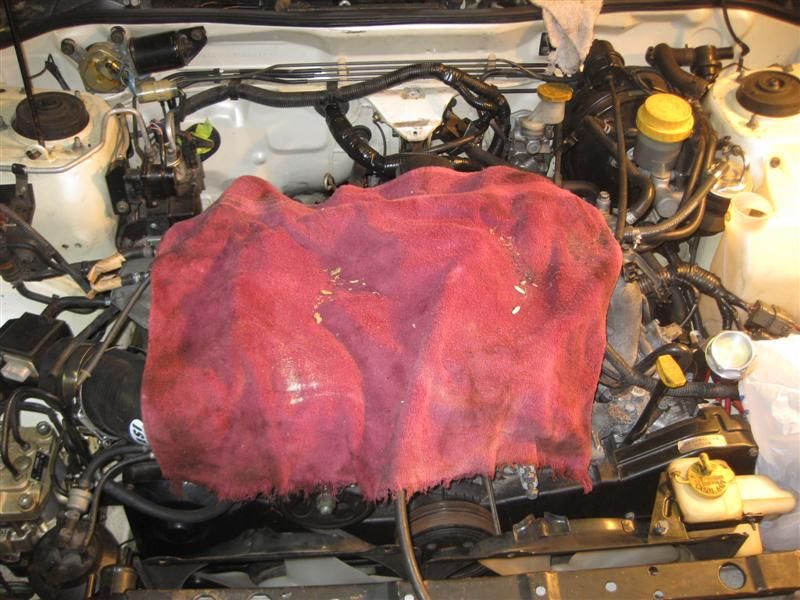
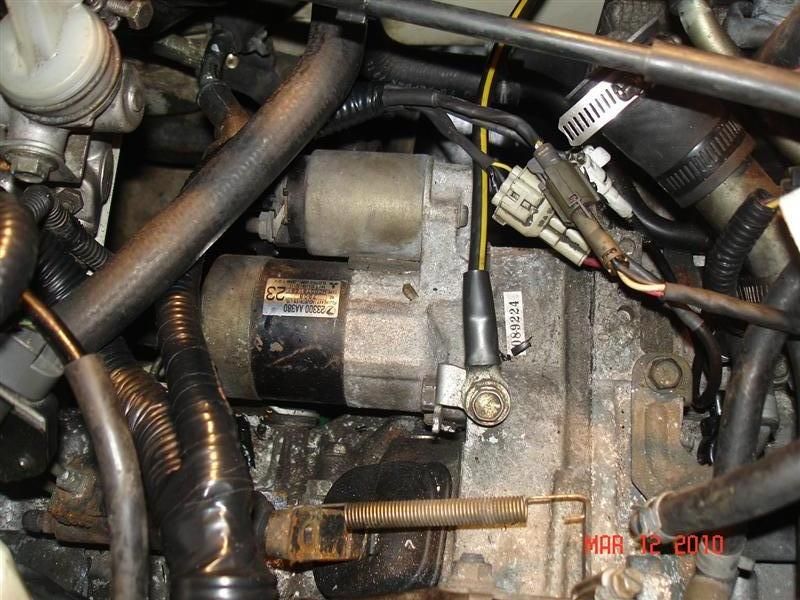
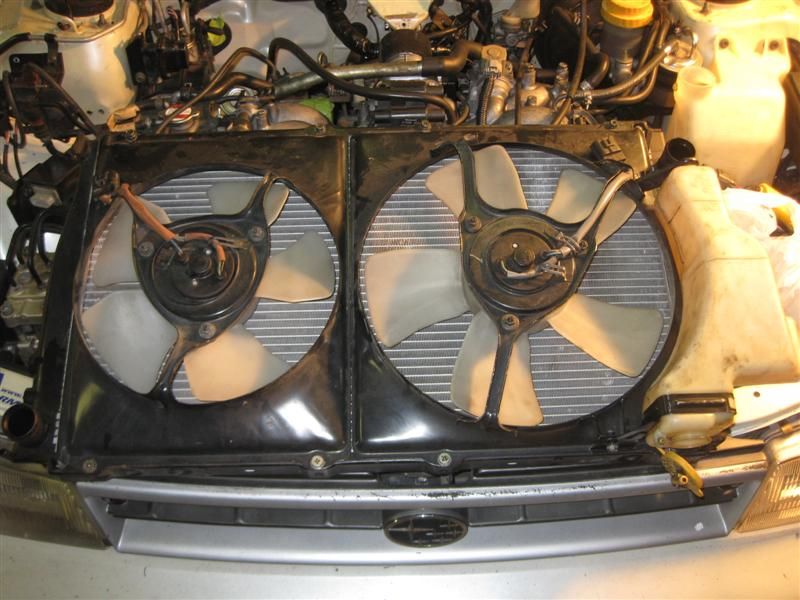
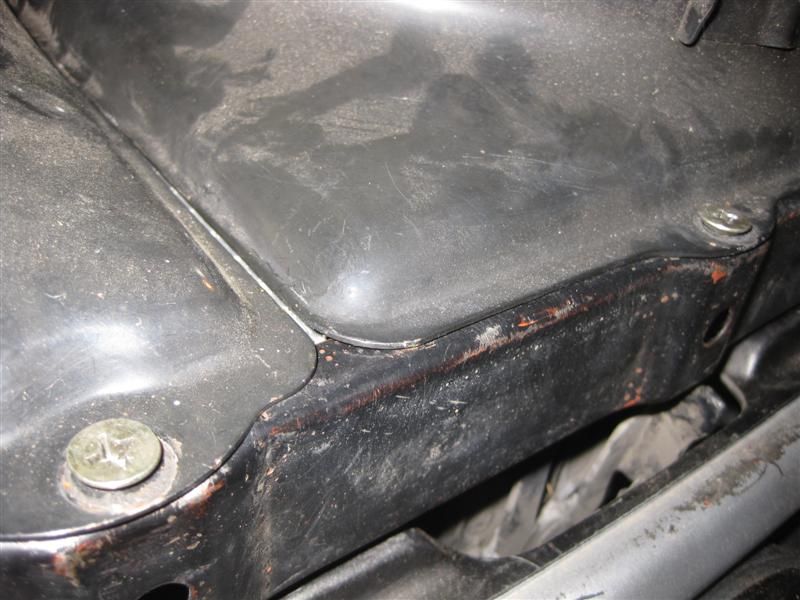
Fans bolted on. When I got this radiator from Jake I got no mounting bolts with it. I found 4 leftover mounting bolts for the metal plate I installed on the back of the motor and had to use the stock bolts that were holding the plastic cover on to bolt the top of the fans on. Not the best bolts for the job but they'll suffice for now.
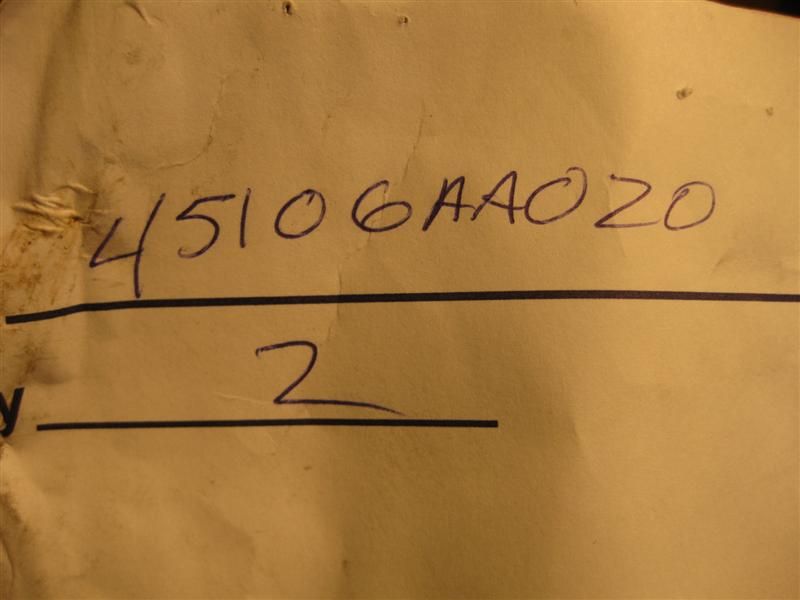
The guy at the dealership took either removed the lower bushings from the packages and discarded them or they never came with any so I'm assuming this is the part number for them. Written on the paper envelope they all came in.
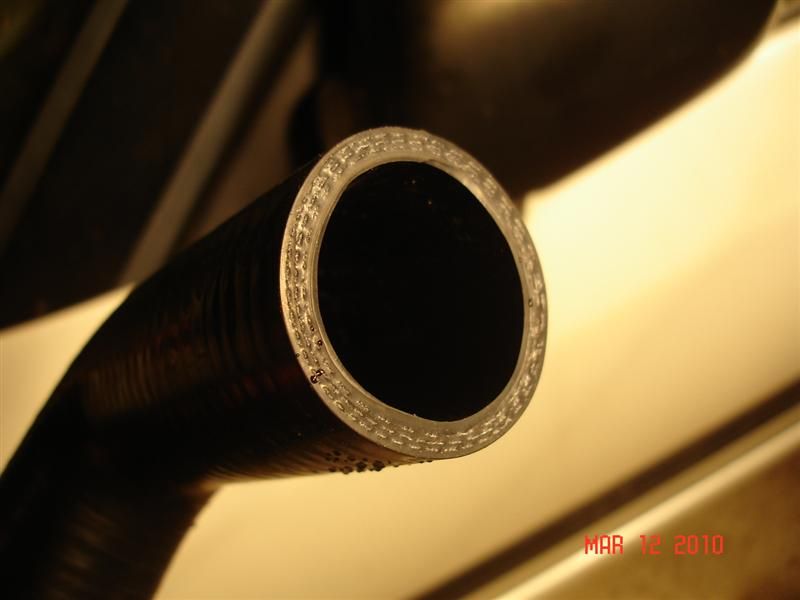
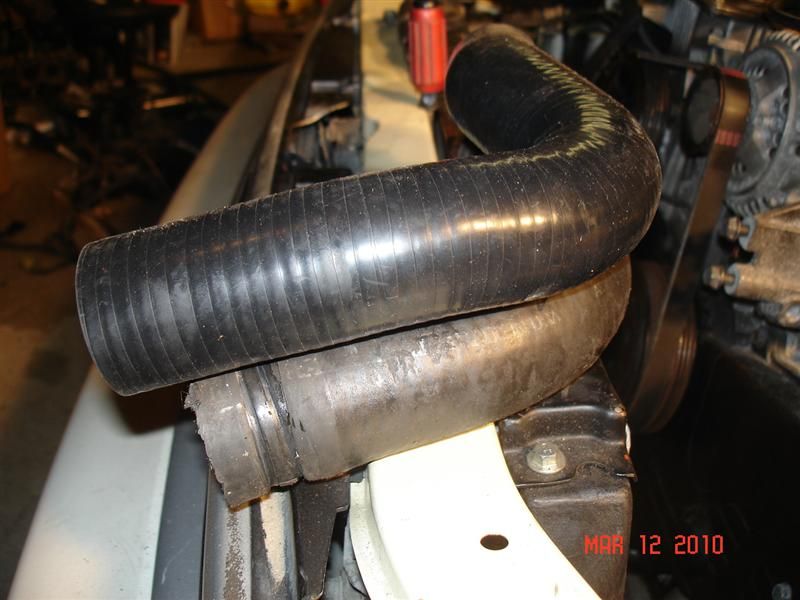
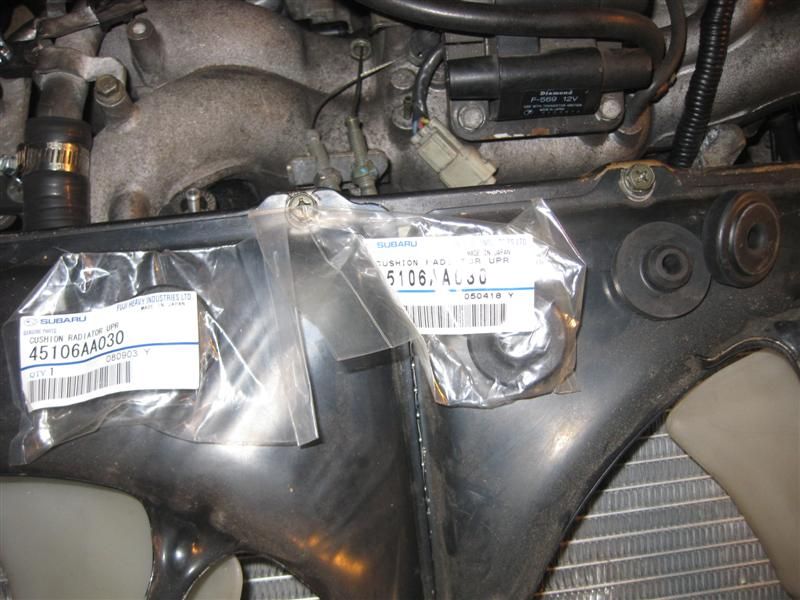
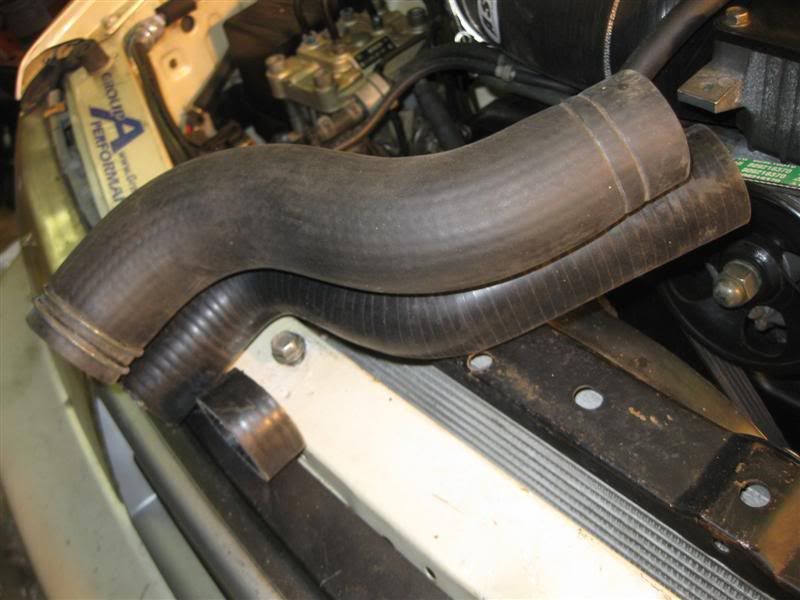
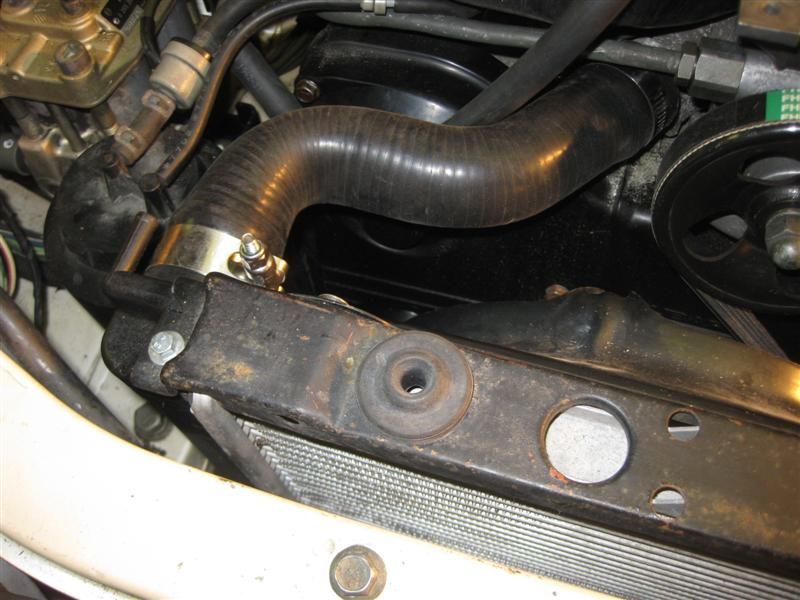
As mentioned above, the silicone hoses I got off ebay for a GC impreza were too long so I trimmed them with a box cutter and they fit great.
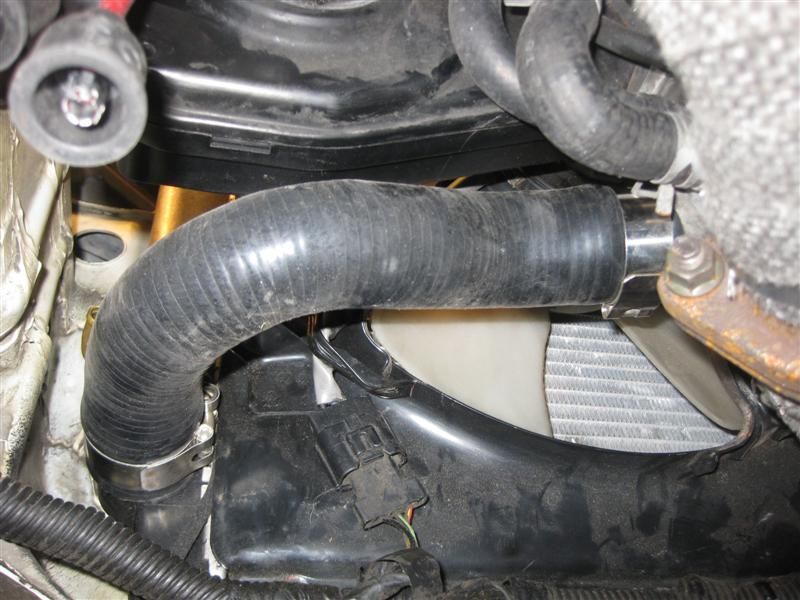
Installed except a couple hoses on the sides and I'm missing the other bracket that holds the top of the radiator in place. It's in the garage but I'm not having any luck finding it.
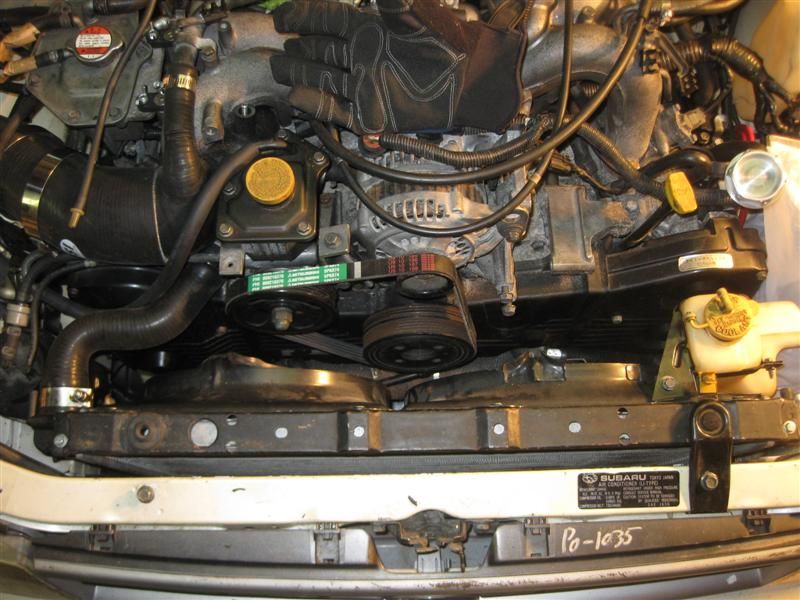
I left a towel covering my engine the last couple times I got done working on it. Both times I've now found empty seed shells and mouse turds on the towel on top of my engine. Bastards. If those things chew my wiring I'm gonna lose my mind. I don't know how the hell they discover these places to sleep. I have a sneaking suspicion that mice are the reason my other legacy is having all kinds of crazy electrical problems after sitting in a field for 2 years.
Fans bolted on. When I got this radiator from Jake I got no mounting bolts with it. I found 4 leftover mounting bolts for the metal plate I installed on the back of the motor and had to use the stock bolts that were holding the plastic cover on to bolt the top of the fans on. Not the best bolts for the job but they'll suffice for now.
The guy at the dealership took either removed the lower bushings from the packages and discarded them or they never came with any so I'm assuming this is the part number for them. Written on the paper envelope they all came in.
As mentioned above, the silicone hoses I got off ebay for a GC impreza were too long so I trimmed them with a box cutter and they fit great.
Installed except a couple hoses on the sides and I'm missing the other bracket that holds the top of the radiator in place. It's in the garage but I'm not having any luck finding it.
98 Metro Hatch Daily Driver :)
91 SS EJ20G Engine/Tranny/Diff Swap Build Thread Here
"Your testes are close to your bottom but you still play with them all the time." Jeremy Clarkson
91 SS EJ20G Engine/Tranny/Diff Swap Build Thread Here
"Your testes are close to your bottom but you still play with them all the time." Jeremy Clarkson
-
dropdfocus
- Fourth Gear
- Posts: 1937
- Joined: Sun Sep 07, 2003 5:57 am
- Location: Williamsport, PA
- Contact:
Re: kimokalihi's 91 SS EJ20 Swap
Slowly but surely it's getting there!
Jason
'92 LSS "Trixie" - TD04, '06 WRX TMIC, Invidia D/P & TXS U/P, 3" APEX'i CBE, custom intake, TXS MBC & BPV
Perrin LCP, WRX & H6 brakes, S/S lines, Cusco H-brace & RSTB, AGX's, Progress springs, SimplySubie fender braces
'92 LSS "Trixie" - TD04, '06 WRX TMIC, Invidia D/P & TXS U/P, 3" APEX'i CBE, custom intake, TXS MBC & BPV
Perrin LCP, WRX & H6 brakes, S/S lines, Cusco H-brace & RSTB, AGX's, Progress springs, SimplySubie fender braces
-
kimokalihi
- Fifth Gear
- Posts: 8360
- Joined: Mon Nov 06, 2006 3:41 am
- Location: Tenino, WA
Re: kimokalihi's 91 SS EJ20 Swap
I should hit up an exhaust shop soon. Have them weld a couple O2 bungs in my downpipe and get some 2" pipe to do my intercooler silicone hose extension with.
98 Metro Hatch Daily Driver :)
91 SS EJ20G Engine/Tranny/Diff Swap Build Thread Here
"Your testes are close to your bottom but you still play with them all the time." Jeremy Clarkson
91 SS EJ20G Engine/Tranny/Diff Swap Build Thread Here
"Your testes are close to your bottom but you still play with them all the time." Jeremy Clarkson
Re: kimokalihi's 91 SS EJ20 Swap
Eyeball out not only the location, but the angle you want the sensors. They are pretty long when your in the tight confines of the car. If they land up in a bad spot you can end up with a useless bung or a sensor that is too close to something to install or remove.
Looks good Kimo, getting close.......
Looks good Kimo, getting close.......