Tis the time for a major update! Hardly know where to begin, it's been quite the ever evolving project. I've changed my mind many different times and continually went in different directions. From what I thought I wanted to where it is now don't even exist on the same page. LOTS of TIME, MONEY, LABOR, and THINKING went into making this what it is today! Hope you guys enjoy!
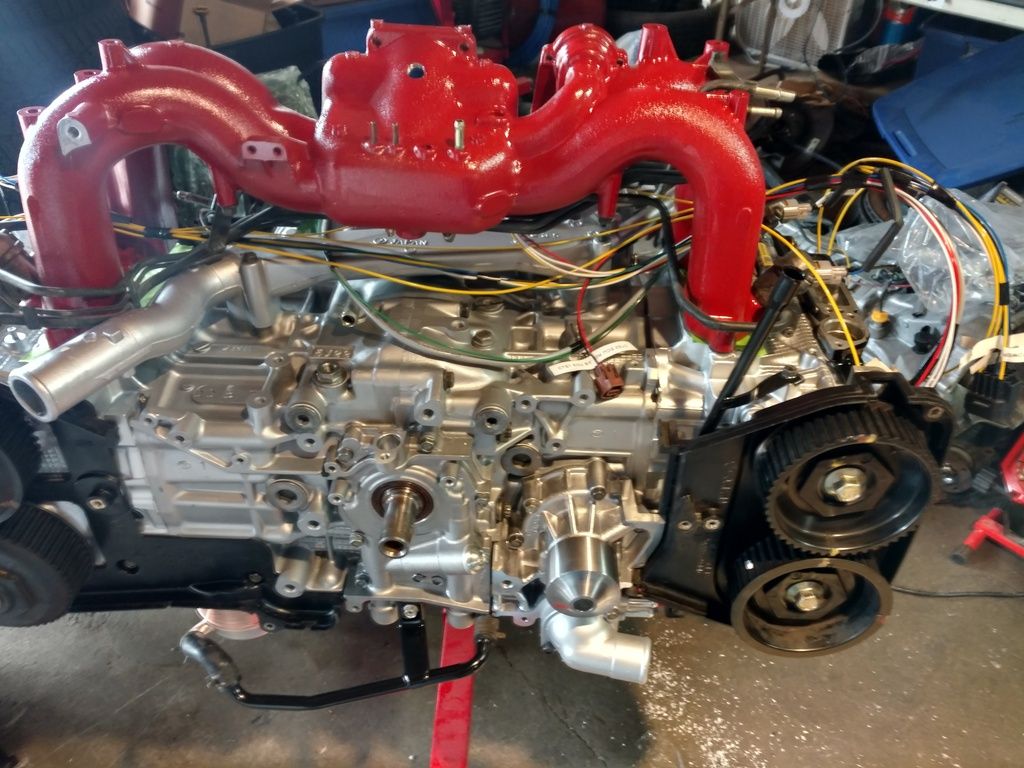
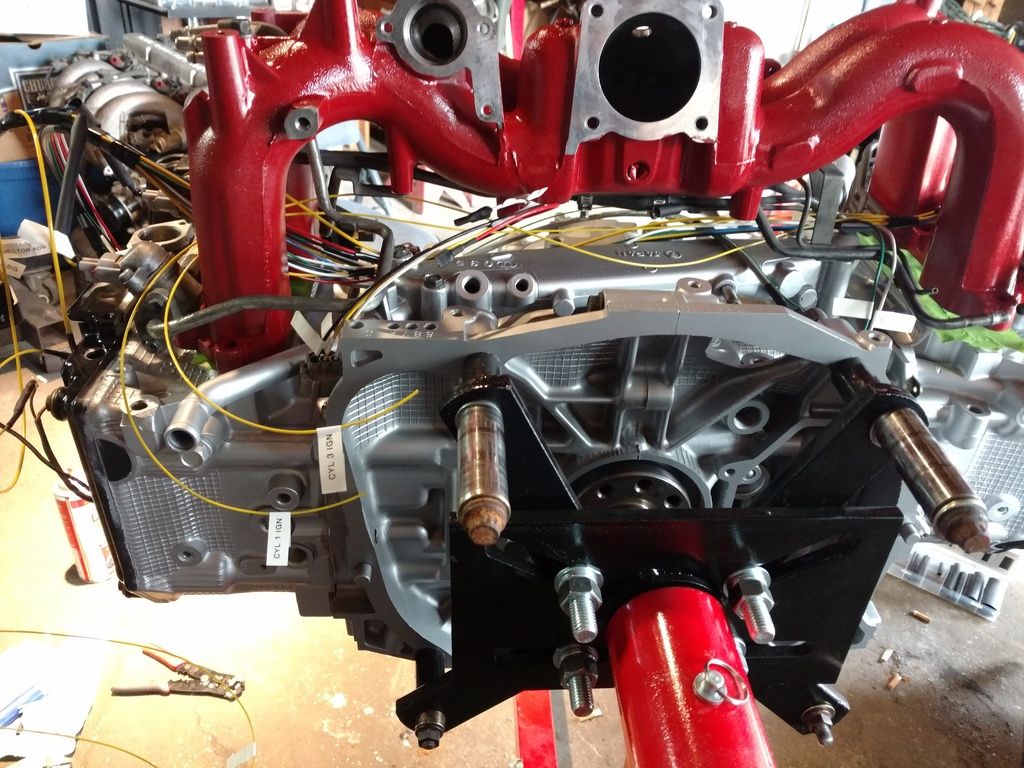
So as I last updated this journal I was assembling the engine, I will pick up where I left off with photos and details:
Although I don't have pictures of it I switched the pick up tube with a killerB Motorsports. At a future time I for sure have plans for the killerb pan or possibly a dry sump system:
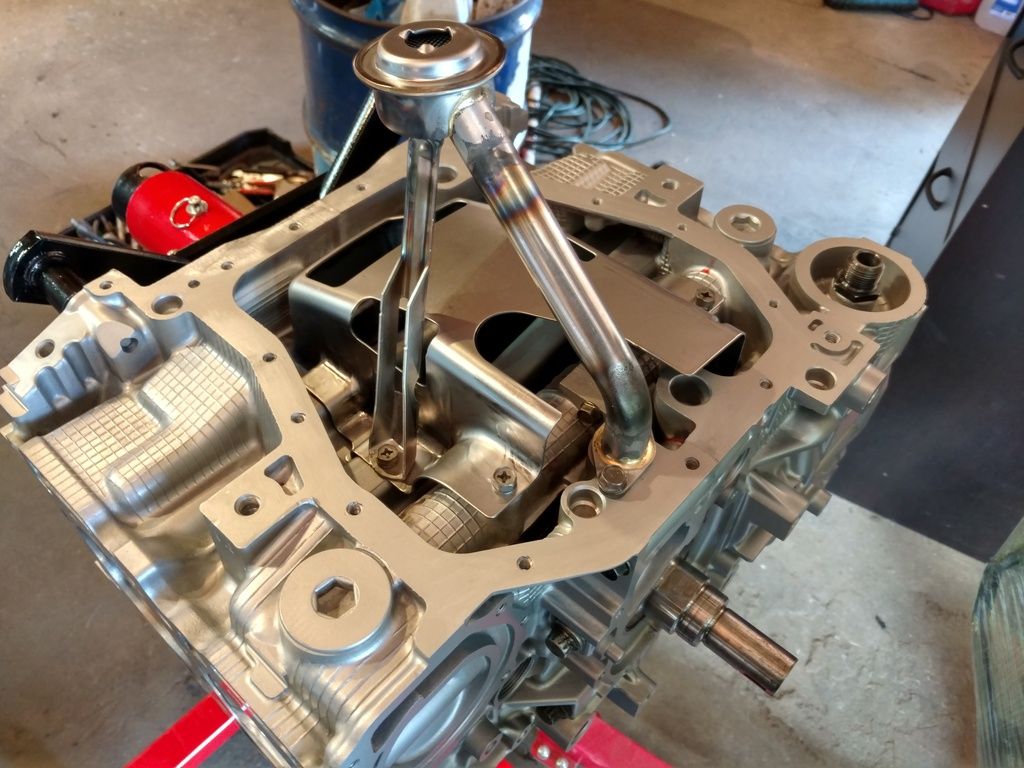
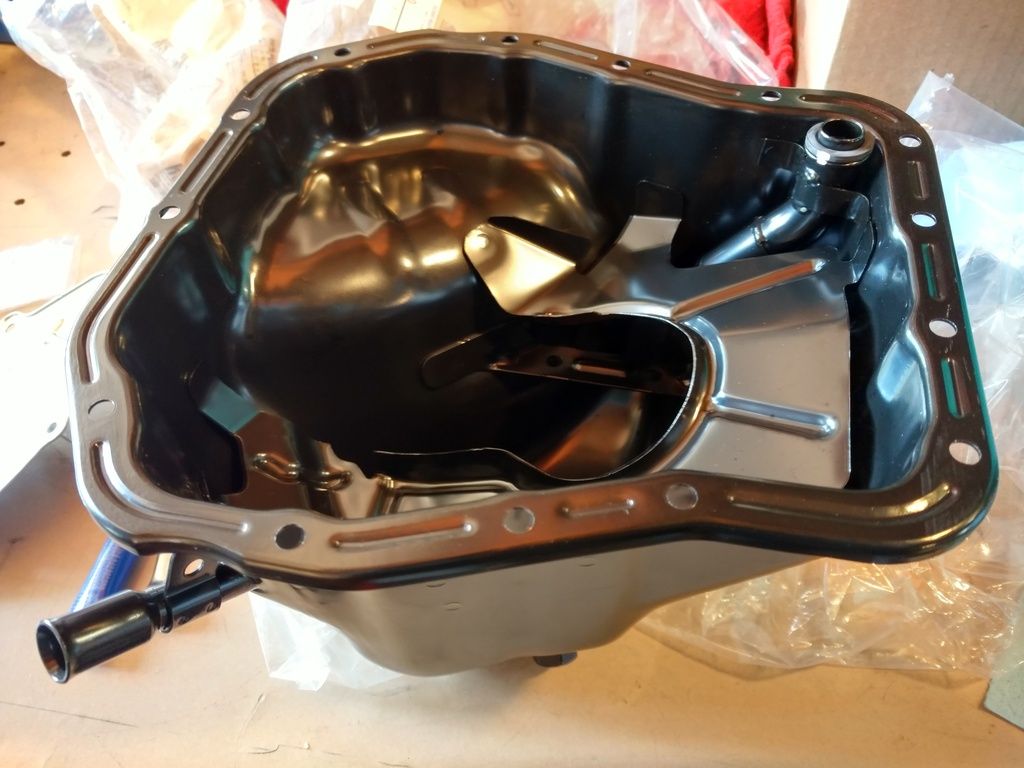
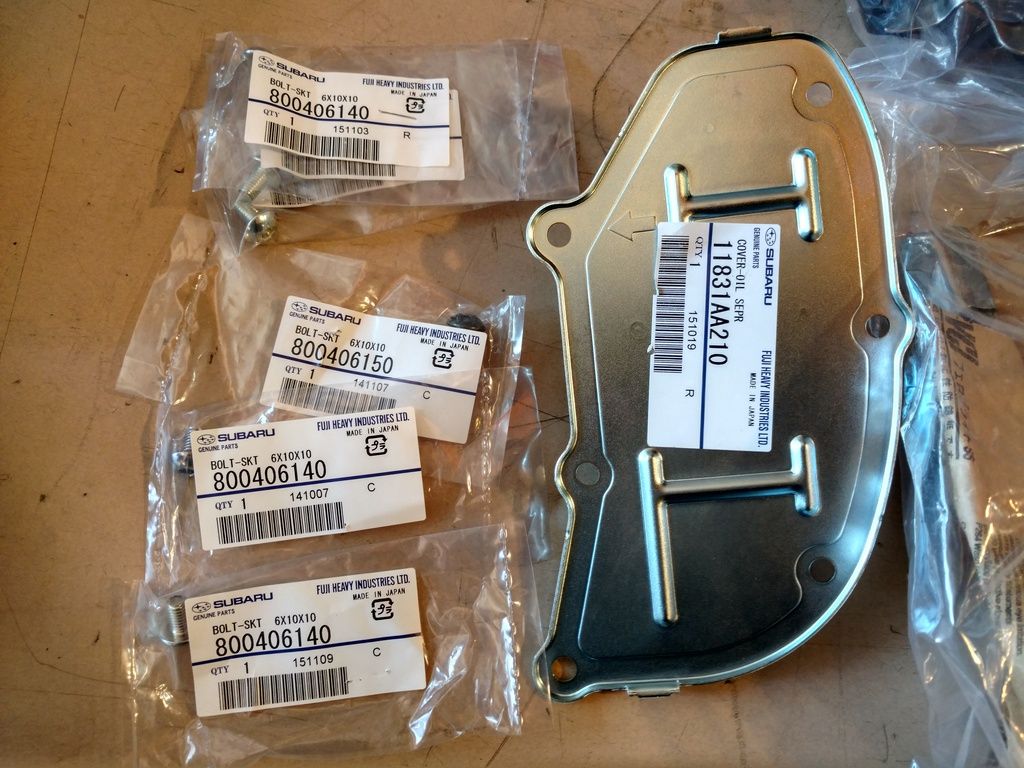
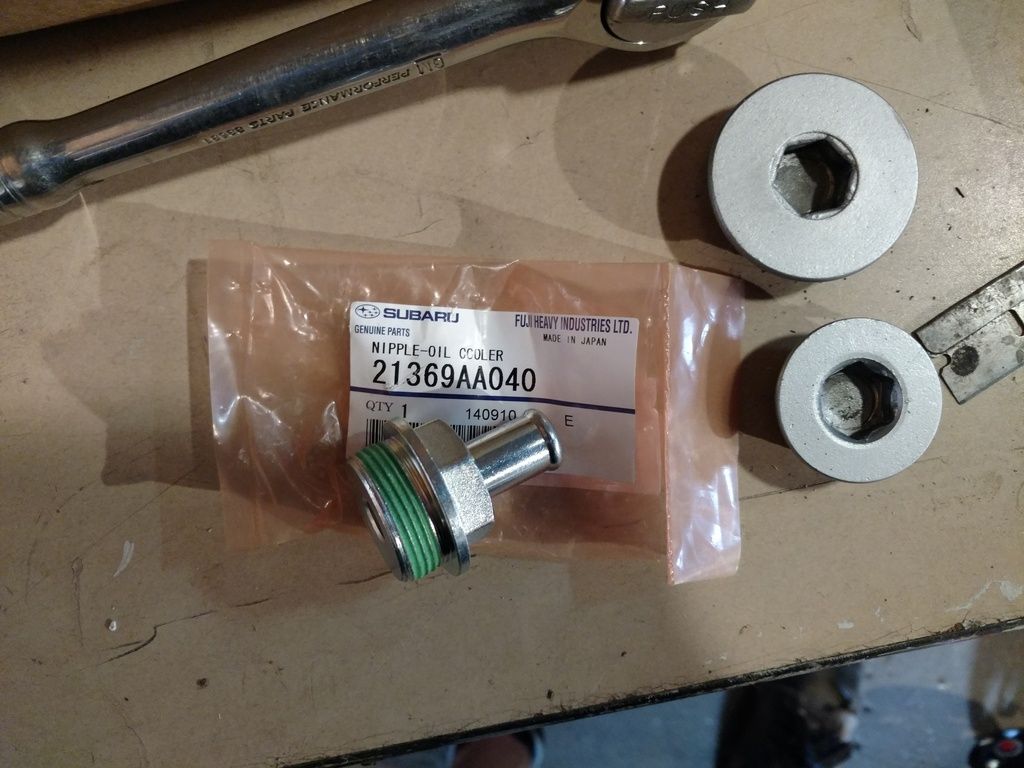
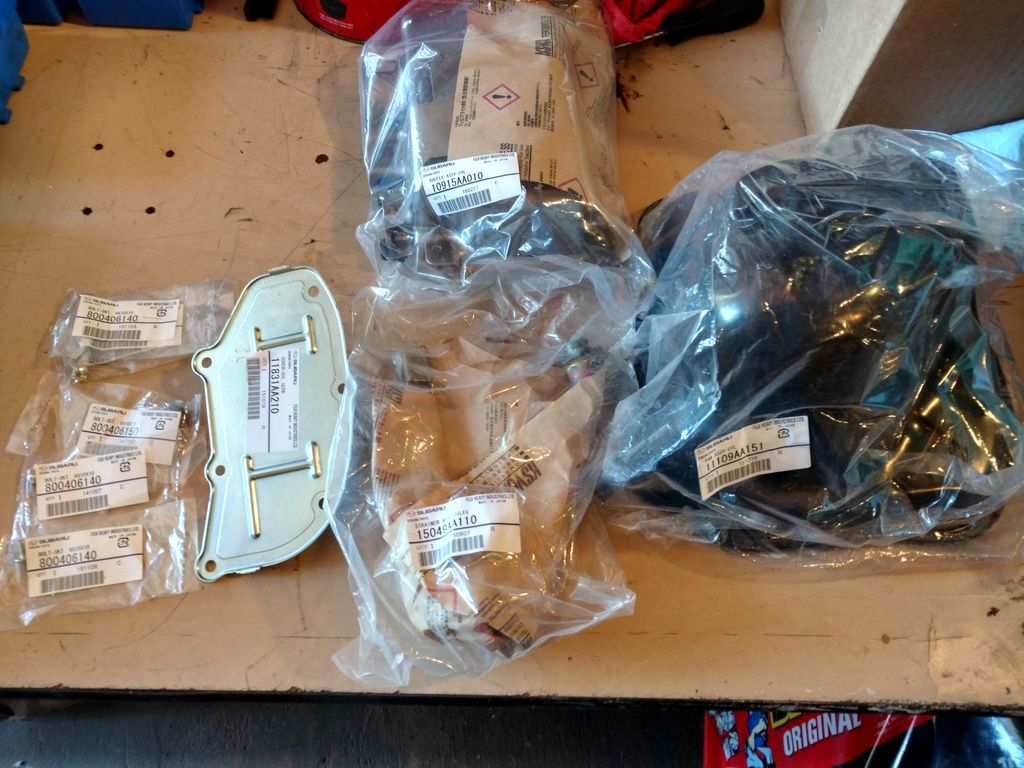
STi oil pan, block heater, parts for oil cooler, revised rear oil plate and hardware:
 ____________________________________________________________________
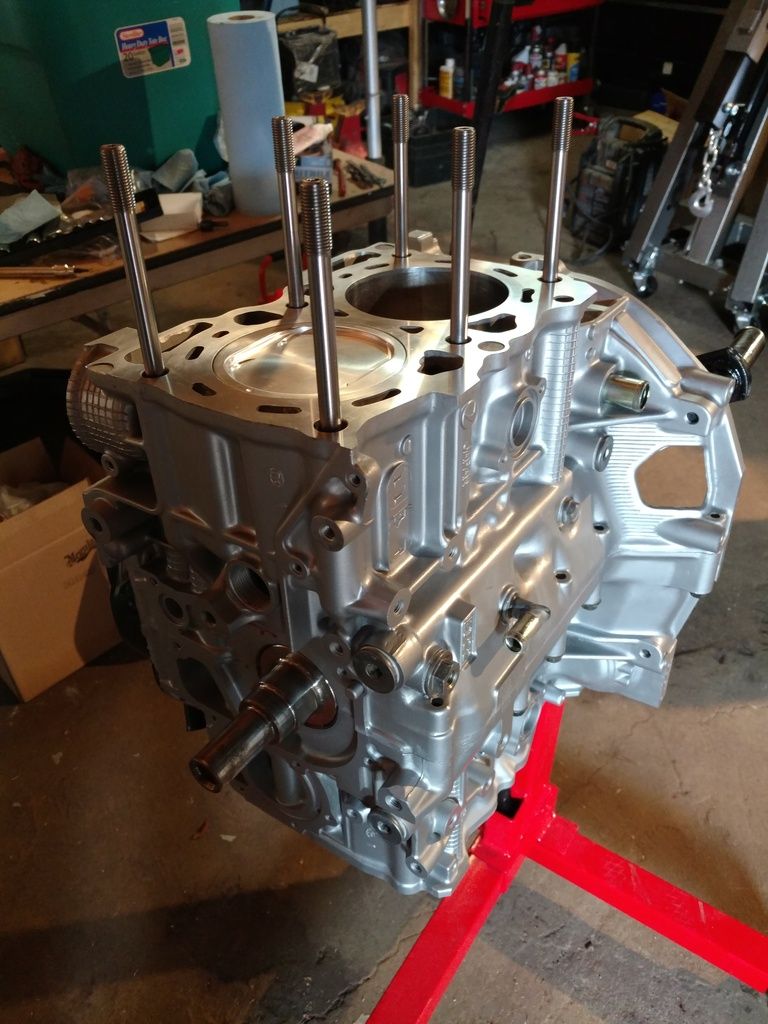
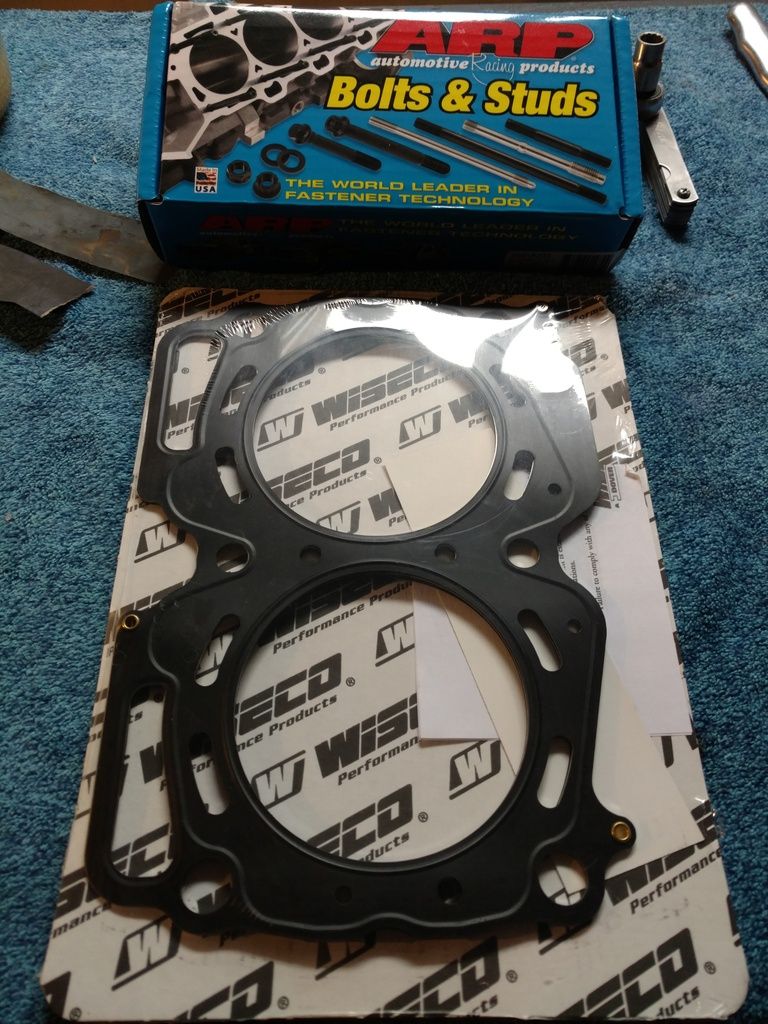
Wiseco MLS head gaskets .051 and
ARP head studs:
That kind of sums up the block and heads from my previous posts to now. I essentially used new New Subaru OEM parts every where, oil pump, water pump, oil cooler, o-rings exc.
____________________________________________________________________
--WIRING
Now I will cover some of the wiring work I did.
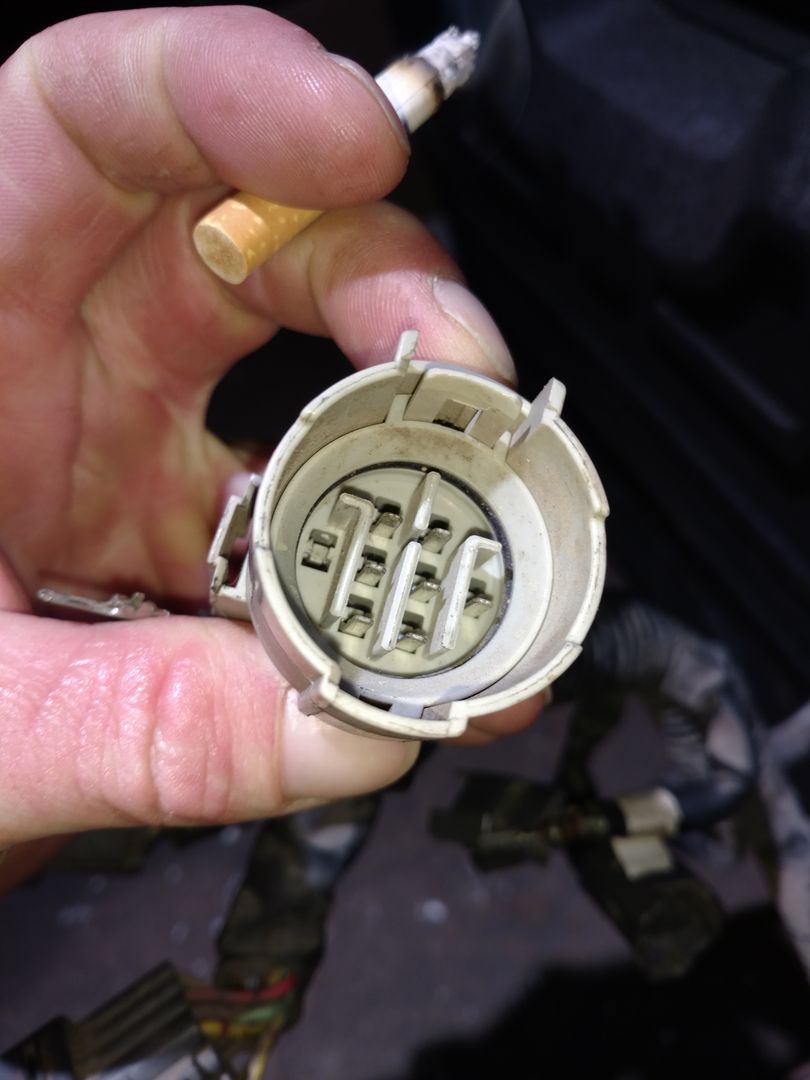
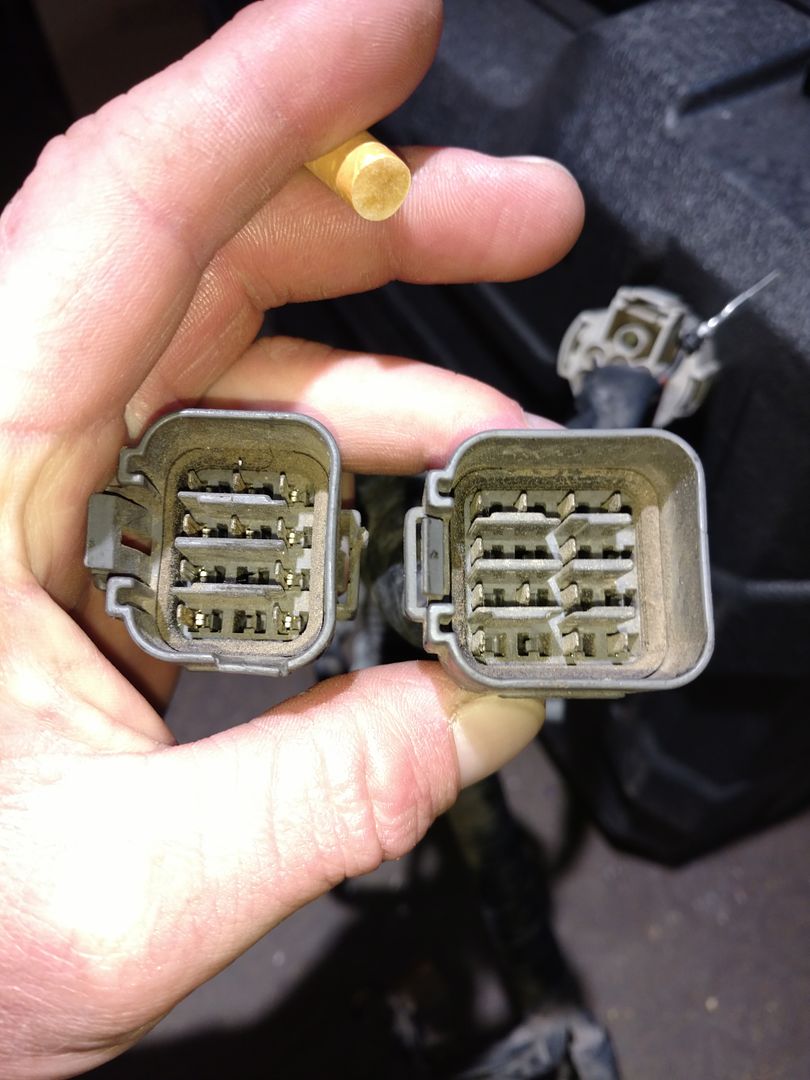
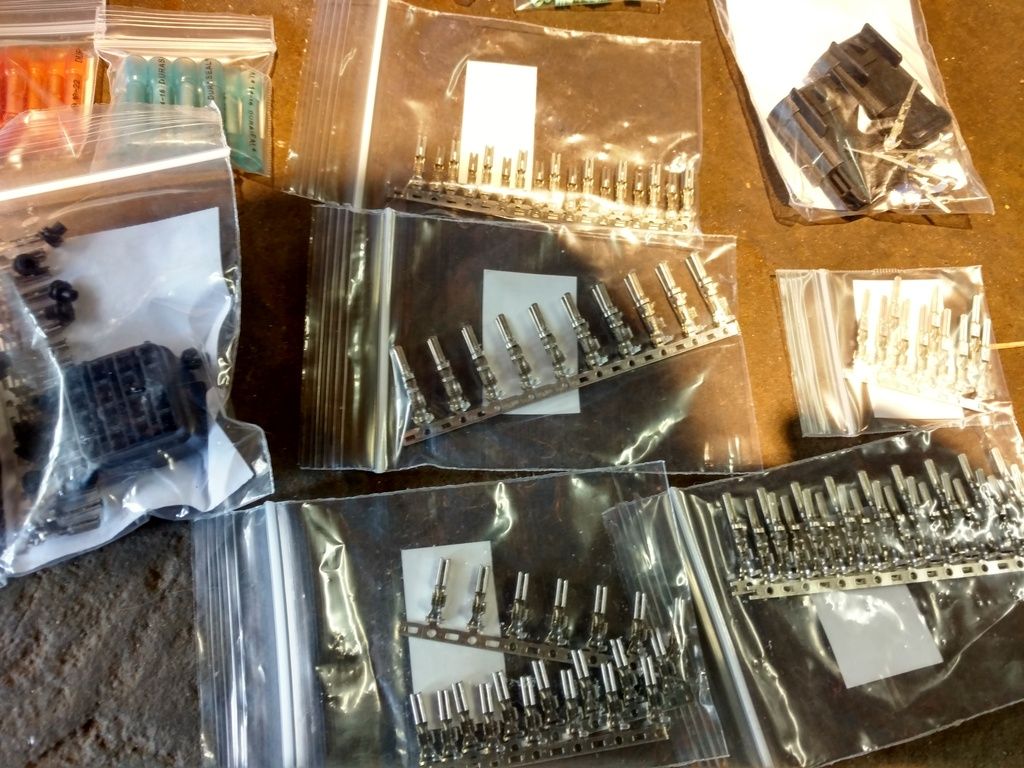
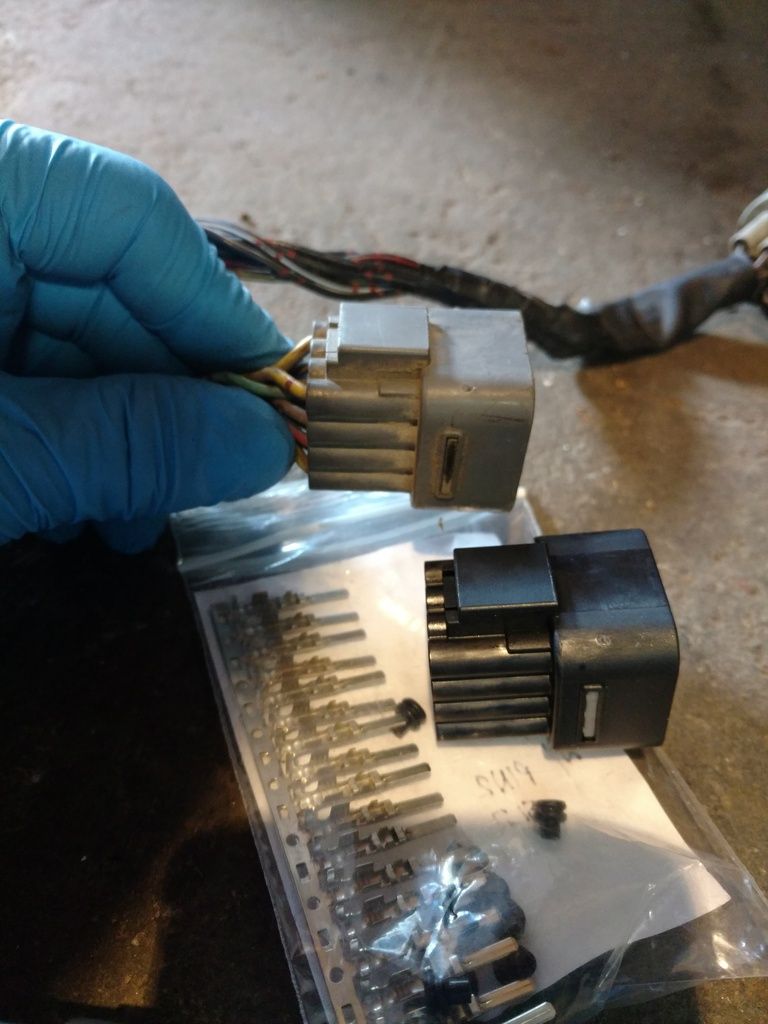
I wanted to make a brand new engine wiring harness, so I set out on a mission to acquire all new plugs, pins, terminals, and the highest quality wiring.
It took me a long time to find alot of the plugs existent in the 1993 legacy SS harness. I discovered that sumitomo was a major manufacturer of many of the plugs found on the legacy, I ended up finding a parts catalog, unfortunately all in Japanese, but at least with pictures. I skimmed through a 1000 pages trying to find each plug. It was daunting to say the least. I did however find most everything, although found that I couldn't order a single plug from sumitomo directly, so I took the parts #'s and began searching the internet for vendors that would sell me one and not a box of a 1000.
In the end I acquired most and for the ones I didn't I was able to improvise with something else or similar.
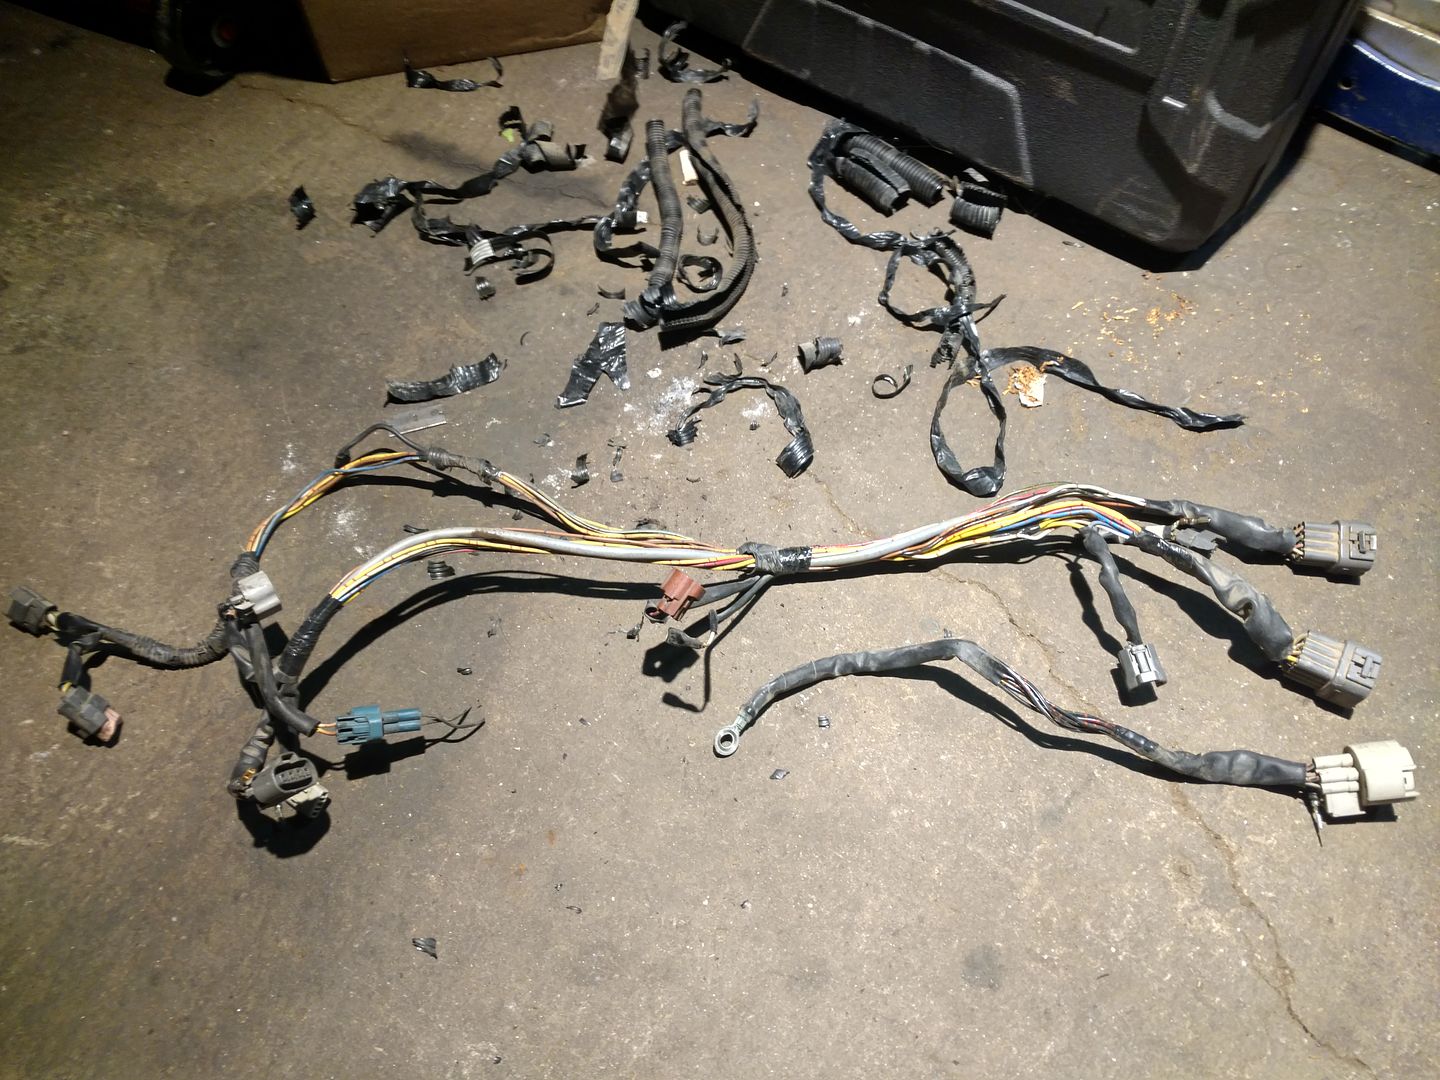
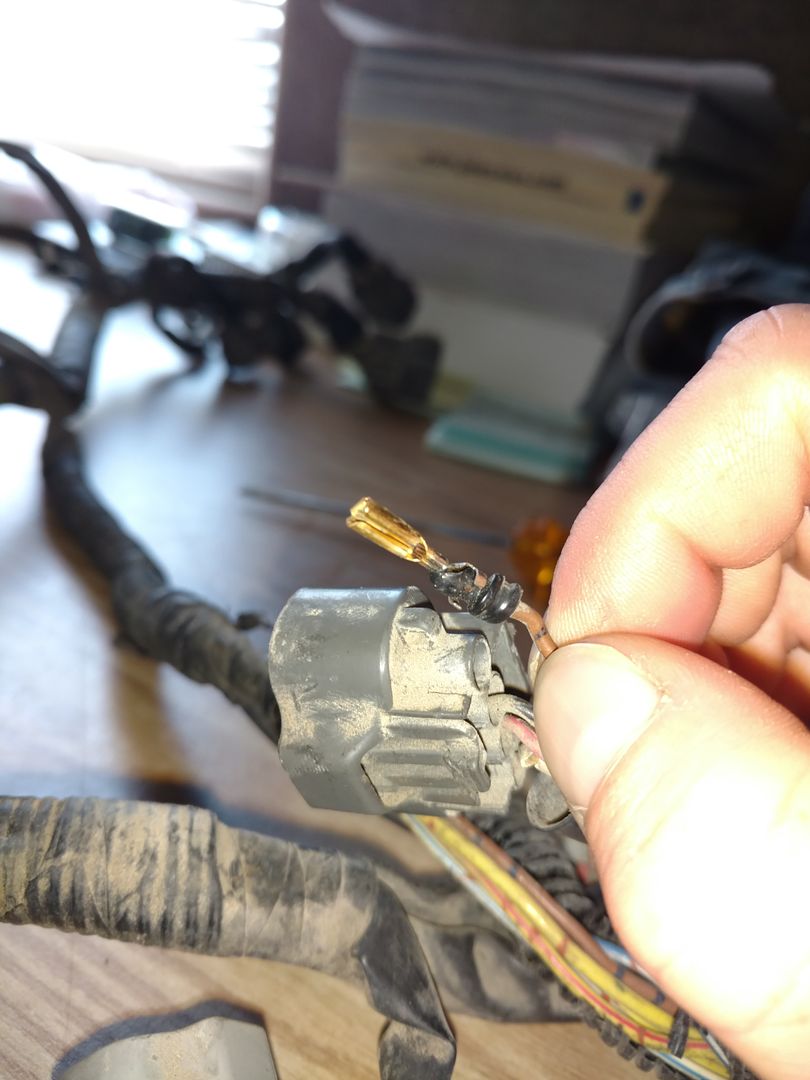
To understand how the OEM harness worked and was assembled I first acquired a harness locally and began dissecting it. I would then use it as mirror of what I should make.
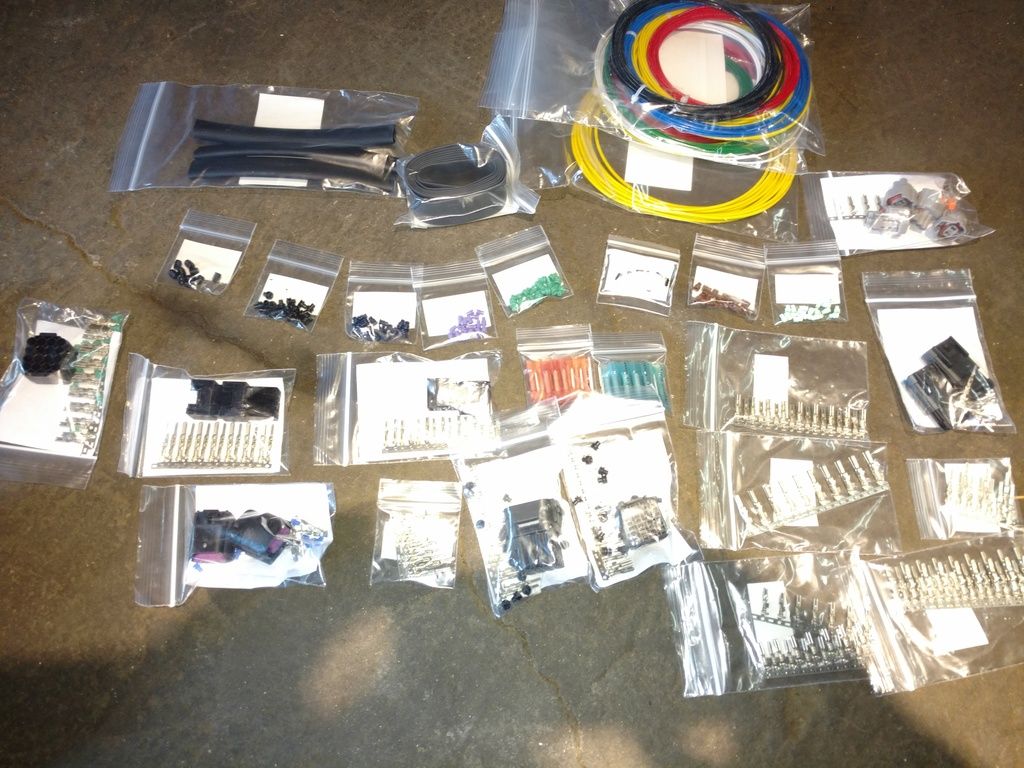
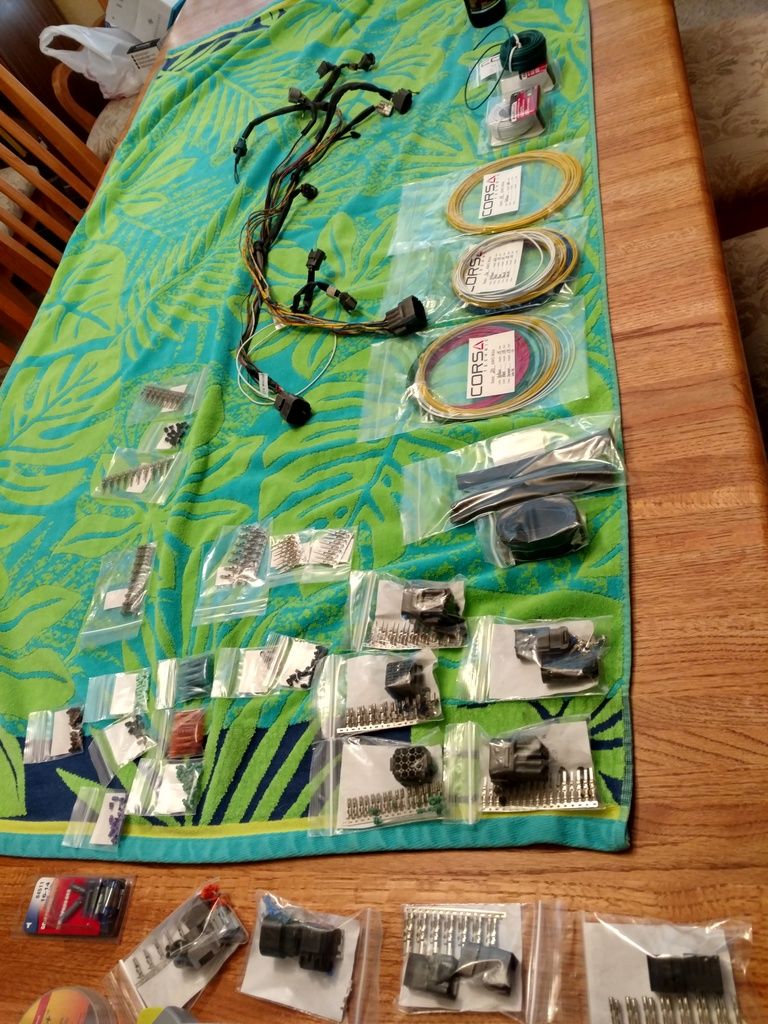
The wire I picked was of extreme quality. The most expensive wire I've ever purchased. Per the manufacturer description:
"Our high-temperature wire is stranded tinned copper conductor insulated with extruded ETFE Tefzel that provides outstanding thermal, physical, and electrical properties. Tefzel insulated wire is in particular outstanding for it's resistance to oil, oxidation, heat, sunlight and flame; and also it's ability to remain flexible at low temperature. They have excellent resistance to ozone, water, alcohol, gasoline, acids, alkalis, aromatic hydrocarbons and solvents."
This was perhaps my favorite thing of the whole swap. It came out incredibly nice, and will leave me worry free of wiring issues .
*One note, I added 2in. Of extra length to each wire to make things easier when plugging in, as I found the original harness was very tight, and also had ideas of a different manifold setup that would possibly need the extra length.
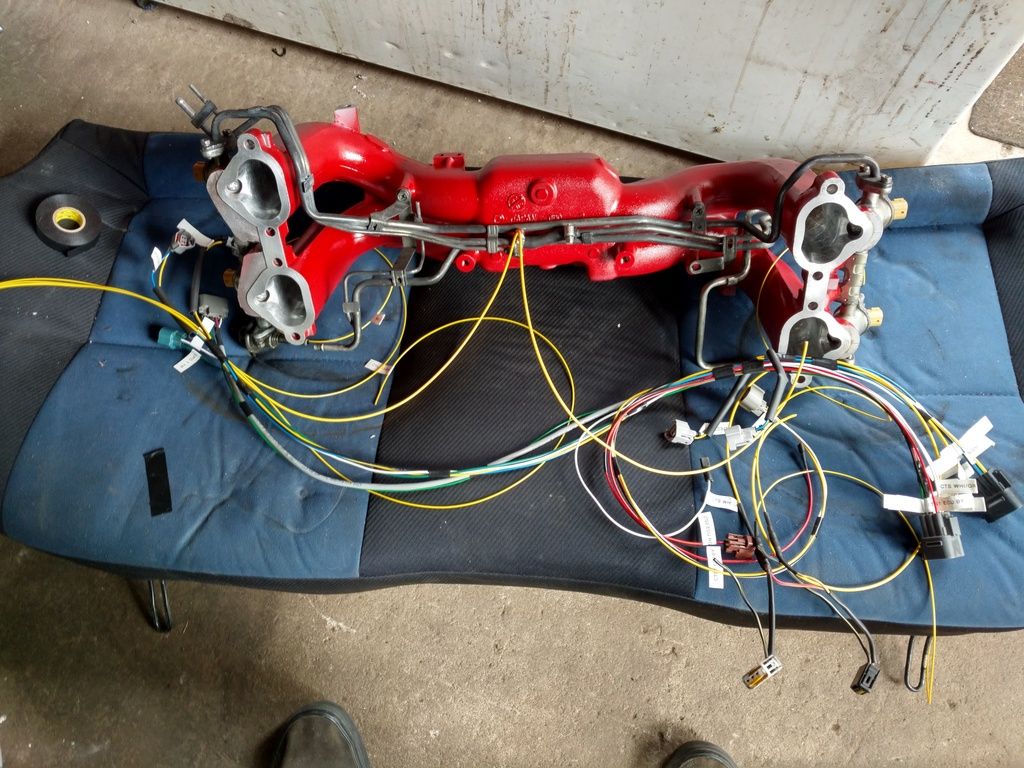
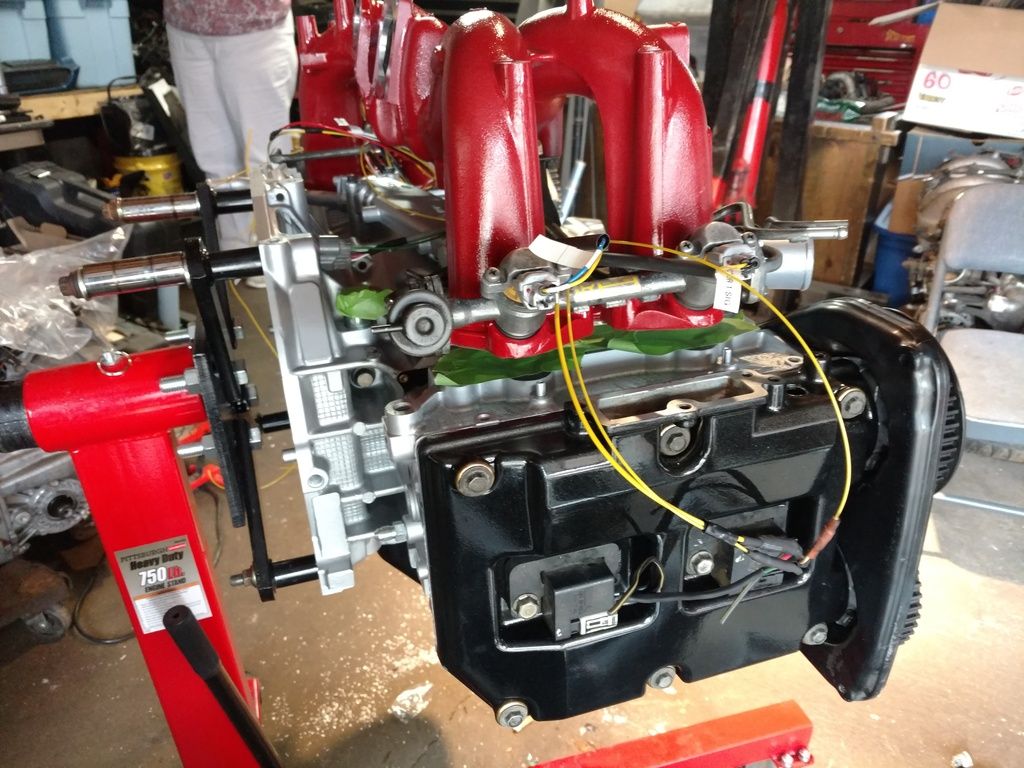
In this next phase, before looming the harness, I left it bare so I could determine how I wanted it routed.
I acquired a JDM ej20h manifold from a fellow member Maciek (macipussy) and wasn't sure if there would be differences in wiring routing.
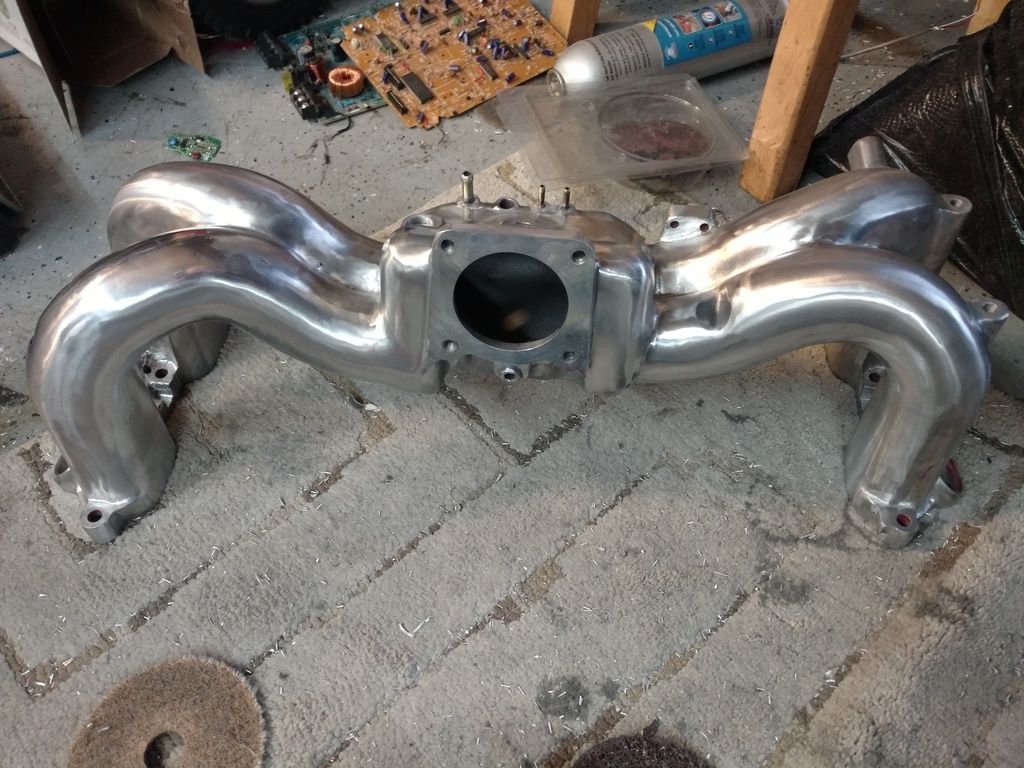
I began testing wiring routing with the newly acquired manifold. I would like to also note that I painted the manifold but didn't have before/after pics of that.
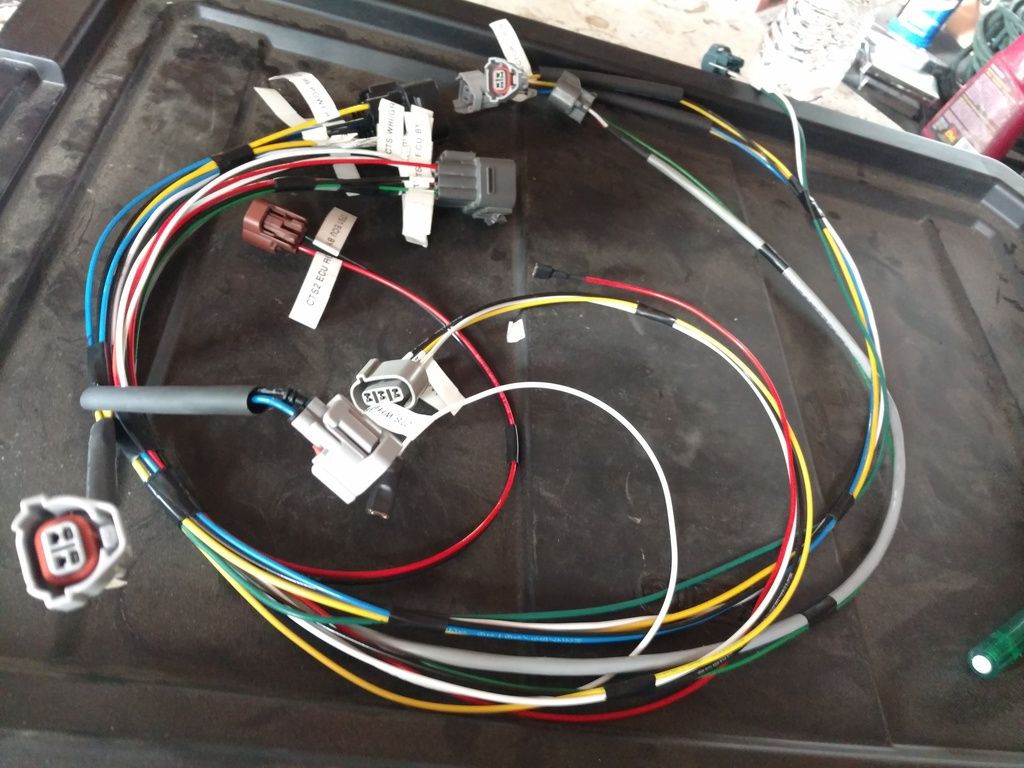
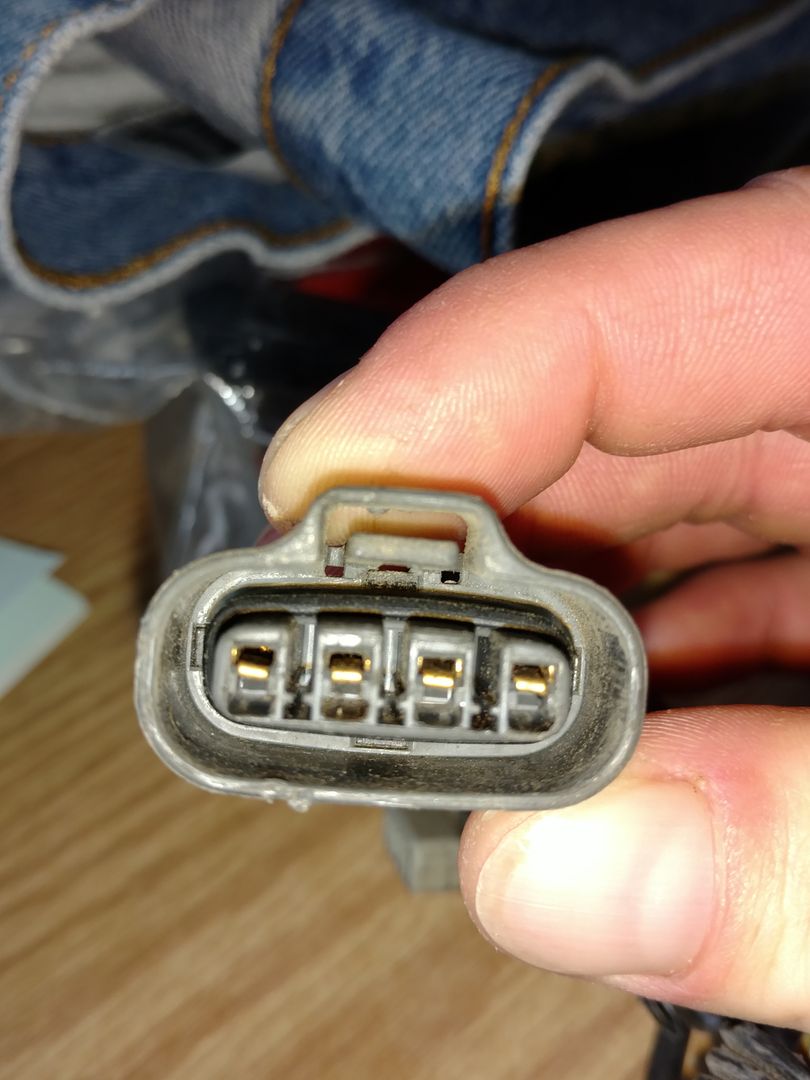
I also took the coils off of my WRX engine and made this a gd WRX COP conversion. I would now make this harness a permanent COP setup by taking the powering wires used for the wasted spark setup and splitting them to the coils. 4 separate coil signal wires where added and terminated at a new 4 pin plug.
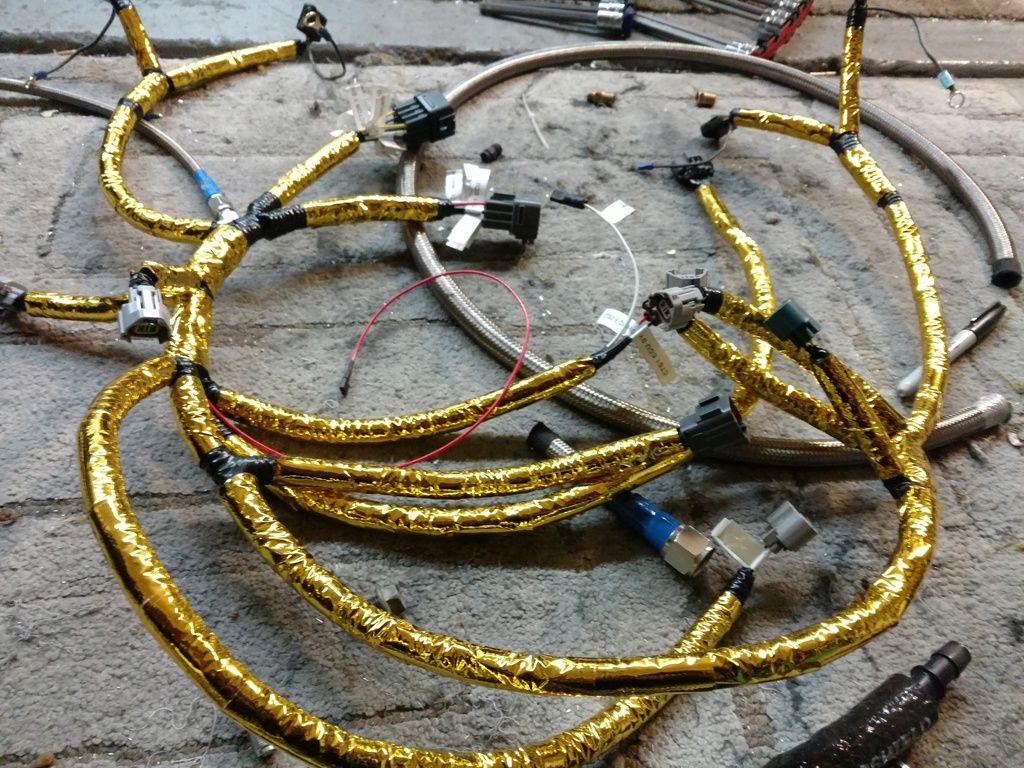
Wiring harnesses completed, wrapped in
gold heat reflective tape:
 ____________________________________________________________________
--REVERSE INTAKE MANIFOLD
____________________________________________________________________
--REVERSE INTAKE MANIFOLD
Now in this next phase, this is when my direction of thought for this build really began to change.
I made the decision to reverse my intake manifold. Doing this brought up alot of issues to sort out and took creativity and thinking.
I had planned on running the intake under the manifold and the fuel lines provided with the manifold would have aloud me to do so, but when reversing it that would no longer be possible.
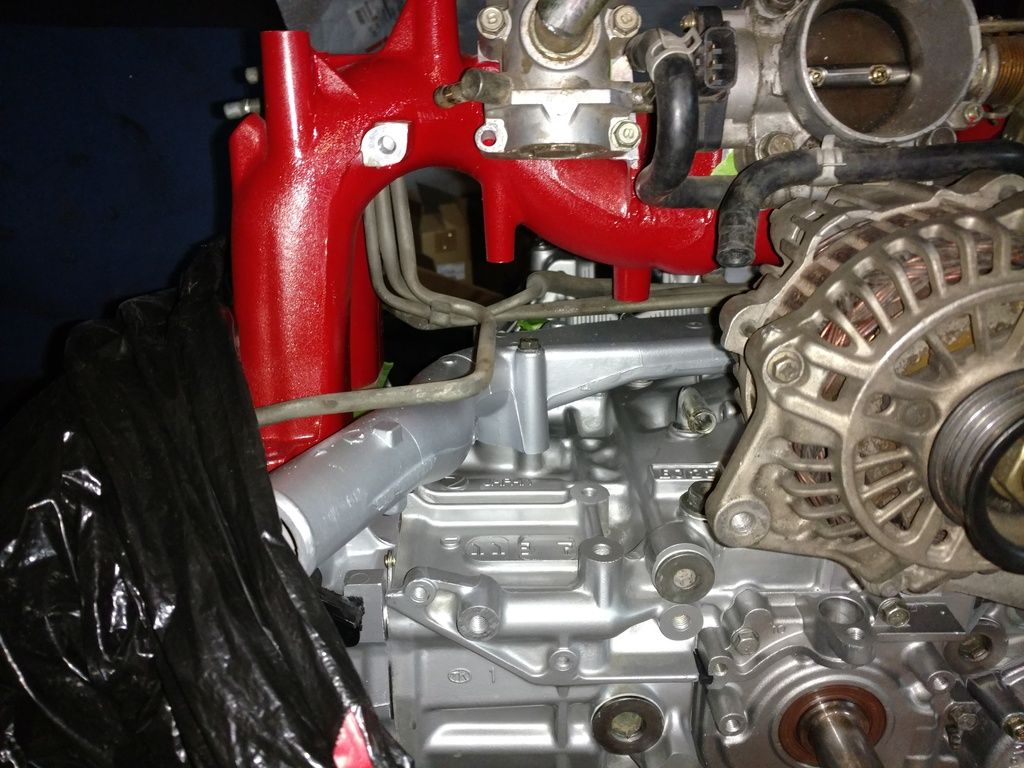
Some mock up pictures:
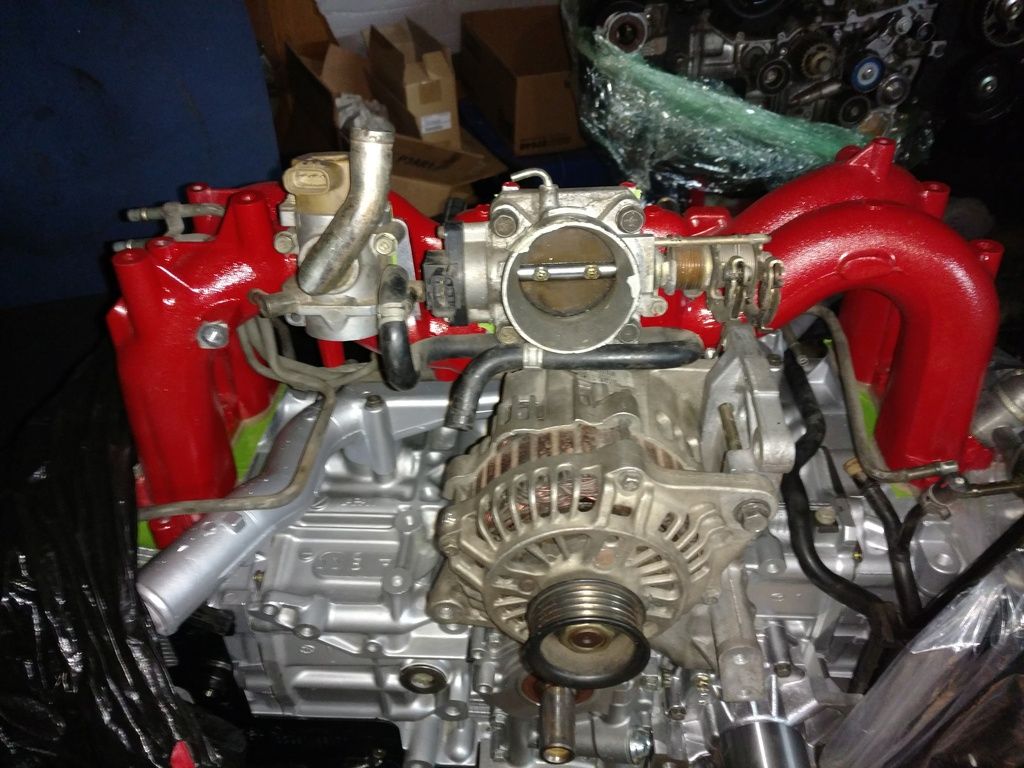
Loss of under manifold intake clearance:
Also acquired with the manifold was an ej20g TB. Before I got to ahead of myself on using the 20g throttle body I was concerned that it was a 3 wire tps, and wasn't sure how to over come that. Long story short, after lots of research I made a switch on my gas pedal to remedy the missing idle switch from the 20g TPS.
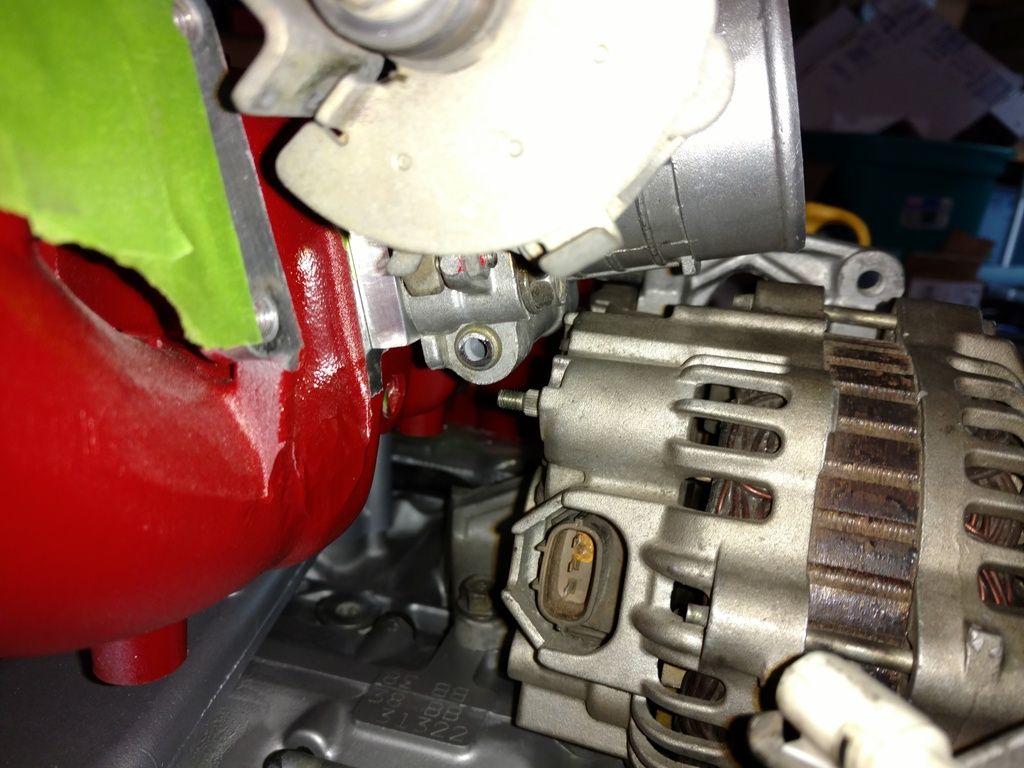
Things were looking pretty good but I was having clearance issues with 20g TB over the alternator, as I was set on lowering the alternator rather than relocating it to the AC location. I tried mocking up the ej22 TB and it was a little better but came with more issues other than alternator clearance. The IAC would interfere with the ej22 throttle cables as they are the opposing side as the JDM setup. Also the ej22 TPS and throttle linkage would have interference with the manifold itself. The only way around it would be flipping the TB upside down and I refused that to be my answer.
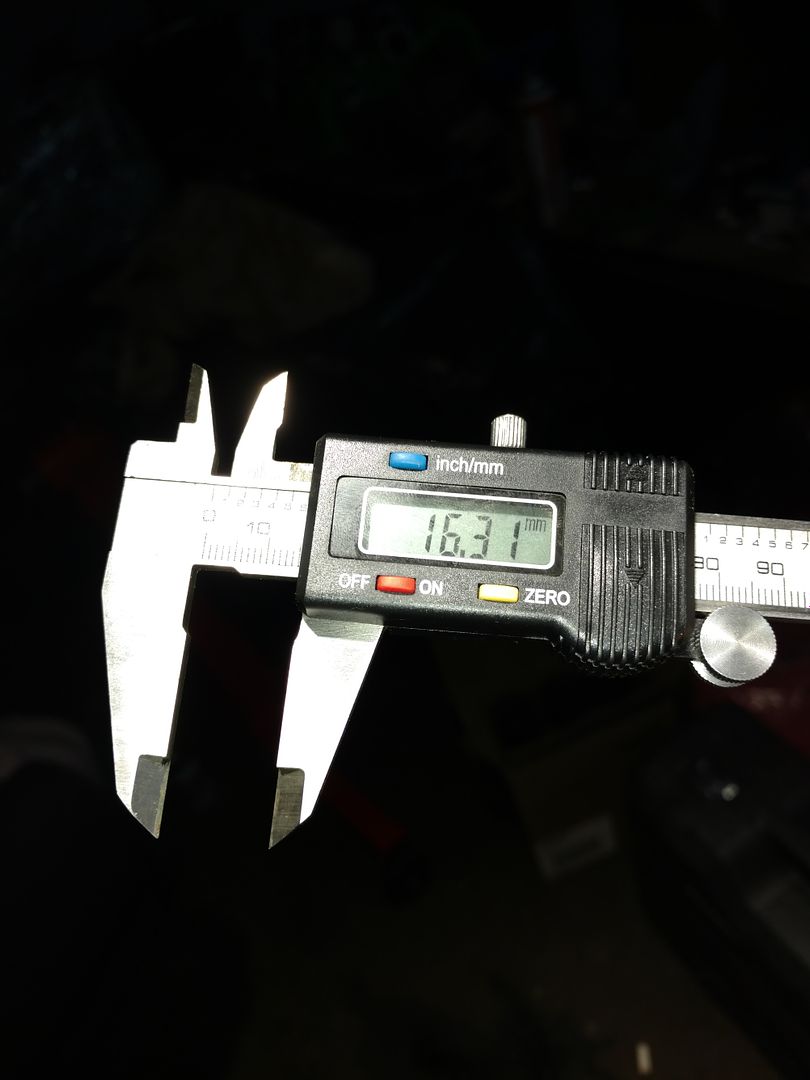
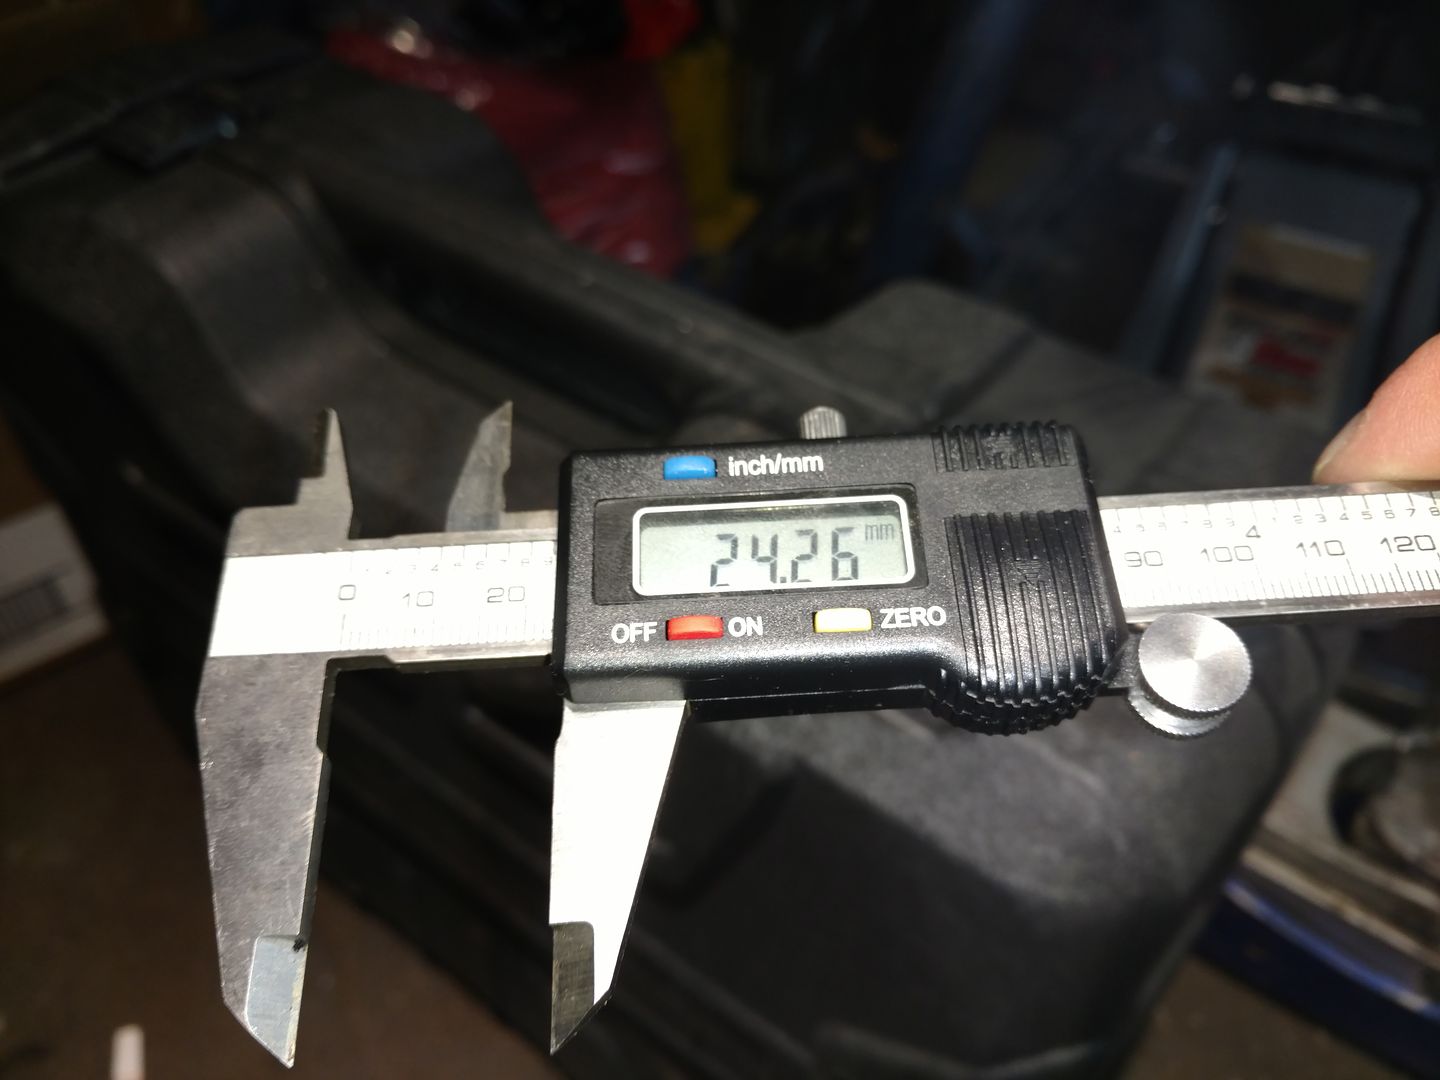
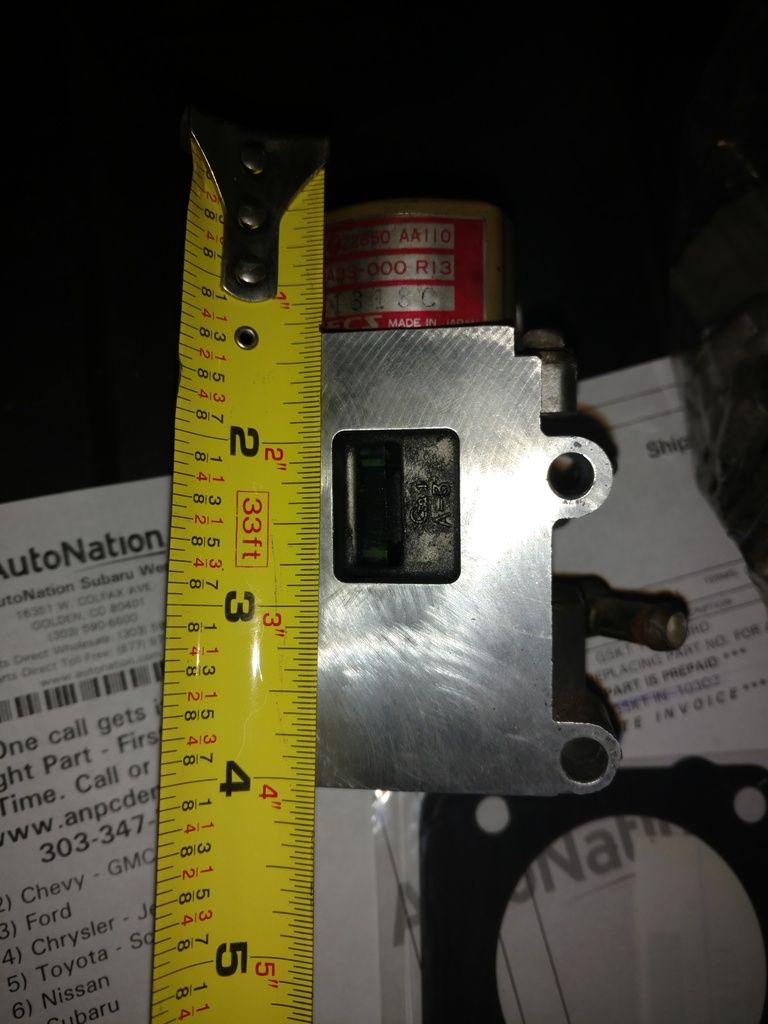
I was stuck on deciding between two crap options. The real kicker that made my final decision was measuring the inside diameters of the two TB's and finding out the ej22 was bigger. So that was my final answer, going to make the usdm TB work on a JDM manifold.
I started answering some of the clearance issues by making a TB spacer. This was a fun project and came out perfect. I used my friends mini-mill with stepper motors controlled by a CNC computer program. Basically a mini CNC machine.
Making a throttle body spacer video:
Throttle Body Spacer Video

Next was to answer the TB to IAC interference issues. I started devising a way to make a plate with a tube that could relocate it's location. I don't have pictures of this but did in fact make it. I made a plate cut to the shape of IAC location on the manifold and welded a tube on it that made a bend down under the manifold and had intentions of it being mounted somewhere at the back side.
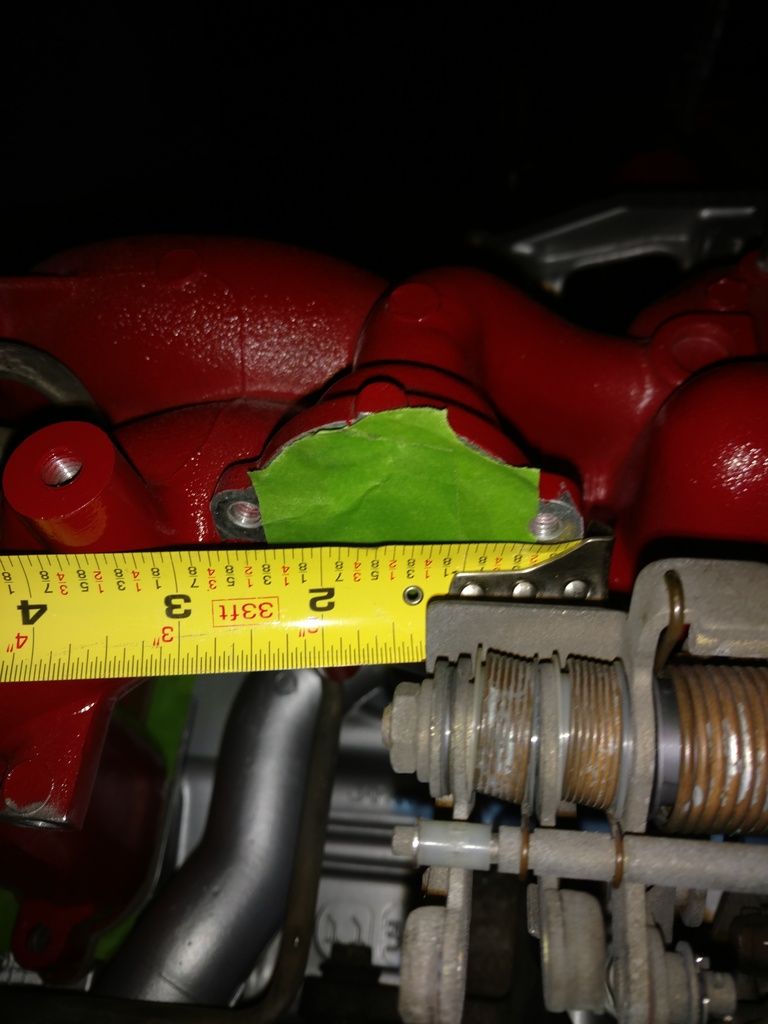
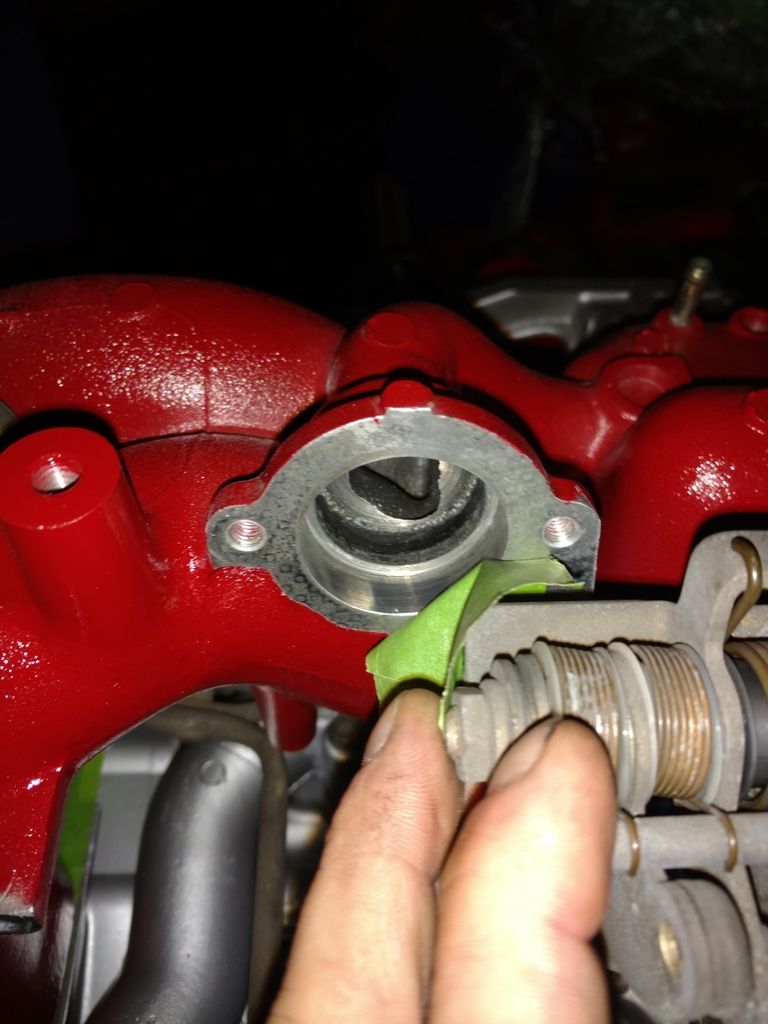
I would also make a plate with the addition of a pipe on it for the IAC port. Pictures of me making measurements to come up with a design:

 ____________________________________________________________________
--FUEL
____________________________________________________________________
--FUEL
At this time I thought I concluded the manifold setup. I then moved into answering the under manifold intake clearance issues.
The fuel lines for the ej20h manifold, no matter the bending I did, they would not work in the reversed position. I tried ej22 and ej25 lines and still couldn't get anything to fit right.
This is when I decided I needed to make my own fuel line setup.
I made the jump into stainless braided lines with AN fittings. This also opted me to go ahead and make this a parallel setup instead of serial.
I chose to use -6AN Russell stainless braided line and fittings.
Unfortunately I'm lacking pictures of this setup, but I used 4 90° swivel -6N hose ends at the rails, stainless line cut to equal legths on each end leading 6AN straight ends connected to two Y blocks, one for feed and one for return.
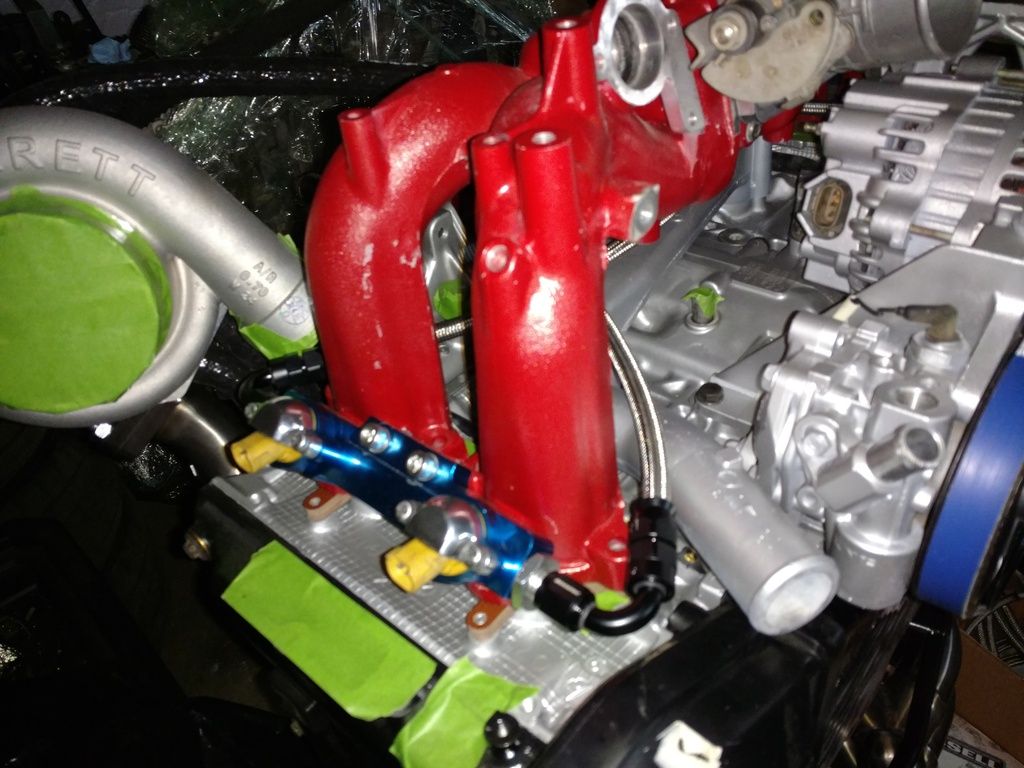
I decided I needed upgraded fuel rails at this point. I found a company that makes high flow rails for the ej20k and mount to phase 1 manifolds. They work for the sidefeed injectors I was planning to use and also came with 6AN fittings at the ends, which would work great with the fuel line setup. For injectors I was planning on STi 550's.
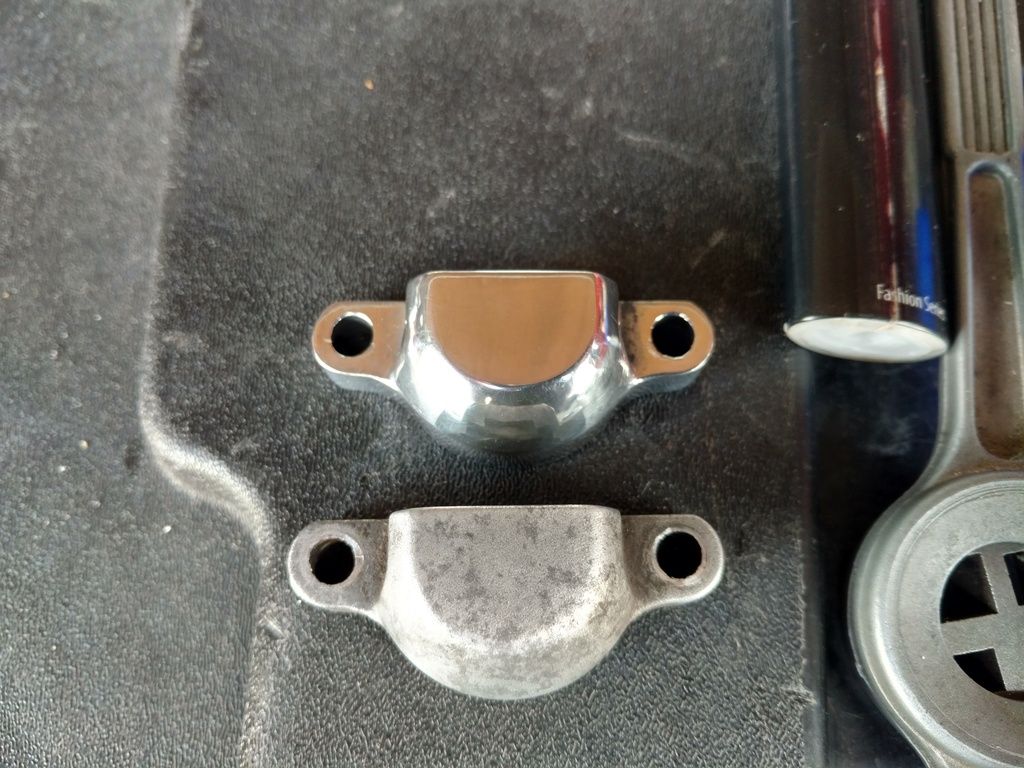
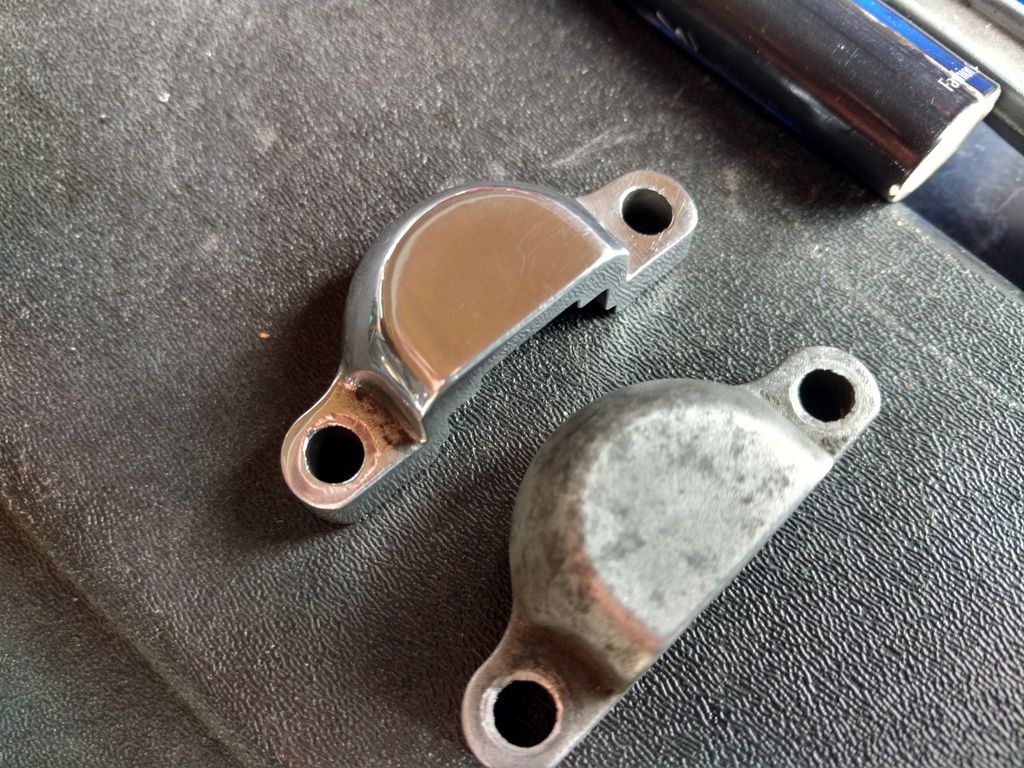
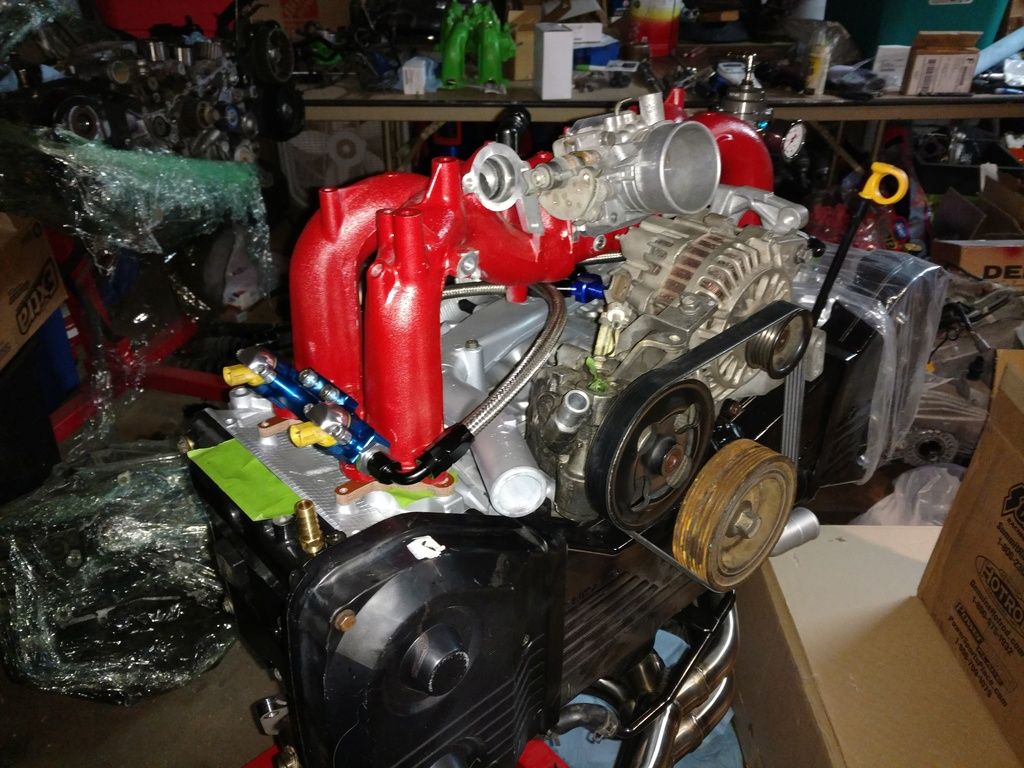
I had these beautiful fuel rails and gross injector caps that looked horrible on the new rails, so I polished them:
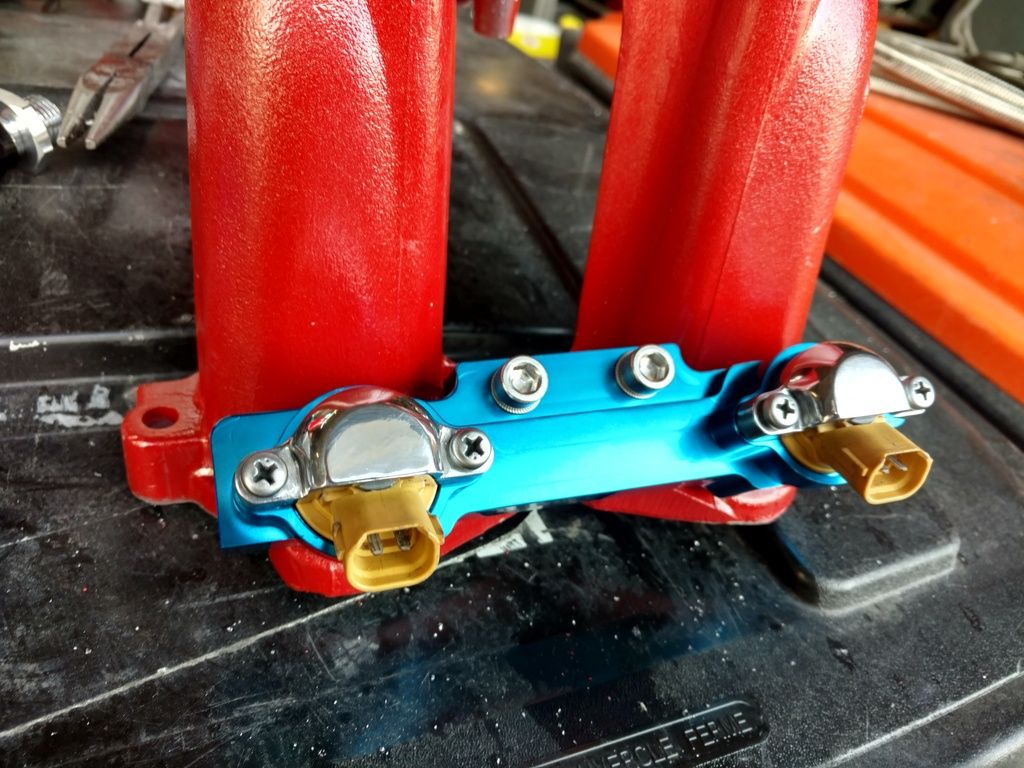
Also seen in the above picture, I upgraded almost every bolt on the manifold/car to stainless Allen heads.
____________________________________________________________________
--ALTERNATOR
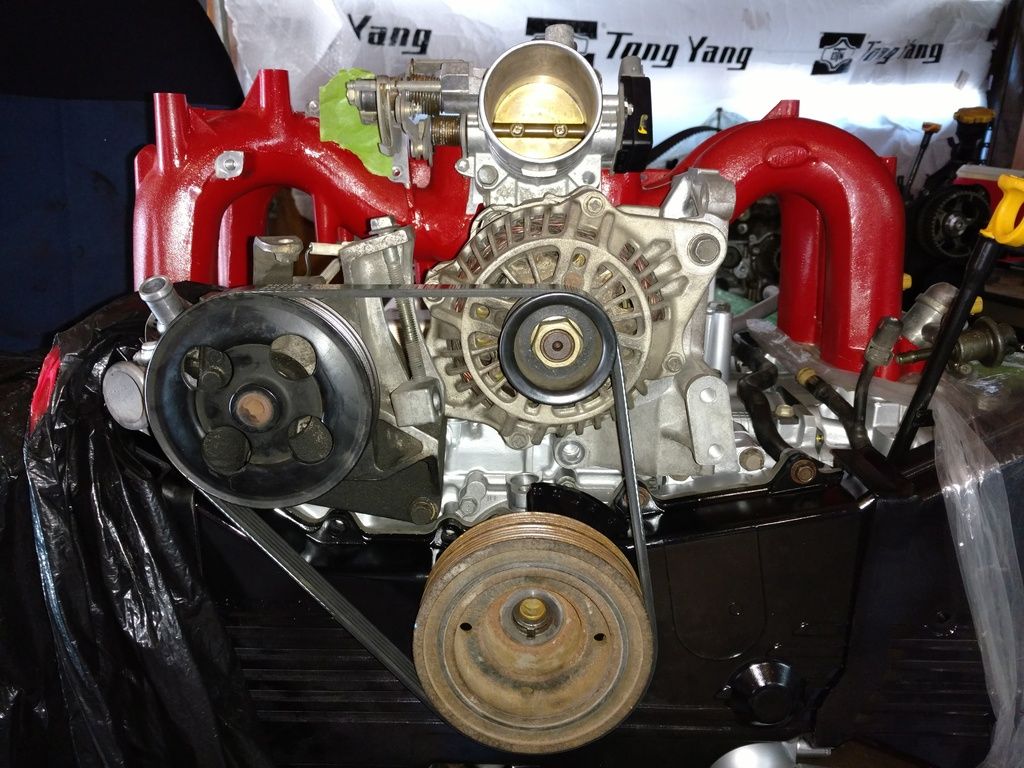
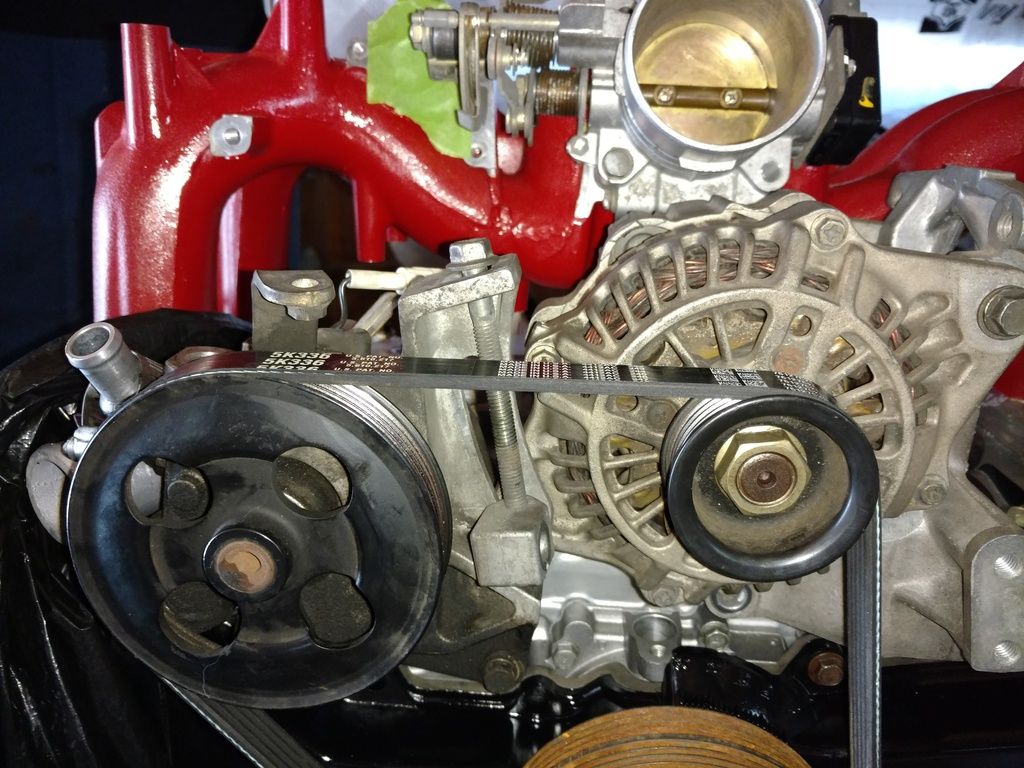
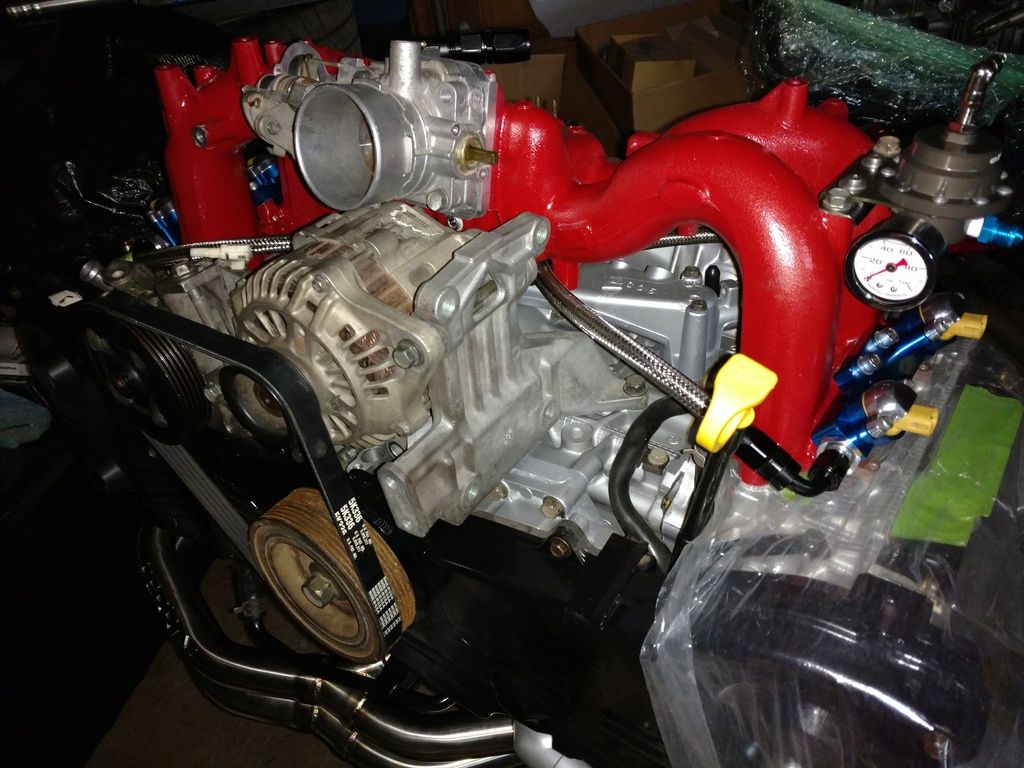
Next I will discuss a little more about the alternator. I ended up using a WRX alternator, based on where the wiring connections were, made it a better choice, plus it's an upgrade from the old legacy alternator.
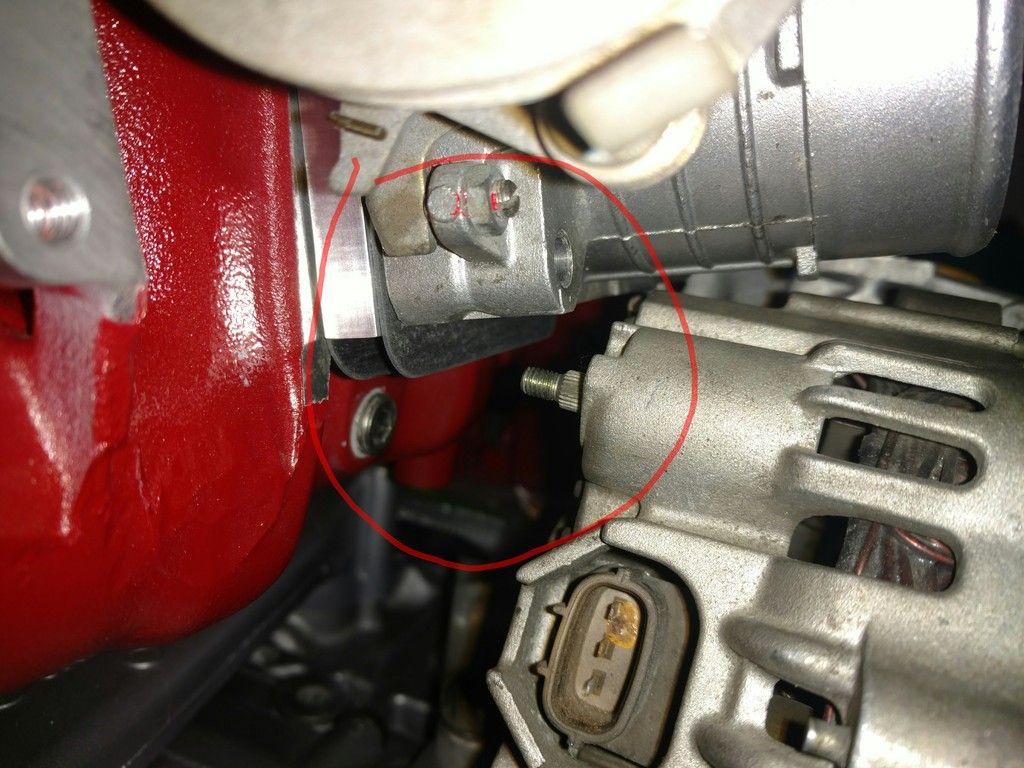
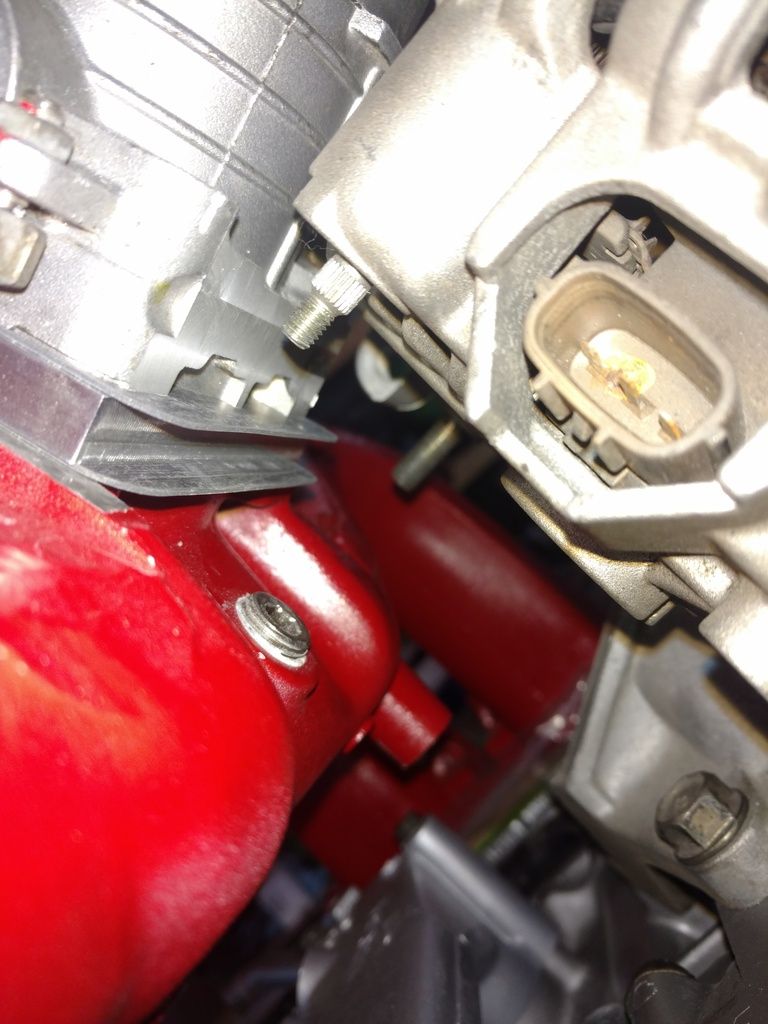
In order to make this work in the factory location I had to make modifications to the alternator bracket and the tensioner on the power steering pump.
I needed the alternator to sit as low as possible. In order to do this I ground a good amount of material away from the lower part of the bracket, until the point of gaining almost an extra inch of lower clearance. Because of dropping it so low , the tensioner also needed to be lowered to match the distance.
Where the tensioner locking bolt slides through a Groove on the PS pump, that groove was drilled out lower to match the alternator height. Unfortunately, I don't have pictures of this detailed process.
Now that I had a good lowering distance I needed to come up with a belt that would work. I measured the distance around the pulleys and headed to the parts store to finding something. I picked 4 different sized belts, trying different things. The goal was to find the tightest belt at the lowest distance. Once I found what I needed I returned all the belts and had to special order a belt from gates. I picked the gates racing belt, stronger, lasts longer, less flex, and looks cool in blue. Expensive though, at $60 for that belt.
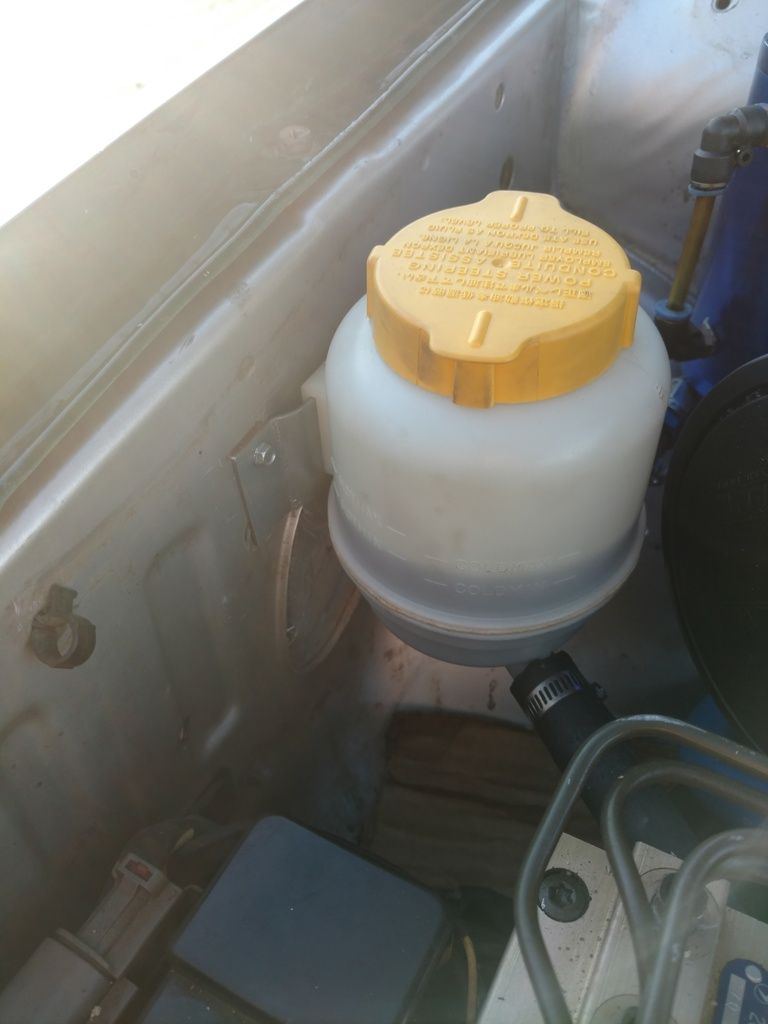
*Note, Because I wanted the under manifold inlet, I used the PS pump from my WRX engine which has the Reservoir externally mounted from the pump.
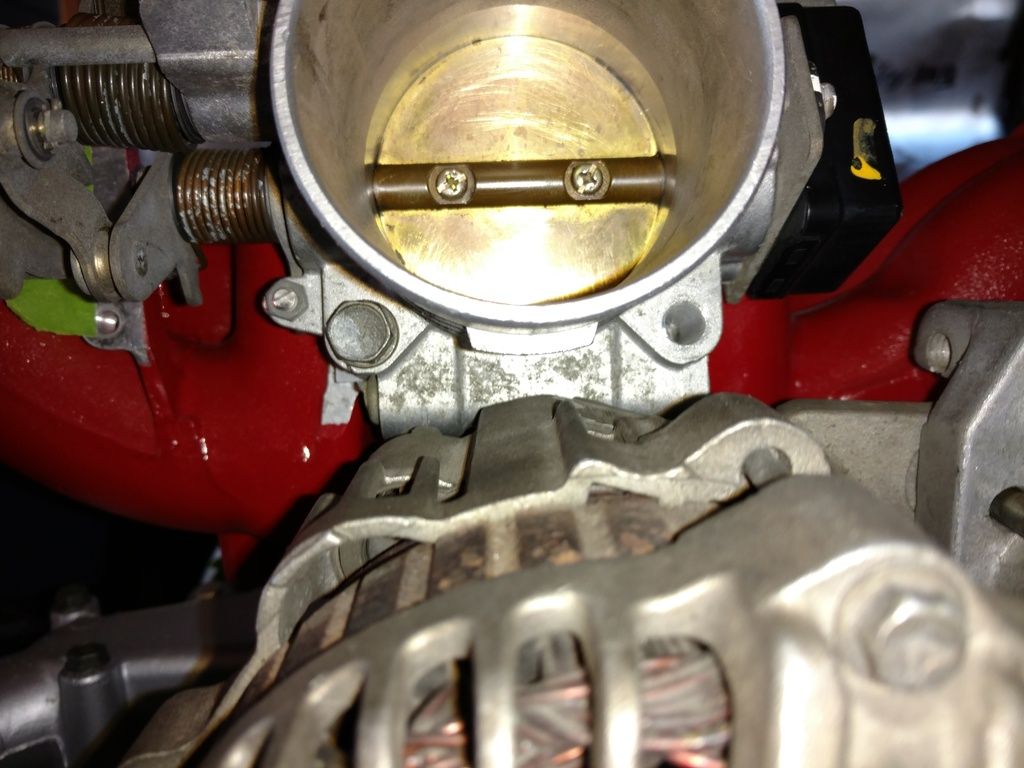
I ended up machining off the coolant pipes on the TB for more clearance:
 ____________________________________________________________________
--GO FAST BITS
____________________________________________________________________
--GO FAST BITS
In this next phase, shit really starts getting crazy. I changed plans entirely and decided I was going to really step things up from the original plans.
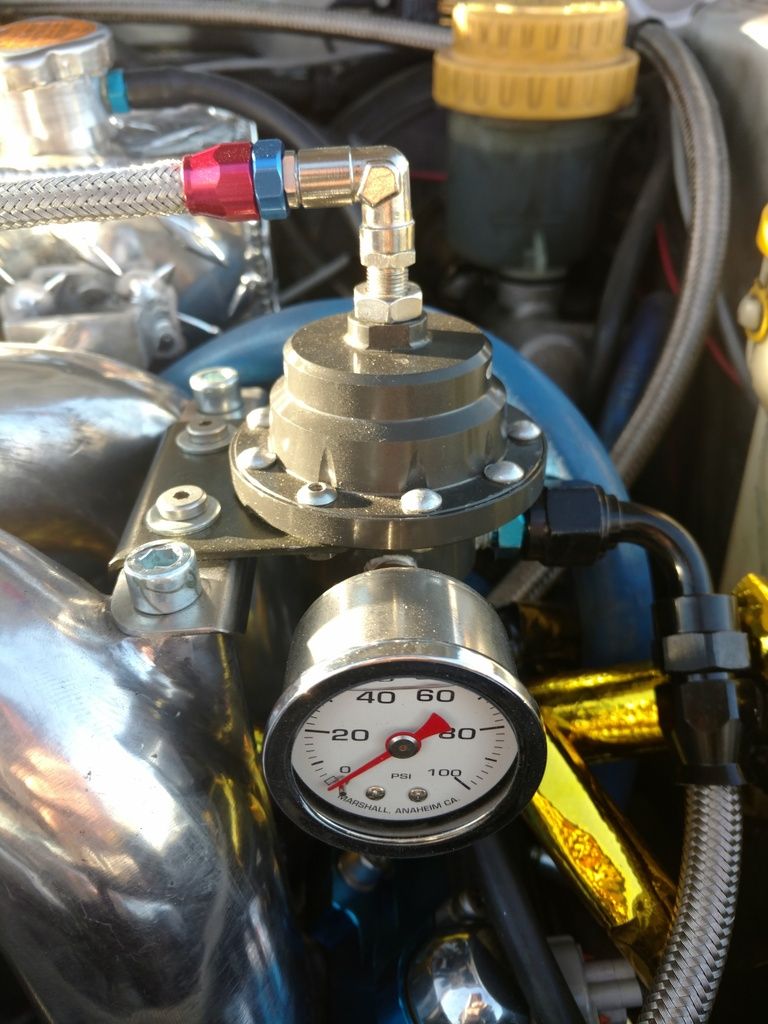
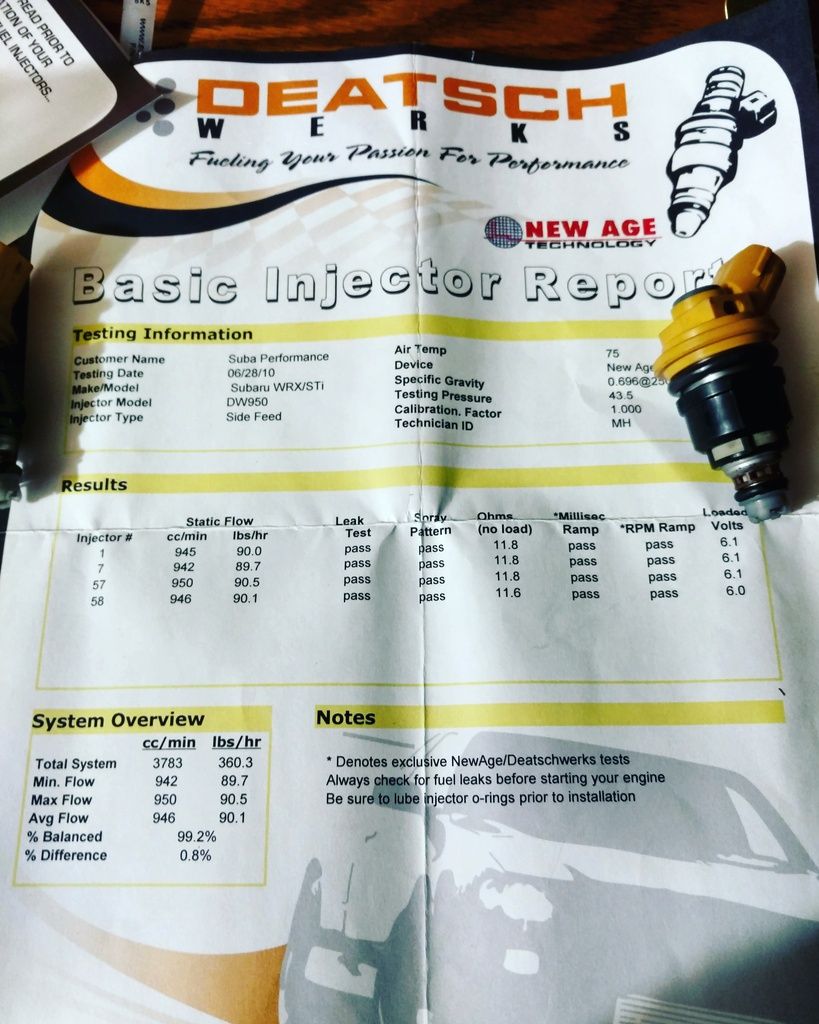
I picked up some
dw950cc injectors and a tomei big diaphragm FPR:
I was working 80+ hrs a week, 7 days a week. The money was there, so I went all out.
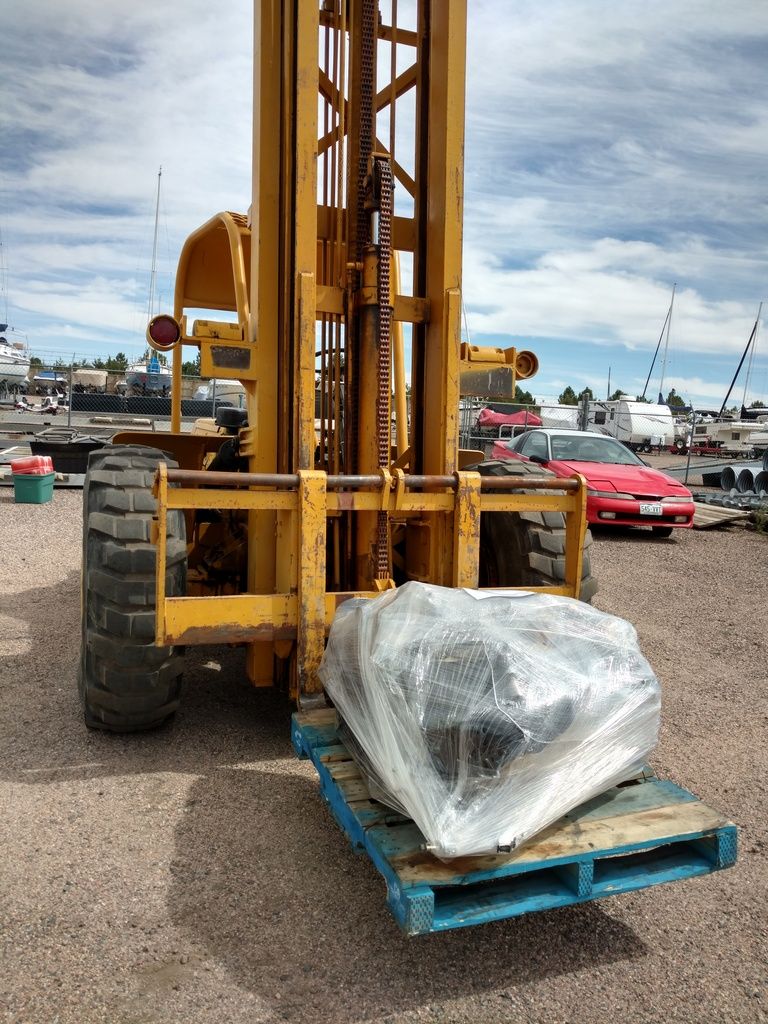
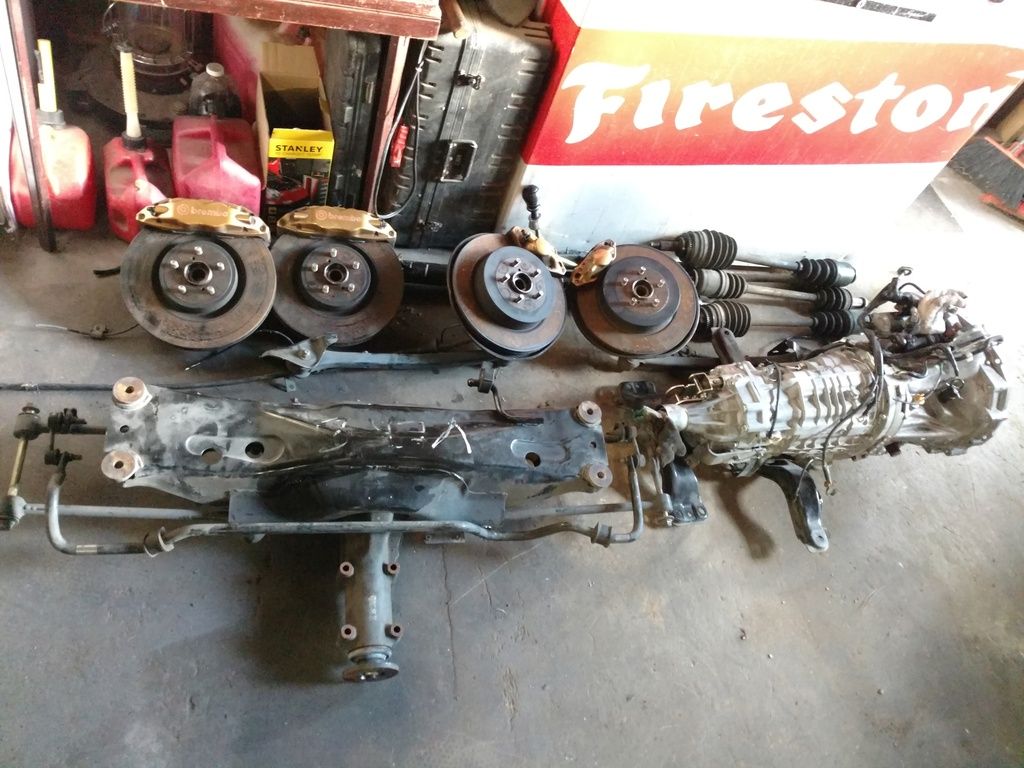
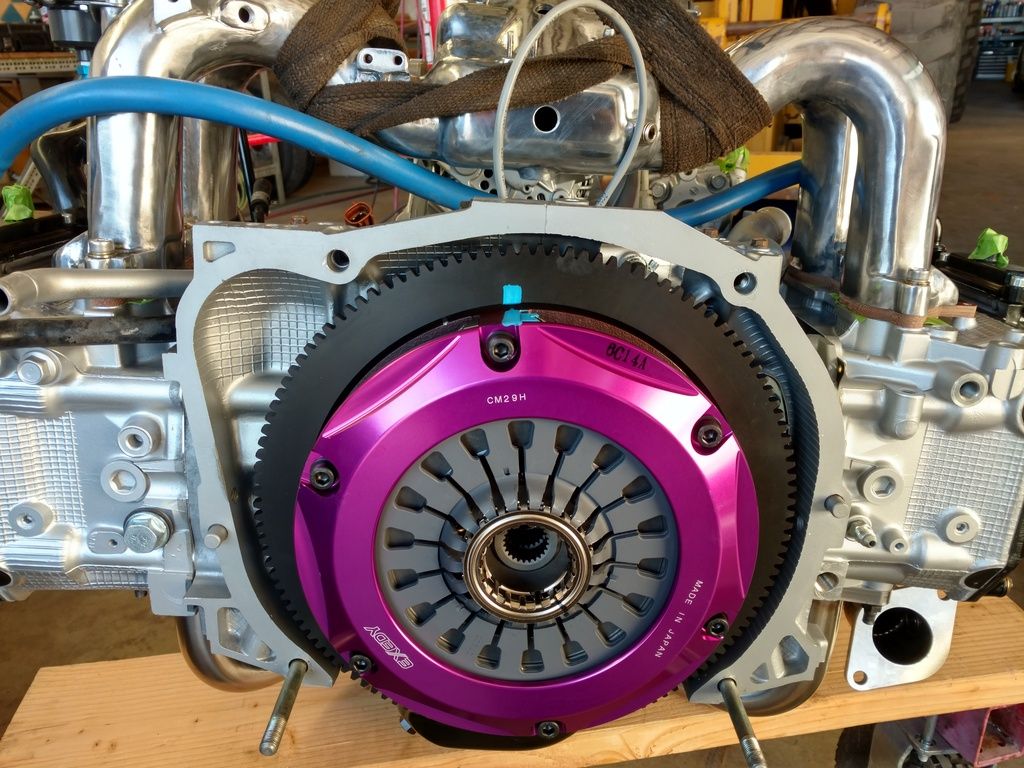
I ordered a JDM v8 STi drive train with 30000 miles on it. 6speed, shifter, flywheel, clutch, starter, driveshaft, r180 diff, subframe, control arms, trailing arms, sway bars, axles, hubs, brembos, rotors, DCCD, brake cables. Almost the entire underneath of an STi.
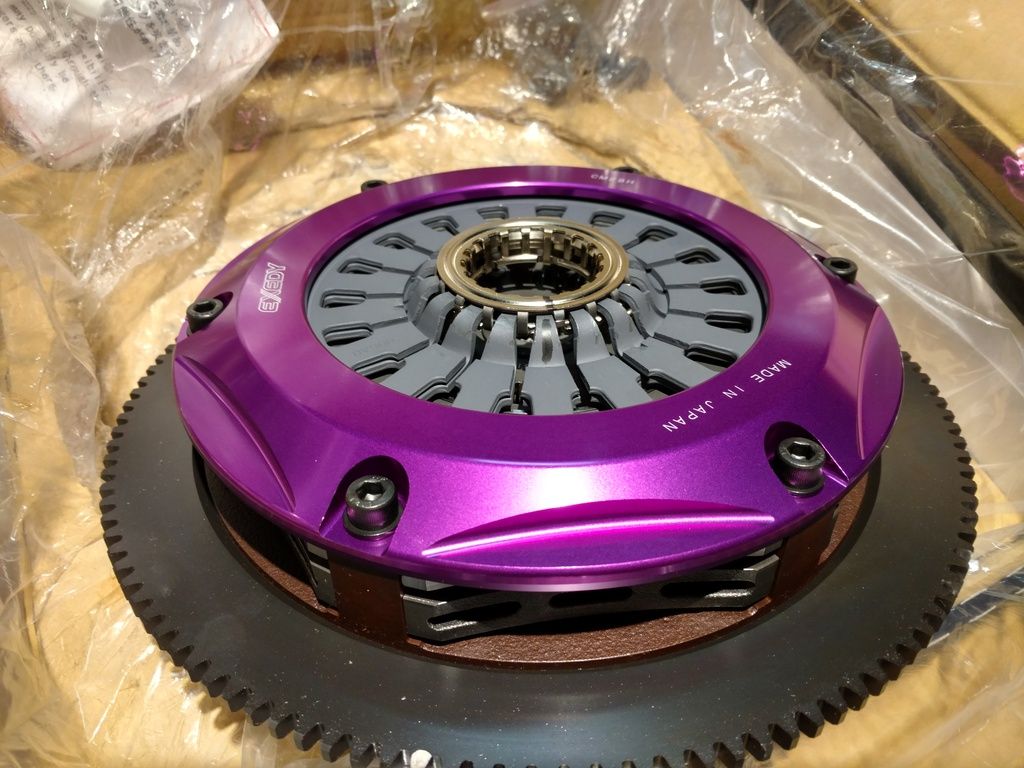
Ordered an
exedy twin disc:
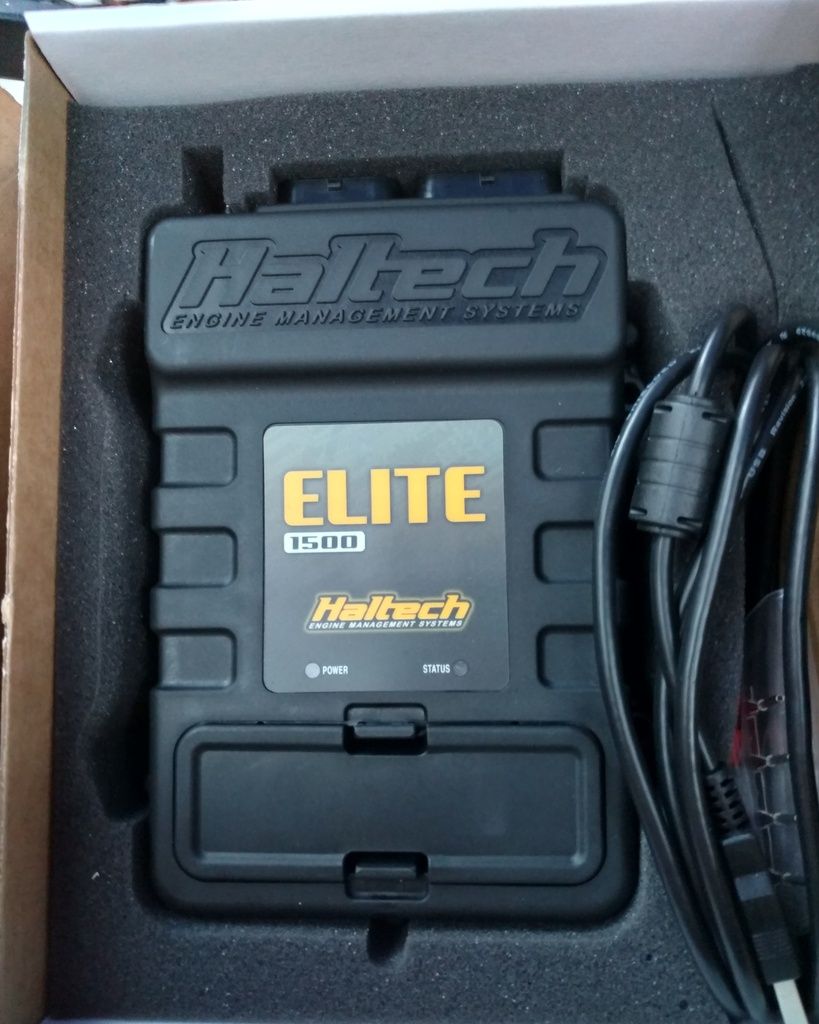
 Haltech elite
 1500 stand alone ECU w/ ej20g patch harness:
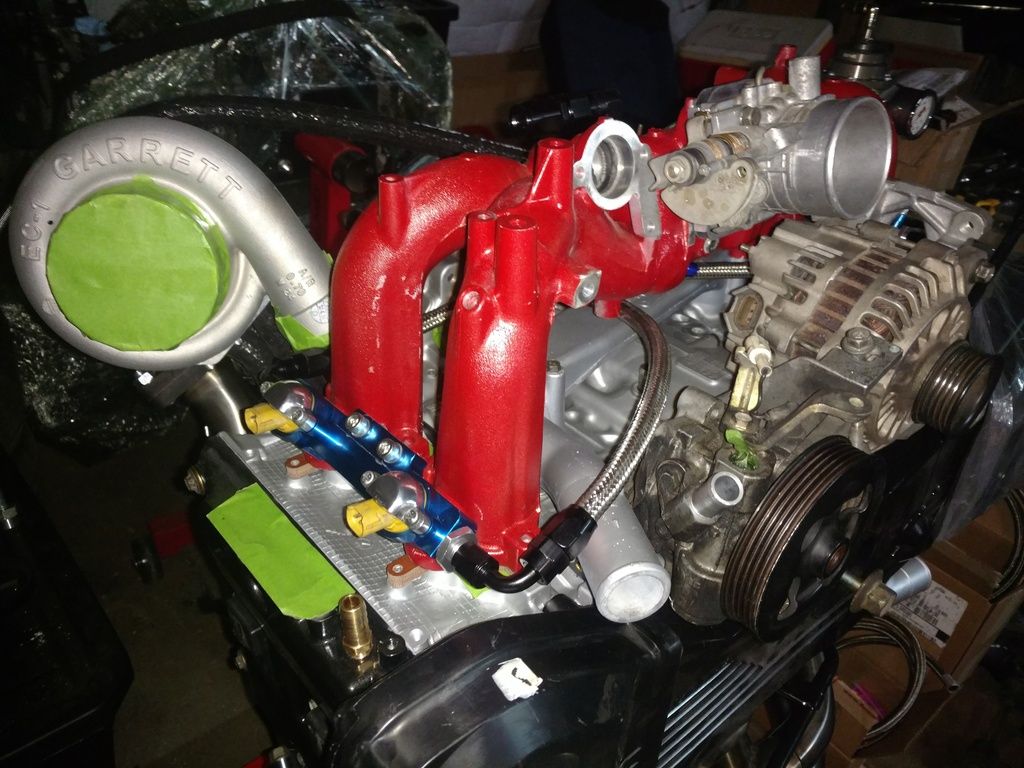
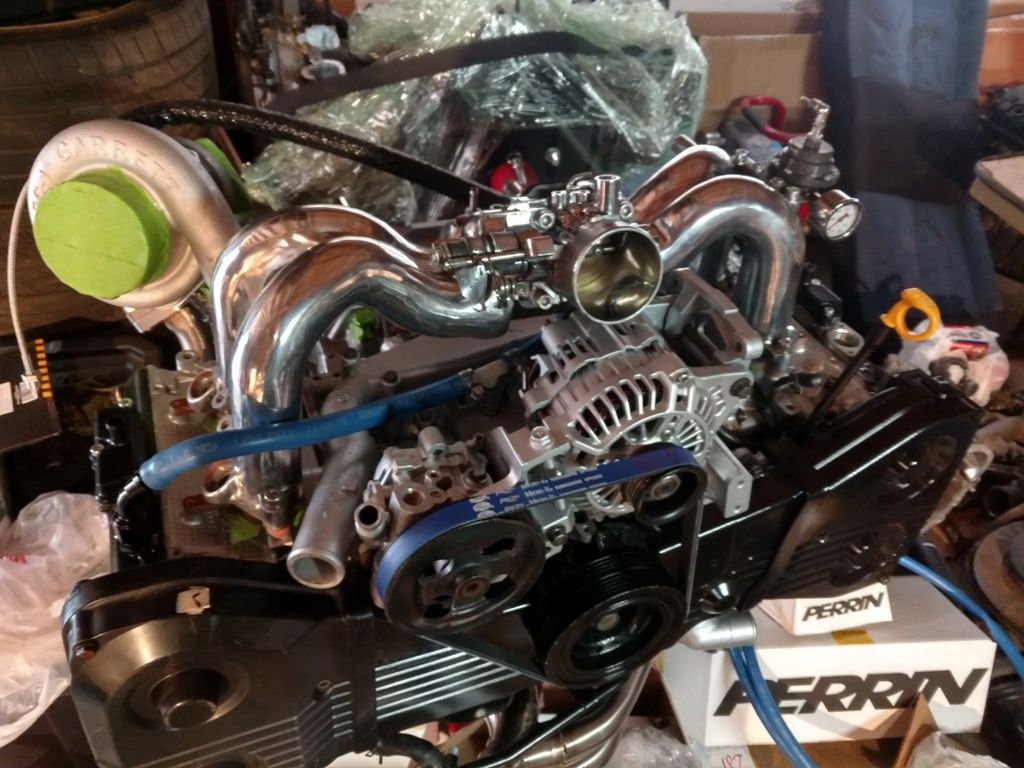
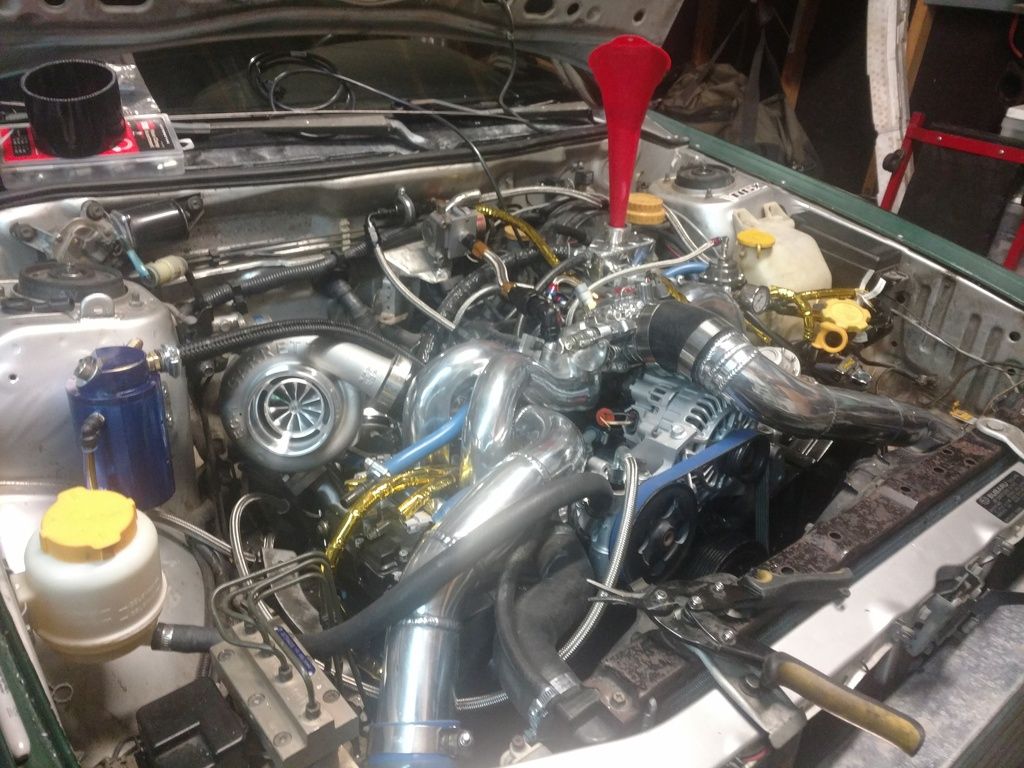
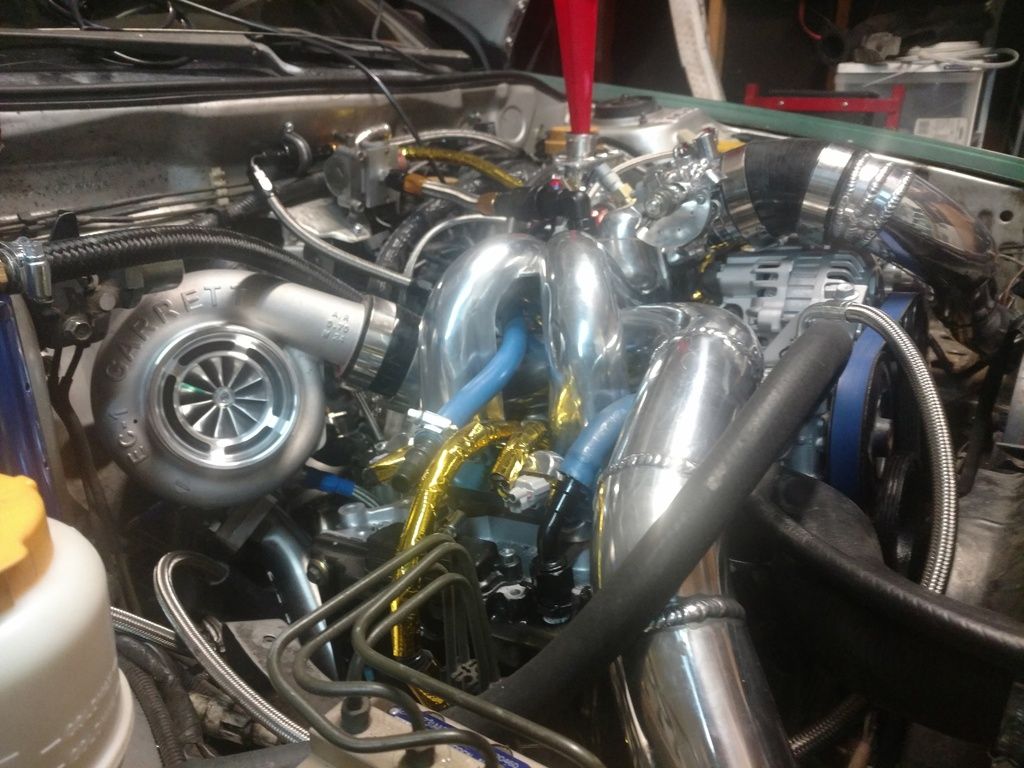
And decided to order a Perrin rotated turbo kit with a Garrett gtx3582r turbo:
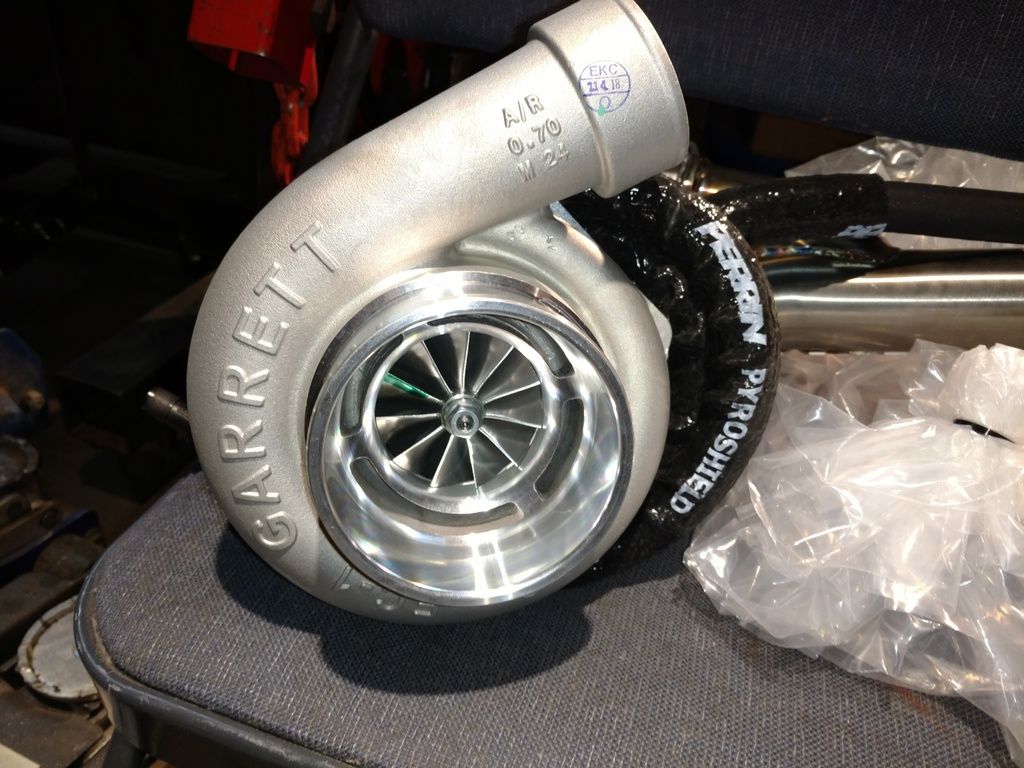
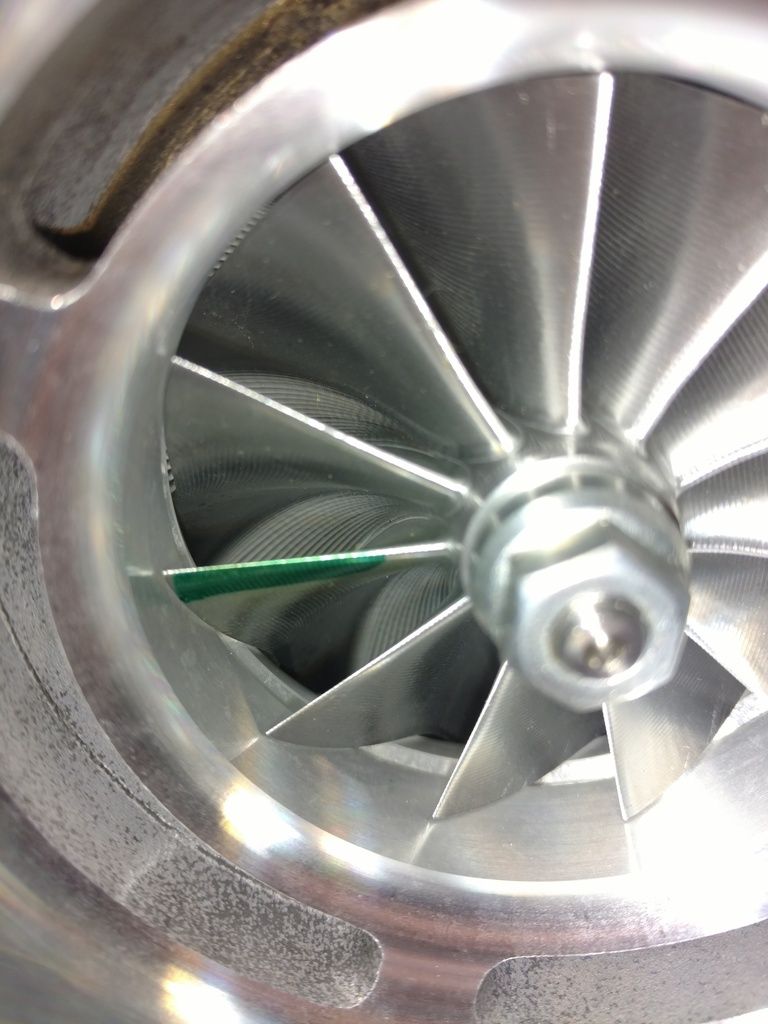
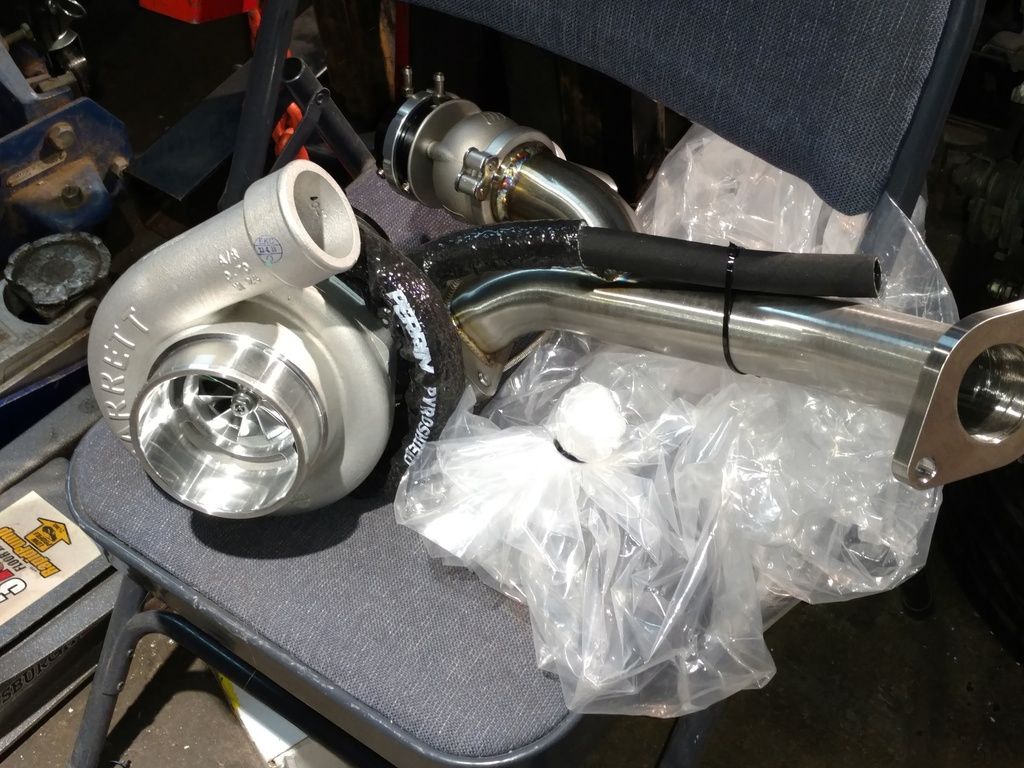
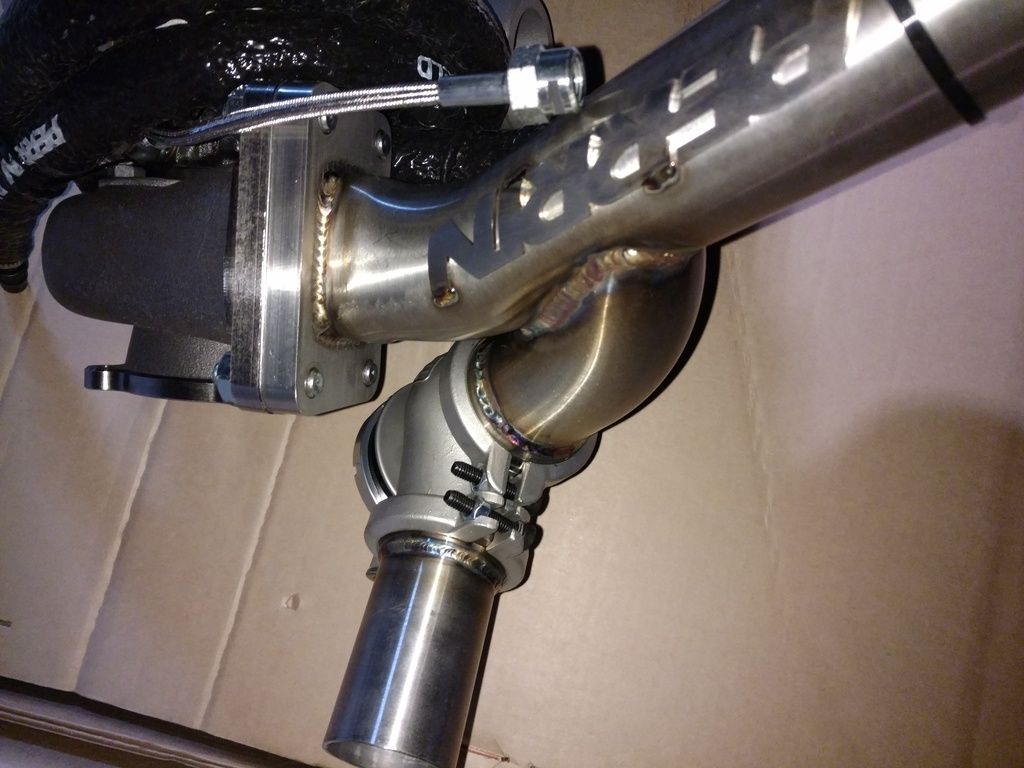
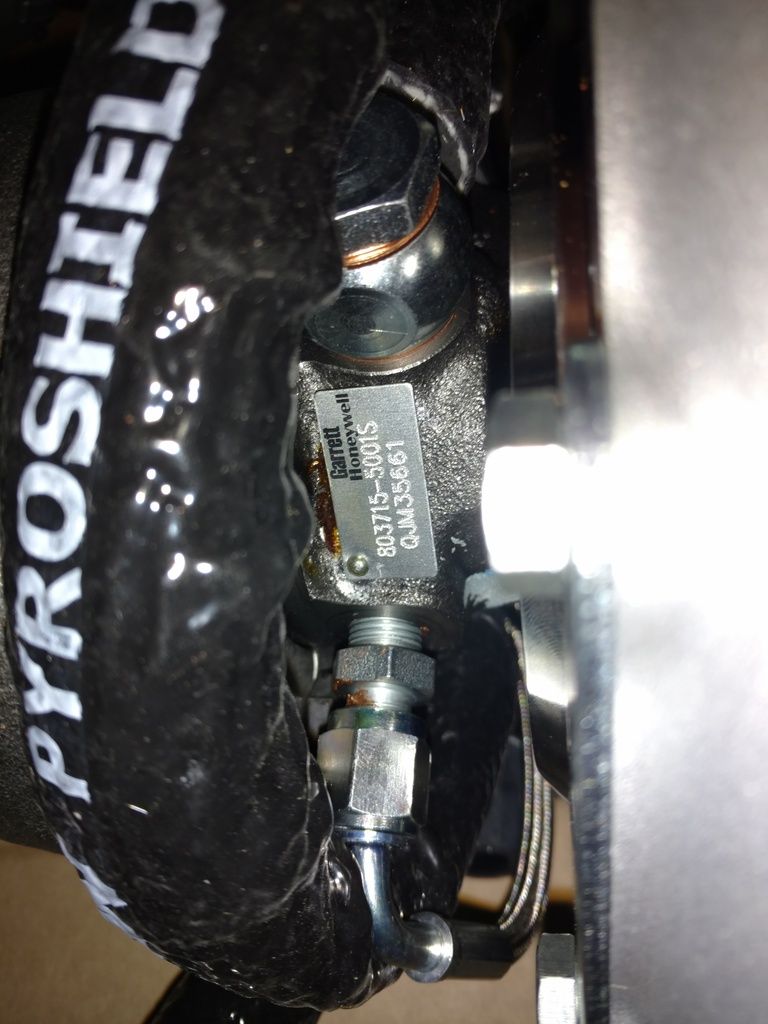
I picked the GTX series turbo over the GT because it spools about 1000rpm quicker. This gtx3582r has about the same spool time as a gt3076r. It's a huge turbo... But
go big or go home right?!
turbo is rated between 450hp-800hp..
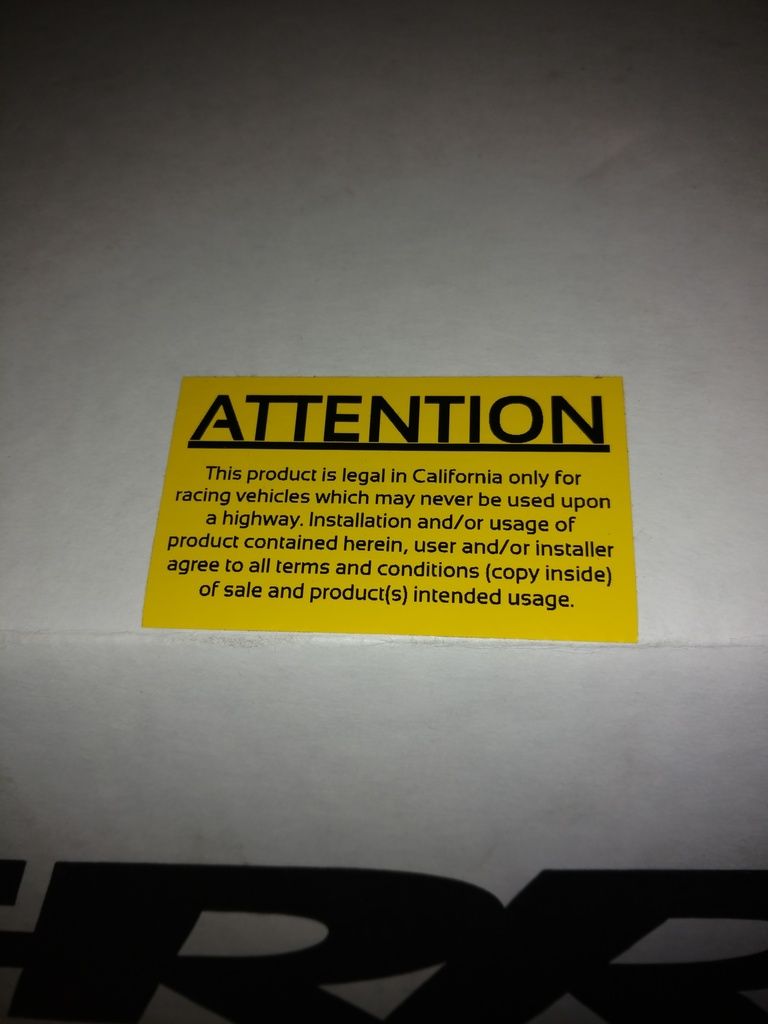
Good thing I don't live in California

:
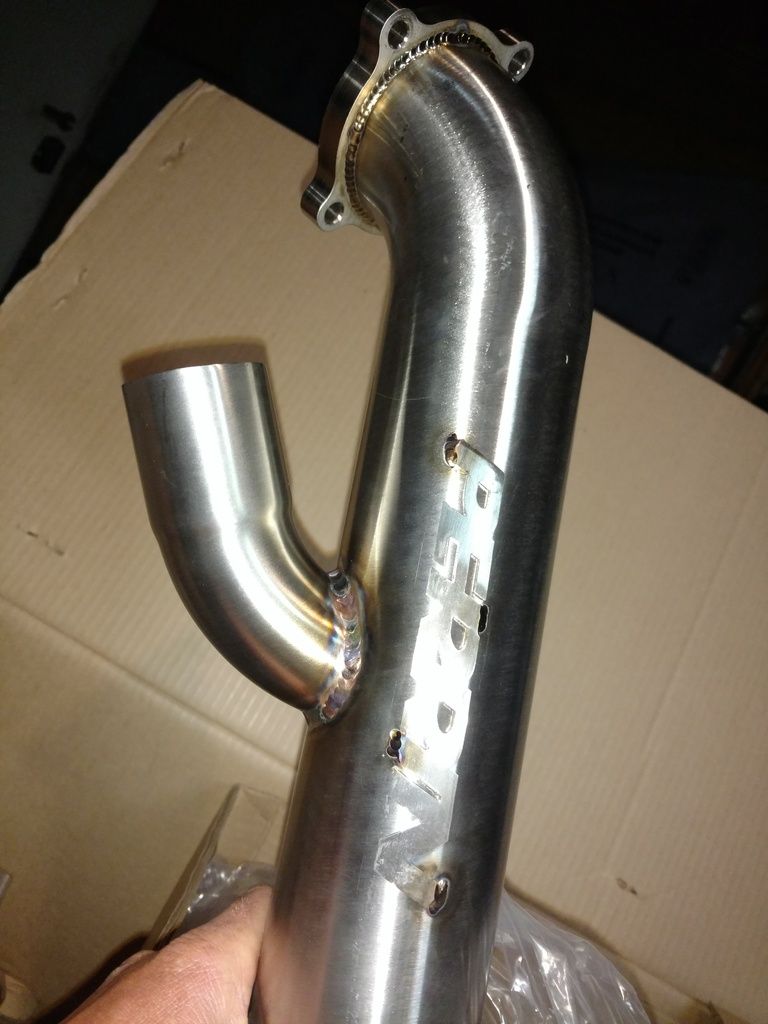
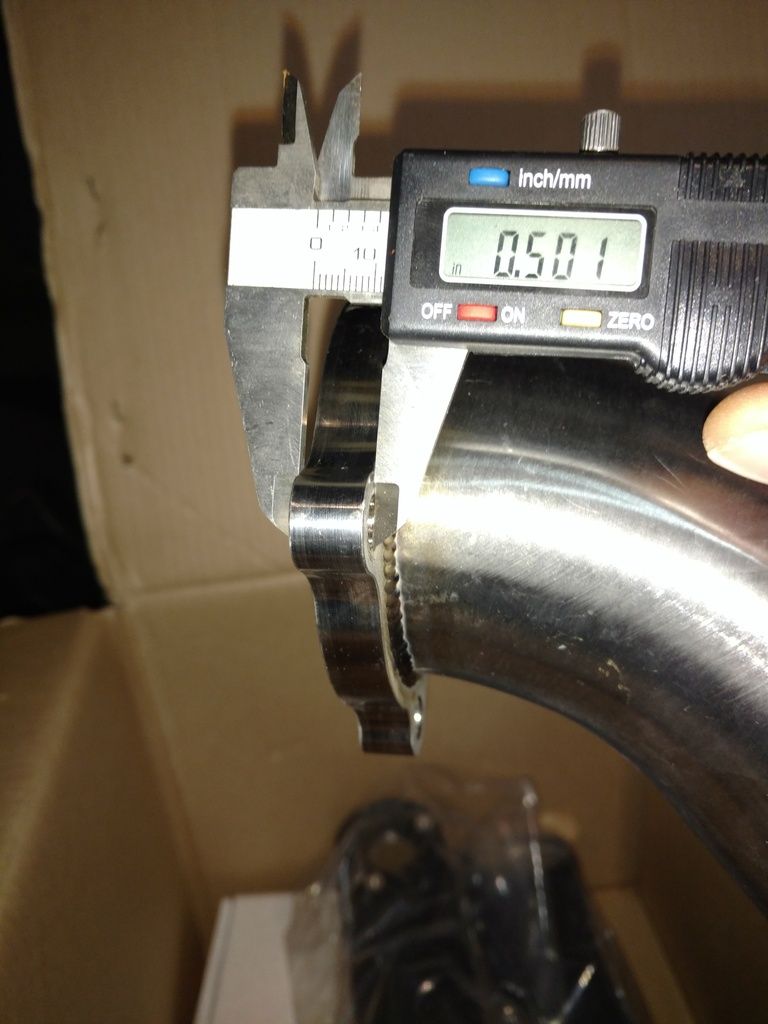
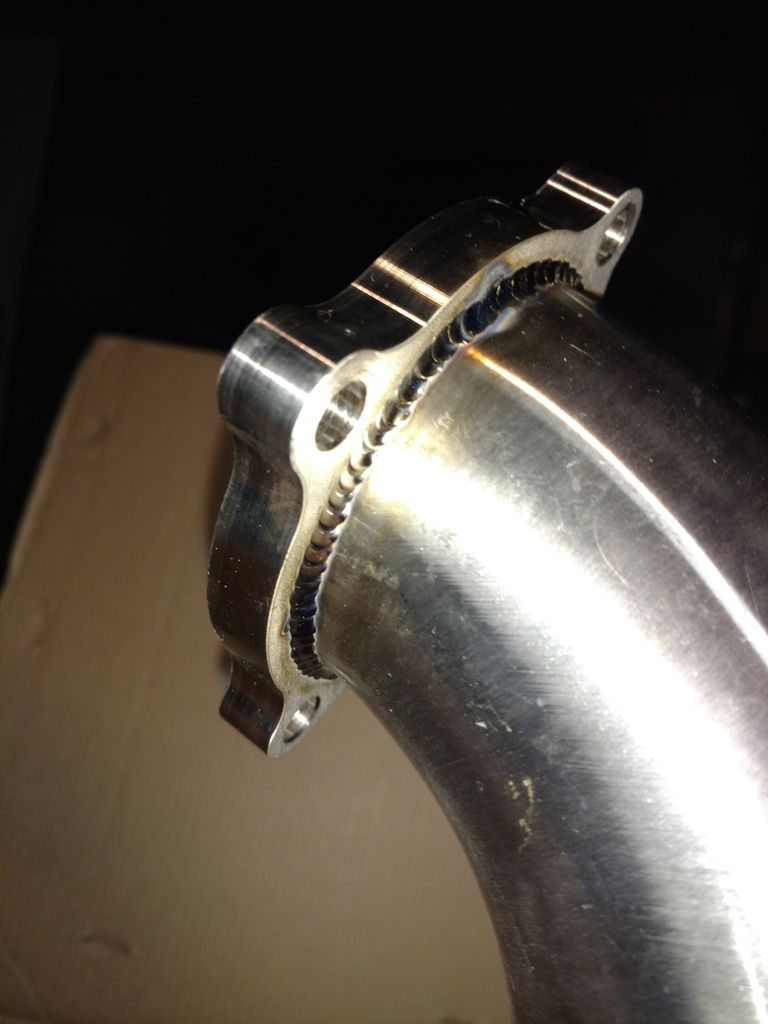
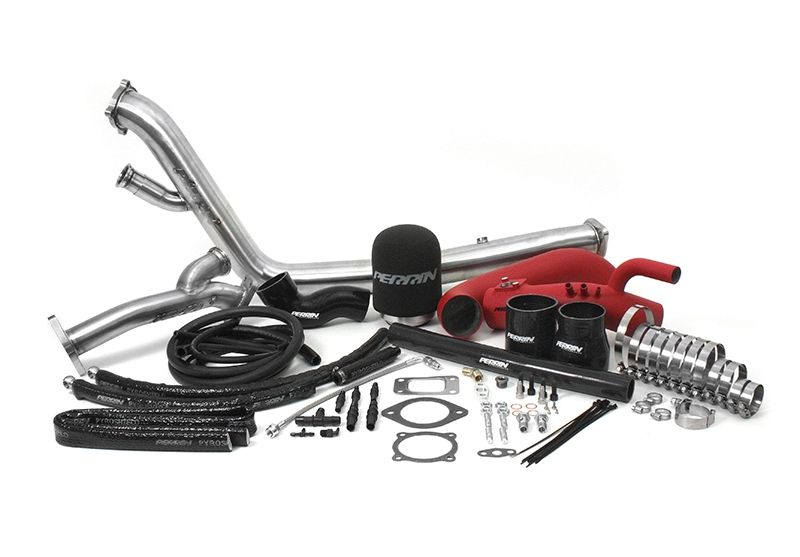
The kit included a Perrin high flow intake filter, two cold air intake pipe options, one for MAF and one without MAF, both powder coated wrinkle black, SS turbo oil feed lines, one for Sti(straight bolt in) and wrx(banjo), turbo smart 45mm ewg with vband flange, Perrin up pipe, rotated down pipe, an assortment of hoses and fittings for coolant/vacuum, gaskets, clamps, bolts, Perrin pyroshield, and couplers. Pretty complete and cool kit to get you going.
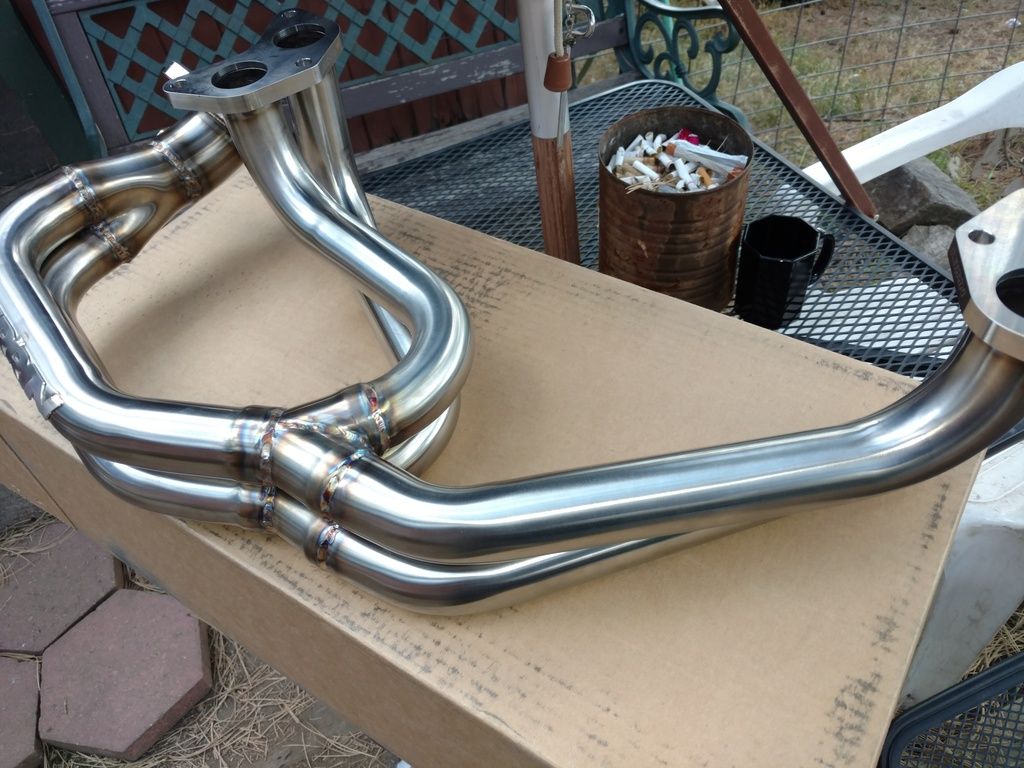
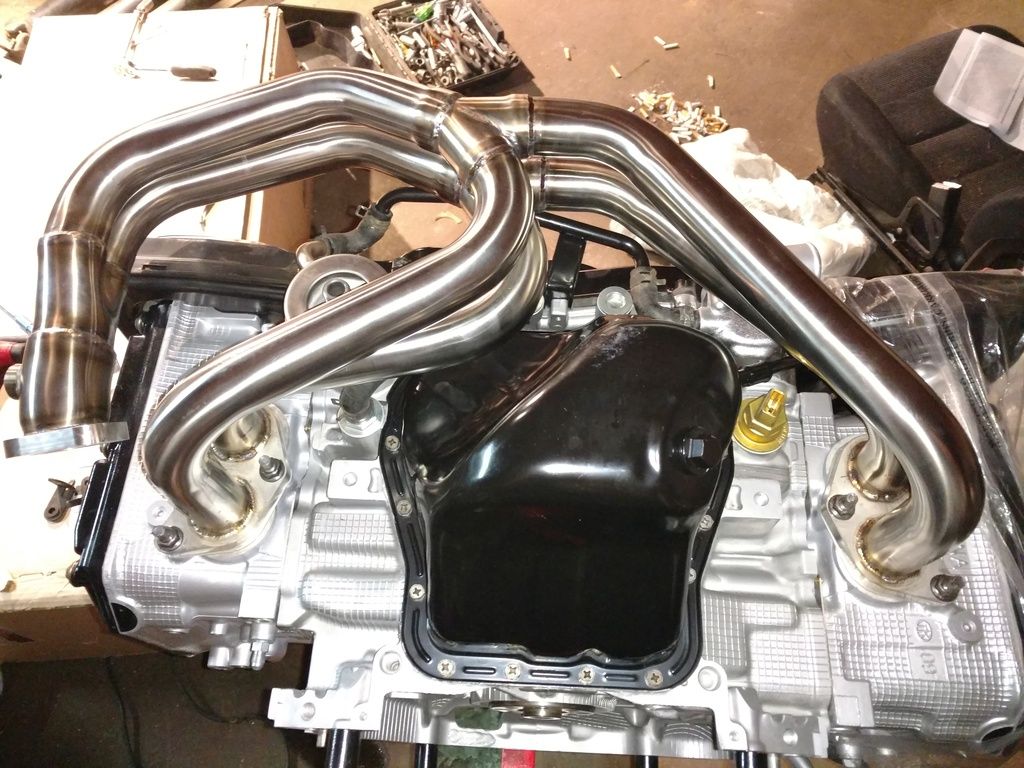
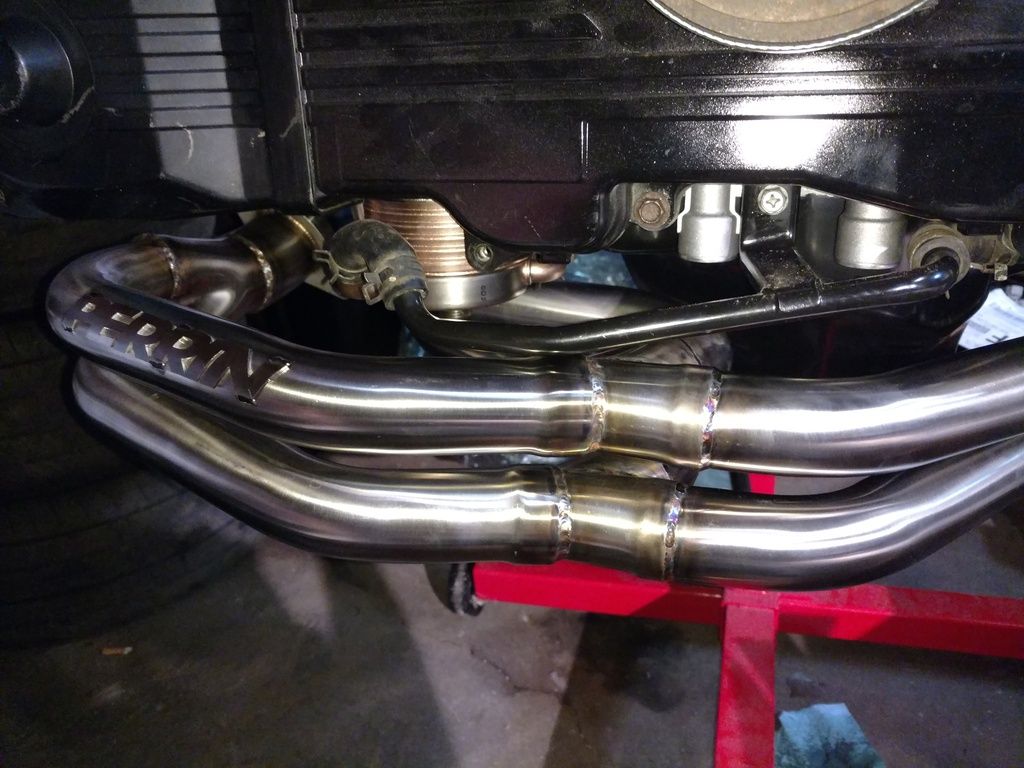
Ordered Perrin big tube equal length headers, rated for a minimum of 500hp:

 ____________________________________________________________________
--INSTALLATION/MOCK UP
____________________________________________________________________
--INSTALLATION/MOCK UP
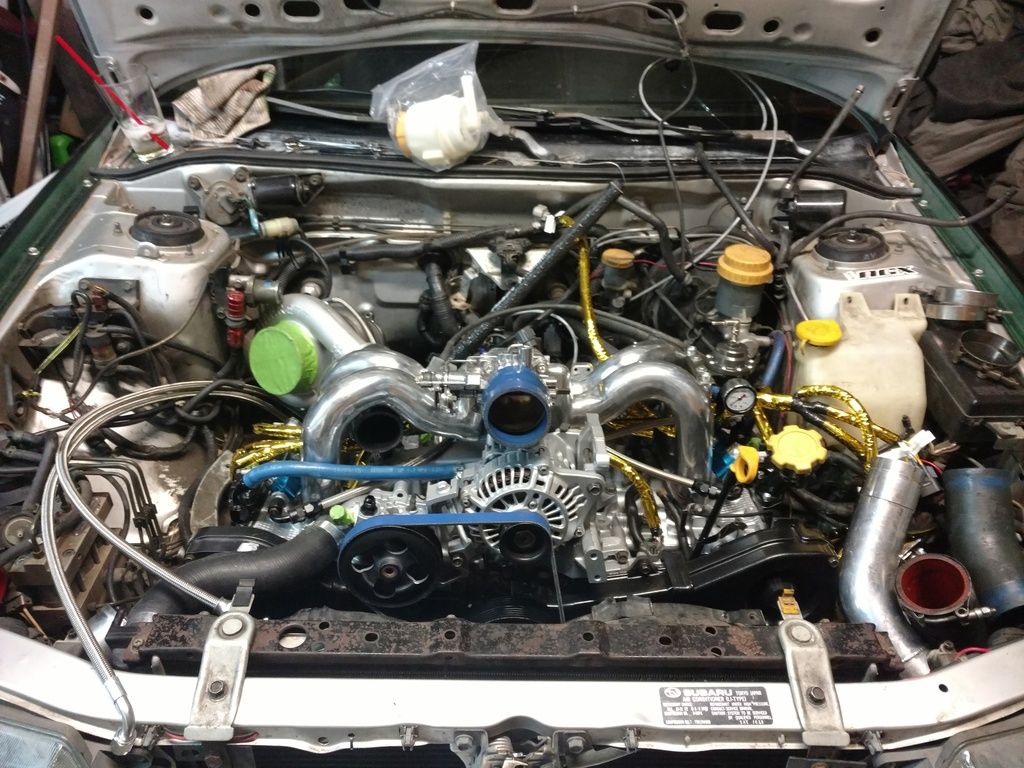
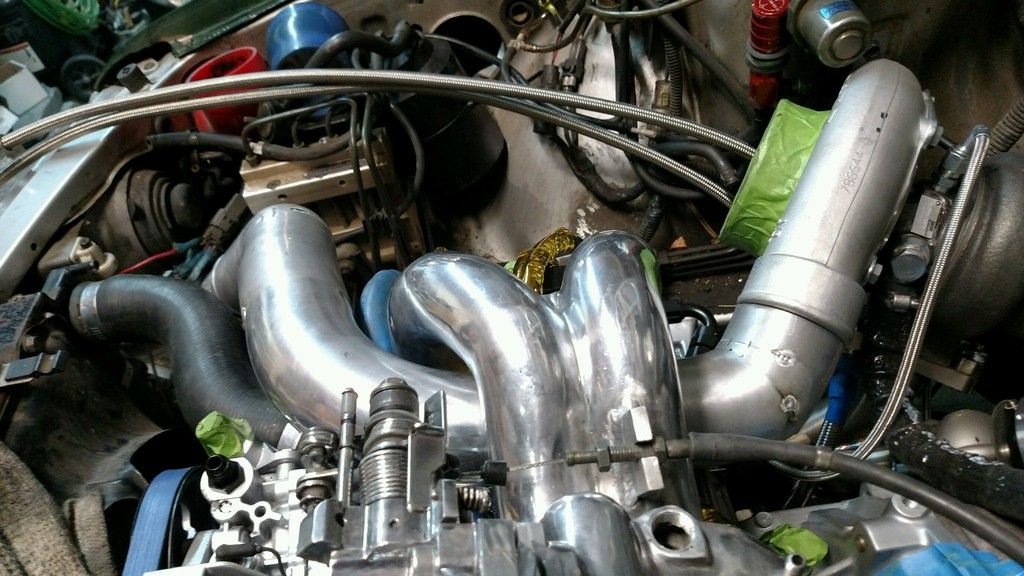
Some installation and mock up pictures:
The idea of having the intake going under the manifold had now changed to having the intercooler hot pipe come under the manifold. I started coming up with ideas:
 ____________________________________________________________________
--FUEL LINE PT.2
____________________________________________________________________
--FUEL LINE PT.2
I realized I was going to start having issues with room under the manifold once I added lines for the center crank vent, valve cover breathers and wiring. I also realized that while the 90° AN fittings for fuel would work, it could be better if I found fittings with a more aggressive angle.
I purchased PTFE stainless braided lines for my PS pump. Through research I knew that PTFE was a much higher quality line over standard braided line for many reasons, but one thing I noticed was the outer diameter was smaller than standard line when comparing 6AN PTFE to standard 6AN. Because of this and needing as much room as I could possibly make under the manifold, I decided to change my fuel line setup to fragola 6AN PTFE stainless braided line and use 4 130° PTFE swivel hose ends for each fuel rail end.
It sucked making a double purchase here to redo the fuel line setup, especially that PTFE line and fittings are very expensive, but it was worth it to do the job right and I figured I could recycle the old lines else where.

 ____________________________________________________________________
--PHENOLIC SPACERS/TIMING BELT
____________________________________________________________________
--PHENOLIC SPACERS/TIMING BELT
It was becoming apparent that my idea for having a line come under the manifold for the relocation of the IAC would also become an issue of room, further more I realized that routing the throttle cables would be an issue. So it was back to the drawing board for the manifold.
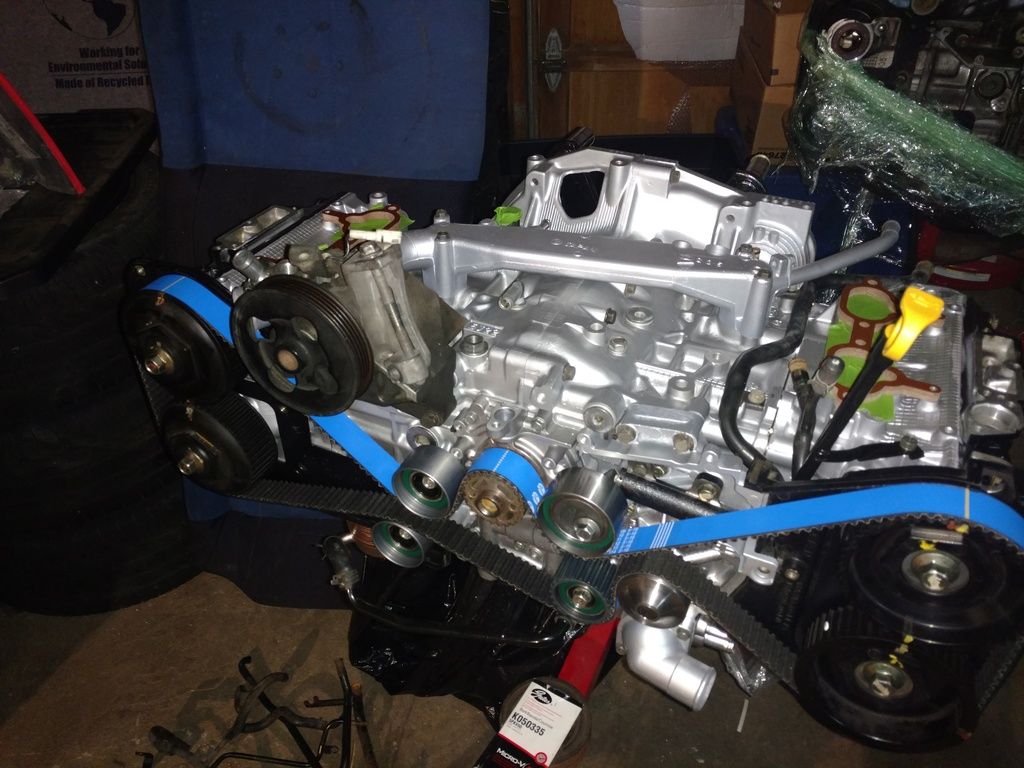
One thing to assist in the issue was picking up some grimmspeed 8mm phenolic spacers, but I still would need to do more.
Pictured are the grimmspeed 8mm phenolic spacers, also Gates racing timing belt:
 ____________________________________________________________________
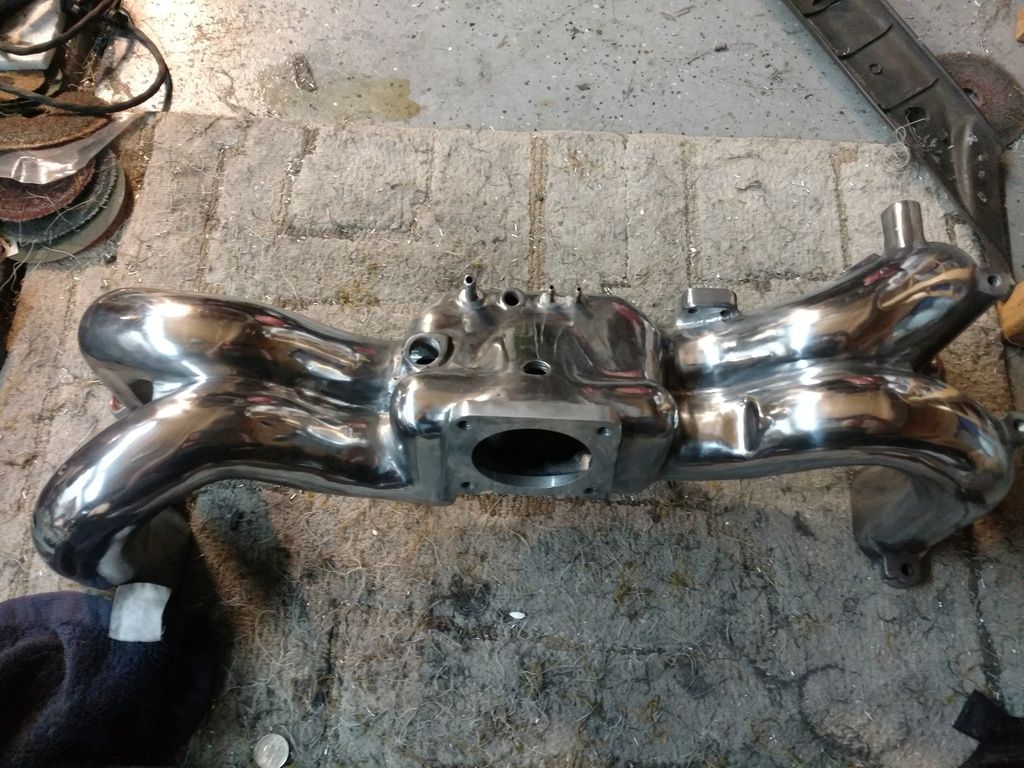
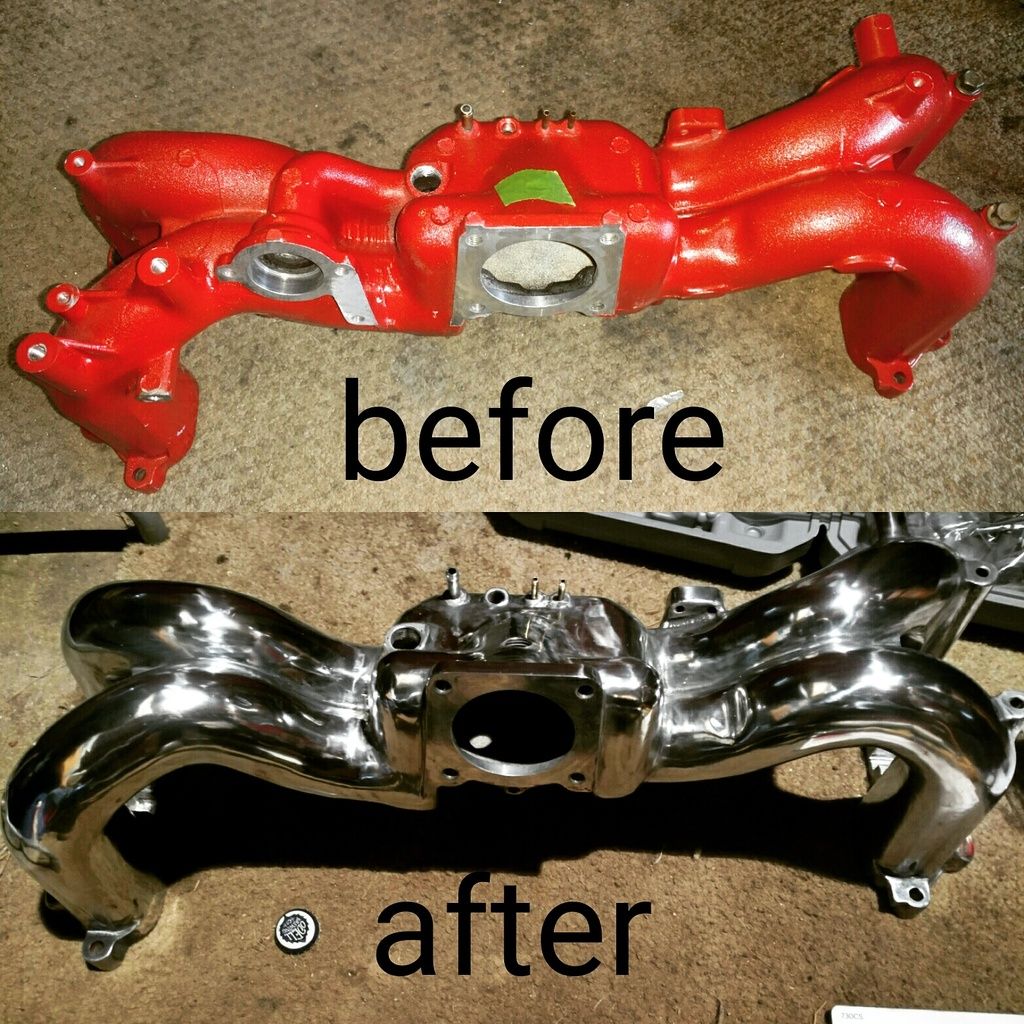
--INTAKE MANIFOLD TRANSFORMATION
____________________________________________________________________
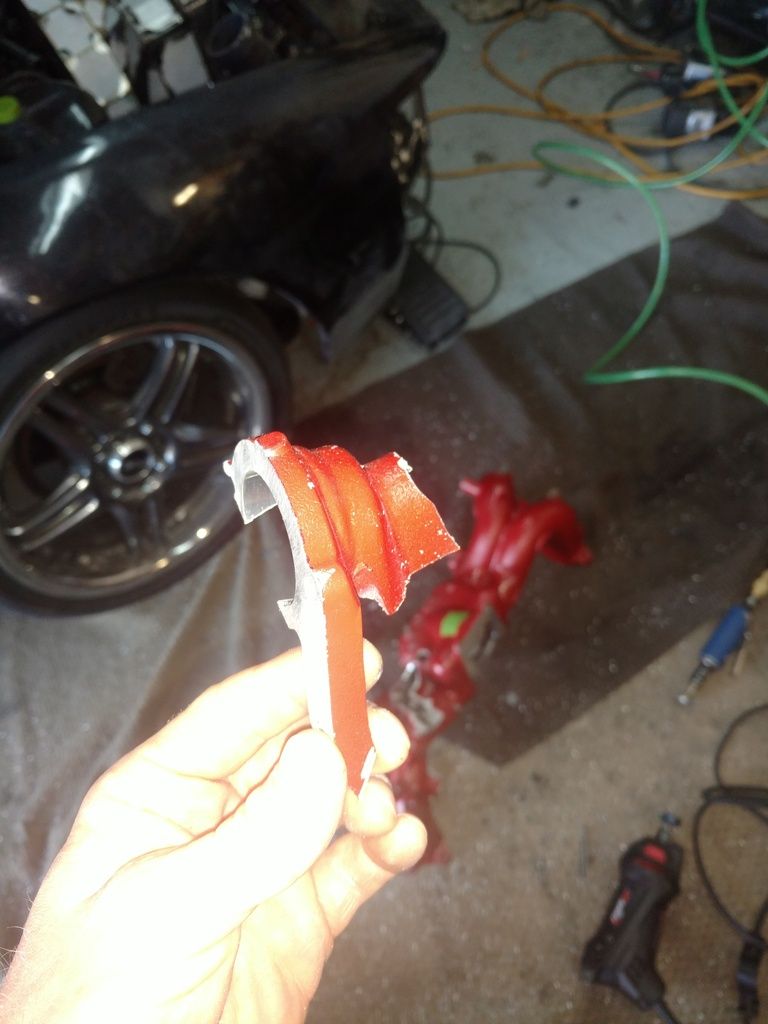
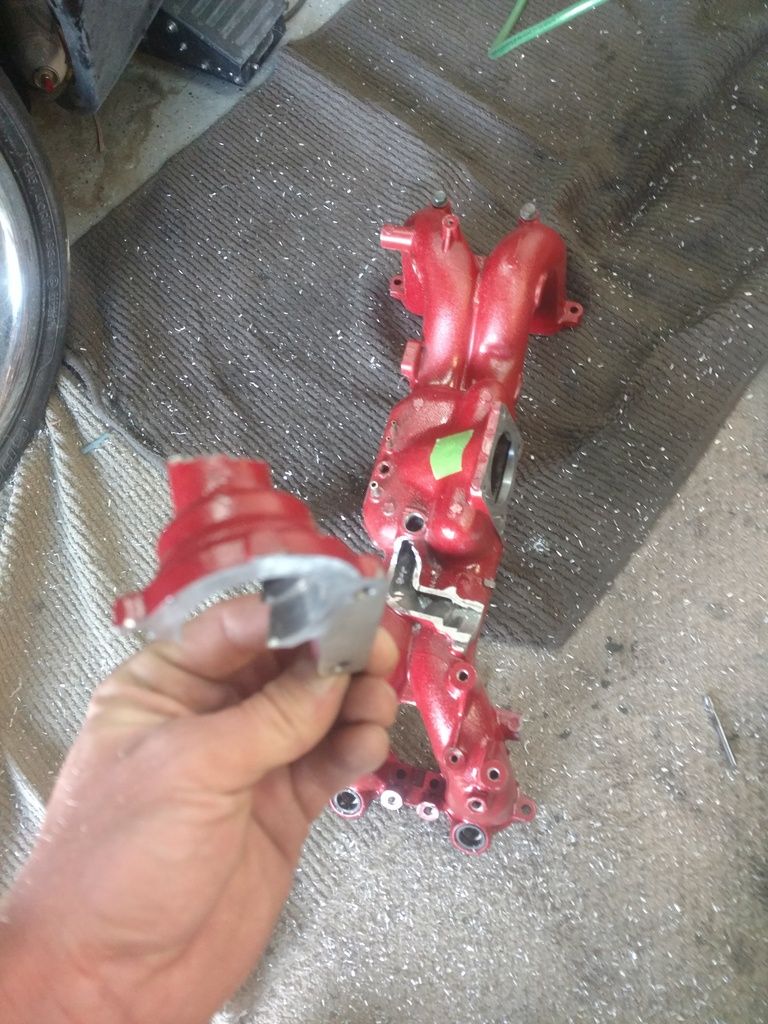
--INTAKE MANIFOLD TRANSFORMATION
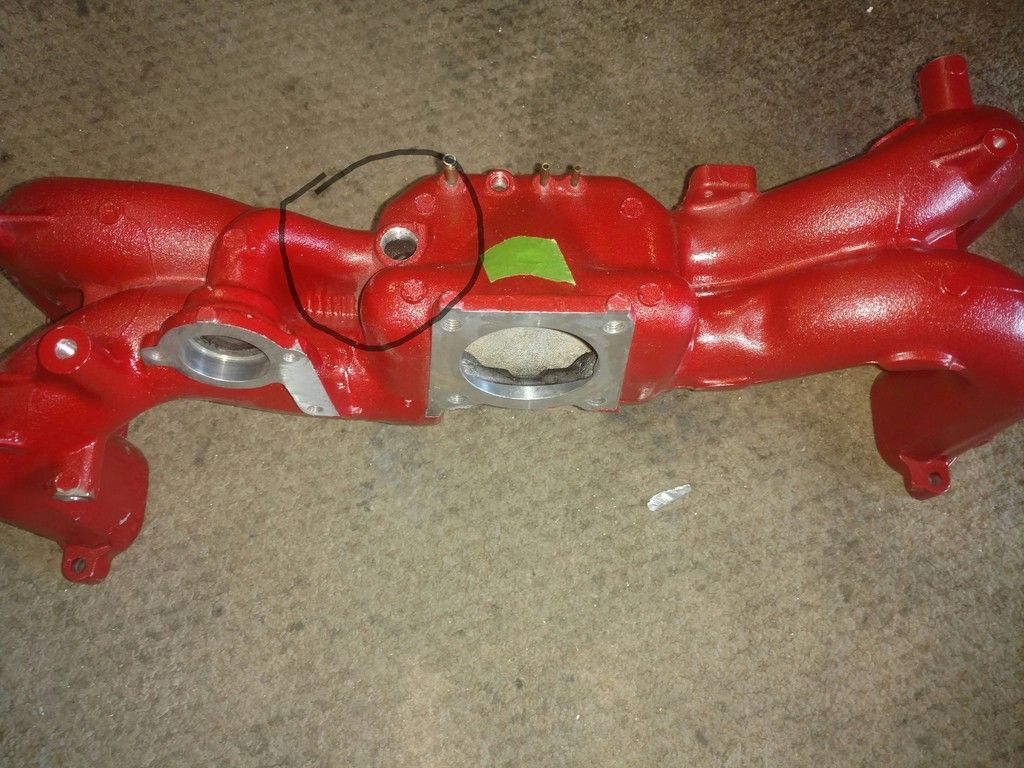
After some thought I came up with the idea of drilling and tapping a hole on the manifold. I noticed that this manifold had a plug on it located at the end of IAC air channel.
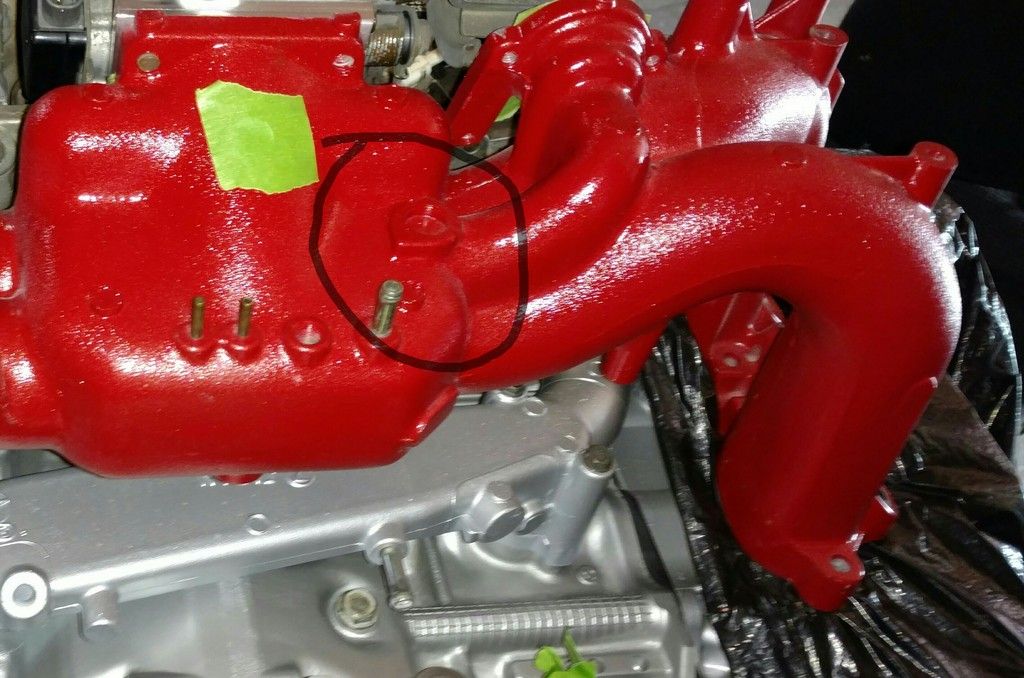
I removed the plug and drilled and tapped it to 3/8npt:
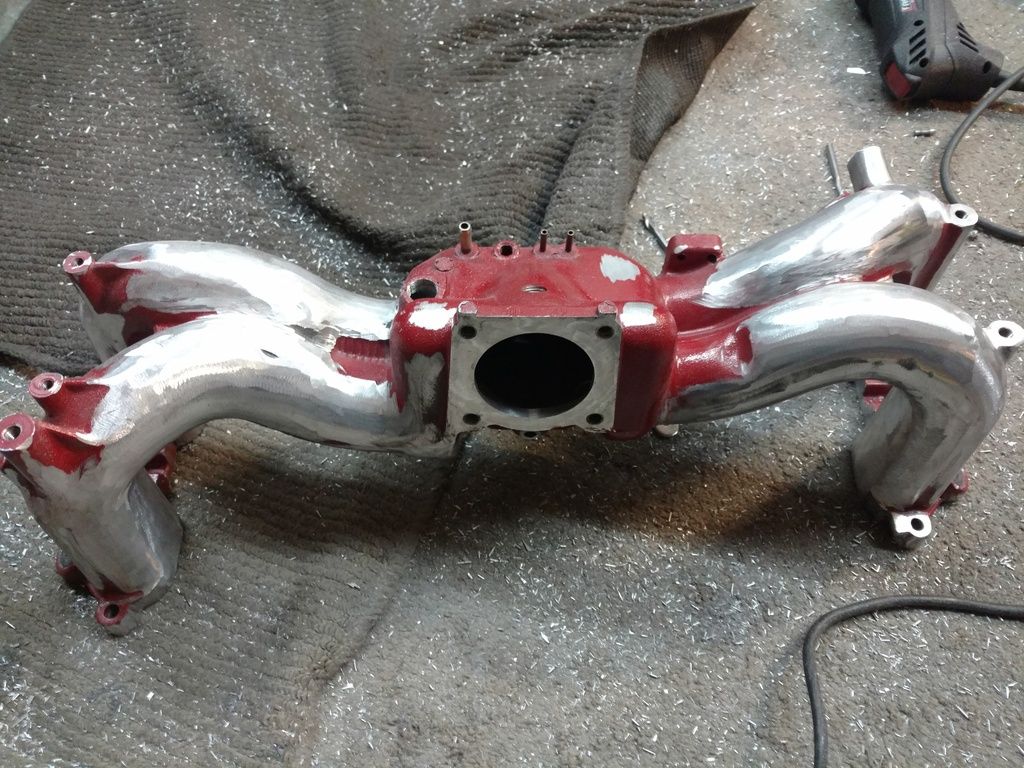
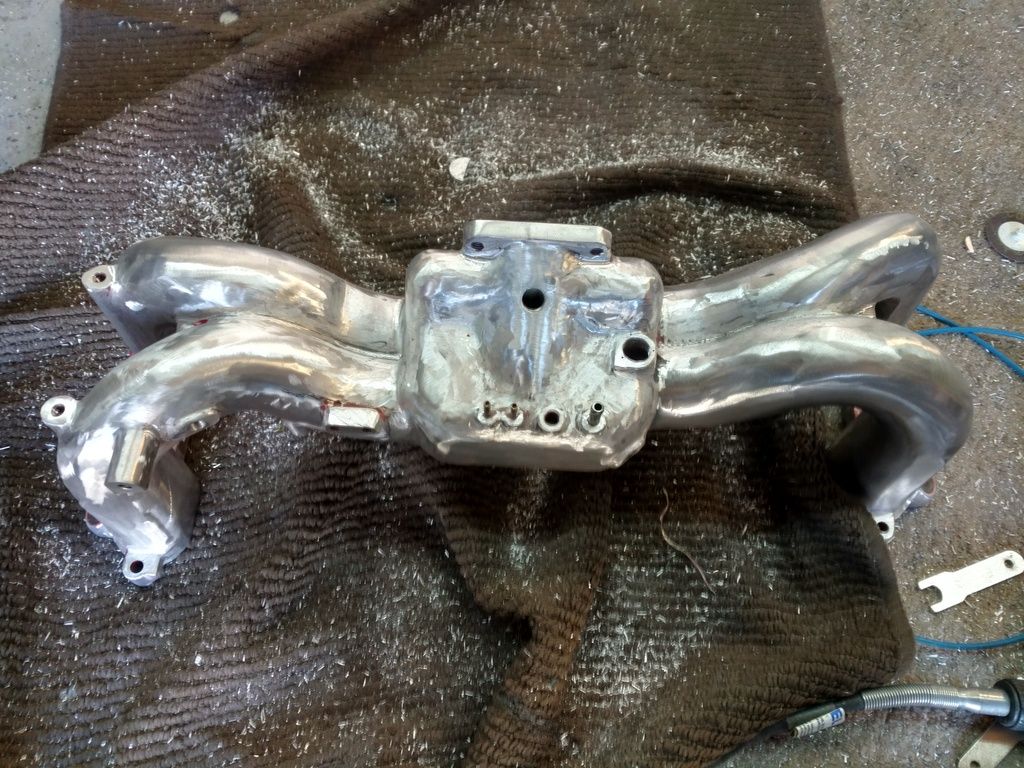
Now for the epic transformation of this manifold. With the new tapped hole for IAC and and no longer needing a bunch of mounting points on the manifold, I wanted to clean this thing up.

 ____________________________________________________________________
--POLISHED THROTTLE BODY
____________________________________________________________________
--POLISHED THROTTLE BODY
I couldn't have a shiny manifold and a dull throttle body, so I plugged away at the TB, all the way down to the return springs:
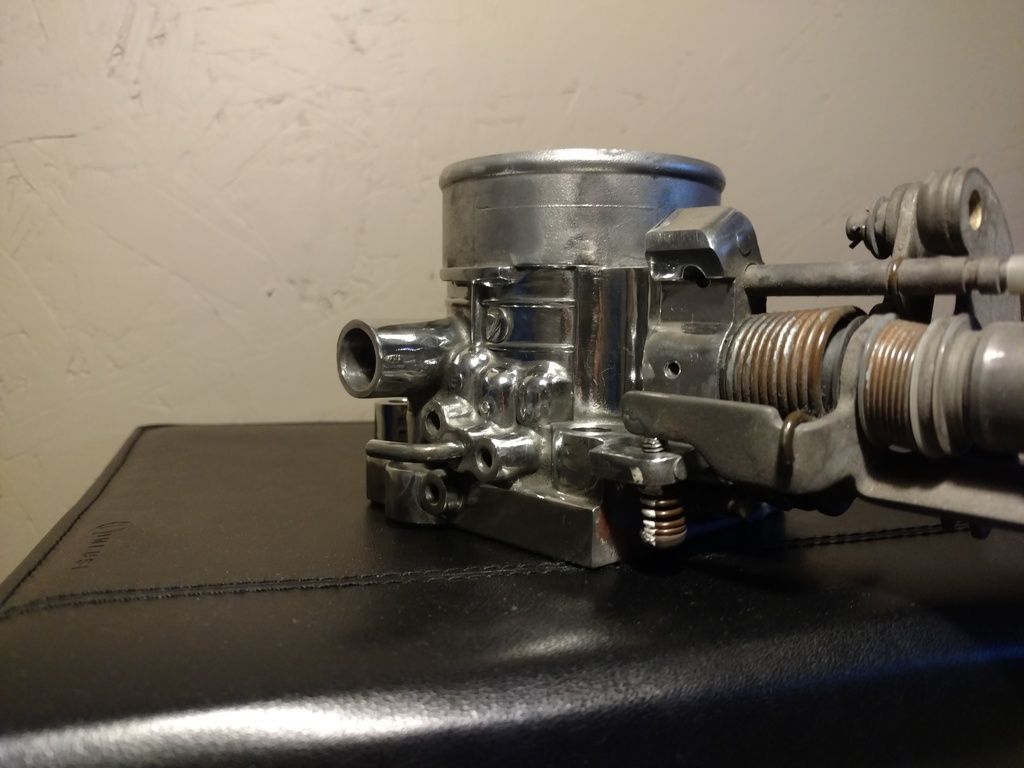
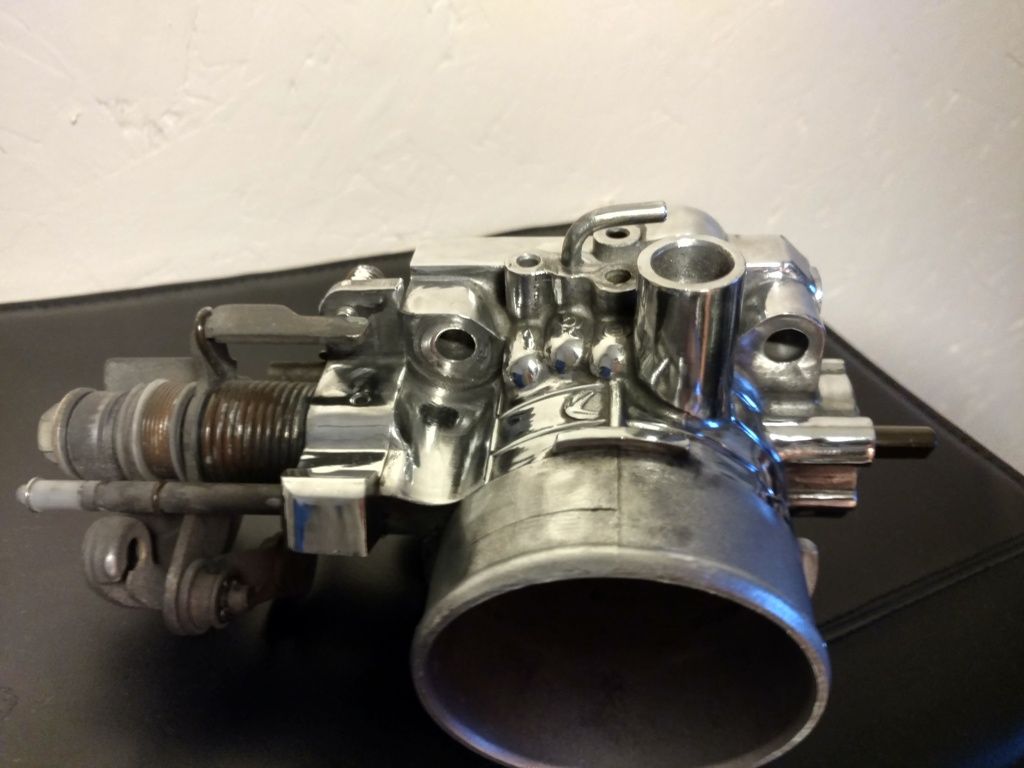
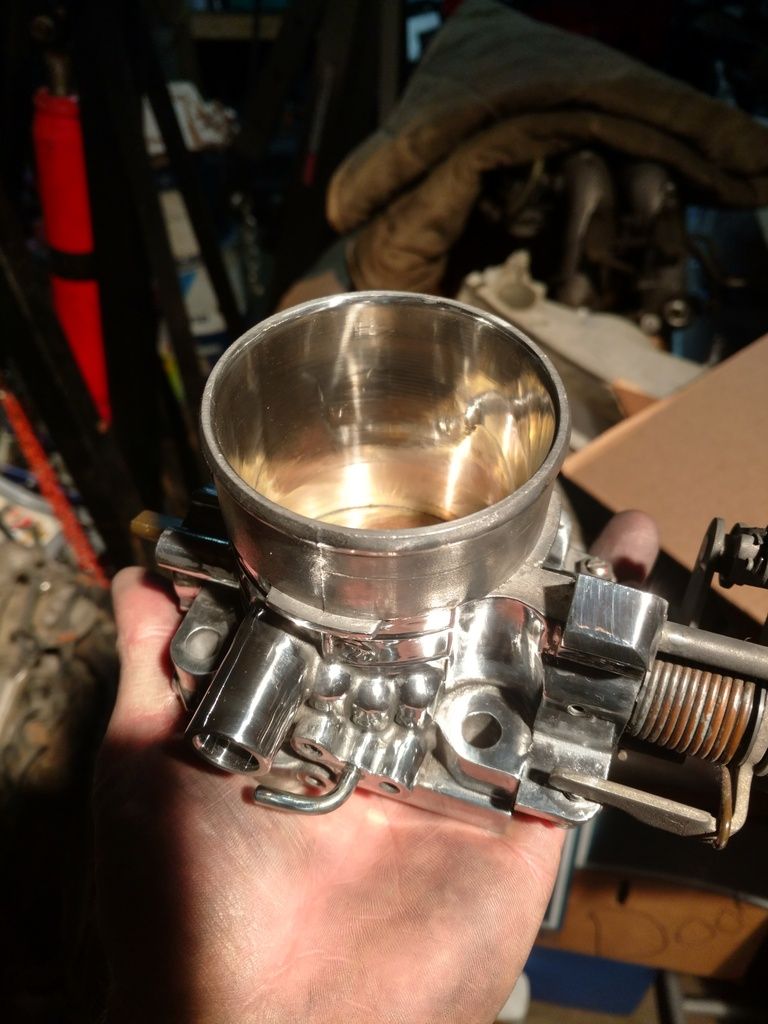
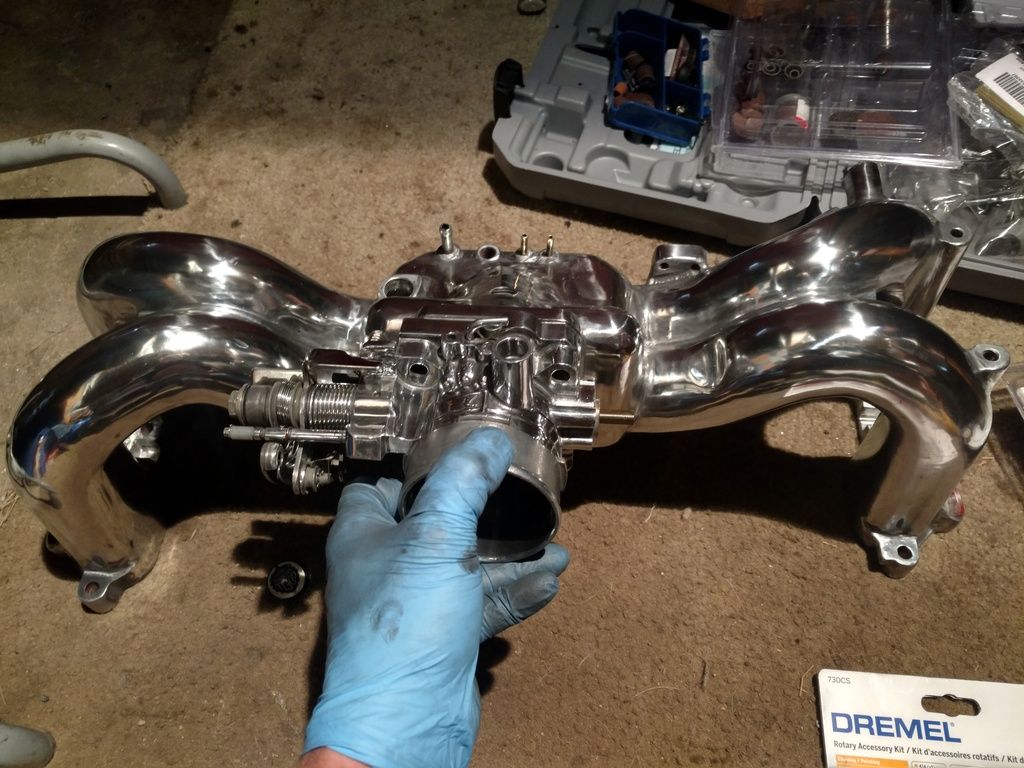
I didn't exactly calculate the hours put into the polishing but I would estimate at least 50 hours. It was alot of hard work and close attention to detail.
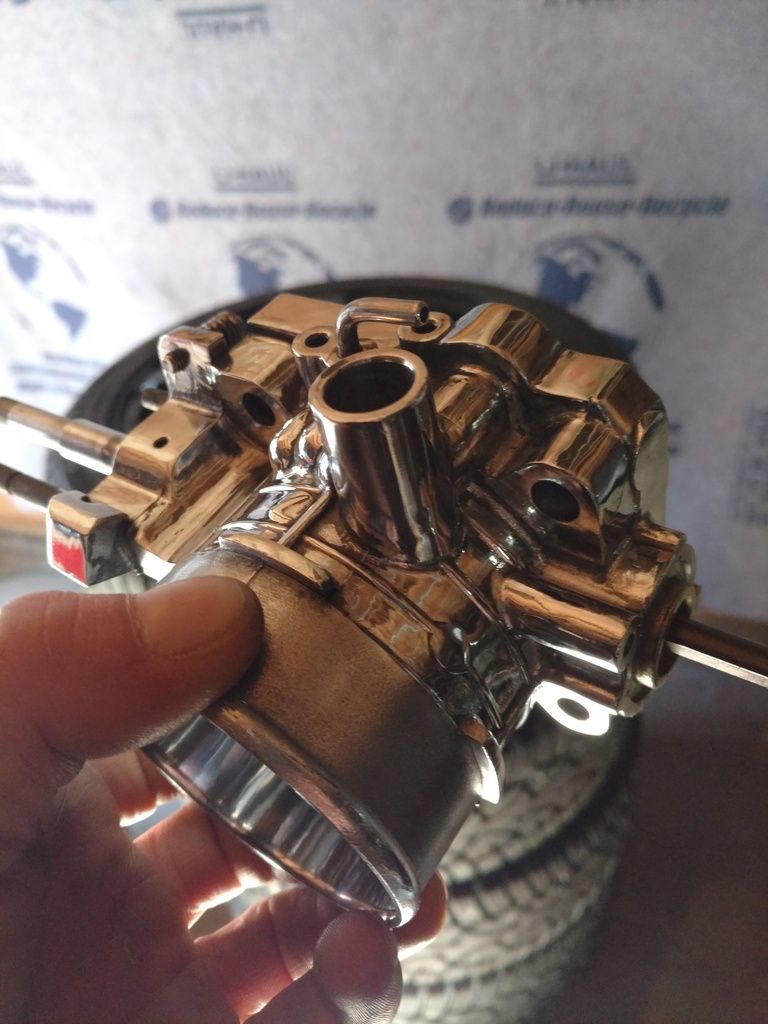
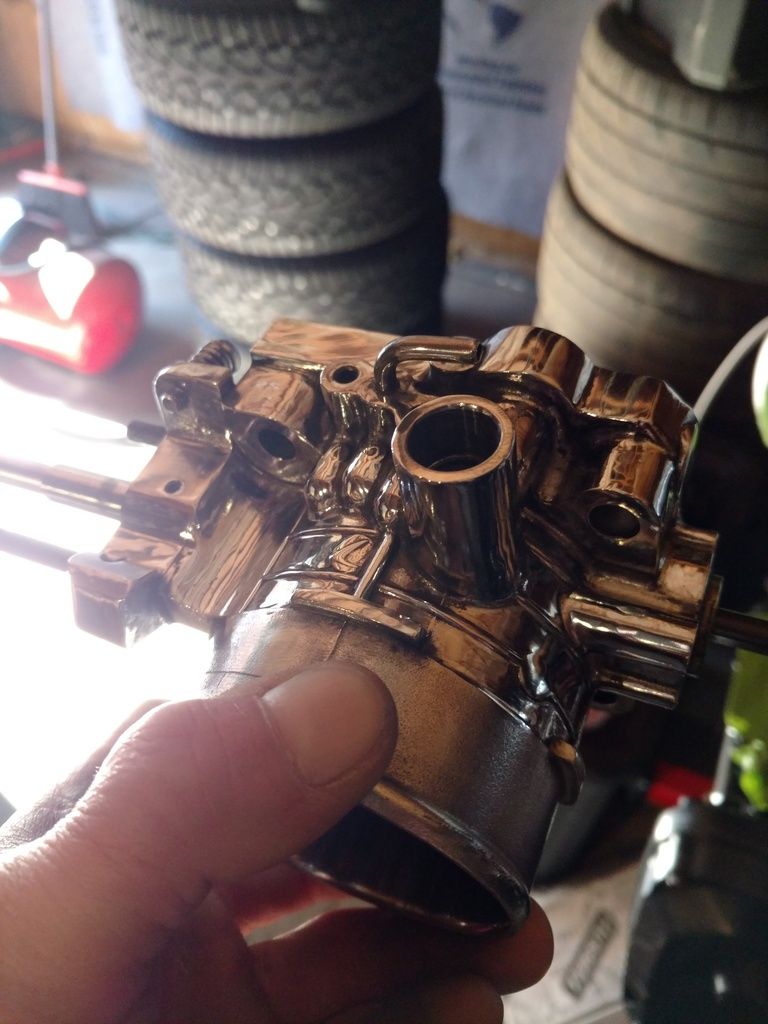
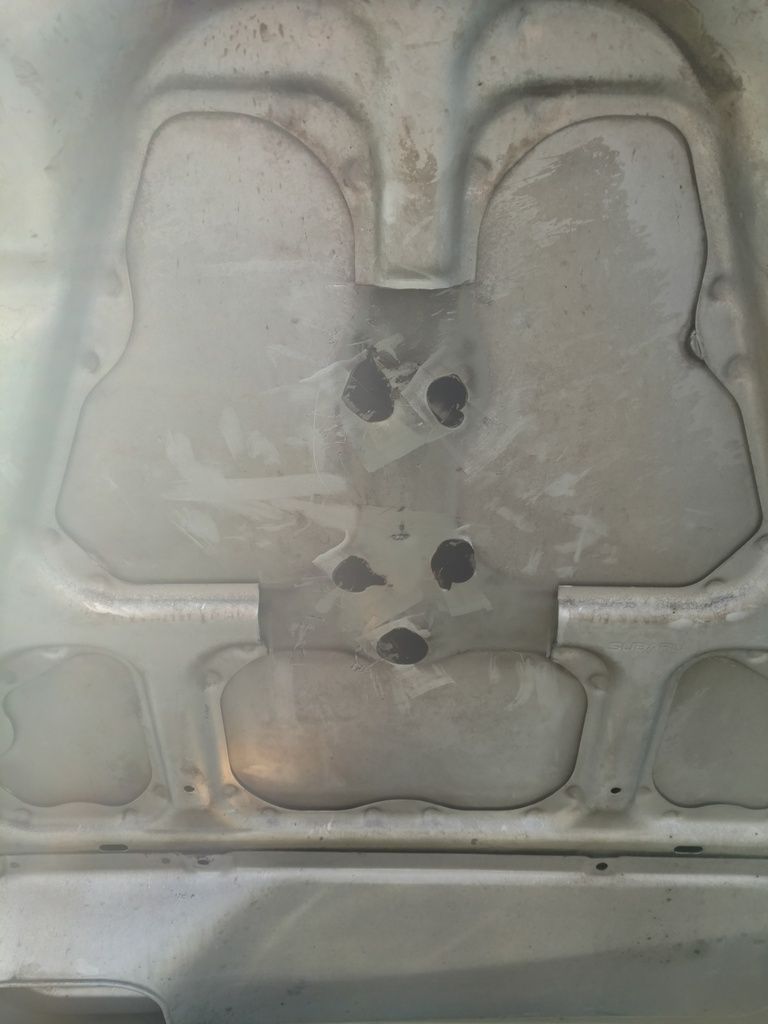
I purchased an A/C tig welder which would help with this project. I needed to close up the exposed hole from the old IAC inlet, and also would fabricate and weld on a new tab for the throttle cable to hook up too. I welded shut the old brake booster port and welded a couple divots that where existent from the old IAC port. Ground and polished to the point of never knowing they existed.
I drilled and tapped a new port for the brake booster on the correct side of the manifold. I also made a new port on the correct side for the PCV valve, and an extra 3/8npt port in case I didn't like using the port on top of the manifold for the IAC.
____________________________________________________________________
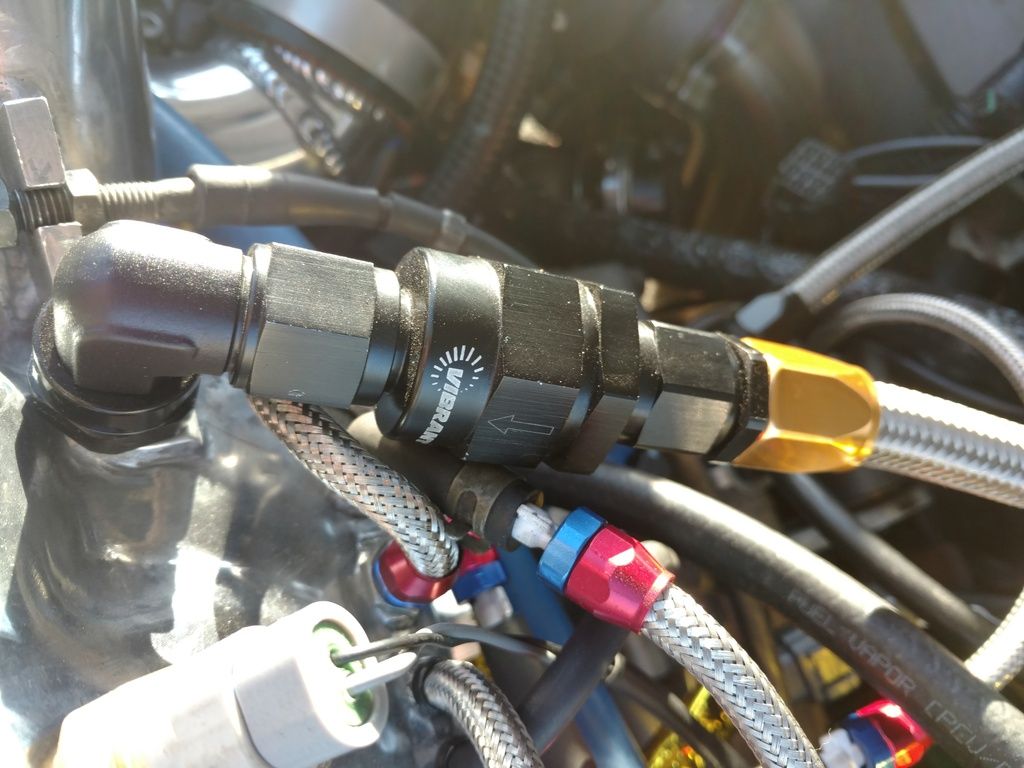
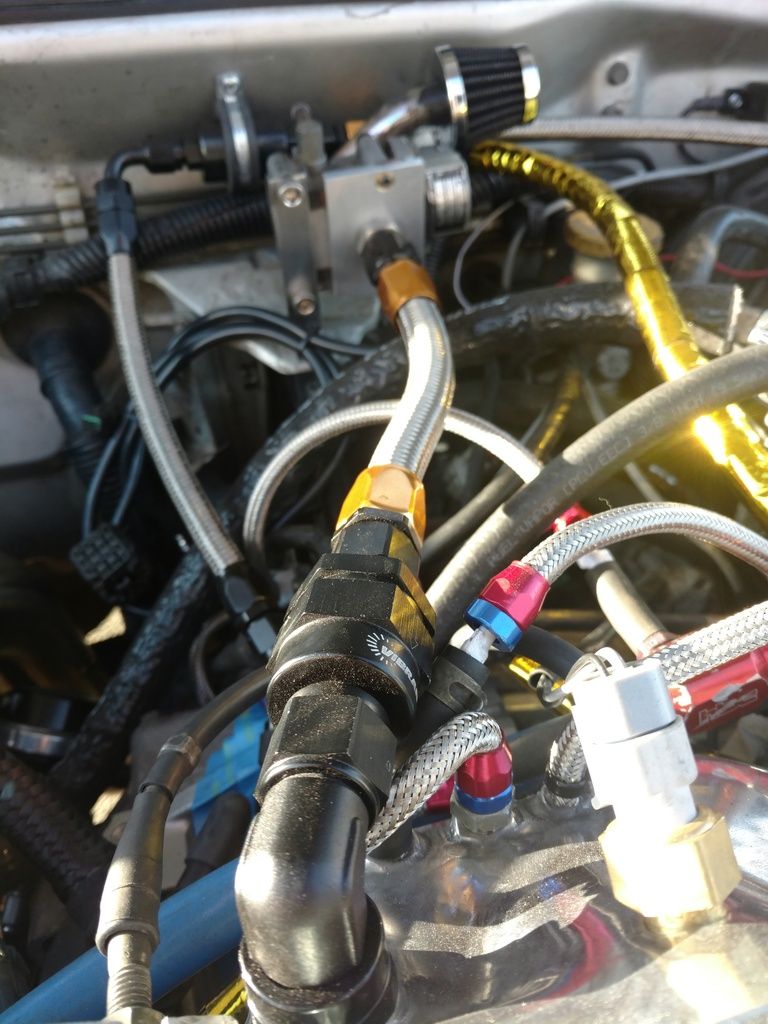
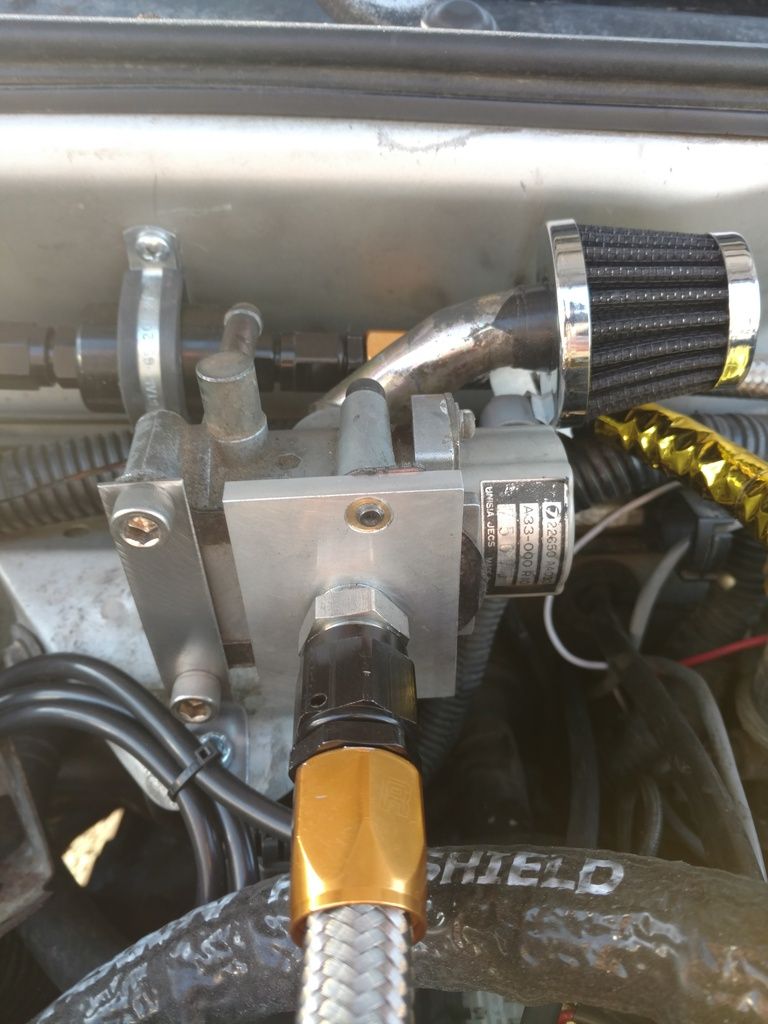
--FINALIZED IAC RELOCATION
Back on the subject of the IAC, I came up with a plan of using a 90° swivel 3/8npt to 8AN fitting off the manifold, leading to a 8AN stainless braided line, leading to a vibrant one way ckeck valve with 8AN male ends each side, leading to another 8AN line, ending at the IAC where I made a plate mounted to the IAC outlet with an 8AN fitting right at the center. The IAC would now be relocated at the firewall where the igniter was once located. Epic.
 ____________________________________________________________________
--VALVE COVERS
____________________________________________________________________
--VALVE COVERS
I drilled/tapped the 25d valve covers and used Russel twist-lok hose and fittings for the center crank vent. I removed the original 90° fitting on the center vent and swapped it with a straight fitting that I took off of a valve cover from single cam 22t head, it fit perfectly. This allowed me to then use a T fitting off of that to connect the hoses off the valve covers.
 ____________________________________________________________________
--RADIUM ENGINEERING SURGE TANK
____________________________________________________________________
--RADIUM ENGINEERING SURGE TANK
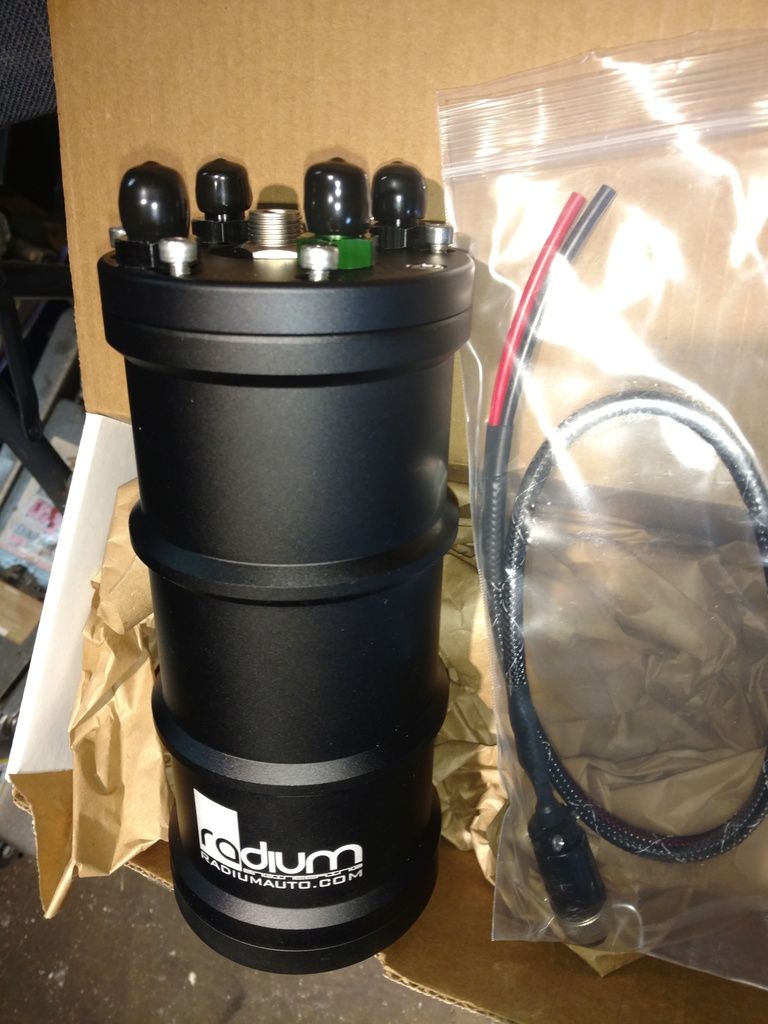
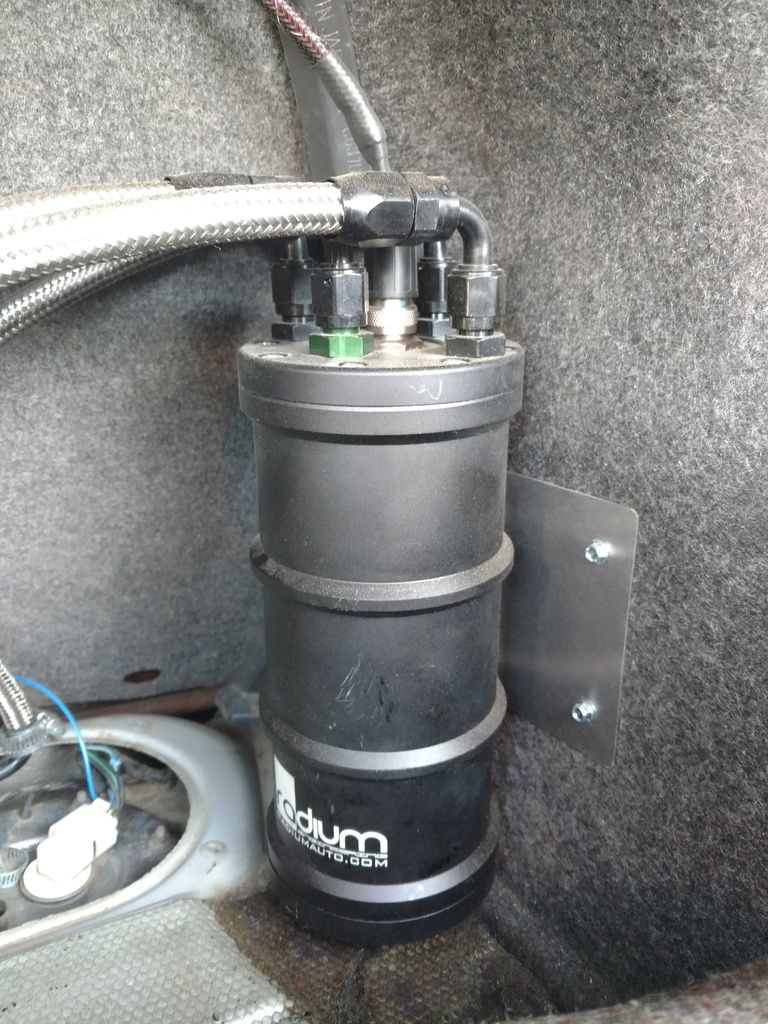
One thing about the legacy is it has a horrible fuel slosh problem. If I ever had a half tank or less and hit corners hard I would get fuel cut. I couldn't have that problem anymore with this kind of setup so I decided to purchase a radium engineering fuel surge tank. I picked the model that utilizes the new walbro 400lph fuel pump.
Custom mounting bracket made:
 ____________________________________________________________________
--UNCONVENTIONAL THANKSGIVING
____________________________________________________________________
--UNCONVENTIONAL THANKSGIVING
Over the Thanksgiving holiday I swapped everything over. Started Wednesday night and finished Sunday morning. Probably the biggest push I've made in my car working days, especially doing it all by myself.

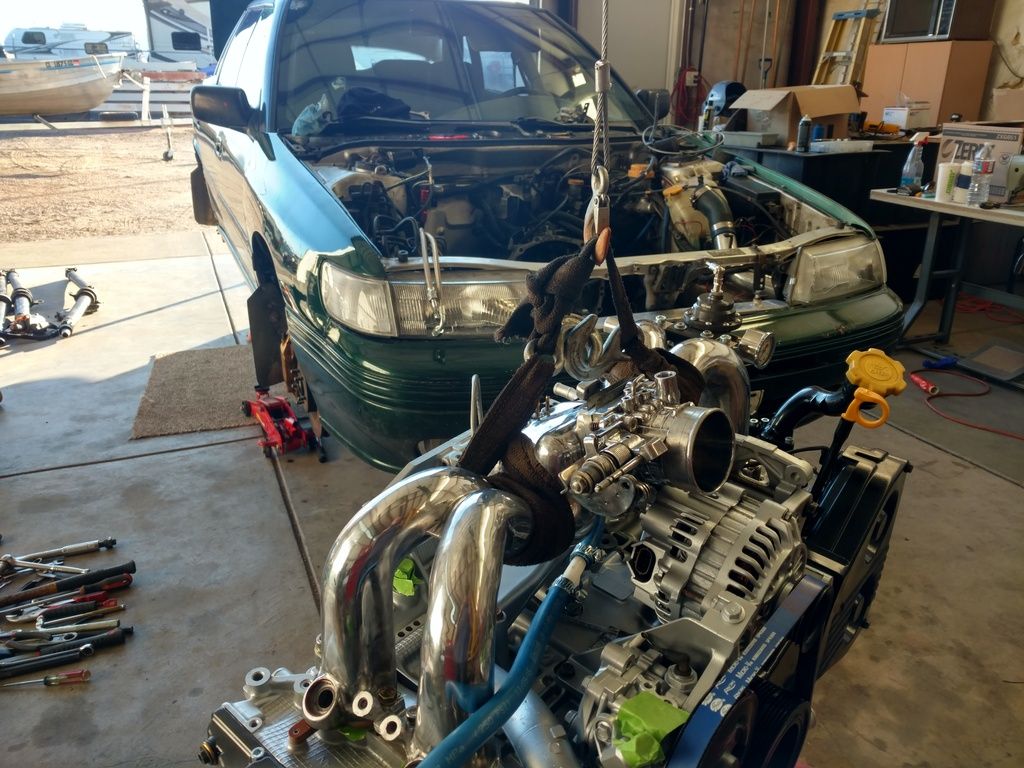
Such a beautiful clutch:
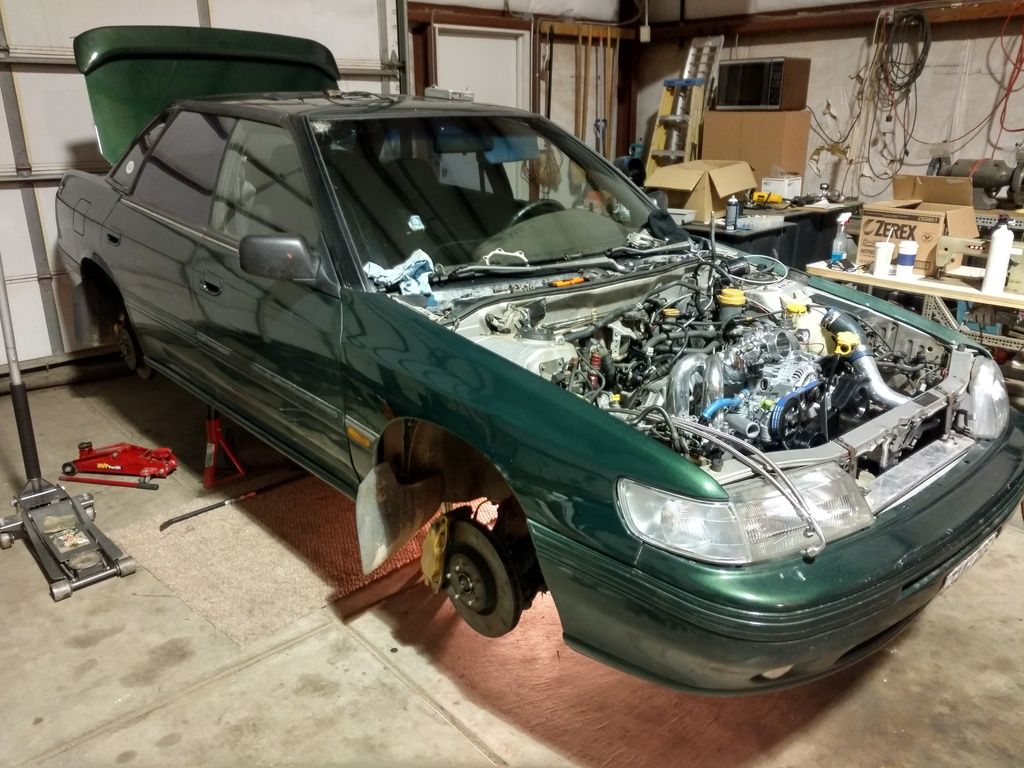
Sunday morning I loaded the car onto the trailer to take to my buddy at MCG, their we would fabricate intercooler piping, make some touch ups, and get the ECU dialed in.
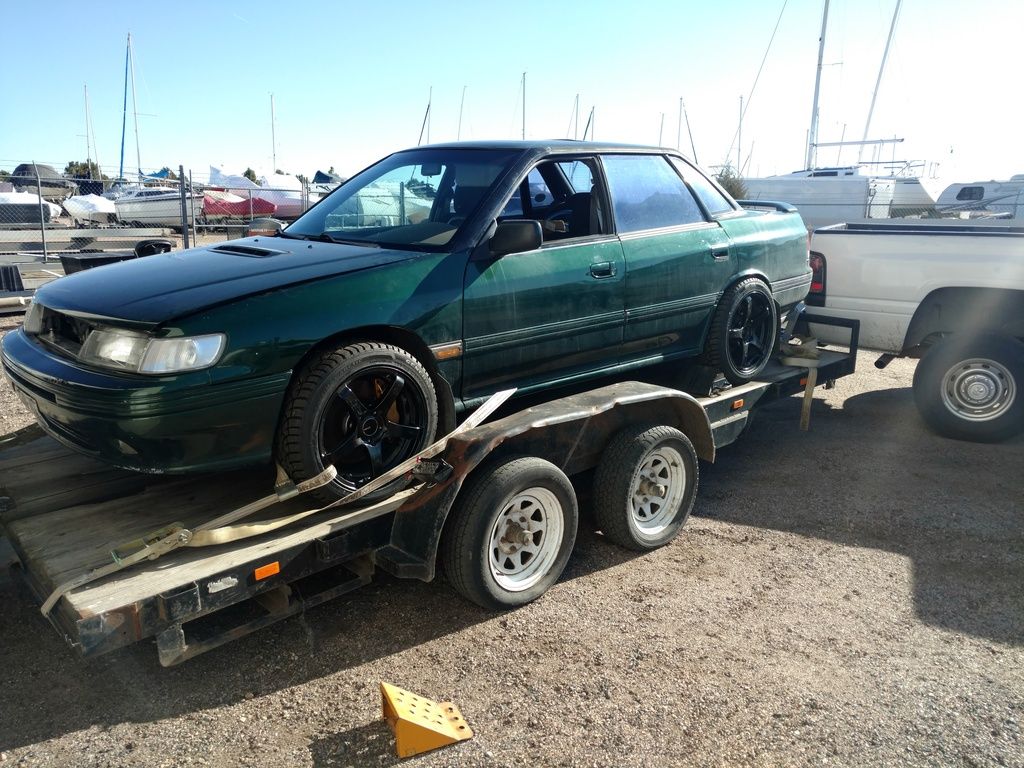
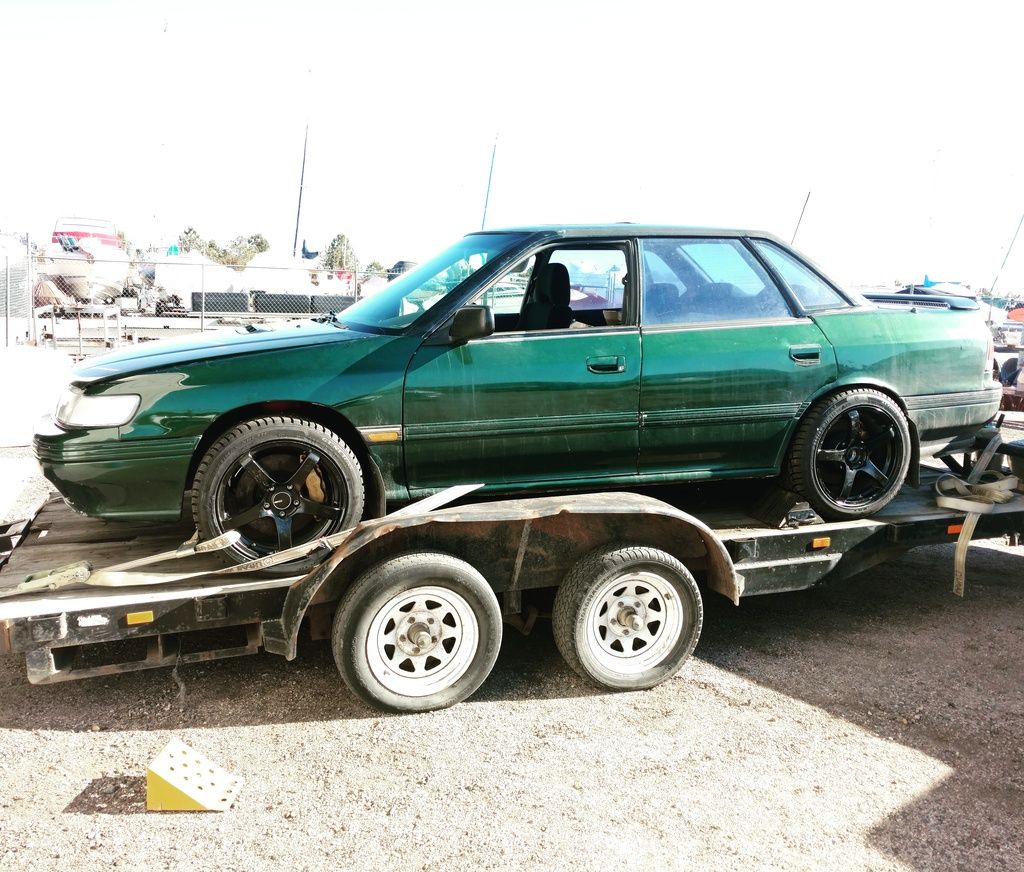
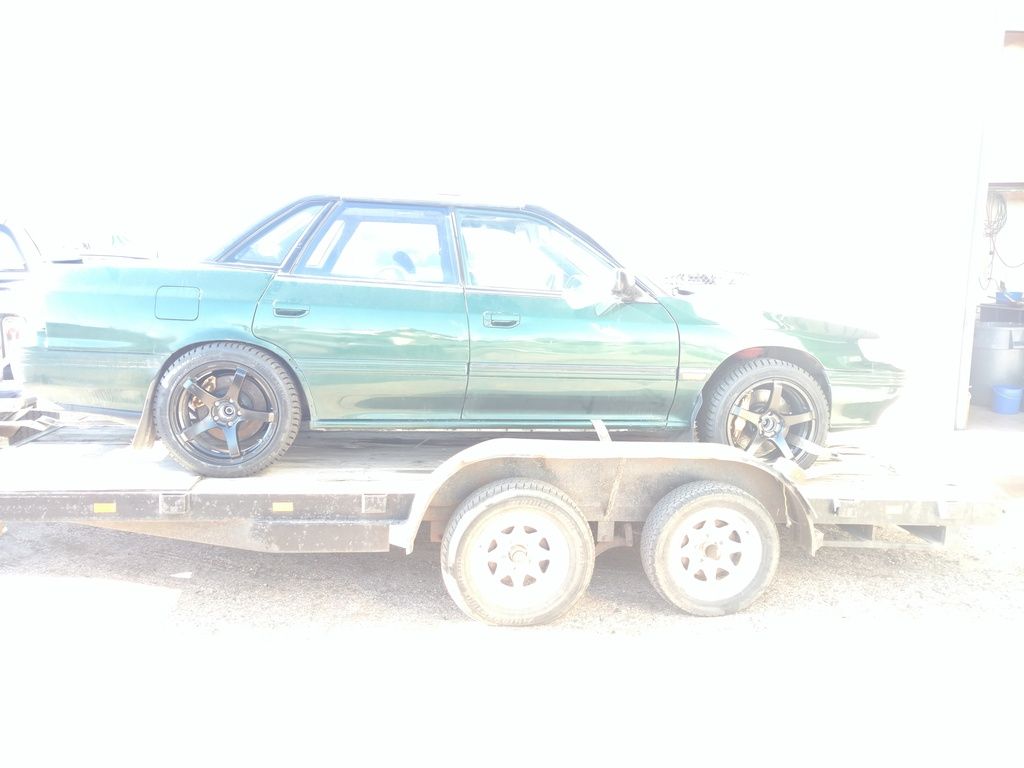

I could no longer use my winter wheels, LGT snowflakes with the brembos, so I picked up a new set of enkeis to use for winter(pictured above). Wrapped in brand new studded general altimax Arctic (hands down my favorite winter tire).
____________________________________________________________________
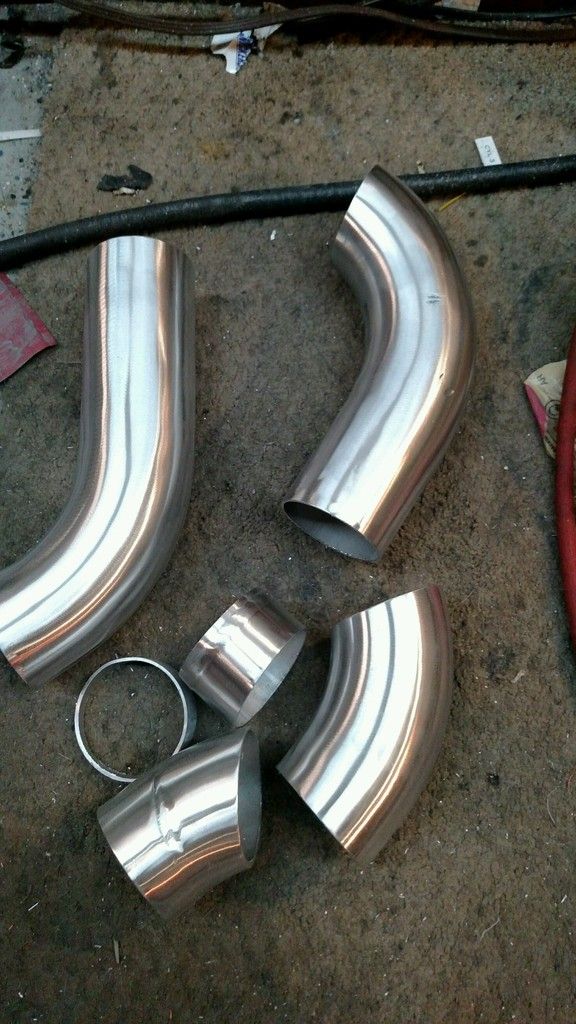
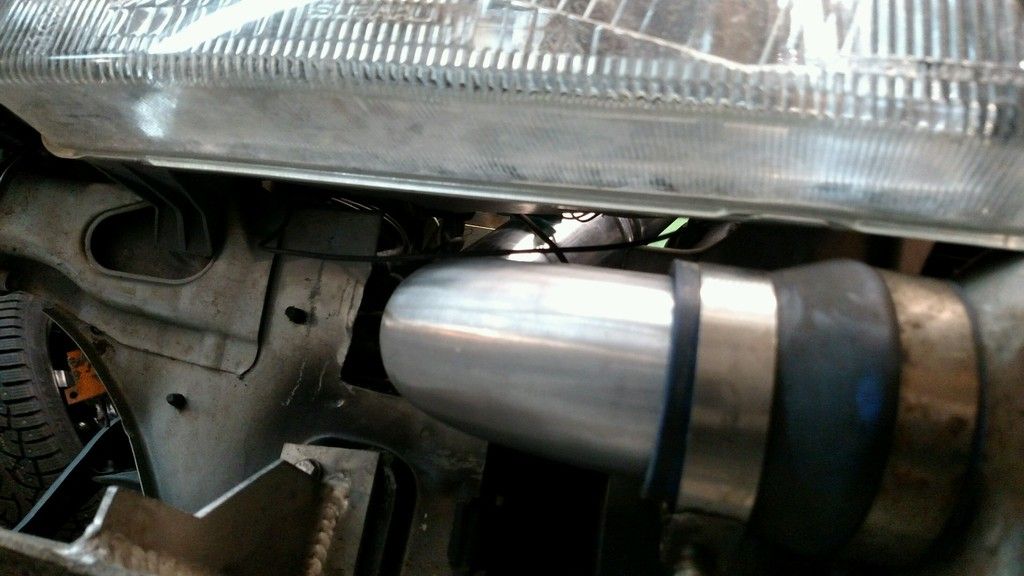
--INTERCOOLER
For the intercooler piping I was able to recycle all the pipes from my old setup. Made lots of pie cuts and welds. With the already flipped intercooler I did and the new reversed manifold setup, this was going to be an even shorter pipe setup.
The goal was to clock the turbo in a way that would send my hot pipe right under the manifold. The hot pipe would then have to bend, clearing the PS pump, and take a path to the intercooler inlet located just below the head light.
The cold pipe would need to make a bend to clear the alternator, but as close as possible to the alternator for hood clearance, then a straight shot down to a 90° below the headlight to the intercooler outlet.
Because the turbo had 2.5in. Outlet off the compressor I decided to make the hot pipe 2.5in. This made things tight, 2in. Would have been much easier, but I got it figured out with some sweet angles.
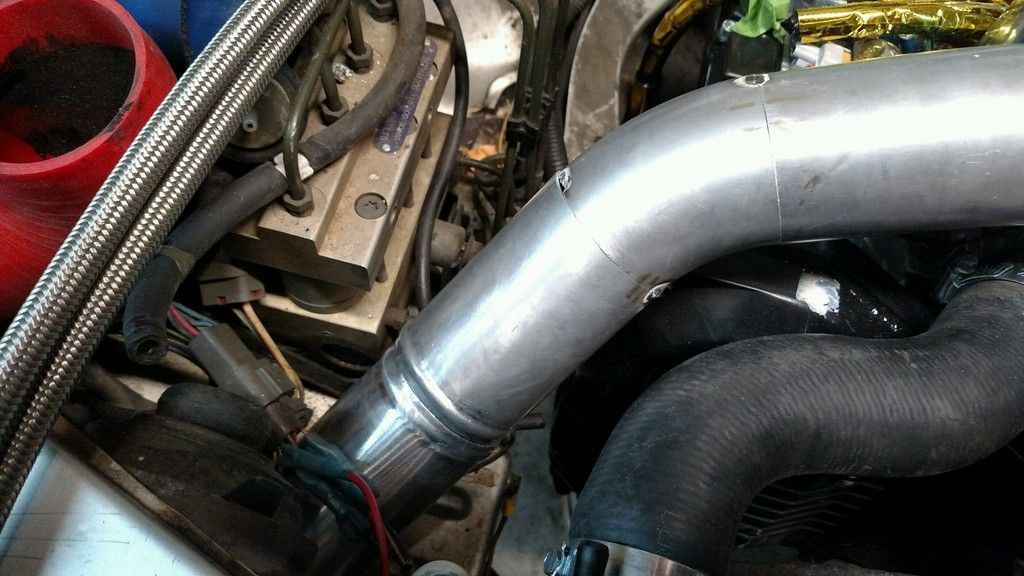
The cold pipe to throttle body was a bit tricky. I was trying to use a straight 2.75 to 2.5 reducing coupler, but the straitness of it and the angle of the throttle wasnt giving me the bend I needed to clear the hood. I tried cutting the coupler to make it more angled, and it worked but I thought it looked less appealing so tried finding something else.
I special ordered a 30° 2.75 to 2.5in. Coupler and got what I was looking for. As seen in the above pictures the black coupler.
I picked up aluminum vband couplers for the piping but decided to hold off for a later date to get those welded on.
I did end up cutting out a little of the under side of the hood to help with clearance for the throttle body:
 ____________________________________________________________________
--POWER STEERING
____________________________________________________________________
--POWER STEERING
Fragola performance 6AN PTFE stainless braided power steering hose for return/feed with metric to AN adapters.
New OEM power steering reservoir with custom made mounting bracket, this will eventually be replaced with a custom made tank featuring AN fittings:
 ____________________________________________________________________
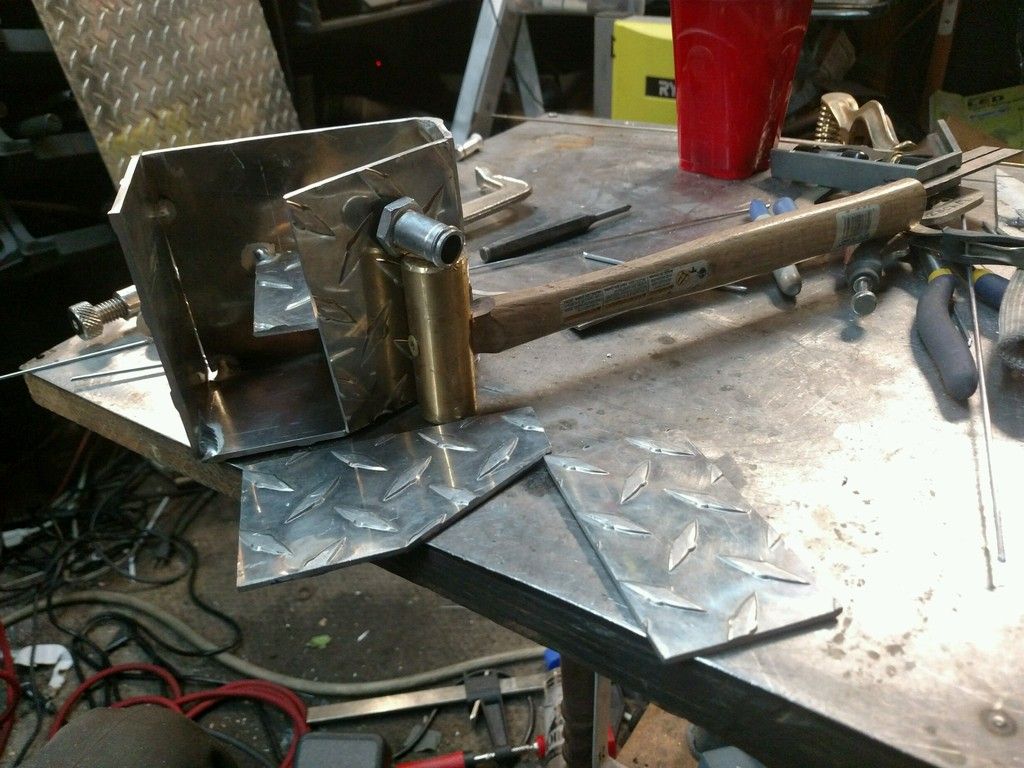
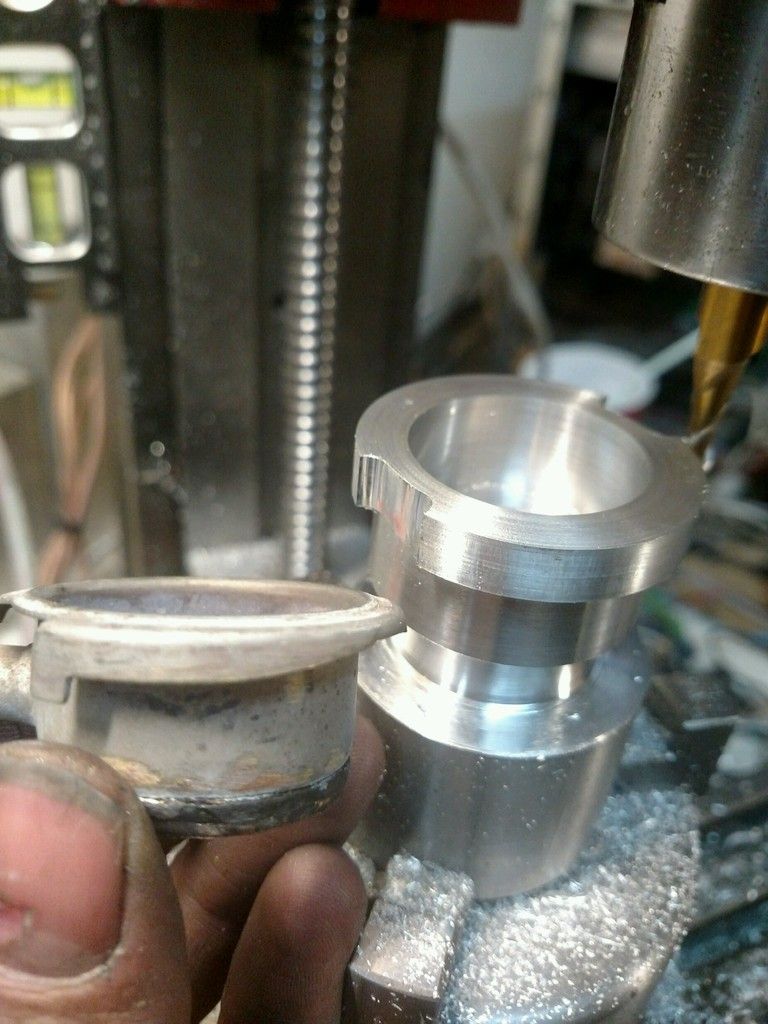
--CUSTOM EXPANSION TANK
____________________________________________________________________
--CUSTOM EXPANSION TANK
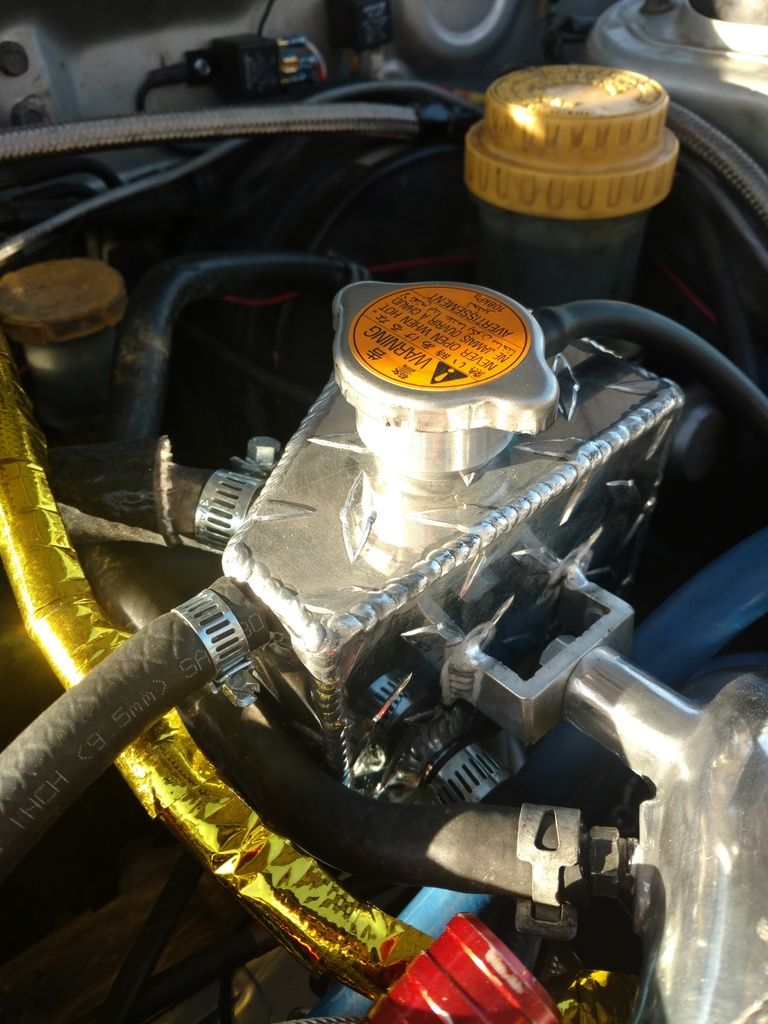
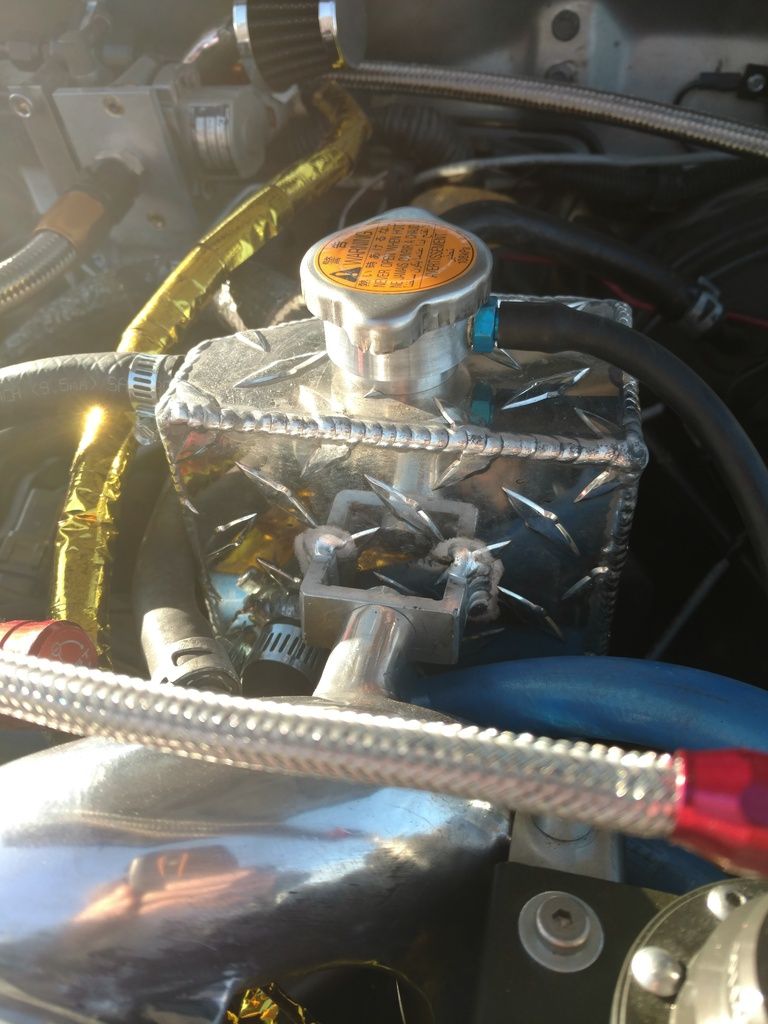
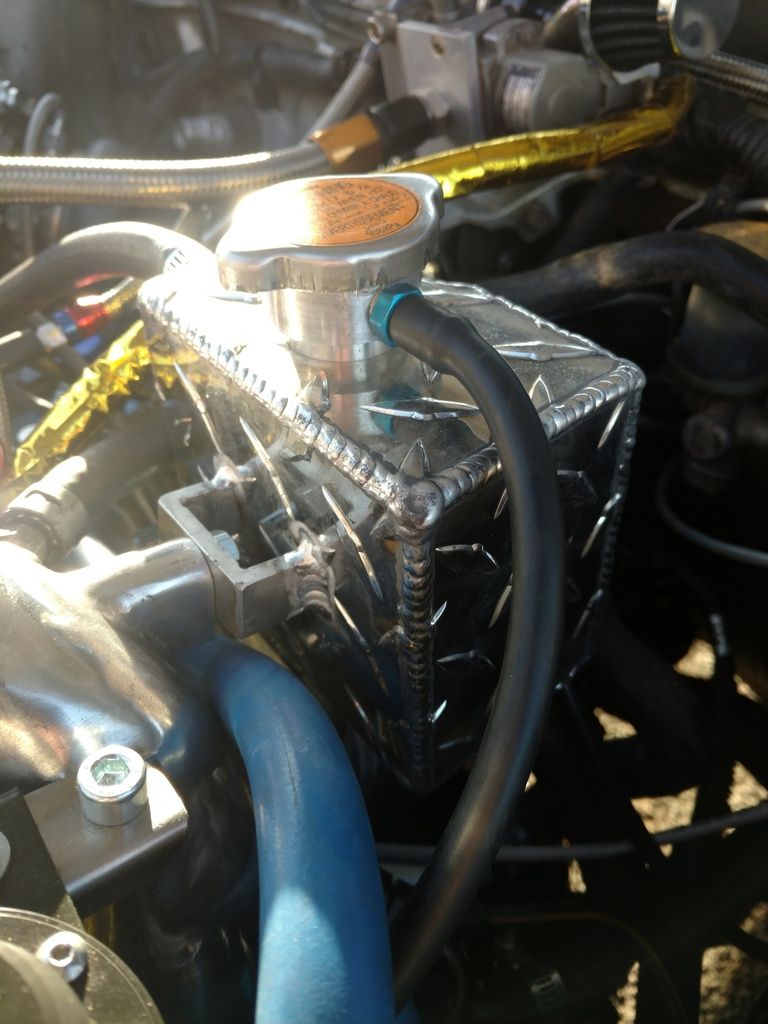
After researching some designs, made this custom expansion tank out of diamond plate. It features a baffle. The head was custom milled out of a block of aluminum, all the measurements for the head where mimicked off the WRX tank so could still use the same cap:
 ____________________________________________________________________
--CRANKCASE VENTILATION
____________________________________________________________________
--CRANKCASE VENTILATION
I don't have pictures of the inside of my catch can but it's a modified eBay can. Took ideas from others I've seen with baffles and tube. Kind of experimental at this point, not sure if it will be permanent.
Only the back crankcase vent is hooked to the can, then to pre turbo. I did decide to delete the PCV valve.
The heads are vented straight to pre turbo, and I'm experimenting with a setup similar to Josh (legacy777) with foam filter material to help coalesce the oil vapor. Time will tell if I stick with this venting configuration.
____________________________________________________________________
--INTAKE
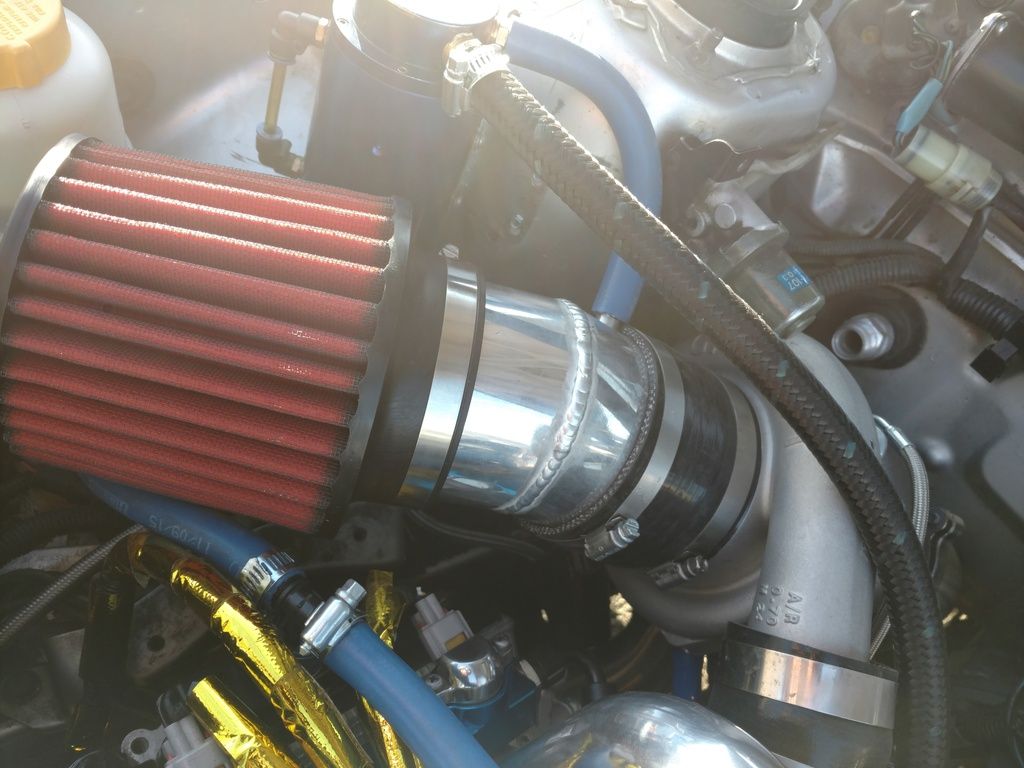
I decided against using the Perrin intake setup as I didn't like the reduction from a 4in. To 3in. Inlet. I picked up a 4in. aluminum pipe and cut and welded to my desired location and welded fittings on for the crank/head vents.
I was super stoked on using the Perrin high flow filter, at first glance it appeared it could be used with 4in. Pipe but upon further looking it was not. I picked an AEM filter for 4in. Instead.
 ____________________________________________________________________
--PLX GAUGE
____________________________________________________________________
--PLX GAUGE
I'm not too big on having lots of gauges in the car especially pillar mounted as I find it difficult to look into the light when making aggressive left hand turns in the canyon.
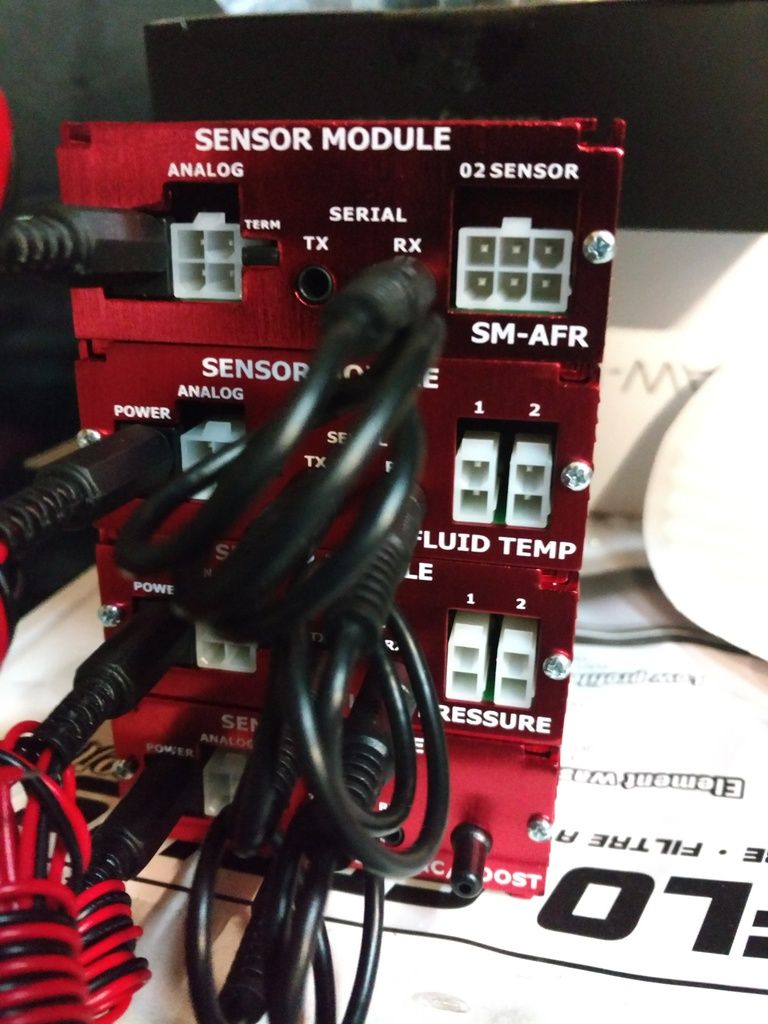
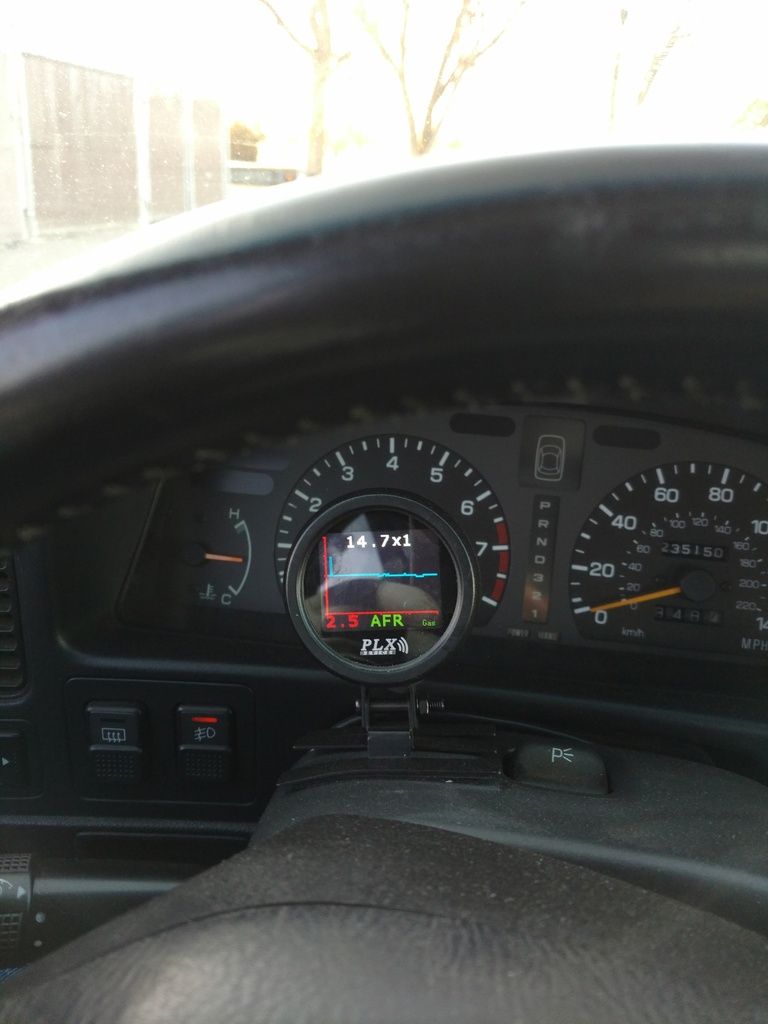
I decided to try this PLX DM-100 gauge that's O.LE.D and capable of displaying up to 4 parameters on a single screen. The gauge is touch screen, super easy to see/read, and can display parameters in digital, analog, and graph form. It's also capable of interfacing with an obd2 port and can display obd2 parameters. I love everything about it except that it requires an individual sensor module for each sensor wanted, thus taking up more space. Picture of sensor modules:
 ____________________________________________________________________
--HALTECH/TUNING
____________________________________________________________________
--HALTECH/TUNING
Getting the haltech ECU wired in was a breeze with the use of the haltech ej20g patch harness. I only had a few wires to add for the IAT sensor and wideband. Aside from that just making the 22t harness conversion to 20g.
Haltech made me a base map good for getting the car running, this was definitely helpfull and easier then starting from the ground up. The map they made was very conservative and safe, more or less just good to get you started and to a tuner. Once the car was running I was able to make some needed adjustments for better operation.
So far I'm very impressed with the software, it can do just about everything imaginable. Haltech has excellent customer service, and has helped me with many questions. Between them having a North American and Australian contact, I can speak with a tech at almost anytime.
So far I have just done some road tuning, focusing on drivability and target AFR ranges. Boost pressure is set to its lowest point of 14psi, I've set the Rev limiter to 5000, and I haven't started pulling any timing yet. Trying to keep things conservative and safe through its beginning stages until I can get on the dyno.
Jan. 7 was the soonest date I could get scheduled for dyno time, very excited for that, until that point I'm just going to keep the tune how have it and try and continue building knowledge of the software.
____________________________________________________________________
--CURRENT MODS LIST
--ENGINE
• 93' ej22t short block
• Wiseco 98mm pistons
• Eagle rods
• Polished low miles ej22 crank(#3 thrust)
• Balanced & Weight Matched Rotating Assembly
• ACL STD Race Bearings (mains & rods)
• 97' ej25d DOHC Heads
• Supertech nitrate coated intake valves
• Supertech nickel econal exhaust valves
• Supertech valve guides
• 04' STi valve components (springs, seats, retainers, collets)
• Wiseco .051 MLS Head Gaskets
• ARP Head Studs
• KBM oil pickup tube
• Port & Polished heads
• Polished and Modified JDM Intake Manifold
• Reversed Intake Manifold
• Remote IAC relocation
• Polished & Modified ej22 Throttle Body
• 04' STi New OEM Oil Cooler
• Gates Racing Timing Belt
• New built Engine Harness
• Grimmspeed 8mm Phenolic Spacers
• Torque Solutions Motor Mounts
-- FUEL
• Phase 1 Sidefeed High Flow Fuel Rails
• Deatswerks 950cc Injectors
• Custom Parallel Fuel Line Setup
• Fragola Performance PTFE Stainless Braided Line
• Russel/Fragola AN Fittings
•Tomei Big Diaphragm Adjustable FPR
• Summit Racing High Flow Fuel Filter
• Radium Engineering Fuel Surge Tank
• Walbro 255lph In-Tank Pump
• Walbro 400lph In-Surge Tank Pump
-- DRIVETRAIN/SUSPENSION
• JDM v8 STi 6 Speed Transmission
• JDM v8 STi R180 differential
• JDM v8 STi rear subframe
• JDM v8 STi Lateral Links, Trailing Arms, Sway Bars
• JDM v8 STi Axles, Hubs/Knuckles
• Exedy Twin Disc Clutch
• Torque Solutions Transmission Mounts
• Torque Solutions Short shifter
• Torque Solutions Shifter Bushing Kit
• MAPDCCD Dccd Controller
• SS Clutch Line
• 93' Legacy AT Driveshaft
• Moog Ball Joints
• KYB AGX Adjustable Struts
• Paranoid Fabrication 3/4in. Saggy Butt Spacers
-- BRAKES/WHEELS
• JDM v8 STi Brembo Front & Rear Calipers
• SS Braided Front & Rear Brake Lines
• EBC Bluestuff Brake Pads
• 07' STi BBS Wheels painted Gold 5x114.3 17x8
• Sumitomo HTR ZIII 245/40/17 Summer Tires
• Enkei Kojin 17x8 5x114.3
• General Altimax Arctic Studded 225/45/17
• 5x100 to 5x114.3 Adapters
-- EXTERIOR
• Oct.2015 Paint Job
Imperial Jade Green w/
Gold Metallic Flake
• EDM Glass Headlights w/ Auto Levlers
• JDM Glass Fog Lights w/ Custom Brackets
• Legacy Cold Weather Package Heated Mirrors
• EDM Headlight Washers
• LED Exterior Light Conversion
• Custom L.E.D City Lights
• JDM Side Skirts
• Rally Armor Mud Flaps
-- INTERIOR
• OEM leather back seats swapped for SS black cloth seats
• 2002 wrx front seats with legacy CWP heated seat elements
• Canadian HVAC control w/ recirculation & No AC
• Canadian non-saggy sun visors
• Pioner Deck w/ bluetooth
• 4 JL audio speakers
• JL Audio W2 subwoofer
• 2.5in. cubby din
• 400w 120v power inverter
• Alpine amp 125w max per
• Lucky fishing lure in ashtray
• Fishing pole in the back
-- SUPPORTING MODS
• PLX Devices DM-100 Multiguage w/ AFR, BOOST/VAC, FLUID TEMP, FLUID PRESS., EGT
• Haltech Elite 1500 ECU w/ Patch Harness
• Custom Oil Catch Can
• Custom Coolant Expansion Tank
• Custom Flipped Front Mount Intercooler w/ Custom Piping
• Custom 4in. Short Intake
• GD WRX COP conversion
• WRX Alternator
• WRX PS Pump and Reservoir
• PTFE Stainless Braided PS Lines
• Perrin Rotated Turbo Kit
• Perrin Big Tube Equal Length Headers
• Tsudo Axel Back Exhaust
• Garrett GTX3582r Turbo
• Custom Stainless Braided Turbo lines Coolant/Oil
• Turbosmart Hypergate 45mm EWG
• HKS Atmospheric Bypass Valve


