Page 3 of 5
Posted: Sat Oct 01, 2005 3:07 pm
by 91White-T
I cut the y-pipe and used a short piece of pipe and some hoses that I had left from the saab installation. It was a real bitch to get it all to fit, definitely not the easiest installation. The results are there though, the first time I opened it up after the install, the power was definitley there, it never torque steered and wanted to break loose in 2nd before...
Posted: Sat Oct 01, 2005 9:11 pm
by BAC5.2
Are you still FWD?
Posted: Sat Oct 01, 2005 9:33 pm
by 91White-T
Yeah still FWD. This car is nowhere close to breaking 4 wheels loose anyway.
Posted: Sat Dec 17, 2005 3:21 am
by rallysam
Update: Now with less ghetto! (but still a little)
Much thanks to gearboxtech.com (the shop Phil works at) because they
came up with most of this.
1) Completely kink-free intercooler piping from the stock turbo to the WRX intercooler. Woo hoo! Now it doesn't whistle like crazy anymore!
* 1 blue, silicone TurboXS 90 degree elbow coming off the turbo outlet (45mm diameter I think).
* 1 red Samco silicone y-pipe for WRX connecting to the intercooler ducts. Note - Cut off the bend that went to the WRX turbo if you are using the stock turbo.
* 1 metal pipe, mandrel-bent, 45 degrees
* for extra ghetto look, be sure to avoid matching your colors.
2) Oil catch can mounted to the fire wall. Aside from the normal benefits, I think my shop did it so they could get all the PCV lines out of the way so they could run the intercooler pipes the way they wanted to.
3) Coolant tank: started leaking. Replaced with a WRX tank and relocated it as described in this thread:
http://bbs.legacycentral.org/viewtopic. ... 332#151332
Here's a pic:
4) BOV adaptor: replaced Vikash's homemade plumbing adaptor with a TurboXS flange and 90 degree elbow. Note - if you want to keep the stock BOV - this elbow worked great. i just ran a hose from the elbow to the stock BOV. But, I eventually threw on a TurboVS recirc. valve:
5) A silicone sheet under the intercooler to stop it from banging around and wearing away as described in this thread:
http://bbs.legacycentral.org/viewtopic.php?t=24497
Posted: Sat Dec 17, 2005 3:25 am
by rallysam
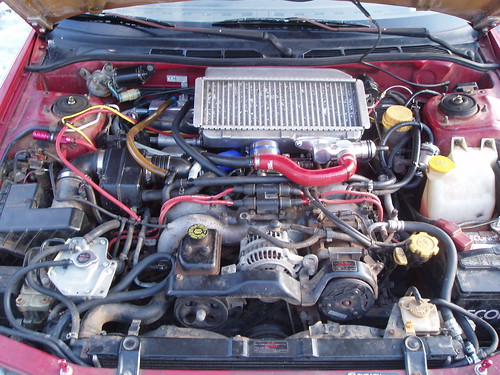
Entire engine bay:
Posted: Sat Dec 17, 2005 3:42 am
by rallysam
Oh yeah, the manual boost controller is new too. You can see it - it's red on the passenger side strut tower. That's the perfect place for it. It's pretty close to the turbo, and there was already a bolt there holding the AC line in place, so I just put the MBC bracket under the same bolt.
Posted: Mon Dec 19, 2005 4:19 pm
by vrg3
Cooooool.
Two worm-drive hose clamps on the blue silicone elbow?
Do you have any details on how the catch can was plumbed up? I don't think we ever figured out what the Right Way was.
Hee hee, that silicone sheet is just like what I'm using to "mount" my MSD DIS-2.
Posted: Mon Dec 19, 2005 4:47 pm
by rallysam
Yeah, a lots changed since you were in there last!
Two clamps for a couple reasons. First of all, to be double sure that it doesn't pop off. Second of all, because I think we ran out of t-bolt clamps. The last 6 months have definitely proved that rallycross owns aftermarket IC hose jobs.
I'll have to take some more pictures of the catch can setup and routing. The only line I paid much attention to was the most annoying line - that plastic "f" that came up right right in front of the compressor outlet right in the way of where you'd want to run ANY intercooler piping. I noticed that gearboxtech.com capped that off altogether.
Posted: Tue May 23, 2006 2:38 pm
by Legacy Rally Guy
This is really informative!!
I have a quick question though... I picked up an atmospheric BOV(I assume, this is the name, since it doesn't recirculate...) Do I HAVE to use a recirculating BOV?
I hope not... lol
Thanks
Posted: Mon May 29, 2006 4:44 am
by rallysam
Thanks.
About the atmostpheric BOV - you can find discussion about this in existing threads. You can use it, many people do. It is the optimal choice for making a lot of noise, which is the real reason most people do atmospheric. Atmostpheric is also easiest to install and probably vents the air out faster than a recirc valve. But, it is NOT ideal for your car running the right mixture during shifts because we have MAF-based cars. The BOV blows off that air after its already been metered by the MAF, so the ECU gives the car a ton of fuel to match the erroneous MAF reading. That means the car runs super rich during shifts and throttle lifts and possibly even in continuous part-throttle driving as well (depending on how it's adjusted). This can be a plus if you have no cats and you like shooting fireballs. Not so great for mother nature.
I see...
Posted: Mon May 29, 2006 11:18 am
by Legacy Rally Guy
I dont mind running rich somewhat... I've a gray tabby and he prolly hates fireballs... J/K I now what you mean by "cats," but it just struck me odd.. haha This is more of a rally car than a street car, so the cats are laying in a recycling center somewhere...
Thanks!
Posted: Wed Jun 07, 2006 6:39 pm
by IronMonkeyL255
Where did you get the TXS flange?
I am looking at taking the mlunge soon, and was looking at how to plumb in the recirc valve.
Posted: Fri Jun 09, 2006 3:20 pm
by rallysam
Andrewtech had one lying around. But, you can order it straight from turboxs. It is it's own part number I believe - you don't have to get it along with a BOV or anything, so it is pretty useful tool for those of us with TMICs.
Posted: Thu Jun 15, 2006 2:37 am
by IronMonkeyL255
Also, WHere did you find the copper elbow for the original adapter?
I have a thin piece of steel plate with a hole in it, now all I need is an elbow for it.
Posted: Thu Jun 15, 2006 2:43 am
by vrg3
A hardware store. It's a copper 3/4" 90-degree street elbow sweat fitting.
Posted: Thu Jun 15, 2006 4:06 am
by legacy92ej22t
That new T-XS DV setup looks tight Sam! Me likes.

Posted: Thu Jun 15, 2006 9:40 pm
by IronMonkeyL255
Got my ghetto flange soldered up today.
Looks pretty nice. I threw some epoxy on there to fill in all the nooks and crannies, and will paint it flat black prior to install.
Posted: Sat Nov 11, 2006 1:41 am
by Cynt
So I'm trying to get ahold of everything I need. right now I have only the WRX intercooler and stock Y pipe, can we get a solid list?
like:
-Turbo to intercooler
1.75in/45mm 90deg silicone elbow ?
1.75in 90deg pipe ?
3 hose clamps in the 1.75 - 1.89in range ?
(turbo out, silicone to metal, metal to y pipe?)
Then i will need clamps to hook the Y pipe to the intercooler too, what size anyone?
-Recirculation or Blow off
(i want to just use the stock recirc)
90deg metal elbow fitting
Electrical outlet plate.
(what size bolts?)
What size tubeing from elbow to Valve, then valve to intake
Intercooler to Thottle body
3in silicone tube?
2 clamps
What am I missing here?
Posted: Sat Nov 11, 2006 1:59 am
by Bane
turbo outlet connected to a Vibrant Performance 90deg elbow, with 2"inner diameter.
into a 3"long piece of exhaust metal
cut off the bottom of stock y-pipe, insert other end of metal pipe into it.
clamps at all connections
sorry, i had it off twice in the last few days, didn't even think to take a photo (nothing wrong with the setup... just getting the tranmission looked at, and then reseating it after the tech made a booboo)
since i have some time to myself tomorrow, i'll try and take some photo's for you with it off.
Posted: Tue Apr 03, 2007 6:51 pm
by NuclearBacon
can anyone repost the pics on this thread??
it would be a GREAT help. thanks!
Posted: Tue Apr 03, 2007 8:24 pm
by know1
+1 the blury highway doesnt help too much

Posted: Tue Apr 03, 2007 10:05 pm
by Bane
i can't do too much about the original pics, but i can post mine later on.
any chance?
Posted: Tue Apr 03, 2007 10:46 pm
by 2.0 legacy
I'm doing the same install.. the only problem is the pics that are up when I view this thread are a night shot of a hwy..
Any chance of (anyone) sending the pics to me?
Thanks
Ian
subaru.legacy.turbo@gmail.com
Posted: Wed Apr 04, 2007 1:59 pm
by rallysam
Yeah, Thawa took down his server, and that screwed almost all of the old pics on this BBS. That highway thing is some default for broken links.
I can probably re-host all the pictures, but it wouldn't be for a couple weeks because I'm back visiting the states right now and my computer is in London.
Posted: Fri Apr 06, 2007 8:57 pm
by Bane
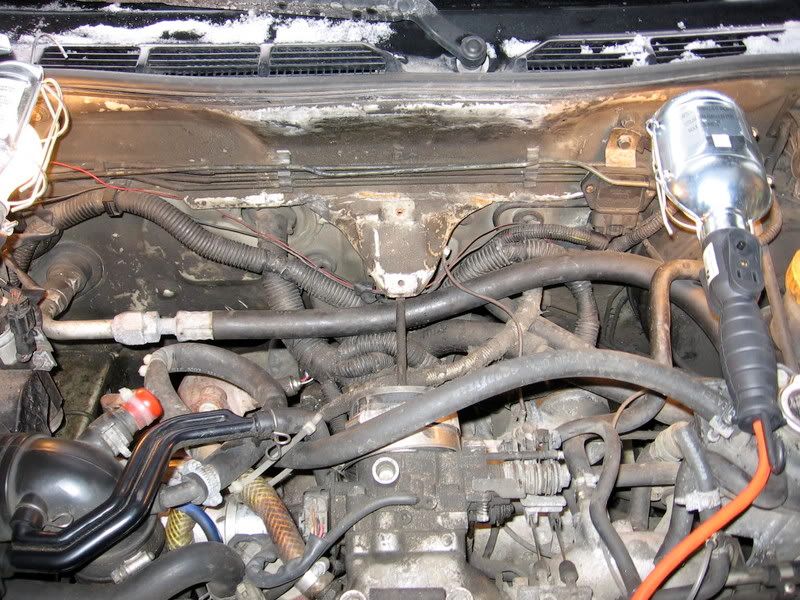
alright hope these photo's help.
was fixing a wiring problem my exhaust shop caused, so i had to take the intercooler out.
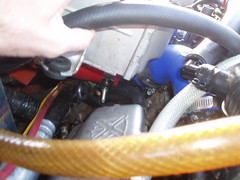
This is assuming you've already relocated the coolant resevoir, off the drivers side intake manifold.
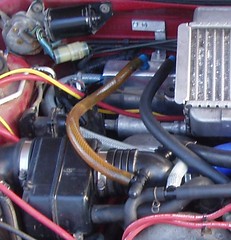
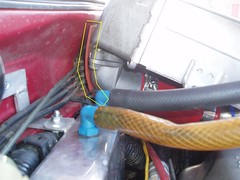
in the first photo, you can see that i relocated the ignitor, and mounted it to the bracket for the cruise control (even if you don't have cc, the holes are still there). The bracket for the ignitor was bent a little to not get hit by the intercooler on the way in. edges of the pitchmount were hammered, as well as the tiny lip under the lines on the firewall
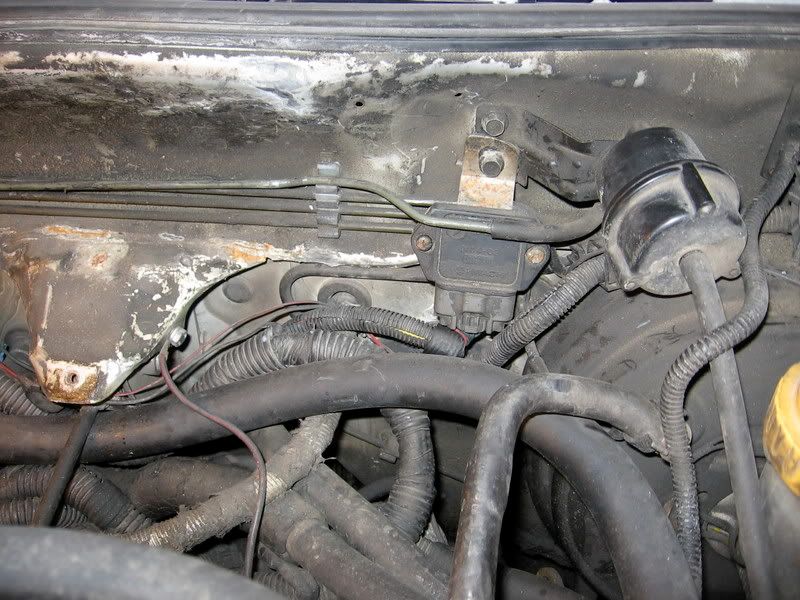
close up of the ignitor
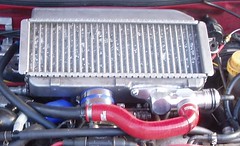
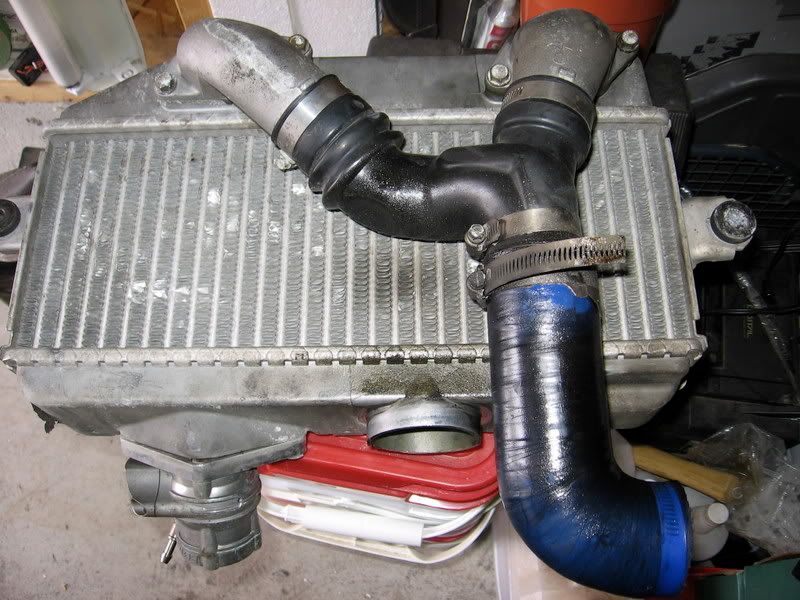
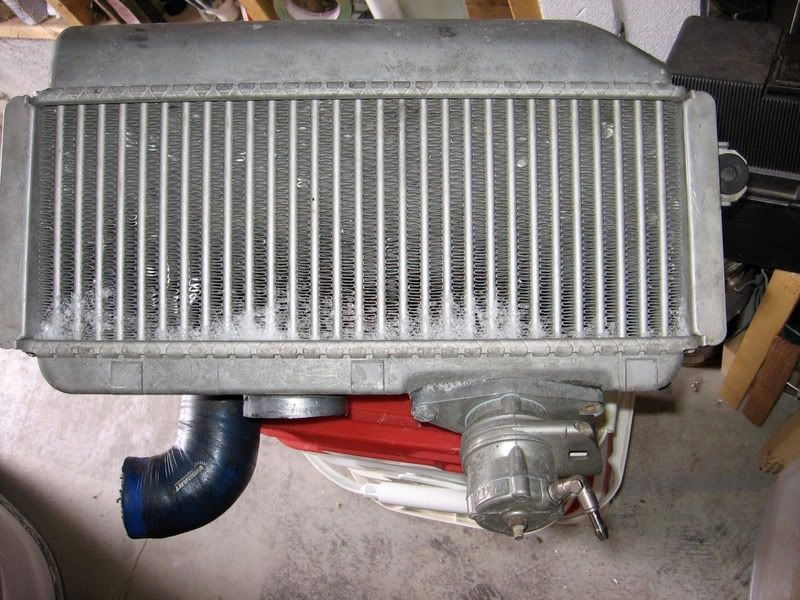
instead of trimming the throttle body, i cut the edge of the intercooler outlet, by about .5", just make sure your clamp will still fit the remainder.
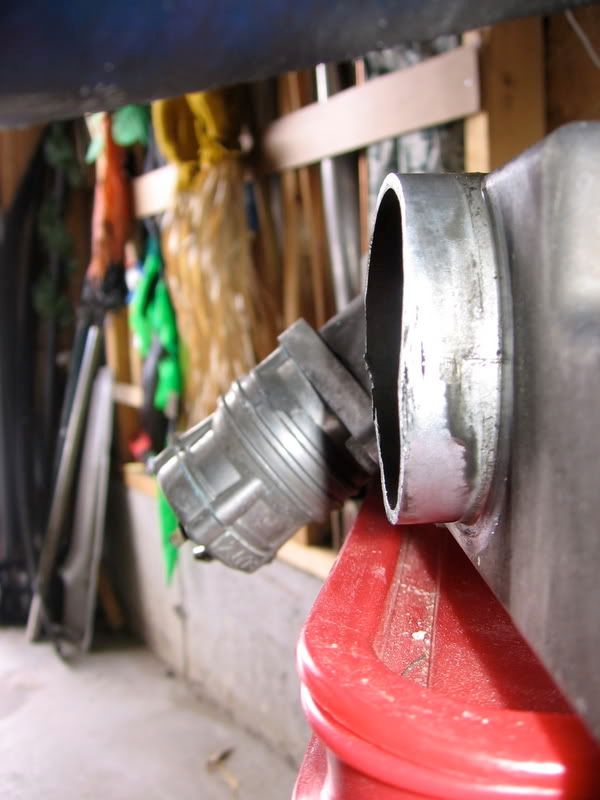
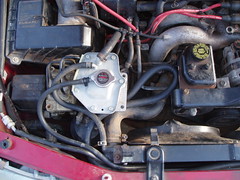
here is where i cut off the last elbow of the y-pipe that leads to the turbo outlet. Instead i inserted a piece of metal into the y-pipe neck, and clamped on a silicon elbow, so that it was extended longer then the original end, and the angle could be changed.
THIS WOULD BE EASIER: if you picked up a perrin or "X" branded silicone y-pipe kit. none were to be had when i was doing this, so i mcguyver'd it.
you may want to put the BOV on before mounting the intercooler, dependant on the model of BOV i guess, in my case "blitz dd" it clears the throttle and cruise control cables, so i mounted it first.
if you need a different picture, i can try and take something else.
good luck.
EDIT: yes, that's snow on the intercooler

nothing like a snow storm on easter weekend, when i planned on replacing the calipers, front rotors and pads.
SUPER-d-DUPER!
